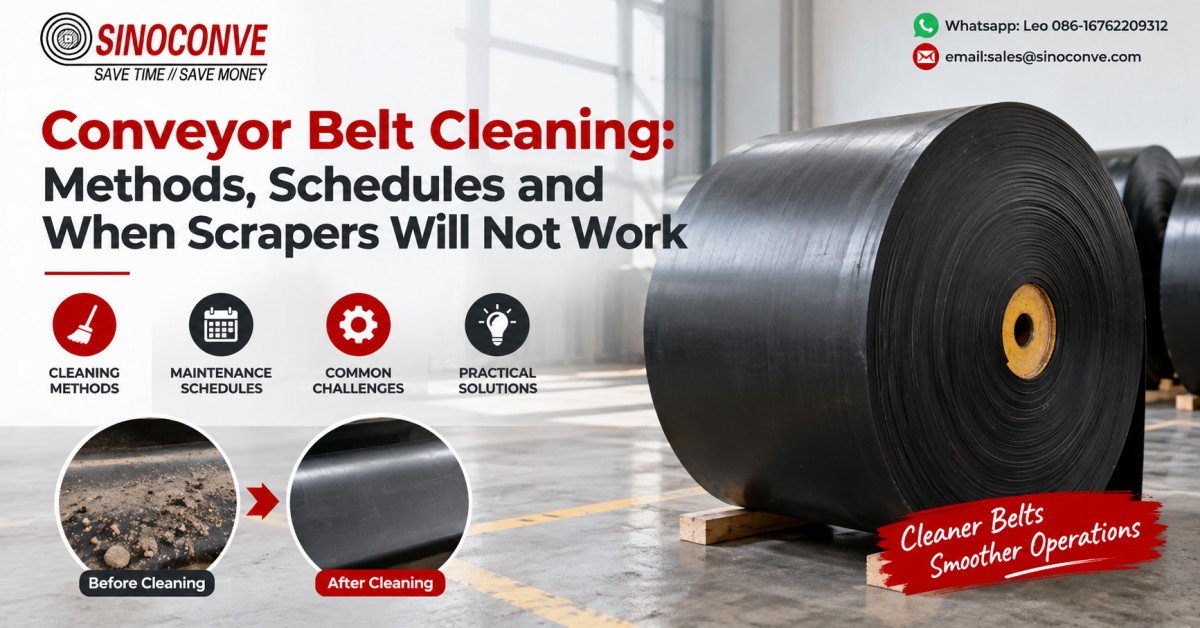
Conveyor Belt Cleaning: Methods, Schedules and When Scrapers Will Not Work
How clean is clean enough? On a normal troughing conveyor, conveyor belt cleaning has done its job when the return strand leaves no stripe of material wider than roughly 25 mm, and when a walk under the discharge pulley at the end of a shift turns up nothing loose enough to kick. That is the line we work to. Everything past it is cost. Load a blade harder than the belt needs and it stops shaving material off the surface and starts shaving cover rubber off the belt.
So this article is about the work, not the shopping list. We cover what carryback costs, why a belt face holds material at all, which method removes which kind of residue, where each device has to sit, and how to build a schedule and read blade wear. Then the part that rarely gets written down: five ordinary situations where a scraper physically cannot do the job, and what to use instead. Cleaner selection, blade models and pricing are a different exercise, so we hand that over to the article that already covers it rather than repeating it here.
We build belts in Ningbo. Our engineers spend a fair part of every year at crushed-stone pits, clinker lines, coal yards and fertiliser plants, and much of that time goes on measuring things nobody enjoys measuring: carryback depth behind the head pulley, roller seizure rates, blade wear in millimetres per month. This is what those visits keep teaching us.

01What Carryback Costs on a Real Line
Carryback leaves a plant twice. First as product you paid to mine, crush and screen and then threw on the ground. Second as wages, because somebody has to shovel it. Most maintenance budgets count the second and quietly ignore the first, which is why cleaning gets cut in a bad quarter and reinstated after the next belt failure.
Take an ordinary aggregate line: a 800 mm belt carrying 200 t/h over two shifts, 300 days a year, close to 960,000 tonnes. Carryback at the head runs 0.2 to 0.5 percent of throughput on a belt with no working cleaner. Use the middle of that band, 0.35 percent, and you are dropping about 3,300 tonnes a year on the floor. At 10 to 20 dollars a tonne for a mid-range aggregate, the lost product alone gets noticed at year end.
Now add labour: one or two people, 1.5 to 2 hours a shift, sweeping under the head and along the return strand. Then add the second-order damage, which is where it really bites. Material packed onto return rollers stops them turning, and a stopped roller acts as a cutting wheel against the belt edge.
The ledger nobody keeps
We ask managers to total four lines, and very few can do it from records. The figures below are the ranges we measure with a stopwatch and a tape. Treat them as order of magnitude: the spread between a well-run pit and a neglected one is easily five to one.
| Cost line | Basis on a 800 mm, 200 t/h line | Annual order of magnitude |
|---|---|---|
| Product lost as carryback | 3,000 to 5,000 t swept away, valued at 10 to 20 dollars per tonne | 30,000 to 60,000 |
| Cleanup labour | 1 to 2 people, 1.5 to 2 h per shift, fully loaded hourly rate | 12,000 to 30,000 |
| Return roller replacement | 8 to 15 rollers per line seized or badly fouled each year, part plus lift | 1,500 to 5,000 |
| Tail pulley lagging and snub drum wear | Lagging renewed every 18 to 30 months on a dirty tail | 2,000 to 6,000 |
| Training idler and frame wear, belt edge damage | Tracking drifts once the tail drum builds a lump on one side | Hard to invoice, easy to see |
| Housekeeping plant | Loader time, water truck, vacuum, dust suppression | 5,000 to 20,000 |
Order-of-magnitude ledger for a single mid-duty line; the spread between plants is larger than the spread between years.
When the cleaner pays for itself
Put a working cleaner on that line and the first three lines mostly collapse. A primary blade plus correct installation typically lands between 1,500 and 4,000 dollars in hardware for a belt this size, blades being consumable after that. The arithmetic is not subtle. The installation is where most plants lose the benefit. Selection, moulded versus urethane, and carryback control logic are covered in Conveyor Belt Cleaner Selection and Carryback Control, so we stay with method and discipline here.
Field note from our engineers: At a crushed-stone plant in Zhejiang we measured a 1,200 mm belt whose secondary scraper had been tensioned by feel for two years. The cover under the blade had lost 3.5 mm, the rest of the belt 1.1 mm. The maintenance crew had been buying blades every four months and calling the cleaner expensive. We backed the pressure off by two turns and blade life went to seven months, with less carryback, not more. More force is not more cleaning.

02Why the Belt Face Holds Material Back
Carryback is not a cleaning problem first. It is an adhesion problem, and adhesion is set by the material, the surface and the geometry of the discharge, in that order. Fix the first two and the cleaner has an easy job. Ignore them and no blade geometry on the market will save you.
Moisture decides almost everything
A dry, free-flowing aggregate drops off because gravity wins. Wet clay does not. Between 20 and 40 percent moisture the material behaves like stiff paste: it sticks to itself and to the rubber, and the film left behind is exactly what the cleaner has to remove. That is why one cleaner can be perfect on graded stone at 3 percent moisture and look useless on the same conveyor after rain.
Fines are the sticky fraction
Run a sieve analysis and you will usually find the answer. Particles below about 1 mm carry the moisture film and provide the contact area; material above 20 mm falls away on its own. A feed with 30 percent minus-1 mm content sticks far worse than one with 10 percent, at identical moisture. This is why washed sand, screened fines and crusher dust are the classic carryback materials, and why a 40 mm minus pit run is usually easy.
Speed, trough angle and discharge geometry
Belt speed sets how long the material has to release. Above about 3.5 m/s the discharge arc is flatter and material leaves higher on the pulley arc; below 2 m/s a fine wet product rides further round and trails a film.
Trough angle matters at the edges. A 35 degree three-roll trough on an 800 mm belt leaves the outer 60 to 90 mm flatter against the pulley than the centre, and that is where the last material sits. Speed matters for another reason: a belt running below design speed moves the discharge arc, so a cleaner set perfectly last year begins to run dry while carryback grows. Slipping drive belts and polished lagging are the usual causes. That side of the machine has its own literature, such as our notes filed under transmission belt manufacturer and V-belt manufacturer.
Cover condition, and why old belts stick more
Rubber polished by 20 million tonnes of graded stone releases material less readily than rubber that still has its moulding texture, and abrasion removes that texture first. A cover rated at 150 mm3 loss under DIN 53516 holds it far longer than a 250 mm3 compound on the same duty. As a conveyor belt manufacturer we would rather specify release behaviour than repair it later. The grades themselves are walked through in rubber conveyor belt cover grades.
03The Toolbox: What Each Method Can Actually Remove
Every cleaning device on a conveyor scrapes, brushes or washes. Everything else is a variant of position, pressure and material. Sort your options that way and the question changes from which product to which physical action your residue responds to.
Primary scrapers: the bulk removers
A primary blade mounts against the head pulley, usually 50 to 150 mm below the tangent point, and takes off the bulk of what the belt still carries, typically 70 to 85 percent. Its limit is edge geometry: it cannot remove a film thinner than the radius of its own edge, and pushing harder wears belt cover instead of residue.
Secondary scrapers: the film removers
A secondary blade sits 300 to 500 mm further round the pulley and takes off what the first blade left. It needs a flatter belt path, so it only works where the primary is doing its job. Two blades in series remove far more than one blade at maximum tension.
Tertiary blades and return-side scrapers
A third stage, or a blade on the return strand ahead of the tail pulley, answers one specific material rather than being a standard fit. It cuts the film further on moist fines, and it adds a second place for material to pack.
Rotary brushes: when bristles beat a blade
A powered or belt-driven brush running at 200 to 600 rpm lifts fines out of a texture that a blade rides over. This is the answer for patterned belts, for very fine dry dust and for material that smears rather than slides. Nylon suits dry fines, polypropylene damp grain, and metal-impregnated nylon only where heat would destroy polymer bristles in weeks. Set the tips 1 to 3 mm into the surface, no deeper.
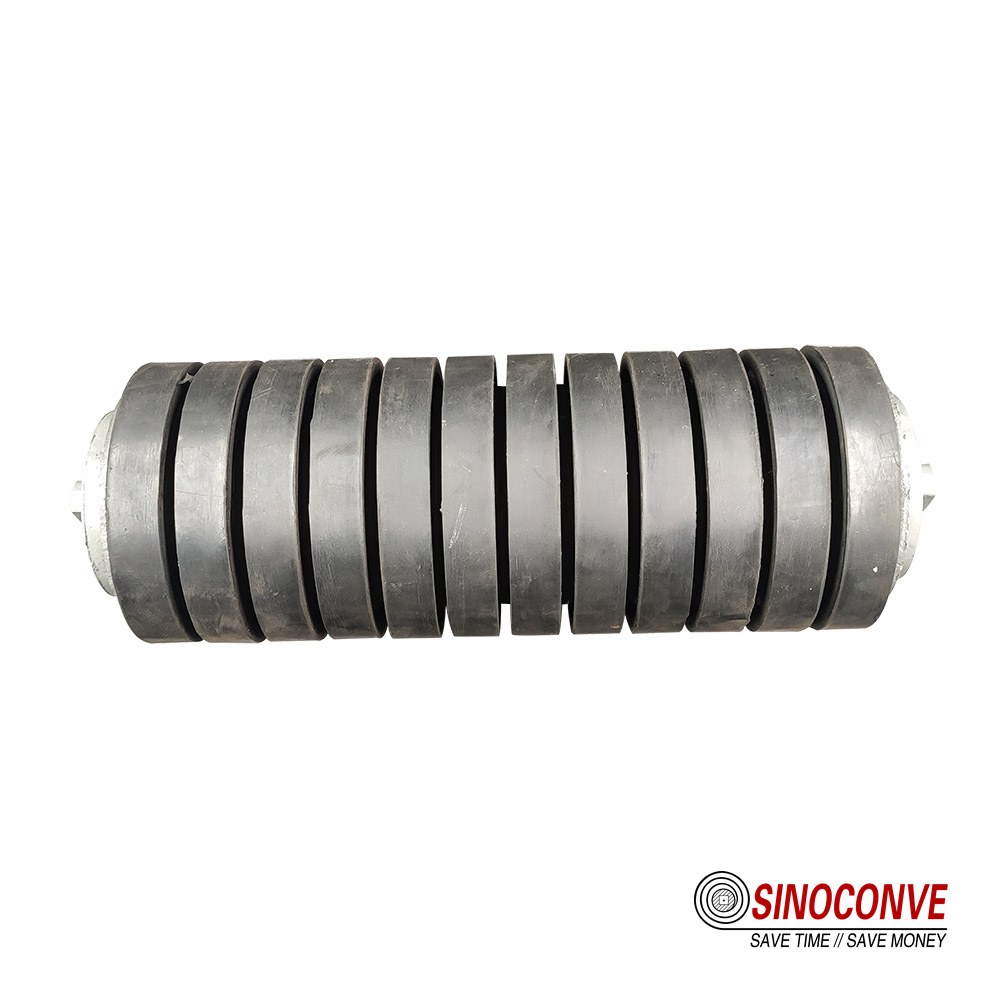
Self-cleaning return rollers: rubber disc and spiral
Not every cleaning action happens at the head. A rubber disc or spiral return roller works on the principle that a surface which never accumulates material never has to shed it: the discs flex as they roll and throw off what lodges between them. On sticky material these cut the buildup that eventually seizes a plain steel roller, and they are often the best payback on the list. We covered the fine-dust version under sealed conveyor rollers for fine dust, and the selection logic sits in our conveyor idler roller guide.
Water wash boxes and spray bars
Water is the only medium that removes a sticky film completely, because it changes the material instead of fighting it. A wash box with spray bars at 3 to 8 bar, followed by a squeeze roller, takes a clay film down to a stain. The cost is real: 1 to 4 m3/h of water, a slurry stream to manage, corrosion, and freeze risk in winter.
Air knives and blow-off nozzles
Dry, non-contact and power-hungry: a 1,000 mm air knife at 4 to 6 bar pulls 15 to 30 kW once the compressor is counted. It suits fine dry products such as cement, lime and plastic granules, and it is a specialist tool for food and light-duty lines rather than a general fix.
V-ploughs on the return strand
A plough is the crude, reliable option: two angled blades that push material off both edges of the return belt before it reaches the tail pulley. It costs almost nothing to run and is the standard defence where carryback can be managed but not eliminated. Set the blades with a small clearance so they ride rather than dig, and never use a plough to compensate for a failed head-end cleaner, because pushing a heavy load sideways destroys belt edges on a long line.
| Method | Material it removes well | What stops it working | Running cost signal |
|---|---|---|---|
| Primary blade | Dry to damp bulk above about 1 mm, bulk of the load | Patterned belts, mechanical splices, pasty material | Blade set every 4 to 12 months |
| Secondary blade | The thin film a primary leaves on a smooth belt | Worn or uneven belt surface, oil contamination | Lower cost per tonne than extra primary tension |
| Rotary brush | Fines in texture, chevron and rough-top surfaces, dry dust | Wet sticky clay, high heat, bristles worn under 8 mm | Bristle set roughly once a year |
| Rubber disc or spiral return roller | Prevents accumulation rather than removing residue | Very high load, wrong diameter for the belt trough | Long service life, low wear when sized right |
| Water wash with squeeze roller | Clay, wet sand, filter cake, anything pasty | No water supply, freezing weather, moisture-sensitive product | 1 to 4 m3/h water plus slurry handling |
| Air knife | Loose dry dust on light belt, no contact with the belt | Wet material, dust-laden environment, power budget | 15 to 30 kW at the compressor for 1,000 mm width |
| V-plough | Whatever has already fallen onto the return strand | Heavy loads, narrow belts, edges already damaged | Cheap to run, cheap to replace |
Use this as a first sift. The final combination depends on moisture, texture and belt construction, which is what section 06 deals with.
One more thing. The cleaner is the last 20 percent of the job; the other 80 percent is belt construction and the material you run on it. On a long industrial conveyor belt duty, the difference between a cover that releases material and one that holds it is worth more than any amount of blade pressure, and it is cheaper to decide that at the drawing stage than to fix it in the field.
04Where Each Device Has to Sit
Position is the difference between a cleaner that works for a year and one that damages the belt for a year. The rules are not complicated, but they are unforgiving, and they are the reason we insist on a site measurement before anyone specifies hardware.
Primary blade position on the head pulley
Mount the primary blade on the descending side of the head pulley, below the point where the material leaves the belt. The usual band is 50 to 150 mm of belt travel below the tangent, measured along the belt path, not straight down. Too high and you are trying to scrape material that is still held against the belt by the discharge trajectory; the load lifts the blade and jams material underneath. Too low and you are scraping a belt that has already begun to flatten out of its trough, which is fine, but you also lose the support of the pulley face and start fighting the belt with nothing behind it.
Angle of attack and blade load
Angle of attack is the angle between the blade face and the belt tangent, and the working range is roughly 15 to 30 degrees. Shallow angles clean less and wear slowly; steep angles scrape harder and cut into the belt. If you take one tool to a conveyor survey, take an angle gauge.
Blade load is the other number worth recording, usually expressed as force per unit of width and held by a spring, a torsion element or a counterweight. That force exists to overcome blade-to-rubber friction. It is not a measure of determination.
Secondary stage: further round, lower pressure
A secondary blade goes behind the primary, along the same belt path, typically 300 to 500 mm further round and set at a shallower angle. It should barely touch: enough to lift the residual film, not enough to be a second heavy scraper. Set the primary for volume and the secondary for finish. Two blades configured this way will outlast and outperform a single blade run at high pressure, and they treat the belt more kindly.
Return-side positions
On the return strand, order matters. A V-plough goes immediately after the head, while the material is still loose. Rubber disc rollers go wherever support is needed, because their value is preventive. A return brush goes as close to the tail pulley as geometry allows, so what it lifts falls into the tail area instead of being carried forward again. A wash box sits near the head, so the wet belt has the longest possible run to dry before it re-enters the loading zone.
Clearance to the skirtboard and chute
Nobody plans the space for a cleaner. On a retrofit, the chute wall, the skirtboard and the pulley guard are usually where they were in 1998, and the cleaner gets squeezed into whatever gap is left. Measure this before you order anything: the distance from the pulley face to the chute, the height below the belt, and the clearance to the frame on both sides. A cleaner that physically fits but cannot be adjusted by hand will be adjusted with a hammer, or not at all. As a conveyor belt supplier we see this on almost every retrofit enquiry, and it is worth saying plainly that the mounting space is part of the specification. If your line was built without it, the conversation is usually with a conveyor belt factory that can also supply the belt geometry to match.
05The Five Cases Where a Scraper Will Not Work
This is the section we wish existed when we started in this business. A blade cleans a flat, smooth, continuous, reasonably dry surface. Take away any one of those four conditions and the tool stops being a cleaner and starts being a source of damage. Yet the standard answer on most sites is still to buy a stronger blade and fit it more tightly. There are five situations where that instinct is wrong every time, and where the correct move is a different method altogether.
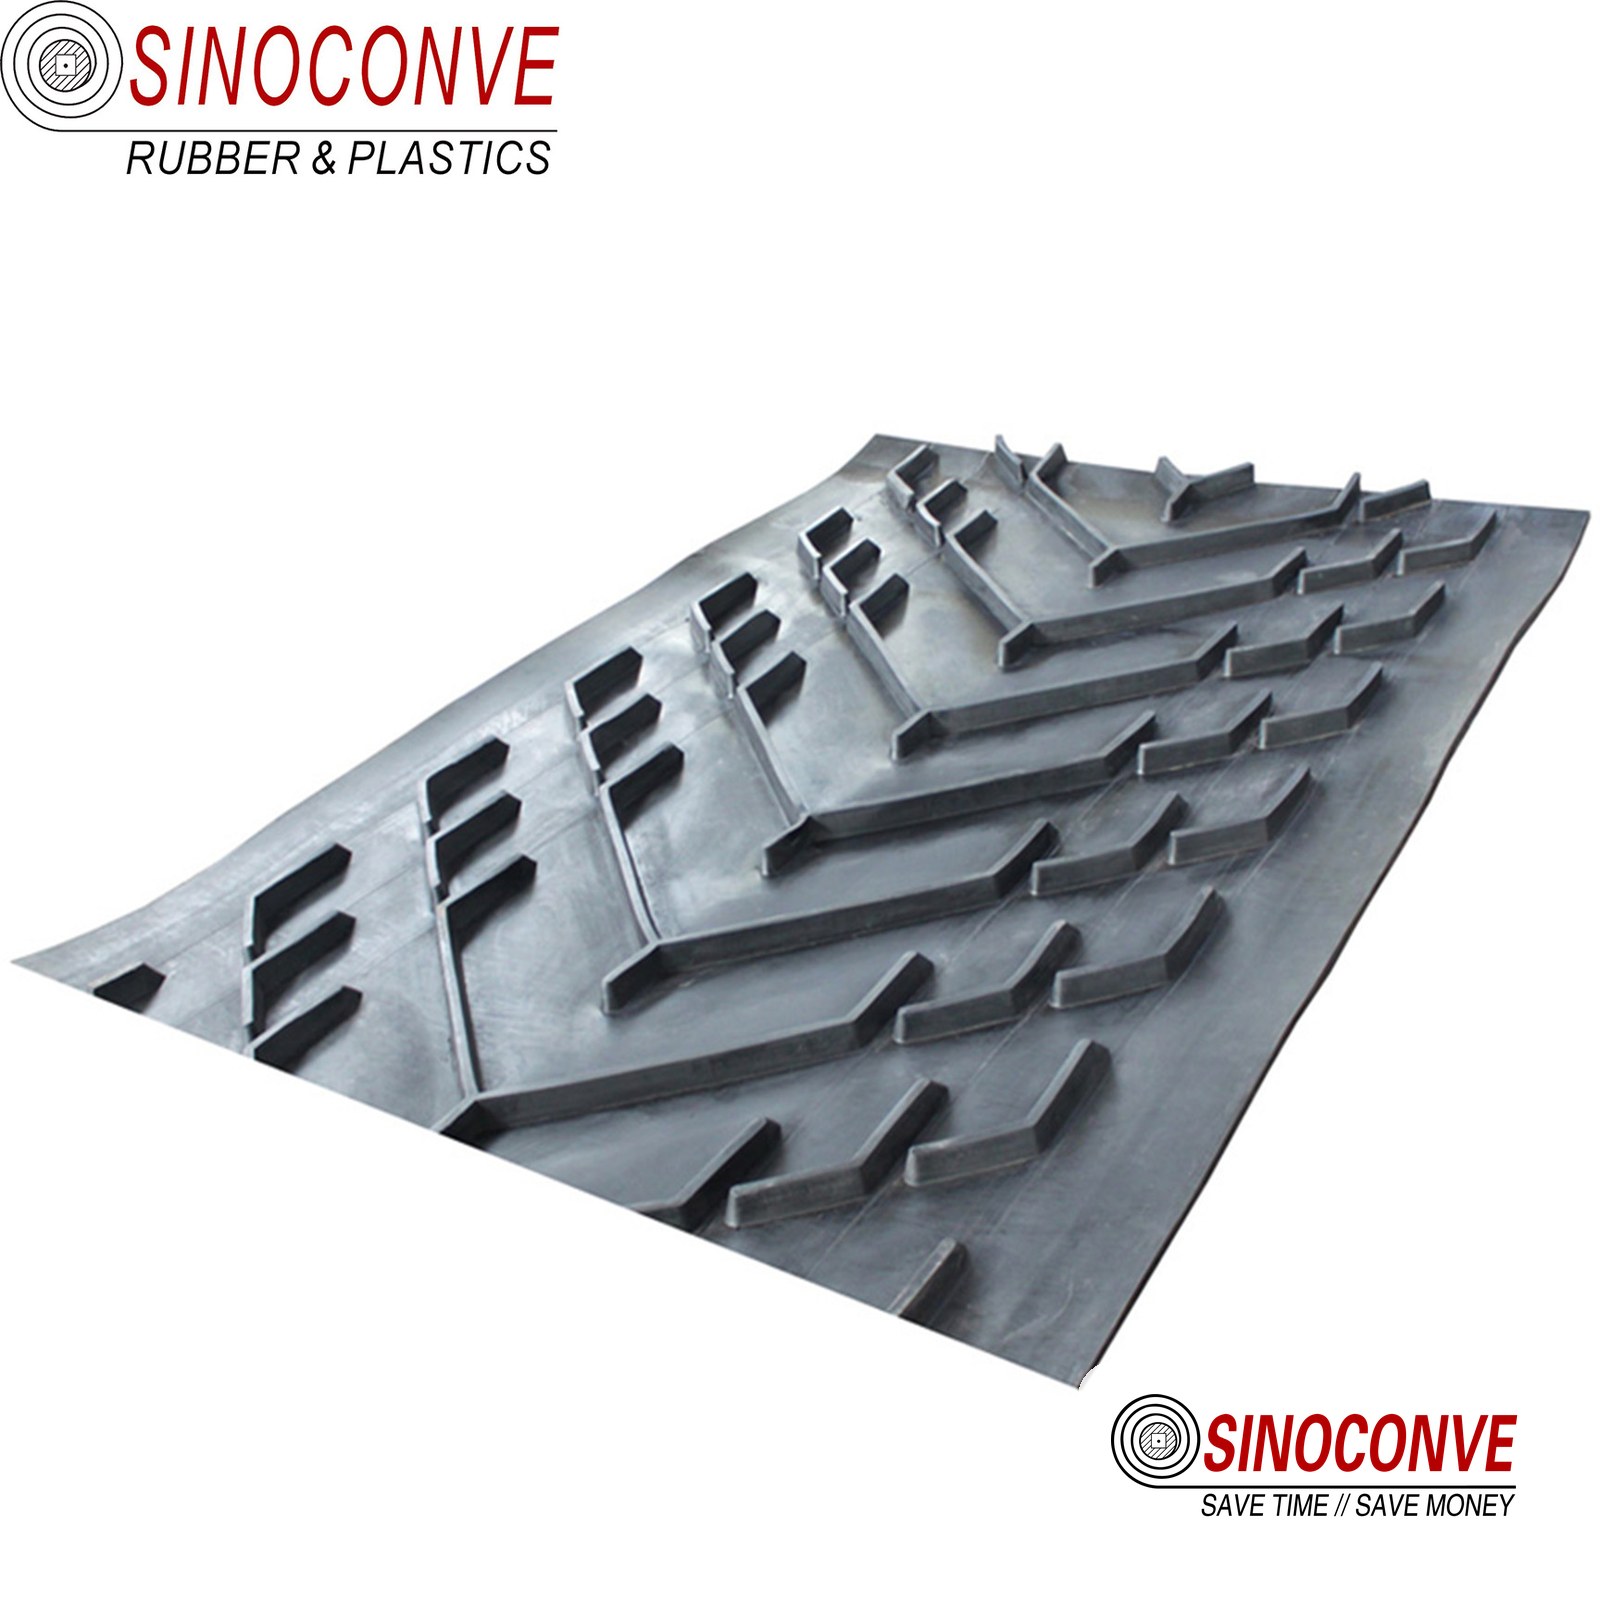
Case 1: Chevron and patterned belts
A chevron belt has ribs moulded onto the carrying surface, usually 15 to 30 mm high depending on profile and belt width. A scraper blade is a straight edge. It can only contact the tops of the ribs, so it touches perhaps 30 to 40 percent of the belt surface, and the material sits in exactly the valleys it cannot reach. Worse, the blade does not ride smoothly: it climbs each rib and drops behind it, so instead of a steady scraping action you get a repeating impact at belt speed. Count the events. On a belt with a 400 mm rib pitch running at 2.5 m/s, that is roughly six impacts per second, all day.
What happens next is predictable. The blade edge chips, the ribs wear unevenly at their leading faces, and the belt cover between the ribs starts to show gouges where a broken blade corner has dug in. Maintenance then increases blade pressure to compensate for the poor cleaning, which accelerates everything. On a steep-angle line carrying wet sand or coal, we have seen rib tips rounded off within a season by a scraper that was supposed to help.
The replacement route is a brush or a wash, not an edge. A rotary brush with bristles long enough to reach the valley floor will clean a chevron belt properly, and it does so without an impact cycle, because bristles flex over the ribs instead of colliding with them. Set the brush so the tips reach 1 to 3 mm into the valley, and check the depth every month, because the ribs wear down and the effective depth changes. Where the plant has water available, a spray bar plus a brush drum on the return strand takes a chevron belt close to clean. Where the product is fine and dry, a counter-rotating brush alone is often enough. A V-plough with a soft urethane edge, run at low pressure on the return strand, handles whatever falls off; two rails of angled urethane are cheap and they will last.
There is a design decision hidden in here. If cleaning is genuinely difficult on a steep incline, it can be worth reviewing whether the incline needs a chevron pattern at all. Sometimes a smooth belt with a correctly specified friction cover, or a different transfer arrangement, does the job without the cleaning problem. That conversation starts with the steep-angle options; if you need the angled transport, our notes on chevron conveyor belts for incline and anti-slip duty set out what each profile is for, and the broader range sits under conveyor belt distributor stock lines.
Case 2: Cleated belts and sidewall belts
A cleated belt has cross bars every 200 to 600 mm. A sidewall belt has corrugated walls bonded along both edges, sometimes 60 to 200 mm high. Both are built to hold material on a steep incline, and both present a scraper with features it was never designed to meet.
The failure mode is blunt. The blade contacts the top of a cleat instead of the belt surface, is pushed backwards, and then snaps forward into the gap behind it. That gap is maybe 150 mm at 1.5 m/s, which is enough time for the blade to spring forward, strike the base of the next cleat and take a chip out of it. Cleat roots are also the most highly stressed part of the belt. Every impact is a small crack initiation site at the bond line.
Sidewalls are worse, because they are the most expensive part of the belt and the hardest to repair. A blade edge that catches the bottom of a corrugated wall will start a peel. Once a sidewall base begins to lift, water and fines get in behind it and the failure runs along the belt. We have been called to look at exactly this more than once: a cement plant fitted a secondary blade to a sidewall belt because the return strand looked dirty, and two months later the sidewall base had separated over several metres.
Field note from our engineers: The cement plant case was avoidable and cheap to avoid. The belt carried clinker at up to 90 C with a corrugated sidewall 120 mm high. The blade was a standard 1,000 mm tungsten-tipped secondary unit, mounted so it cleared the cleats by 4 mm and hit the sidewall base by nothing at all. We took the blade off, fitted a low-speed brush across the belt width and a spray bar at the head, and the return strand went from a 20 mm ridge of dust to a stain. The sidewall damage was already done, but it stopped progressing.
What works instead, in order of preference: a brush or a wash station that acts on the belt surface between the cleats; a segmented blade system with individual fingers short enough to sit in the gaps, accepting that it needs frequent inspection, since a missing finger becomes a gouge; and a return-side V-plough set with generous clearance to catch what falls off anyway. What does not work is a full-width rigid blade. On a cleated belt, keep the cleat height as low as the application allows and the gaps as long as the capacity allows, because that is what makes cleaning possible later. The trade-offs are covered in the material on cleated conveyor belt selection for bulk handling and on sidewall conveyor belts in incline transport.
Case 3: Mechanical fastener joints
A vulcanized splice is a continuous belt. A mechanical fastener joint is a row of plates, hooks or hinge pins that stands a few millimetres proud of the belt surface. That few millimetres is the whole problem. A scraper blade cannot distinguish the belt from the joint, and the joint wins.
Three things happen, usually in sequence. The blade edge catches the leading edge of a plate; the plate lifts slightly and opens; the next pass catches the pin. Meanwhile the constant hammering work at the blade mount and the spring. Fastener joints also tend to be uneven, so the blade lifts and drops at every joint, and the belt at the joint sits lower than the belt surface, meaning the blade pressure at that instant is wrong on both sides. On a 1,200 mm belt with a joint every 30 m at 3 m/s, the blade sees a joint roughly every ten seconds. That is 2,500 impacts a shift.
The visible damage is at the belt edges, where the joint plate ends and the blade corner overhangs. We have seen edges chewed back 40 mm in a few months on lines where the joint was the real problem and nobody connected the two facts. There is also a safety point: steel blade against a steel fastener in a dusty environment is a spark source, which matters more than it used to on coal and grain lines.
The right answer depends on why the joint is mechanical. If the line can be stopped for a vulcanized splice, that solves cleaning, strength and fatigue in one move, and the methods and costs are set out in conveyor belt jointing methods. If the joint must stay mechanical, because the conveyor is short, or the belt is changed seasonally, or there is no vulcanizing capability on site, then the cleaning method has to be chosen around the joint rather than in spite of it. A brush is the usual answer, since bristles pass over a fastener without catching. If a blade is unavoidable, use a soft urethane edge on a spring mount that can deflect, keep the blade load at the bottom of the range, and inspect at every joint pass. Do not fit a rigid primary blade over a mechanical joint on a wide belt. That combination destroys edges, and it is one of the first things we look for when a customer sends us photographs of a torn belt edge. There is more on how these failures develop in conveyor belt splice failure causes.
Case 4: High-moisture, high-adhesion material
This one is subtle, because the blade appears to be working. It contacts the belt, it is not worn, and carryback still increases. What is happening is that the blade is not removing the material, it is shaping it.
With a pasty material, a blade develops a rolling wedge of material in front of the edge. The wedge grows until the blade lifts or the material squashes out under the edge as a film. Either way, a layer roughly 0.5 to 3 mm thick passes the blade and stays on the belt. Clay at 30 percent moisture, washed sand at 20 percent, dredged material, filter cake, and wet fertiliser all behave this way. Extra blade pressure makes the wedge denser and the film thinner but never absent, and the cost is belt cover.
Water is the honest answer, because it changes the adhesion rather than fighting it. A wash box with spray bars at 3 to 8 bar, followed by a brush drum and a squeeze roller, is the only method we have seen take a clay film down to a stain. If water is not available or the product cannot take it, the next best combination is a brush running damp at low speed plus a return-side disc roller arrangement that will not let the film build into a ridge, and a plough that clears what does fall. If the material is hot as well as wet, remember that the cover softens; on clinker above 90 C the effective hardness of the belt drops and the blade bites deeper, so the blade load has to come down, not up. Our colleagues have written about the wet end of this problem in the context of sand washing conveyor belt duty, and about the dry end under dust-resistant conveyor belt considerations. If the wet material is also oily or greasy, which happens in recycling and in some food plants, the film is different again and the chemistry matters, as explained in the notes on oil resistant conveyor belts.
Case 5: A belt whose cover is worn thin or age-hardened
A scraper needs something to scrape against. On a belt with 1 mm of cover left, the tool starts removing the belt. This is the case that produces the most expensive outcomes, because the damage is not local to the blade: once cover is gone, moisture reaches the carcass, the fabric plies delaminate, and the belt fails somewhere else entirely.
The warning signs are easy to read once you know them. Cover thickness under 1.5 mm at the blade line. A surface that feels hard and slick rather than grippy. Fine cracking in a crosswise pattern, which is usually ozone or flex fatigue rather than impact damage. Repair patches that keep reappearing at the same spot. Any of these, and the correct decision is to stop scraping.
What to do instead, in the short term: brush and wash, a plough, or a blade run at minimum pressure with a soft urethane edge and inspected weekly. What to do in the medium term is plan the replacement, and specify the cover for release behaviour and abrasion resistance rather than taking the cheapest grade available. A cover at 90 mm3 DIN 53516 loss costs more per metre, and it outlasts a 250 mm3 compound by enough that the per-tonne figure often comes out ahead. If you are specifying a replacement, the cover grades comparison is in rubber conveyor belt cover grades, the wider buying logic in the 2026 rubber conveyor belt guide, and volume pricing patterns, which are published as ranges only, are discussed in wholesale conveyor belts material. Magnitude only: a mid-duty EP belt in the 800 to 1,200 mm range sits somewhere in the tens of dollars per metre band, and the spread inside that band is driven by carcass, cover grade and splice.
| Situation | Why the blade fails | Use instead | Do not do this |
|---|---|---|---|
| Chevron or patterned belt | Rigid edge touches 30 to 40 percent of the surface and impacts every rib | Rotary brush set into the valley, spray bar, light V-plough | Increase blade pressure to chase the valleys |
| Cleated or sidewall belt | Cleats push the blade back, then it strikes the next cleat root | Brush or wash between cleats, segmented fingers, wide-clearance plough | Full-width rigid blade, especially over a corrugated sidewall |
| Mechanical fastener joint | Plates and pins stand proud, lifting and hammering the edge | Vulcanized splice if possible; otherwise brush, or soft urethane on a spring mount | Steel blade on a wide belt with hinge-pin joints |
| High-moisture sticky material | The edge builds a rolling wedge and smears rather than cuts | Water wash with brush and squeeze roller; damp brush as a fallback | Add tension to beat a paste |
| Cover worn thin or hardened by age | There is no sacrificial rubber left, so the blade eats structure | Brush, plough, minimum-pressure soft blade, and a replacement plan | Keep scraping while ordering a new belt next quarter |
Read that table the other way round and it becomes a specification tool. If your conveyor has two of these conditions on the same line, which is common on a single transfer tower, then the head-end scraper is not the primary solution at all. The primary solution is a return-side arrangement that tolerates the mess, plus a belt specified for release, plus a schedule. Blades go where blades fit.
06Matching a Cleaning Combination to the Material
Two questions decide the combination: how wet the material is, and how much of it is under 1 mm. The belt construction then sets the limits, because a rubber conveyor belt with a smooth release cover tolerates a blade while a patterned belt does not.
| Material | Behaviour | First line | Add if needed |
|---|---|---|---|
| Dry graded aggregate, 3 to 5 percent moisture | Falls away cleanly, light dust film | Primary blade | Secondary blade, disc return rollers |
| Washed sand, 18 to 22 percent moisture | Clings as a wet film, drains and sets on the floor | Spray bar with brush | Squeeze roller, plough |
| Clay and sticky overburden, 25 to 35 percent | Pastes onto the belt, blades smear it flat | Wash box, 3 to 8 bar | Brush drum, disc return rollers |
| Cement and clinker dust | Dry and fluid until humidity rises, then sets hard | Primary plus secondary blade | Enclosed transfer, sealed rollers |
| Coal, 6 to 12 percent surface moisture | Fines stick, and spark risk constrains blade material | Urethane primary blade | Brush, plough, flame-resistant belt spec |
| Grain, food and packaging lines | Dust and crumbs, hygiene limits on lubricants and wash water | Brush or air knife | Dry wash-down, food-grade belt |
| Fertiliser and other hygroscopic products | Absorbs moisture, becomes abrasive paste, corrodes steel | Dry brush plus wash at shutdown | Coatings on frames, daily rinse |
| Hot clinker above 90 C | Cover softens, blade bites deeper than intended | Heat-rated urethane blade, reduced load | Brush on the cooler return strand |
Moisture percentages are the ranges we measure at the discharge, not the laboratory figure for the product.
07Cleaning Schedules and Wear Inspection
A cleaner that is never inspected is a cleaner that has stopped working. The schedule below is the one we recommend to plants running two shifts, and it costs about twenty minutes a week.
| Interval | Task | Reject or act when |
|---|---|---|
| Every shift | Look at the return strand and the floor under the head | A visible ridge deeper than 10 mm forms |
| Weekly | Measure blade height at three points across the width, check spring or torsion tension | Blade worn to 30 percent of original height, or uneven by more than 5 mm across the width |
| Monthly | Check brush bristle length, plough clearance, disc roller rotation and mount bolts | Bristles under 8 mm, a plough touching the belt, a roller that will not spin by hand |
| Quarterly | Re-check angle of attack, cover thickness at the blade line, belt tracking at the tail | Cover under 1.5 mm at the blade line |
| Annually | Recalculate the tray catch test and compare against the baseline from last year | Carryback above 0.4 percent of throughput |
Measuring blade wear properly
Photographs do not measure wear. A steel rule does. Record remaining blade height 100 mm in from each edge and at the centre; wear is normally uneven and the low point is what matters, because that is where the blade stops touching the belt. Replace or re-set at 30 percent of original height for urethane, earlier for tungsten tips if the insert is chipped. Flip a blade only if the mount was designed for it, and keep one spare set of blades and springs on site per critical conveyor.
08Six Failure Modes of a Belt Cleaning System
Most cleaning systems do not fail because they are worn out. They fail because something in the system is fighting the belt.
1. Too much blade pressure. Excess load shaves cover, heats the surface and wears the blade faster while cleaning no better. Back the load off before replacing anything.
2. Blade chatter. A hopping blade leaves a striped wear pattern and a drumming noise. Causes: a mount too flexible, worn pulley lagging, or an angle of attack at the top of the range. Reduce the angle first.
3. Material packing behind the blade. Wet fines build a wedge that lifts the blade and eventually blocks it solid. Dry that hardens into a block that scores the belt. Clear it at every inspection.
4. Spring and cushion fatigue. Tension elements lose their setting long before the blade wears out, so a blade that cleaned well for three months and then stopped is usually a tired spring.
5. Heat. Above about 90 C at the belt surface, urethane softens and loses its edge. Heat-rated compounds help; water quench and a longer return run help more.
6. Over-tensioning the return strand. A belt pulled very tight wraps the tail pulley over a longer arc and holds material harder, so the same cleaner performs worse. Check tension before blaming the blade.
09How Carryback Turns Into Misalignment and Roller Damage
Cleaning is not only about recovering product. It is the first line of defence for the belt's alignment and for every roller on the return side, and those two failures cost more than the material does.
The mechanism is simple. Material that leaves the belt accumulates on the rollers. On the tail drum a lump builds on one side first, changing the effective diameter and pulling the belt towards it. The belt tracks off centre, the edge rubs the structure, and fraying starts. Meanwhile fouled rollers stop turning, and a stopped roller under load drags on a moving belt: polished flat, edge damage, new belt. We see this pattern on lines where the cleaner was removed because it was causing wear.
The order of prevention is: cut carryback at source, keep the return strand clear with disc or spiral rollers, and correct tracking before it becomes edge wear. The self-clearing argument is in our notes on self-aligning rollers and in the conveyor roller selection guide; the loading-zone end, where spillage starts, is covered under impact rollers for loading zones. If the belt is already drifting, the EP conveyor belt tracking guide works through the causes in order. On three aggregate lines we found tracking problems that vanished once the tail drum was cleaned and lagged, with no adjustment to the training idlers at all.
10How the Joint Type Constrains Your Cleaning Options
We covered mechanical joints in the five cases above, but the point deserves its own heading, because splicing decisions are usually made by someone else, months earlier, on grounds of schedule rather than cleaning.
A vulcanized splice leaves the belt surface continuous, so every method on the list stays available. A mechanical fastener joint removes the blade option for anything wider than about 600 mm and pushes the plant towards brushes and ploughs. A belt supplied endless and installed by threading avoids the problem entirely, which suits short conveyors and light-duty lines, as explained in the notes on endless conveyor belts. The cost and downtime comparison in the 2026 conveyor belt splicing guide is a fair starting point. The rule we give customers is simple: decide the cleaning method and the splice in the same meeting, because deciding them separately is how plants end up with a rigid blade on a hinge-pin joint.
11The Economics: Cleaning Cost Against Cleaning Loss
Set the annual cost of a cleaning system against the annual cost of not having one, on the same belt. Both sides are estimates, and the second side is always underestimated.
| Line | With a maintained cleaning system | Without one |
|---|---|---|
| Hardware and blades | 1,500 to 4,000 first year, then 400 to 1,200 a year in blades and brush segments | Zero |
| Inspection labour | About 20 minutes a week | 1.5 to 2 man-hours a shift |
| Product retained | Carryback typically held under 0.1 percent of throughput | 0.2 to 0.5 percent of throughput lost |
| Roller and pulley life | Return rollers reach normal service life | 8 to 15 premature roller replacements, lagging brought forward |
On the 800 mm line from section 01, the difference lands in the region of tens of thousands per year and the hardware is recovered in the first few months. That is a magnitude, not a promise. What does not move is the direction.
12Twelve Mistakes We See on Site
All of these are common. Most are cheap to reverse.
1. Assuming a tighter blade cleans better. 2. Using a tungsten blade on a belt with a 1.5 mm cover. 3. Fitting a rigid blade to a chevron or cleated belt. 4. Leaving a mechanical joint under a wide primary blade. 5. Setting the angle of attack by eye and never checking it again. 6. Mounting a cleaner on the ascending side of the head pulley, where the belt simply lifts away. 7. Buying a cleaner before measuring the space around the chute. 8. Treating a wet clay problem as a blade problem. 9. Ignoring the tail drum while fighting carryback at the head. 10. Replacing blades without ever checking the springs. 11. Removing a working cleaner because the belt shows normal wear. 12. Specifying the belt on price alone, then spending three years cleaning it.
13Where the Belt Ends and the Cleaner Begins
Cleaning is a system, not a fitting. The material decides the method, the belt construction sets the limits, and the schedule decides whether any of it still works next year. If your conveyor runs a patterned or cleated belt, a mechanical joint, or a wet sticky product, an edge scraper is not your instrument, and the money is better spent on a brush, a wash station and self-clearing rollers. The full range starts at the product catalog; if you would rather describe the problem and get an opinion, the frequently asked questions page or a direct enquiry works too. We answer with measurements, not adjectives.

14Conveyor Belt Cleaning FAQ
Conveyor belt cleaning: is more blade pressure ever the answer?
No, not past the point where the blade contacts the belt properly. Additional force increases friction, cover wear and blade wear, and it barely changes what comes off. If a correctly loaded blade still leaves material, the material or the belt surface is the constraint, and a different method is the answer.
How clean does a belt actually need to be?
Clean enough that the return strand shows no stripe wider than about 25 mm and the floor under the head stays clear for a shift. In measured terms, carryback below 0.1 percent of hourly throughput. Chasing a spotless surface costs more in belt wear than the recovered material is worth; proper conveyor belt cleaning is about removing the film that causes damage, not about polishing rubber.
Why does the belt only carry back after rain?
Because a 2 percent rise in surface moisture can double the adhesion of a fine product. The cleaner has not changed; the material has. On open stockpiles this is seasonal and predictable, so the schedule should allow for it rather than the crew being surprised by it.
Can I fit a scraper to a chevron belt?
You can fit one. It will not clean the belt. A rigid edge touches only the tops of the ribs, roughly 30 to 40 percent of the surface, and impacts every rib at full belt speed. Use a rotary brush set into the valleys, ideally with a spray bar.
What about cleated and sidewall belts?
Brushes, wash stations and wide-clearance ploughs only. A full-width rigid blade will strike the cleat roots and can start a peel at the sidewall base, which is the most expensive repair on that kind of belt. If a blade is unavoidable, use segmented fingers that fit between the cleats and inspect them often.
My belt has a mechanical fastener joint. What are my options?
A vulcanized splice removes the problem, and it is worth costing even if the belt has to come out for a day. If the joint has to stay, use a brush, or a soft urethane blade on a spring mount with the load at the bottom of the range. Steel blades and hinge pins do not mix.
How do I prove that cleaning has improved?
Put a 600 mm tray under the discharge for one hour, weigh what it catches and divide by the hourly throughput. Repeat monthly and log it. It is crude, and it settles more arguments than any amount of inspection opinion.
What causes a blade to wear a groove in the belt?
Usually one of three things: excessive blade load, an angle of attack near the top of the range, or a blade that has worn unevenly so one corner is doing all the work. Check the height at the edges, not just the centre. A groove under the blade line means the cover is being sacrificed.
Do self-cleaning rollers replace a scraper?
No. They reduce the consequences of a scraper that cannot do the job, keeping the return strand clear and the tail drum clean. Fit them as insurance, not as a substitute.
Related Products You May Need
- Conveyor belt and component catalog
- Chevron and patterned conveyor belts
- Self-cleaning conveyor rollers
- Abrasion-resistant rubber conveyor belt
Related Blog Posts
- Conveyor Belt Cleaner Selection and Carryback Control
- Chevron conveyor belts for incline and anti-slip duty
- Sidewall conveyor belts in incline transport
- EP conveyor belt tracking guide
- Dust-resistant conveyor belt selection
- How to choose the right conveyor idler roller
- Industrial belts for cement plants