Timing Belt Buyer's Checklist: 12 Things to Verify Before You Order
A 30-tooth 5M pulley, a 450 mm belt, a machine that indexes forty times a minute. The quotation matched the drawing. The belt that arrived carried 89 teeth instead of 90, because somebody converted a pitch length into a tooth count and rounded down. The drive ran for nine days, then started jumping one tooth every eighth cycle. Two fitters spent a whole shift stripping the servo before anyone thought to count the belt.
That one mistake is why this page exists. We mold synchronous belts in Ningbo and quote against customer drawings most days of the week, so we sit on both sides of the same argument: a buyer holding a purchase order, an engineer holding a caliper, and a belt that has to satisfy both. What follows is a working timing belt supplier filter, not a procurement lecture. Twelve checks in three stages, and each one names the tool, the document or the number that settles it.
This page skips the theory on purpose. If you are still choosing between an MXL, an 8M and a GT3, read the 2026 timing belt guide to types, pitches and selection first, then come back with a profile already chosen. And if the axis is a bulk line rather than a precision drive, start from our conveyor belt manufacturer range instead.

The table below is the whole checklist on one screen. The sections that follow expand every line with the measurement that closes it.
| Stage | # | What you verify, and what settles it | What it costs when missed |
|---|---|---|---|
| A - before order | 01 | Tooth profile and pitch, read off the pulley drawing or a measured groove | Tooth jump, noise, a belt that chews itself in weeks |
| A - before order | 02 | Teeth against pitch length, both on the PO with one marked master | A belt that fits the machine and misses on register |
| A - before order | 03 | Width plus tolerance, tooth face and back cover | Edge fray, slip on the back idler, jammed film |
| A - before order | 04 | Cord type by name, with a strength figure per mm of width | "Aramid" that stretches like glass, timing drift |
| B - on arrival | 05 | Three dimensions measured with tape, depth gauge and chalk | Fitting a belt that was never the size on the PO |
| B - on arrival | 06 | Appearance, teeth and cord ends, under a 10x loupe | Root cracks that open into a failed belt at month two |
| B - on arrival | 07 | Endless or joined belting, with the joint inspected | One soft tooth per revolution, forever |
| B - on arrival | 08 | Marking, carton label and production date photographed together | A batch you cannot trace, PU older than you were told |
| C - before install | 09 | Pulley match and teeth in mesh | Tooth jump under a load spike you never modelled |
| C - before install | 10 | Tension, centre distance and take-up travel | Prying a new belt over a flange with a screwdriver |
| C - before install | 11 | Environment sweep: temperature, wash chemicals, dust | A compound right on paper and wrong in the room |
| C - before install | 12 | Warranty boundary and a signed acceptance sheet | An argument about causation with no data |
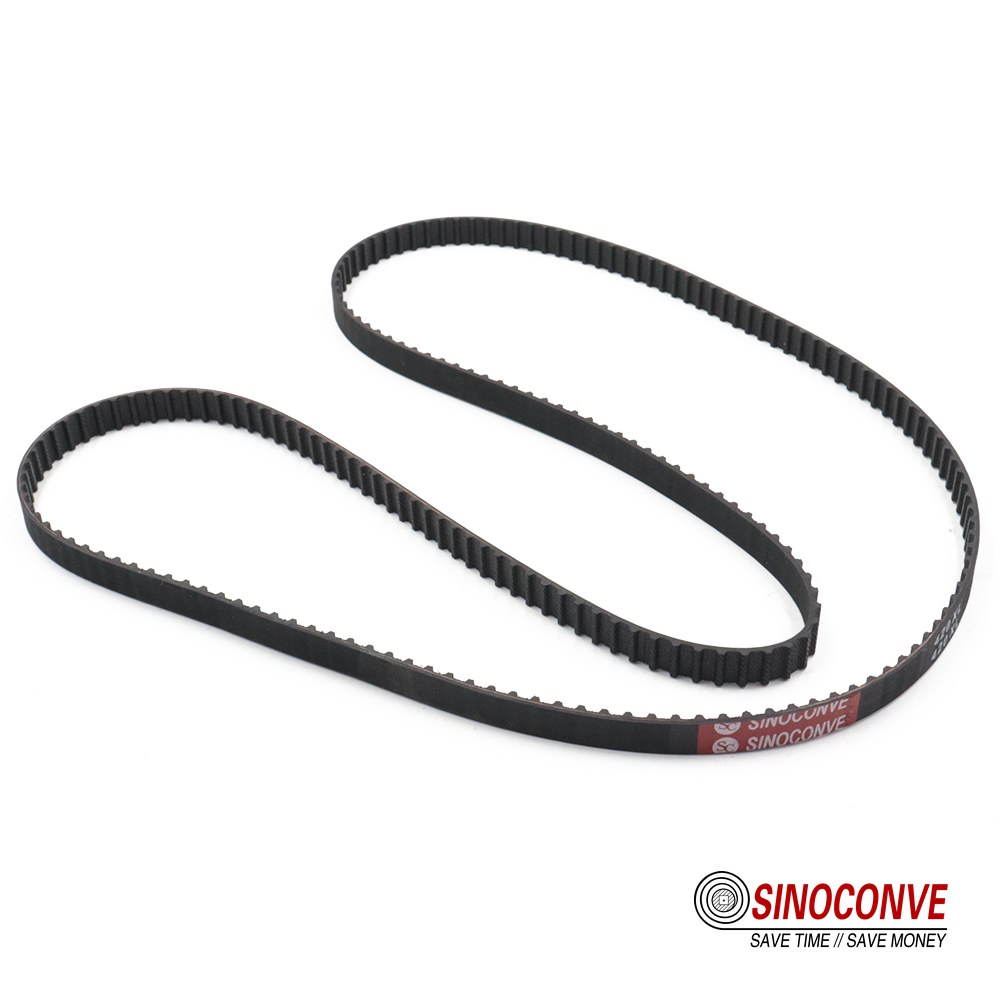
01Stage A, Check 01: Profile and Pitch, Read Off the Pulley and Not the Old Worn Belt
The first line of a synchronous belt RFQ should be a profile and a pitch. Not a length, not a price. "5M belt, 450 mm, 15 wide" is a specification. "Timing belt for a packaging machine, send best price" is a wish, and wishes are what the pallet arrives as.
Four profile families, and the gaps between them
Imperial trapezoidal first: MXL, XL, L and H, with XL at 5.08 mm and L at 9.525 mm. Then metric trapezoidal, T2.5, T5 and T10 with their deeper AT cousins. Curvilinear HTD follows in 3M, 5M, 8M and 14M, and the GT2 and GT3 family across 2, 3, 5, 8 and 14 mm.
Here is the trap. Identical pitch does not mean identical tooth. A 5 mm GT2 belt on a 5 mm HTD pulley usually runs well; reverse it, an HTD tooth form on a GT pulley, and you get the combination that buzzes at speed and polishes the flank. AT against T is worse. An AT10 belt will not seat in a T10 groove, because a tooth deeper than its socket has nowhere to go, so torque capacity falls away and the belt starts walking sideways.
| Belt profile | Pulley in the machine | Practical verdict | Inspect before you commit |
|---|---|---|---|
| GT2 or GT3, 5 mm | HTD 5M | Normally fine | Belt lies flat in the groove, no rock by hand |
| HTD 5M | GT2 or GT3 pulley | Do not | Shallow tooth in a deep socket, flank contact only |
| AT10 | T10 | No | Measure tooth height against groove depth |
| T10 | AT10 | Only if nothing else exists | Expect lost capacity, watch belt temperature |
| 8M HTD | 8YU | Check, do not assume | Gauge pin between two grooves, compare to drawing |
| XL, 5.08 mm | Any other inch pitch | Never | Nothing to inspect, the pitch itself is wrong |
If the axis turns out to be a friction drive rather than a synchronous one, you are shopping at a V-belt manufacturer instead and none of the above applies. That is a different purchase with different failure modes.
Reading a profile off an unmarked pulley
Pulleys lose their markings long before they lose their teeth, and the plate on the machine may have been painted over four times. Measure instead. Count the teeth, then measure across ten pitches with a steel rule and divide by ten - single-pitch measurement magnifies every bit of hand error. Roll a gauge pin into a groove to read depth, and check the flank for a step that a molded belt has been polishing away for years.
Field note from our engineers: A fruit packing line in Zhejiang was buying sixty belts a year for one drive and losing each of them at the tooth root. The pulley was a 24-tooth 8YU. The belts were 8M HTD. Nobody had compared tooth forms because both say 8 mm on the box. We matched the belt to the pulley, and the annual reorder went from sixty pieces to four.
The wider picture of how profile choice interacts with speed, torque and backlash sits in our industrial timing belt guide for precision drives. Tooth-face material behaviour is covered separately in PU timing belt versus rubber timing belt.
02Stage A, Check 02: Teeth Count Against Pitch Length, and Which Number Is Master
One number on the order is never enough. A pitch length without a tooth count leaves the supplier guessing which reading you took, and a tooth count without a pitch length leaves the freight forwarder guessing which standard you meant.
The only conversion you need
Teeth equals pitch length divided by pitch. An 8M belt at 1,200 mm is 150 teeth. A 5M at 450 mm is 90. A T10 at 1,150 mm is 115. An XL at 5.08 mm with 60 teeth is 304.8 mm. Run that division by hand once before the RFQ goes out, and keep the working in the file.
Now the reason length-only ordering bites. The words "1,200 mm" can describe pitch length, outside length or inside length, and on an 8M belt the spread between those three readings is only a few millimetres, while the distance between one tooth and the next is 8 mm. Your conversion error is larger than the ambiguity you were trying to dodge. On an indexing axis that repeats forty times a minute and holds register to about a millimetre, one tooth in the wrong direction is unrecoverable.
Put both numbers on the purchase order
Then mark which one governs. If the tooth count is master, the supplier derives the length from pitch. If pitch length is master, the supplier rounds to the nearest stock tooth count and sends it back for approval before tooling. Leave both numbers loose and the factory quietly picks whichever suits its existing mold - and you find out at goods-in. Two follow-on questions belong in the same email. Does the count you need exist as standard tooling, or is it molded to order with its own lead time? And can the machine be opened far enough to fit a closed loop, or does the drive need a split belt with a documented joint position?
We run this same arithmetic on the conveyor side. A customer asking for an industrial conveyor belt by centre distance is doing the mirror of this calculation, and a loose answer looks the same there: a belt that is close, and not right. Standard tooth counts, pitches and stock widths are listed on the synchronous belt product page.
03Stage A, Check 03: Width, Tooth Face Material and What the Back Is Asked to Do
Width looks like the easy line on the drawing. It is where a surprising number of belts get returned, usually because nobody wrote a tolerance next to the number.
Width is a tolerance, not just a dimension
Metric widths run 6, 9, 10, 15, 20, 25, 30, 50 and 100 mm. Imperial runs 1/4, 3/8, 1/2, 3/4 and 1 inch. A belt slit from a wide sleeve carries a slitting tolerance on the order of half a millimetre to a millimetre, while a molded sleeve holds tighter. Ask for the number and the tolerance together, and put both on the order.
Too wide and the belt rubs the flange, which frays the sidewall and eventually exposes cord. Too narrow and it has room to walk, which does the same damage from the other direction. On a 15 mm flanged drive, a 15.8 mm belt is not a comfort margin. It is a wear item with a two-week life.
Tooth face: HNBR, CR or PU
Three compounds cover most of what we ship. HNBR takes heat and oil mist and holds up where a standard compound hardens. CR, general-purpose chloroprene, brings good flex life at moderate cost over a wide temperature band. PU is the abrasion and cut-resistant choice, and the right one for clean rooms and food lines, with one caveat: polyurethane is sensitive to hydrolysis, so hot water and caustic wash need declaring up front rather than being discovered in month four.
Then decide what the back of the belt has to do, because the back is a separate specification. A nylon fabric back runs quiet and slick over a steel snub idler. A plain gum back grips. A ground back is what you buy when back thickness has to hold a tight tolerance for a sensor or a knife. If nothing rides on the back, say so and keep the price down.
Widths, tooth-face compounds and back treatments repeat across a whole belt range rather than one product, which is why our wholesale conveyor belts listing is worth a look even if you only buy synchronous belts.
04Stage A, Check 04: Cord Type, Locked on Paper and Proven by Test
The cord is the one part of a timing belt you never see. It is also where a supplier protects margin, because the words "high-strength cord" cost nothing to print and a strength figure per millimetre of width costs real money to deliver.
Three cords, three different jobs
Glass fiber is the volume standard. Low stretch compared with any textile, predictable, inexpensive, and it dislikes moisture once a cut end has exposed it. Aramid brings more strength per unit and much better shock tolerance, which matters on a drive that sees frequent starts or a jam-and-release routine, and it is friendlier over small pulley diameters. Steel cord is the register and length-stability choice for long, hot, heavily loaded drives; it normally ships endless, cannot be spliced on site, and cannot survive a kink. None of that is an argument for buying the strongest cord available. What you are buying at this stage is certainty about which cord you ordered, not the highest number in the table.
What proof actually looks like
Write the cord on the purchase order, by name. Not "high-strength", not "premium", but glass fiber, aramid or steel, followed by a strength per millimetre of width and an elongation figure at a stated load. Then ask what document comes with the batch: a breaking-strength figure for the belt, a tooth shear value, and a batch certificate that ties the belt marking to the cord lot used that day. Publicly stated catalogue figures are a fine starting point, but they are not evidence for the belt in your crate.
Then test the claim, cheaply. Take 20 mm of scrap, cut the backing away and pull the cords with pliers. Glass fiber shatters and leaves a white powder on your fingers. Aramid resists, then frays and looks yellow at the break. Steel is obvious, and a magnet confirms it. A supplier that will not name the cord in writing has already told you what you need to know, and the same reflex applies to any conveyor belt factory you are considering: there is either a batch sheet or there is a story.
| Item on the PO | What it has to say | Good enough | Send back for revision |
|---|---|---|---|
| Belt description | Profile, pitch, teeth, width plus tolerance, back treatment | All five present | Any of the five missing, or a width with no tolerance |
| Cord declaration | Cord material by name, strength per mm of width, elongation at a stated load | Actual numbers | Adjectives instead of numbers |
| Batch document | Batch or lot number that matches the marking on the belt | Provided at quotation stage | "We can send it after delivery" |
| Tooling answer | Whether the tooth count is stock or molded to order, with a stated lead time | Answered before you release the PO | A lead time that appears only after the PO is signed |
| Storage note | Temperature and humidity window for storage, and the production date format on the label | Written, so goods-in can check it | "Keep it somewhere dry" |
05Stage B, Check 05: Measure Three Dimensions, and Let the Belt Settle First
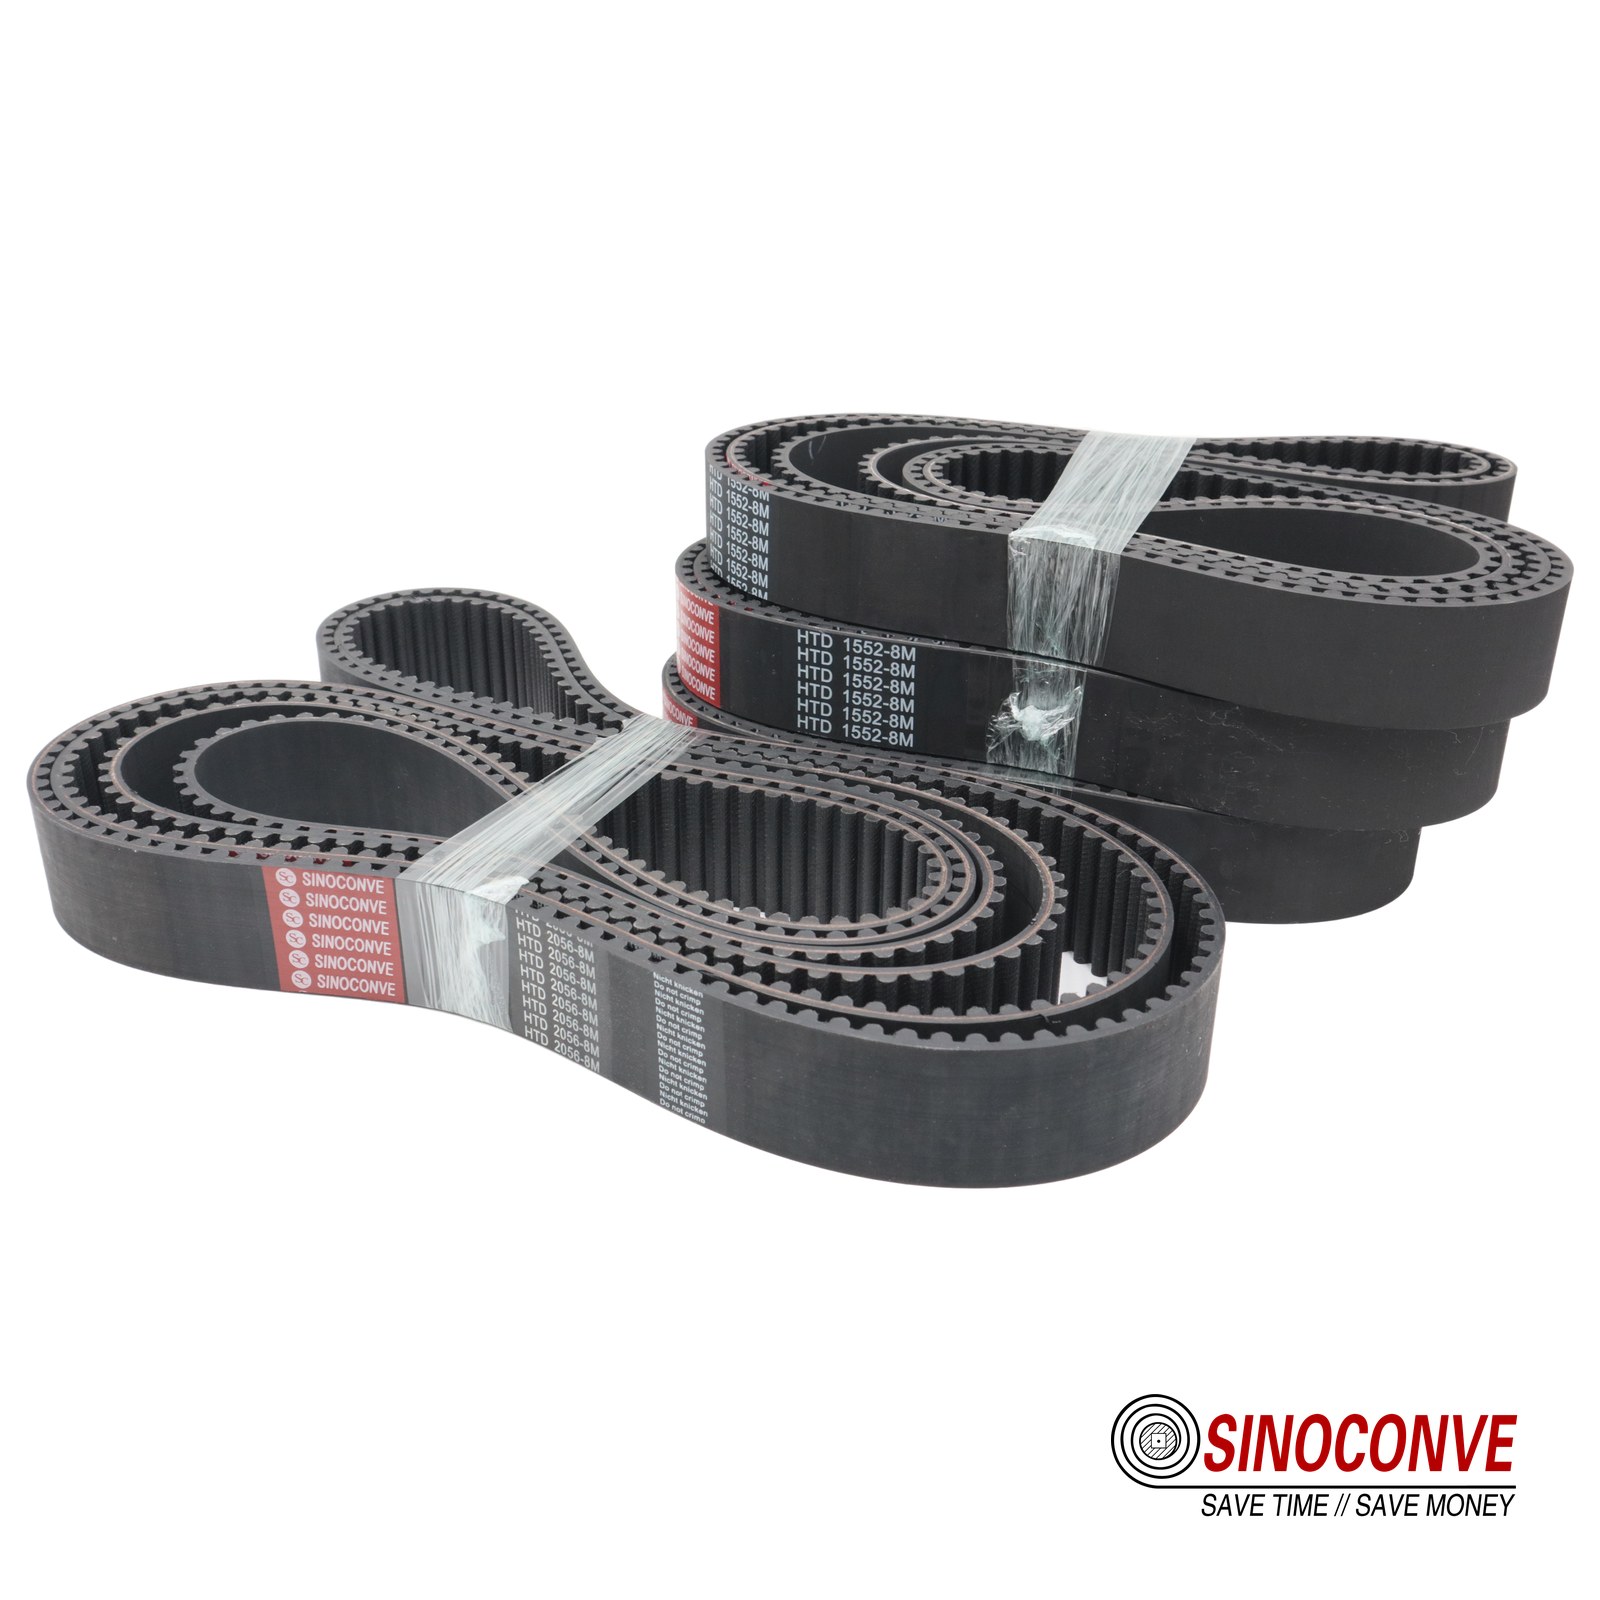
A belt that has just crossed an ocean in a container is not the belt you will install. Leave it in the store for a day at room temperature before you measure anything, because a PU or CR belt pulled off a winter truck and measured immediately can read short by enough to start an argument that lasts a month.
Three measurements, three different tools
Start with the tooth count, and count it properly. Chalk one tooth, then work around the loop with a finger and no shortcuts. Tooth count is an integer, so there is no tolerance to negotiate: it either matches the purchase order or the belt does not belong on the dock.
Then pitch length, which is where hand error gets expensive. Do not measure a single pitch. Mark the leading flank of one tooth, measure to the leading flank ten teeth later, divide by ten and multiply by the total tooth count. On a 5M belt that removes about a millimetre of reading error per pitch. Lay the belt flat and relaxed, and measure the same way a second time.
Width closes the set. Take three readings, both ends and the middle, with the belt slack. If the three differ by more than the slitting tolerance you agreed, the belt was cut on a dull blade, and the narrow spot is where it will climb or fray.
What a good reading and a bad reading look like
On a molded endless belt the pitch length normally holds within a fraction of a percent of nominal. A full pitch out means the wrong belt. Half a pitch means somebody shipped an adjacent tooth count. Both are goods-in rejections, and both are cheap to prove with one photograph of the belt on the tape measure with the marking in the same frame. One rule overrides the rest: never stretch a belt to make a dimension read right. Tension on a bench does not change the belt, it only changes the number on the tape.
This is the same incoming routine we apply to a conveyor belt supplier shipment of EP belting: count, measure, photograph, file. The tools differ with the product. The habit does not.
06Stage B, Check 06: Appearance, Tooth Roots and Cord Ends
Most timing belt defects that matter are visible before the belt is ever tensioned. They hide in the tooth root, at the sidewall and under the back face, and they take about four minutes to find with the right light.
Five things to look at, in order
Bend the belt gently and read the tooth roots with a 10x loupe. Hairline cracks across the root radius are where flex fatigue begins, and a new belt carrying them at goods-in will not reach its first maintenance interval. Pick at the tooth-face fabric with a fingernail; a corner that lifts is a lamination problem that grows every revolution. A wave in the coating of a ground face becomes a high spot that wears the pulley.
Sidewalls come next. Slitting flash and loose fibre are cosmetic up to a point, and a light trim is acceptable. A fuzzy edge with cord ends standing proud is not: it wicks moisture into a glass cord and loses strength from the inside. Back flatness needs a flat steel plate. Lay the belt down and look for a gap or a ripple; a local hump usually means a cure or shrinkage problem in the sleeve, and it shows up as noise against a back-side idler.
Cord ends need judgement, not a rule. Cord visible in the cut face of an open-ended or cut-width belt is normal, because that face is a slice. Cord visible along the running sidewall, or through the back, is a reject. Exposed glass cord absorbs moisture and loses strength quietly; exposed steel cord corrodes, then breaks. We apply the same look-over to every rubber conveyor belt before it leaves the press.
07Stage B, Check 07: Endless, Open-Ended or Joined, and Why the Difference Shows Up Once per Revolution
Synchronous belting arrives in three shapes and they are not interchangeable, even when the markings look alike. A true endless belt is molded as a closed sleeve and cut to width, so the cord runs unbroken around the loop. Open-ended belting is a flat strip with two free ends, used on linear axes where the ends are clamped rather than joined. The third shape is a welded or finger-spliced loop.
Telling them apart on the bench
Roll the belt through your hands and watch the back face. A true endless belt is uniform all the way round, with no band, no weld line and no step. A joined belt shows one of those three things, and once you have seen a weld band you will spot it at arm's length. If you are unsure, count ten teeth across the suspect area and compare that distance with ten teeth taken anywhere else on the same belt. A joint that changes the spacing beats once per revolution, and you will hear it before you see it.
Then judge whether the joint is acceptable for the job. A continuous cord is what makes a synchronous belt hold register, and any join interrupts it. On a low-torque conveying duty at modest speed, a good welded loop can last years. For an indexing drive or a printed register, insist on a true endless belt, because the joint is a position error that repeats forty times a minute. On an open-ended strip, the checks move to the ends: are they square, cleanly cut without cut cord, and inside the length tolerance you agreed. If the machine uses clamps, the clamp tightening torque belongs on the installation sheet, not in someone's memory.
Field note from our engineers: Twice last year we were asked to quote replacement belts for a drive that was "eating belts every three weeks". Both times the installed belt was a welded PU loop sold as endless, and both times the joint sat directly over a 30-tooth pulley. Moving the joint into a straight run fixed it. Nobody had specified where the joint had to be, so the last person to fit the belt simply put it wherever it landed.
If you buy through a conveyor belt distributor who holds your stock rather than a factory, add this line to their goods-in sheet as well, because a joint is created by whoever makes the loop and inherited by the buyer. Our conveyor belt splicing buyer's checklist covers methods and strength claims on heavier belting.
08Stage B, Check 08: Marking, Traceability and the Age of a PU Belt
A timing belt that cannot be identified is a belt you cannot claim against. The marking is also the fastest way to catch a mixed pallet before it reaches the machine.
Match the belt, the label and the order
A properly marked synchronous belt carries the profile and pitch, the tooth count, the width and, on most of what we ship, a batch reference and a production date. Read all of it off the back of the belt and compare it against the carton label and the purchase order, line by line. Photograph the belt marking and the carton label in the same frame and file the image against the PO number. That photograph has settled more disputes than any other document in the pack.
Belts cut from a wide sleeve need one extra step. The label on a cut belt usually refers to the sleeve it came from, not to the belt itself, so the sleeve or roll number must appear on the delivery note. Without it, a good sleeve and a suspect one look identical on the shelf.
PU belting ages, and it ages faster than you think
Polyurethane takes up moisture and hydrolyses, and the process needs no running machine, only time, warmth and humidity. Shelf life is publicly quoted at roughly two to three years from production for PU belting kept at 15 to 25 °C, below about 60% relative humidity, out of sunlight and away from ozone sources such as electric motors. Rubber compounds tolerate longer storage, which is one more reason to know which compound is in the crate.
So when a shipment lands, find the production date and do the arithmetic. A PU belt molded eighteen months before it reached you has been ageing the whole time. Bend a tooth and look for a hazy, crazed surface where the compound should be clear. Store what you do not use by the rules on the label: on a large radius peg, or flat on its own core. Do not clamp a stack under a pallet of rollers.
Traceability questions land with a transmission belt manufacturer long before they land with a buyer, which is why a batch number is not paperwork for its own sake. It is the difference between a claim and an opinion.
Stage B on one sheet, in the order you should walk it.
| What you check | How to take the reading | Accept when | Reject when |
|---|---|---|---|
| Tooth count | Chalk one tooth, count all the way round the relaxed loop | Matches the purchase order exactly | Any other number at all |
| Pitch length | Leading flank of one tooth to the leading flank ten teeth later, divide by ten | Within a fraction of a percent of nominal | Half a pitch or more away from nominal |
| Width | Three readings on a slack belt: both ends and the middle | All three inside the tolerance you agreed | A spread wider than that tolerance, or a narrow spot |
| Tooth form | Seat the belt by hand on the actual pulley it will drive | Drops in, sits flat, no rock against the flange | Needs force, or rocks in the groove |
| Tooth roots | Bend gently and read the root radius with a 10x loupe | Clean radius, no line across it | Any hairline crack on a new belt |
| Sidewalls | Run a fingernail along both edges, look for loose fibre | Light flash that trims away cleanly | Fuzz with cord ends standing proud of the rubber |
| Back face | Lay it on a flat steel plate or a granite surface | Flat within about a millimetre over a metre | A local hump, ripple or twist along the length |
| Marking | Read the belt back, then the carton label, then the PO | All three agree on every line | Any disagreement, or no production date at all |
09Stage C, Check 09: Pulley Match and the Minimum Teeth in Mesh
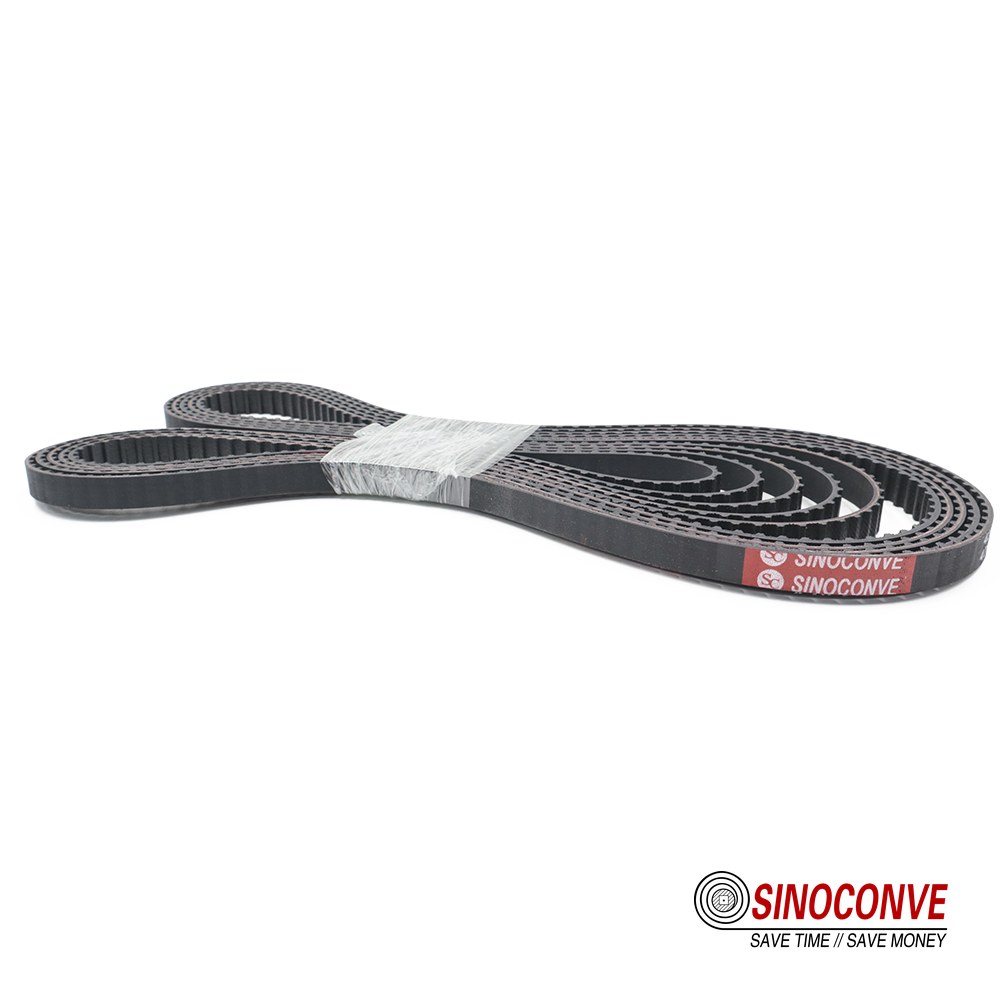
By now the belt is verified and the machine is the unknown. Two numbers decide whether the drive holds register or starts eating itself, and both of them belong to the pulley rather than the belt.
Pitch diameter, and why a worn pulley beats a worn belt
Pitch diameter equals pitch multiplied by tooth count, divided by pi. An 8M pulley with 30 teeth measures 76.39 mm on the pitch line; a 5M pulley with the same 30 teeth comes to 47.75 mm. You do not need either figure to place an order, but you need it to confirm that the pulley in the machine is the pulley on the drawing, because drives get rebuilt over the years by people substituting what was in the stores.
Measure the outside diameter with a caliper and compare against the drawing, then roll a gauge pin into the groove to read wear. A groove that has opened up adds backlash, the belt runs a degree or two late, and the drive gets hot for reasons that no amount of tension adjustment will fix.
Teeth in mesh is the number that causes tooth jump
Teeth in mesh equals the teeth on the small pulley, multiplied by arc of contact in degrees, divided by 360. Take a 2:1 drive with a 20-tooth small pulley. Contact on the small pulley is close to 180 degrees, so roughly ten teeth carry the load. Comfortable. Now make the same drive a 6:1 reduction. Contact falls towards 120 degrees and the mesh drops to about 6.7 teeth.
Six is the floor most drive designers treat as the minimum for a loaded HTD or GT drive. Within a tooth of that floor, a jam, a hard start or a cold morning will jump the belt, and the user will blame the belt. The fix is a step up in profile, a wider belt, or a back-side idler that wraps the small pulley further. It is a design question, and it is far cheaper to answer before the RFQ than after the second failure.
While the belt is off, look at the flanges. A flange bent inward by a jammed product will cut a belt edge, and an edge that opens fails from the cord outward. The same arc-of-contact arithmetic governs any friction drive, which is why a V-belt manufacturer asks for both pulley diameters before quoting a wrapped belt, and why the answer changes when you switch, as we set out in V-belt versus timing belt.
Field note from our engineers: A dairy plant fitted 5M GT2 belts against an old HTD drawing and one jumped a tooth every shift. The pulley was a 16-tooth HTD, belt wrap under 130 degrees, and the mesh worked out at four teeth. Nothing was defective. The drive had been living on borrowed margin for years.
10Stage C, Check 10: Tension, Centre Distance and Whether the Base Will Actually Move
This is the check that fails on installation day more often than every other item on this list combined, and it fails for a boring reason: nobody looked at the motor base before the belt arrived.
Count the slot before the belt lands
Measure the adjustment slots and the swing of the tensioner, then work out the range of centre distance you actually have. You need enough slack to slide a closed loop over the flange without forcing it, and enough take-up afterwards to reach working tension. A synchronous belt does not creep the way a friction belt does, so the travel needed is smaller than for a V-belt drive, but it is not optional: on an 8M drive think a few millimetres, on a 14M drive rather more.
Set tension by measurement, then write it down
Two methods are worth the effort. The deflection method uses a spring gauge at mid-span and asks how much force pushes the belt in by a stated amount. The frequency method uses an acoustic tension meter: tension equals four times belt mass per unit length, times the square of the free span, times the square of the measured frequency. Either way, put a number on the installation sheet. "Tight enough" is not an instruction, and night shift reads it generously.
Over-tensioning is not safe. It overloads the cord, loads the bearings and polishes the flanges, and the belt usually outlives the bearings, which makes the diagnosis harder. Under-tensioning is worse on a synchronous drive: a loose belt jumps teeth under load instead of slipping quietly, and that breaks the machine's timing rather than the belt. Loosen the base, slide the belt on, never lever it over a flange, and re-check tension after the first day of running.
Field note from our engineers: We were sent a failed 14M belt by a customer who was certain the compound was wrong. The cord at the failure point carried a row of nicks about 40 mm apart, all the way across, on an otherwise clean belt. Screwdriver marks. Somebody had levered it over the flange on installation day, and the belt held for eleven days before it let go. Standard warranty covers manufacturing, not a pry bar.
If your drive sits behind a guard on a machine you did not build, our notes on specifying timing belts for automation and OEM drives cover the interface details that tend to get left off the drawing.
11Stage C, Check 11: An Environment Sweep, Read Against the Label You Already Have
This check is not a materials lesson. You have already bought a compound, and the label on the belt names it. The job now is to walk the drive and confirm that the room agrees with the receipt, before the belt goes on.
Temperature at the worst hour, not the average
Take a contact thermometer or an infrared gun and read the drive at the time of day the plant is hottest, or after the longest continuous run. Peak temperature is what ages a compound; a 24-hour average is a comfort blanket. Typical ranges, as usually quoted, run to roughly 100 °C for general-purpose CR, higher for HNBR, and around 80 °C for PU with short excursions above that. If your peak sits at the edge of the window on the label, plan the next reorder around a different compound rather than waiting to see what happens.
The other five irritants
Oil and grease next. A drive under a leaking gearbox seal lives in a mist that softens some compounds and swells others, so note whether the leak is hydraulic oil, gear oil or food-grade lubricant.
Then wash chemistry, which is the one that gets missed. Caustic at a couple of percent at 60 °C, quaternary ammonium sanitiser, steam lances and foam cleaners are all routine in food plants, and polyurethane reacts to several of them over time. Write the actual list down; "wash down daily" is what turns into a hydrolysis claim six months later.
Dust and grit come fourth. Abrasive fines work into the tooth mesh and grind both belt and pulley, so near a bagging or cutting operation a simple wiper or deflector costs less than a belt and a set of pulleys. Ozone and UV are fifth, and they are free to fix: a motor, a welding set or a bright skylight within a metre of stored belting will age it on the shelf.
Last, static. Where a static discharge is a real hazard, an antistatic build is a specification you order, not a property you assume. This walk takes an hour and closes the gap between what the belt was built for and the room it will live in, and it is where packaging and food-handling people usually find they need a coated tooth face or a different profile entirely, which is the subject of our PU timing belt notes for packaging and robotics.
12Stage C, Check 12: Warranty Boundaries and the Acceptance Sheet Nobody Writes
Every belt failure argument follows the same shape. The user says the belt was defective. The maker says the belt was abused. Both are guessing, because neither side kept a record of the day it was installed.
Understand what is actually excluded
Manufacturing coverage normally runs to a defined length of time, commonly quoted in this trade as twelve months from delivery or six months from installation, whichever comes first, and covers defects in material and workmanship. It does not cover the drive the belt was put on. Over-tensioning, a worn or mismatched pulley, temperature above the stated window, chemical exposure outside the agreed list, storage beyond the shelf life, installation damage and any joint the customer made themselves are all on the buyer's side of the line, and each leaves physical evidence a decent record would have caught.
Fill one sheet, sign it, keep it
The acceptance sheet does not need to be long. Purchase order number, belt marking, measured tooth count, measured pitch length, width, cord type, batch number, production date, the temperature window agreed, the tension figure used, the installer's name and the date. Add one photograph of the belt marking and one of the carton label. Ten minutes on the day, and it converts every future failure discussion from an opinion into a data set.
Do this and the warranty question mostly disappears, because the belt either failed inside its window on a drive that was in specification, or it did not. Either way you will know, and so will the engineering team you are talking to, which is the only basis on which anyone can fix the real cause. Volume buyers ordering private-label stock will want the same sheet in a fixed format, as we set out in our notes on private label timing belt supply and the rubber timing belt wholesale guide.
The exclusions below come up again and again in claim discussions. None are unreasonable, and all are provable if somebody wrote it down on the day.
| What happened on site | Why it sits outside the warranty | The record that settles it |
|---|---|---|
| Belt ran above the agreed temperature | The compound has a defined window and it was published | Temperature log taken at the drive, not at the wall |
| Belt installed too tight | Cords and pulley bearings were overloaded from hour one | Tension figure recorded on the install sheet |
| Pulley found worn or mismatched | The pulley belongs to the machine, not to the belt order | Gauge pin reading and measured pitch diameter |
| Belt levered over a flange | Mechanical damage is visible in the cord structure | Installation method, installer name and date |
| Chemical exposure beyond the agreed list | Compatibility was agreed against the list you supplied | Wash chemical list attached to the purchase order |
| Stock held past the shelf life | PU ages on the shelf with no machine involved | Production date plus where the roll was stored |
| Belt re-joined or welded in house | Joint quality stops being the maker's responsibility | Who joined it, on what date, with what equipment |
| Back face ground or modified locally | Surface integrity was removed after delivery | Photograph taken before the belt went on |

13Frequently Asked Questions for Buyers Working with a Timing Belt Supplier
Timing belt supplier vetting: what do I ask for before the first order?
Four things, and none are confidential. A profile and pitch list showing which tooth counts are stock tooling and which are molded to order. A tooth-form drawing or section sample for each profile you plan to buy. A cord declaration with real strength and elongation figures. And a batch document showing what will be printed on the belt. A supplier who cannot produce those four is not a supplier yet, they are a broker with a telephone. Our own profile and pitch data sits on the timing belt product page.
Can you make a non-standard pitch length?
Usually, yes, and the cost depends on which kind of non-standard you mean. A tooth count outside the common table but on an existing mold plate is a straightforward cut length. A brand-new tooth form, or a count that needs new tooling, is a mold project with weeks of lead time and a tooling cost attached. Ask which of the two you are in before you negotiate price.
Can a GT2 belt replace an HTD belt on the same pulley?
In that direction, usually yes. A GT2 or GT3 tooth form generally seats in an HTD groove and runs, because the modified profile is the more accommodating of the two. The reverse is the problem. An HTD belt in a GT pulley touches on the flank only, so it wears, runs warm and eventually jumps. If the pulley is already worn, neither belt will hold and the pulley is the real purchase.
How long can a PU timing belt sit on the shelf before it stops being reliable?
Two to three years from production is the figure usually quoted, and only if storage behaves: cool, dry, dark, away from motors and welding sets. Beyond that the compound takes up moisture whether or not anything moves, and the first sign is a dull, crazed surface when you bend a tooth. Check the production date on arrival, not at installation.
What is the minimum order quantity?
It depends on one question: does the tooth count already exist in tooling? Stock counts get cut from a sleeve, so the order can be small and priced per belt or per meter. A molded-to-order length is driven by the mold run, so the MOQ follows the tooling, not your consumption. Ask for the figure in the quotation rather than assuming a catalogue number, and check it against your real usage rate before committing to a year of stock.
What lead time should I expect on a timing belt order?
Industry-common practice splits it three ways: stock tooth counts and widths move in days, molded-to-order lengths run in weeks, and ocean freight adds weeks again on top. That is a planning rule, not a promise. What matters more is getting the lead time in writing before you release the purchase order, so a tooling question does not surface as a delay two weeks later. Confirm against your actual drawing and destination.
Can I send a sample, or a worn belt, to be matched?
Yes, and it is often the fastest route to a correct first order. Send the belt itself, or cut two teeth out of it, keeping the marking intact so the starting point is documented. Add a photograph of the pulley and the tooth count, plus the pitch diameter if you can measure it. One caveat: a worn sample gives you a worn tooth form, so it is only a starting reference, and a belt built from it can run slightly loose in a new pulley.
How do I verify that a cord is really aramid rather than glass fiber?
Three checks, in order of cost. Look at a cut end under a loupe: aramid fibres look yellow and slightly fuzzy, glass looks white and brittle. Pull a few cords with pliers and glass shatters, leaving powder. Sweep a magnet near the cord if steel is possible. Then ask for the strength figure per millimetre of width and the batch certificate, because a cord that resists hard pulling without a number behind it is still an unverified claim.
14Related Products You May Need
- Timing belt - our synchronous belting line, with stock pitches and molded-to-order tooth counts, cut to the width you specify.
- V-belt - the friction-drive alternative when a synchronous belt is the wrong answer for the axis.
- Conveyor roller - for the roller side of the same line, including the idlers that tension a back-side run.
- Rubber conveyor belt - heavy-duty material handling for the bulk side of the plant.
- EP fabric conveyor belt - polyester and polyamide carcass grades for longer centres and higher tensions than light-duty belting can carry.
- Heat resistant conveyor belt - compounds for carry-side temperatures where ordinary rubber stops working.
- Chevron conveyor belt - profiled and cleated surfaces for inclines and steep handling.
- Full product catalog - every belt family we press, in one place.
15Related Blog Posts
- Timing belt guide 2026: types, pitches and how to choose - read this one first if the profile is still undecided.
- PU timing belt versus rubber timing belt - the material decision behind check 03.
- Aramid fiber versus steel cord in PU timing belts - the cord comparison behind check 04.
- Aramid fiber PU timing belts: strength and efficiency - why the cord choice changes drive behaviour.
- PU timing belt surface precision - coatings, grinding and thickness control.
- PU timing belts for packaging and robotics - where the environment sweep of check 11 usually ends up.
- Timing belts on vertical packaging machines - a worked example of tight wrap angles and short centres.
- Automotive timing belt sourcing checklist for aftermarket buyers - the same verification logic applied to a different market.
- Automotive timing belt guide: construction, uses and buying tips - how the cord and tooth construction translates into automotive service life.
- Conveyor belt splicing buyer's checklist: 12 things to verify - the joint side of the same discipline.