Conveyor Belt Splicing Buyer's Checklist: 12 Things to Verify Before You Order
Almost every splice argument we are called in to referee does not start inside the press. It starts in the purchase order, or in the email that never said who was bringing the generator. This page is written for the person who signs the order — the maintenance planner, the procurement engineer, the site manager — and it covers one side of the job only: what to check before you buy conveyor belt jointing as a service. If you want to know how a splice is actually built, ply by ply, our field team already published that in the splicing methods, costs and field tips pillar, and the method-by-method overview sits in the conveyor belt joint methods guide. Read those for the how. Read this one for the buy. They are different jobs, done by different people, and the second one is where the money leaks.
We have quoted, witnessed and torn apart a lot of vulcanized splices over the years. The pattern is boringly consistent. A 1,400 mm three-ply belt goes down on a Saturday, the crew cures two joints, everything looks flat and clean at 6 p.m., and eleven weeks later the buyer is on the phone because the joint at the head-end is lifting along one edge. Nine times out of ten the cure chart was never requested, the compound batch number was never written down, and nobody had agreed in writing who pays for the second shutdown. None of that is a splicing problem. All of it is a purchasing problem.
So here are the twelve items, in the order we would work through them if we were sitting on your side of the table. Each one has an answer you can demand in writing, a number or a range that belongs in a table, and a slot in the contract where it needs to live. Bring them to your next tender and the quote you get back will be more expensive on paper and far cheaper in practice.
The twelve checks, in one screen
Print this, tick it, attach it to the RFQ. The last column is the part people skip.
| # | What to verify | Written evidence you should hold |
|---|---|---|
| 01 | Scope and interface split | A signed supply matrix naming compound, power, water, shelter, rigging and waste. |
| 02 | Press spec against belt width | Datasheet: crossbar length, rated pressure, number of pressure bags, temperature tolerance. |
| 03 | Steps versus plies | Ply count confirmed on site plus the step length the crew intends to cut. |
| 04 | Compound batch and date | Batch number, cure date, grade, storage temperature, retained sample. |
| 05 | Weather and power hold points | Agreed thresholds, and the name of the person allowed to call a stop. |
| 06 | Shutdown window | Hour-by-hour plan to restart, with contingency stated as a percentage. |
| 07 | Temperature, time, pressure record | One chart per joint, signed by the operator and by your witness. |
| 08 | Acceptance test and peel criteria | Specimen size, test speed, pass threshold, who pays for the cut-out. |
| 09 | Rework and liability | Failure definitions, response time, who carries the downtime. |
| 10 | Spares left behind | A closing list of consumables, tools and documents handed over. |
| 11 | How the invoice is built | Unit prices by width and ply count, plus travel, standby and aborted-cure rules. |
| 12 | Warranty start point | A date and a tonnage trigger, written into the order, not the invoice. |

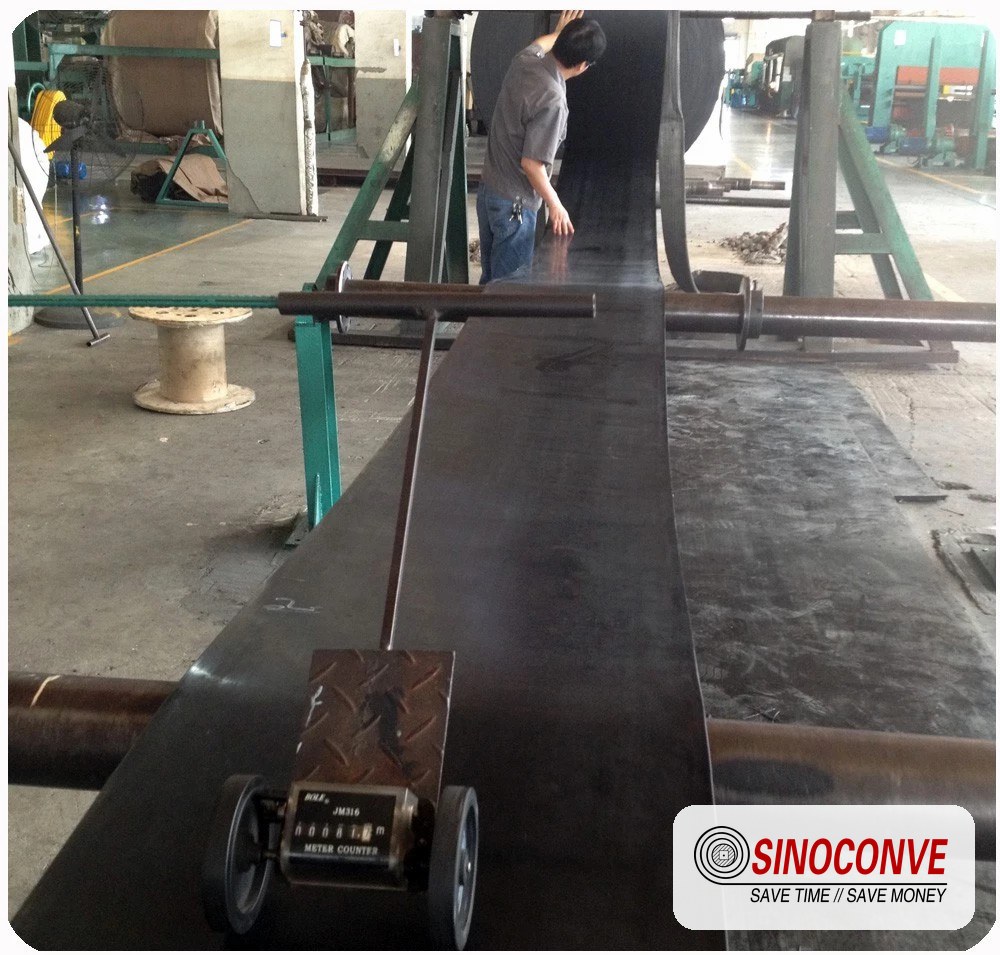
A 1,200 mm three-ply splice under the press. Everything you cannot see in this photo — the batch number, the soak time, the pressure log — is what the checklist is for.
01Scope and Interface: Who Supplies What
A splicing crew is not a factory. It arrives with a press, a set of tools and a plan, and it depends on your site for almost everything else. When one of those dependencies is missing, the crew stops, the clock keeps running, and the argument about who pays starts. We have watched a two-hour job turn into a nine-hour job because nobody confirmed that the only 380 V outlet within reach was already feeding the dust suppression pump.
A splicing quote has to itemize, not summarize
If the quotation says "supply and install splice, inclusive", you have bought a surprise. Ask for the same job priced with a supply matrix attached, and make the contractor tick every line before the order is placed. In our experience, roughly four out of five disputes over a conveyor belt jointing invoice trace back to a line that both sides assumed the other was carrying.
| Line item | Usually the buyer's side | Usually the contractor's side | Write it down as |
|---|---|---|---|
| Uncured compound and cover strip | Rarely | Yes, with batch number | Grade and batch to be recorded on the cure chart. |
| Power to the press and pump | Yes, at the agreed rating | Cables and distribution box | Voltage, phase, breaker size, distance in metres. |
| Cooling water | Yes, for water-cooled platens | Hose and fittings | Flow rate, pressure, whether the site can hit both at once. |
| Shelter, lighting and floor | Tent if required | Task lighting | Where the tent is anchored, and who dries a wet floor. |
| Belt handling | Winch or crane, rigging, clamps | Alignment pins, pull straps | Rated capacity of the lifting gear on site. |
| Consumables | Sometimes solvent and rags | Release film, sealant, skive lubricant | Listed by name, not as "consumables included". |
| Permits and isolation | Lock-out, hot work, confined space | Their own PPE | Who issues the permit and how long it takes. |
| Waste | Skip or bin | Clean-up of their own area | Where skive offcuts and drums go. |
The three interfaces that cause the most trouble
Power. Water. Shelter. In that order. A mid-size platen set with two pressure bags and a hydraulic pump will typically pull somewhere in the 25 to 45 kW band while it is heating, and the exact figure depends on frame size, blanket area and whether the pump runs continuously. Ask for the number in kilowatts and the plug type, then check the panel yourself. If the site can only give 20 kW, say so before the crew is booked, because a crew that arrives to find half the power it needs will either sit and wait — billable — or cook the splice slowly and hope.
Water is the second. Most portable presses used for fabric belt work are cooled by water, and the flow rates quoted by manufacturers usually land between 20 and 40 litres per minute at 2 to 3 bar. On a site with a 200 litre tank and no mains connection, that tank empties during one cooling cycle. Air-cooled platens avoid the problem at the cost of a slower cool-down, which matters when the shutdown window is tight.
Shelter is third but it is the one people laugh off until it rains. A hot splice must not be open to the weather for one second, and a tent that leaks onto the splice point is worse than no tent, because the crew will keep working under it.
How to put the split into the RFQ
Keep it short and put it above the price, not in the terms at the back. In our own quotations we ask the buyer to confirm six things in writing. Available power at the splice point comes first, because it is the one that stops a job dead. Then water: whether a point exists within hose reach, and what flow it actually delivers at 2 bar. Who provides the tent, and whether the floor under it can be kept dry — wet ground has sunk more splices than bad rubber ever has. What lifting gear is on site. The ambient range expected on the day. Last, the name of the plant person who will stay with the crew from start to finish, since a crew without a counterpart stops at every small question. When those six lines are answered before the crew rolls, jobs finish early. When they get answered by phone at 5 a.m. on the day, they usually do not.
If you are buying both belt and service, it is worth asking whether your conveyor belt supplier runs its own crews or subcontracts them, because that answer decides who you call when something goes wrong eight weeks later. The full stock range we work from sits in the product catalogue if you need to match a splice quote against the belt you are actually running.
02Press Spec Against Belt Width and Pressure
The conveyor belt vulcanizing machine is the one asset in this job that cannot be improvised. A crew can borrow a clamp, borrow a knife, borrow a man. It cannot borrow 300 mm of crossbar. So the machine specification is the first technical question a buyer should ask, and it should be answered on paper with the model number, not with the word "suitable".
Crossbar overhang: allow at least 250 mm a side
Each crossbar and platen has to extend past the belt edges far enough that the clamp bars, the edge seals and the pressure bag sit completely off the belt. A working rule we use is 250 mm of overhang per side as a floor, and 300 mm when the belt is over 1,400 mm wide or the edges are worn or cupped. On a 1,400 mm belt that means a 1,830 mm (72 in) frame as a minimum, not a 60 in frame. A crew that shows up with a frame that only just spans the belt will end up clamping on the belt edge itself, and the edges of that joint will be under-cured for the whole soak.
Pressure is a band, not a maximum
Both under-pressure and over-pressure ruin splices, and they ruin them in different ways. Too little pressure leaves the compound porous: you get small bubbles and a joint that reads thin on the gauge. Too much pressure squeezes rubber out of the sides, thins the splice at the edges and, on a step splice, presses the skived steps into a visible wave. For fabric carcass belts cured on a platen press, the pressures we see quoted most often fall between roughly 0.8 and 1.5 MPa, with heavy high-tension belts at the top of that band and light PVC or thin two-ply belts nearer the bottom. Some press manufacturers will rate a frame for 2.0 MPa or more; that rating is a ceiling, not a target. If your contractor cannot tell you the pressure they intend to run, the pressure they will run is whatever the pump does.
Temperature uniformity across the platen matters just as much, and it is invisible in the finished splice. Ask for the tolerance the machine is specified to hold across the heated area. A commonly quoted number is plus or minus 3 degrees Celsius, and a press that is 12 degrees hotter at one end than the other will produce a joint that is scorched at one edge and under-cured at the other. This is one reason we keep thermocouples on both ends of a frame rather than reading the controller.
Datasheet fields to demand before the crew is booked
Ask for these in the tender, and compare them against your belt, not against the contractor's brochure: rated platen pressure and the area at which it applies, number of pressure bags or rams, crossbar and platen length, heat-up rate, ramp control, coolant type, and the thermocouple count and placement. If the contractor's machine is water-cooled, also ask for the minimum flow. If it is air-cooled, ask what the cool-down time looks like on a 1,400 mm joint, because cool-down is the part of the cycle that gets cut when a shutdown is running long. Our own guide to what a modern vulcanizing machine should offer goes through those features in more detail, and there is a shorter machine-focused piece in the conveyor belt vulcanizing machine guide.
| Belt width | Minimum crossbar length with 250 mm overhang | Pressure bags we would want | Maximum clamp bar spacing |
|---|---|---|---|
| 800 mm | 1,300 mm | 1 to 2 | 300 mm |
| 1,000 mm | 1,500 mm | 2 | 300 mm |
| 1,200 mm | 1,700 mm | 2 to 3 | 350 mm |
| 1,400 mm | 1,900 mm | 3 | 350 mm |
| 1,600 mm and above | 2,100 mm or two presses in line | 3 to 4 | 400 mm |
Field note from our engineers: A granite plant asked us to look at a joint that had failed twice at the same spot on a 1,400 mm, three-ply EP belt carrying roughly 700 t/h. Both times the crew had used a 60 in frame with under 100 mm of overhang a side. The joint edge had never been under the bag. We measured the outer 90 mm of the splice at a visibly duller colour than the centre, and when the sample was peeled the failure was entirely in that outer strip. The belt was fine, the compound was fine, the press was simply too short for the belt. Second lesson from that job: the buyer had never been given the machine model in writing, so there was nothing to check against before the shutdown.
03Step Count Against Carcass Plies
A step splice transfers load through the fabric layers one at a time, so the number of steps has to match the number of plies. It sounds obvious written down. It is one of the two most common shortcuts we find on site, the other being a step length cut short to save compound and time.
Count the plies on site, not on the label
Before the crew opens the splice, someone from your side should cut a short offcut from the belt end, wet it, and count the fabric layers by eye. We have seen a three-ply carcass quoted as two-ply because the original order paperwork was copied from an older belt on the same conveyor. On an EP belt the layer count is usually easy to read on a clean cut edge; on a dirty, worn belt it can be genuinely difficult, which is exactly when the mistake happens. If there is any doubt, ask the conveyor belt manufacturer for the construction of the belt from its specification, and have the contractor confirm the step count in writing before the skiving knife comes out. On a long overland industrial conveyor belt running at high tension, this single check is worth more than any other item on this list.
Step length, bias angle and total joint length
Step length scales with the tension the splice has to carry, not with belt width.For common EP and NN fabric belts, the step lengths we see quoted in working documents and in our own shop mostly sit between 200 mm and 300 mm for a three-ply, and longer — often 300 mm to 400 mm — where the belt rating is high or the joint is expected to survive a drive pulley with a low wrap. The cut edge of a step is normally biased at roughly 60 to 70 degrees to the belt edge rather than square, and the two ends must be cut to the same bias in opposite directions so the steps interlock. A square-cut step splice on a high-tension belt is a joint that will start to open from the corners.
The practical consequence for the buyer is the length of belt consumed. A three-ply joint with 250 mm steps eats about 750 mm of joint length before you add the transition and clamping allowances, so a prepared zone of 900 mm to 1,100 mm is normal. That matters at the head end of a short conveyor, where two or three joints can quietly remove a metre and a half of belt, and it matters when you are ordering a replacement belt: the belt supplier has to know how much length the splices will take, not just the centre distance.
| Carcass | Steps required | Step length we commonly see quoted | What the shortcut looks like |
|---|---|---|---|
| 2-ply EP or NN, light duty | 2 | 150 to 200 mm | Single step, no interlock. |
| 3-ply EP, quarry duty | 3 | 200 to 300 mm | Third step omitted at one end to save an hour of skiving. |
| 4-ply EP or NN | 4 | 250 to 350 mm | Step lengths cut unevenly so one ply carries most of the load. |
| 5-ply and above | 5 or more | 300 to 400 mm, confirm against belt rating | A finger splice used where the belt data asks for steps, or the reverse. |
| Steel cord | Not step-spliced | Built to the belt maker's own splice drawing | Contractor with no steel cord press asking for a fabric-style step splice. |
If a joint does open later, the pattern of the failure usually tells you which of these went wrong. We wrote a longer piece on that in splice failure causes, and it is worth reading before you send a complaint letter, because the difference between an under-cured joint and a step-cut problem decides who pays.
04Compound Batch Number and Shelf Life
Uncured splicing compound is a perishable good with a clock running from the day it was mixed. It will still look and feel like rubber long after it has stopped behaving like it, which is why the batch number is the single cheapest piece of evidence you can collect on the day.
Why the batch number belongs on the invoice
Ask for the batch or lot number and the cure date on the delivery note, and write both onto the cure record for every joint. If a splice fails in four months, the first question any competent failure report will ask is which stock went into it, and without the number you are reduced to guessing. Ask also for a retained sample: a piece of the same compound roughly the size of a fist, sealed, labelled with the batch, and kept by whoever can find it later. We keep retained samples from our own shop work as a matter of routine, and the one time you need it, it is worth far more than the few dollars it cost to bag.
Shelf life and the scorch clock
Compounded rubber is normally quoted with a shelf life of about six months when it is stored sealed, below roughly 25 degrees Celsius and out of direct sun, though some stocks are given shorter windows and a few longer. Two things decay as the stock ages. The first is scorch resistance: an old batch starts to set earlier, which can mean the compound begins to cure while the crew is still fitting and aligning, especially on a 35 degree afternoon. The second is adhesion. An expired stock may still cure to a solid sheet and still peel at an acceptable force, which is what makes the problem hard to catch on the day.
Storage on site matters as much as the date on the bag. A drum of compound sitting in a steel container in the sun can easily run 15 to 20 degrees above ambient, and a week of that shortens the working life noticeably. If your contractor delivers stock to site the day before, ask where it is being kept overnight.
Match the compound to the cover, not just to the belt
A splice is only as good as the least compatible layer in it. If the rubber conveyor belt you are running is a heat-resistant grade handling material above about 100 degrees Celsius, the splicing compound and cover strip have to be the matching heat grade, not a general-purpose gum. The same logic applies to oil-resistant nitrile covers, to cold-service belts, and to flame-resistant belts where the splice itself may need to satisfy the same flame requirements as the belt under standards such as EN 12882 or, for underground work, MSHA 30 CFR Part 14 — and where a certificate for the finished joint is often asked for by the customer. Ask the question before the order, because the correct grade is a small price difference and the wrong grade is an invisible one.
One more grade question people forget: heat resistant conveyor belt covers harden with age, and a joint made with a general compound can end up harder than the belt around it, so the splice stops flexing with the carcass and starts cracking at the transition. Grade matching is not a detail. It is the difference between a joint that lasts the life of the belt and a joint you revisit every year.
05Site Hold Points: Power, Humidity, Temperature
Every contractor has a list of conditions under which they will not open a splice. The useful question is not whether that list exists, but whether it has numbers on it and whether the numbers were agreed before the shutdown. If the crew stops the job for weather and nobody agreed what "too humid" means, you will be paying standby while two people argue in a tent.
The dew point rule, which nobody writes down
Water is the enemy of a hot splice, and the danger is not the rain you can see. It is condensation and moisture already sitting inside the fabric layers. If the belt surface is at or near the dew point, opening the carcass puts damp fabric next to hot compound, and that water turns to steam during the cure. The result is blisters: small raised areas along the splice that can only be found after the press is released and the joint has cooled. A commonly used working threshold is that the belt surface should be at least 3 degrees Celsius above the dew point, and we would treat 5 degrees as safer on a three-ply belt that has been sitting outdoors overnight. Relative humidity above roughly 85 percent is the other trigger most crews quote.
Rain, wind and the tent question
A hot splice is never cured in the open, and a cold splice is barely more forgiving. If the belt has been running wet or has been rained on, it needs to dry, and a soaked three-ply belt can take two to four hours to dry properly through the edges — time that has to sit inside the shutdown window, not on top of it. Wind matters for a different reason: a hot splicing conveyor belt job uses a heat blanket sitting on top of the splice, and a strong draught across the tent mouth pulls heat off one edge of the blanket and lifts the release film. On anything above a stiff breeze we ask for the tent to be closed on the windward side. Below about 5 degrees Celsius ambient the compound stiffens and fitting becomes difficult and slow; above about 40 degrees the scorch clock starts running early and the crew needs shade.
| Hold point | Threshold we would write into the order | Who checks and when |
|---|---|---|
| Belt surface temperature versus dew point | At least 3 degrees above dew point, before the first cut | Contractor reads it, buyer's person witnesses the reading |
| Relative humidity | Under 85 percent, with the tent closed if it is climbing | Read every hour during prep, logged |
| Rain or standing water | No cure begins with water on the belt or under the press | Any person on site may stop the job; that right should be written down |
| Ambient temperature | Below 5 C or above 40 C, the cure plan is revised, not improvised | Agreed the day before, reviewed on the morning |
| Power availability | Agreed kW, voltage and phase, verified with the press and pump running together | Your electrician, before the crew arrives |
| Isolation and permits | Lock-out applied and the conveyor proved dead, hot work permit issued | Plant, before any tool is unpacked |
Electrical hold points are the ones that stop the clock
Weather delays are usually short. Electrical problems can eat a whole shift. Confirm the voltage and phase at the actual outlet, not at the panel nameplate, and confirm that the press and the hydraulic pump can run at the same time as whatever else is on that board. Bring your own earth leakage protection if the supply is a generator, and size the generator with margin — a common planning figure is 1.25 times the rated running load, plus headroom for the heat-up surge, because a generator that dips when the platens switch on will cost you a cure cycle. On a wet-weather shift in a quarry, this is the difference between a joint finished by 2 a.m. and a joint finished by noon. If your operation runs this way year round, the preventive list on our mining and quarrying page is a reasonable starting point, and the practical questions buyers send us most often are collected on the SINOCONVE FAQ page.
06Shutdown Window and Schedule Commitment
Every hour of a shutdown has a cost, and the person who quotes the window is rarely the person who pays for it being wrong. So make the window a deliverable, with a plan behind it and a penalty or standby rule attached.
Build the timeline backwards from restart
Start at the moment the conveyor has to be running again, then subtract each activity and check the arithmetic is believable. For a single hot splice on a 1,200 mm three-ply belt, the field numbers we work with look roughly like this. Belt stopped, isolated and clamped: 30 to 45 minutes. Marking, squaring and skiving to the agreed step length: two to three hours for three plies, longer if the cover is thick or the belt is cold. Dry fitting, alignment and clamping: 45 to 60 minutes, and it cannot be rushed because the steps have to interlock before heat is applied. Heat-up to soak temperature: 20 to 30 minutes depending on blanket and belt thickness. Soak: typically 30 to 45 minutes for this belt class. Cool-down under pressure: 40 to 60 minutes, longer with an air-cooled press. Release, trim, clean and remove the tent: about 30 minutes. Then re-tensioning and a tracking check at first run: another 30 to 60 minutes that most quotes forget entirely. That adds up to somewhere between six and nine hours for one joint, and we would not sign a plan that promised four.
Contingency, and who authorises overtime
Add 20 to 25 percent to whatever the plan says, and write the number in the order. If the joint count goes up, the increments are smaller than you would think once the press is hot and the power is connected — usually 1.5 to 2 hours per extra splice on the same belt — but the first joint always takes the longest because nothing is set up. Name the person who can authorise the crew to keep working past the window, and agree the hourly rate for that before the weekend, not at midnight. In a port with a ship waiting, the standby clock is the most expensive line in the whole job, and we have seen it exceed the splicing price itself on a two-day weather delay. Buyers moving bulk material around the clock usually end up writing a fixed standby rate rather than an hourly one, and our notes on port bulk material handling cover why that structure suits continuous operations.
07The Three-Parameter Cure Record
Temperature, time and pressure. Three numbers decide whether the joint you paid for is a joint or a future inconvenience, and all three disappear the moment the press is packed up. This is the item on the list where a single sheet of paper has the highest value, because it is the only evidence that survives the crew leaving site.
Setpoint is not a reading
Anyone can write 145 on a form. What you want to see is the actual platen temperature over time, from more than one point on the frame. For fabric carcass belts the cure temperature most crews work to sits between about 145 and 150 degrees Celsius, and the number should come from the compound supplier's data for the specific stock, not from habit. A controller setpoint of 150 with a blanket running 138 at the far end is a joint that is under-cured where it matters and normal everywhere you looked. If your contractor only reads one thermocouple, that reading tells you about one square centimetre of a joint that might be 1,400 mm wide.
Soak time versus total time
Be careful about which number the crew is quoting. Total time under the press includes heat-up and cool-down, and quoting it makes the cycle look longer than it is. Soak time is what counts: the minutes the splice spends at curing temperature once the whole platen area is actually up to temperature, which can itself take 10 to 20 minutes after the controller says the setpoint has been reached. For a three-ply fabric belt the soak times we see quoted generally land between 25 and 45 minutes, with thicker stacks and higher ply counts at the longer end. Many crews work from a per-millimetre allowance plus a fixed figure, so the honest request is not "how long is the cure" but "what formula are you using, and what does it give for this belt". Get the formula in writing with the quote.
Pressure that stays where it was set
Pressure has to be maintained through the whole soak, not just applied at the start. A slow leak in a pressure bag or a valve that creeps will show as voids in the middle of a joint, and it will not be visible from outside. Ask for the pressure to be logged at the start, midpoint and end of the soak at minimum, and for any drop over about 0.1 MPa to be noted on the record with the action taken. On a cold splicing conveyor belt job the equivalent discipline is different but no less strict: the adhesive has an open time and a temperature window, and a joint that is rolled after the adhesive has skinned will fail at the interface rather than in the rubber.
| Record field | What a complete entry looks like | Why a buyer should care |
|---|---|---|
| Belt and joint identity | Conveyor tag, belt width, ply count, joint number, position along the belt | Makes a claim traceable to one joint instead of a general complaint. |
| Compound details | Grade, batch number, cure date, retained sample reference | Settles the first question in any failure analysis. |
| Ambient conditions | Air temperature, humidity, dew point at the start of the job | Explains blisters that would otherwise be blamed on the compound. |
| Temperature curve | Start, heat-up, soak plateau, cool-down, with readings from both ends | The only way to prove an even cure across a wide joint. |
| Soak duration | Minutes at temperature, plus the formula used to arrive at it | Lets you check the second joint against the first. |
| Pressure log | Start, mid-soak and end values in MPa, with any drop and the response | Catches the porous joints that look perfect on the outside. |
| Release temperature | Platen temperature at the moment pressure was released | Releasing hot is a classic cause of edge separation in the first week. |
| Signatures | Operator name and your witness name, with the time of sign-off | Turns a form into a record. No signature, no schedule value. |
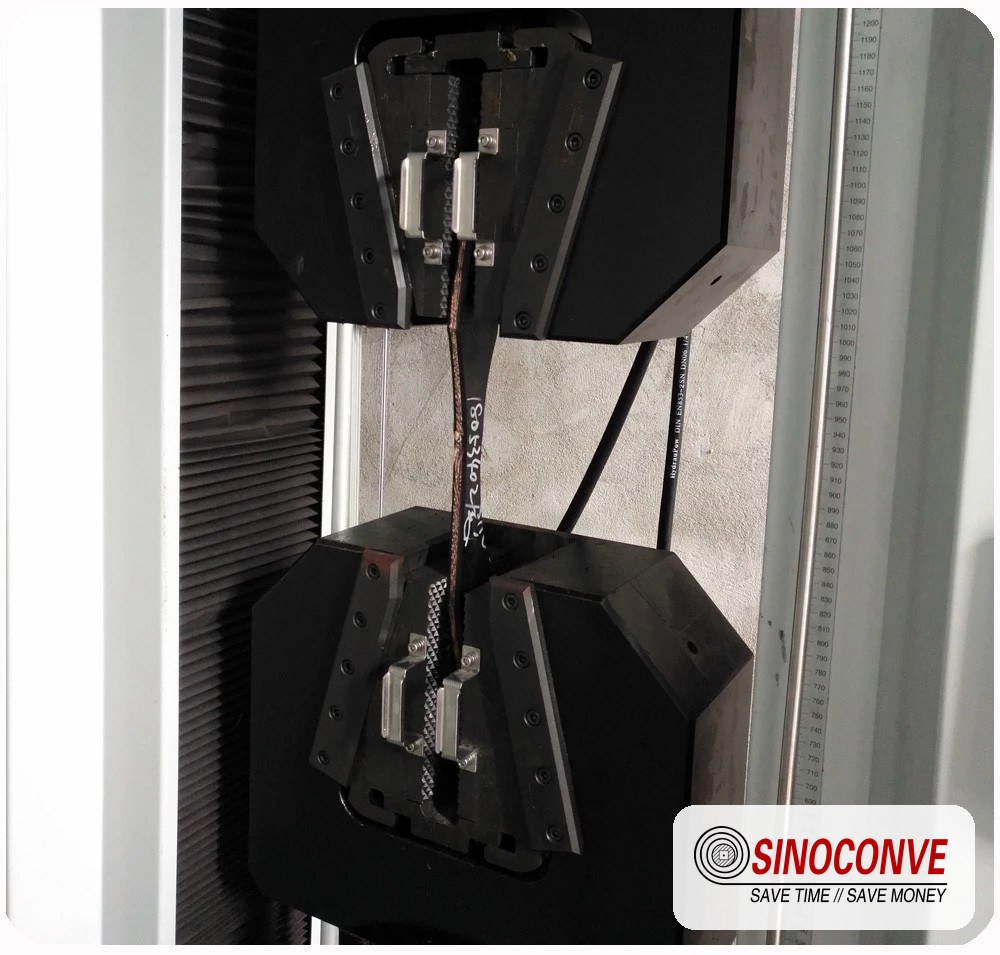
A peeled specimen from a three-ply joint. Where the tear runs through the rubber rather than along the ply interface, the cure and the adhesion are doing their job.
Field note from our engineers: A cement plant sent us a cure chart from a 1,000 mm two-ply joint that had peeled at the edge after seven weeks. The chart showed a single thermocouple reading and a soak time of 22 minutes.The platen was a 60 in frame being used on a belt that had been widened at some point in its life, and the far edge of the blanket sat over a section of frame that never came up to temperature. Nothing on the sheet was obviously falsified. It was simply one probe and one number for a joint that needed four. When you write the record requirement into the order, say how many thermocouples you expect to see, and where they sit.
08Acceptance Sampling and Peel Strength
You cannot inspect a splice the way you inspect a weld. The bond is buried inside the carcass, and the only honest test is to pull a piece of it apart. So the acceptance clause has to answer a practical question first: which piece, cut from where, by whom, and who replaces what is removed.
What you can test without shortening the belt
On most running conveyors there is no spare length to cut. That leaves three workable options, and the right one depends on whether you have belt to spare. A shop test splice made the same week from the same batch on the same press settings is the cleanest evidence, as long as the contractor writes down that it is a witness sample and you get the result, not just a verbal summary. Where the belt is being shortened anyway, the piece being removed is free material and the peel test should be run on it. Where there is genuine spare length rolled on a jib, a full test can be cut from the finished joint. Our own experience is that a small number of buyers ask for a witness splice in the order and everyone else asks for one after the first failure, which is the more expensive order of events. Third-party test houses are worth using for a repeat failure, and if you need a second opinion on a cold-bonded joint the comparison in our mechanical versus vulcanised conveyor belt jointing guide explains why the test method has to match the joint type.
The peel numbers to put in the contract
Adhesion requirements for conveyor belting are usually expressed either as ply-to-ply adhesion in the parent belt or as a splice peel figure. Publicly published RMA figures for fabric belts are commonly quoted at a minimum of about 15 pounds per inch for Grade I and about 10 pounds per inch for Grade II cover-to-carcass adhesion, which is roughly 2.6 and 1.75 newtons per millimetre. In splicing contracts, the criterion we see used most often is that the vulcanized splice should reach not less than the parent belt's own measured ply adhesion, with a floor somewhere in the 60 to 75 percent band for less critical duty. Whichever you choose, write it as a number in the order with the test method beside it, because "good adhesion" has never settled an argument.
Ask also for the test details to be fixed in advance: specimen width, usually in the 40 to 50 mm range, free length of at least 200 mm, peel speed typically around 100 mm per minute, and conditioning of the sample before testing. A result quoted without the specimen dimensions and the test speed is a number you cannot compare with anything.
| Check | Method and specimen | Threshold we would write in | Who pays for the cut-out |
|---|---|---|---|
| Cure state | Cure chart review plus hardness check across the joint | No soft or porous zones at the edges | No cut-out needed, so nobody pays |
| Splice peel | 40 to 50 mm wide strip, 200 mm minimum free length, peeled at about 100 mm per minute | Not less than the parent belt's own ply adhesion, or a stated percentage of it | Agree up front; usually the contractor if the sample fails |
| Finished thickness | Plate gauge at six points across the joint | Within about 0.5 to 1 mm of the parent belt, no more than 1 to 2 mm step across the joint | Contractor's rework if out of tolerance |
| Alignment | Straight edge and tape across the joint, checked at both edges | Lateral skew under 1 to 2 mm across the full width | Contractor, if visible at handover |
| Visual and tap | Full length inspection, then a repeat look after the belt has run for 24 hours | No blisters, no lifted edge, cover flush and trimmed | Contractor if found at the follow-up inspection |
The 24-hour look is the cheapest test you have
Most early splice failures announce themselves within the first day of running: a faint dark line along one edge, a slight ripple across the joint, a cover strip starting to lift. It costs nothing to walk the joint with a torch after the belt has carried a few hours of load, and it is far easier to get a contractor back on site on day two than on day forty. If you run several conveyors and buy splices regularly, ask your conveyor belt distributor whether a joint register is worth setting up on your site. It is a plain table: belt tag, joint number, date, contractor, batch, peel result, and the date of the 24-hour inspection. Plants that keep one tend to stop arguing about who did what, and start comparing joints against each other instead.
09Rework Clauses and Who Pays for What
No buyer enjoys writing this section of the order, and no contractor enjoys reading it. Write it anyway. A rework clause is not an accusation, it is a decision you make once, calmly, instead of twice, angrily, during a breakdown.
Define failure so the argument has fewer doors
Four definitions cover most of what actually happens. A bond failure is separation within the splice with the rubber still bonded to both surfaces. An edge failure is separation along one or both edges while the centre holds. A dimensional failure is a joint outside the agreed thickness or alignment tolerance. Carcass damage is injury to the plies during skiving or cutting, which is sometimes the contractor's fault and sometimes a discovery that the belt was already degraded. Naming these separately matters because the remedies differ, and because a contractor who knows the definition of edge failure will pay more attention to the edge seals and the overhang. The four failure patterns and what usually causes them are set out in more detail in our notes on splice failure, which is worth reading before you write the clause.
The second shutdown is the expensive part
Nearly all splicing contracts say the contractor will fix a bad joint. Very few say who pays for the production lost while it is being fixed, and that is where the real money sits. For a joint replaced on a Sunday morning at a quiet plant, the answer hardly matters. For a joint replaced on a shiploading conveyor in the middle of a sailing window, it can be the largest number in the dispute. Two structures are common and both are workable. The contractor carries labour, materials and travel, and the buyer absorbs the downtime. Or the contractor accepts a fixed liquidated amount per hour beyond an agreed window. What does not work is leaving it silent, because a silent contract means the buyer carries everything by default. Also agree the response time while you are at it: 24 hours is normal for a repeat customer, 72 for a first job, and neither is worth much if the clause does not say it.
Notice, inspection rights, and keeping the evidence
Two clauses protect both sides. The first gives the contractor the right to inspect a suspected failure before the belt is cut, because cutting a joint destroys the evidence that would show what went wrong. The second gives the buyer a defined period to raise the claim — commonly 7 to 30 days from discovery, measured from when the problem became visible rather than from the invoice date. Bear in mind that a claim window that the buyer cannot realistically meet, because the belt only shows the problem two months later, is a clause that helps nobody. And when a joint does fail, bag the sample. A wet, dirty, sun-cured piece of rubber on the floor of a workshop tells a failure analyst almost nothing, while the same piece wrapped in cling film and labelled with belt, joint number and date is a document. In high-throughput logistics hubs where belts rarely stop for anything short of a shutdown, this discipline is what makes the difference between a two-day fix and a two-week negotiation, which is a pattern our logistics and warehousing customers run into more than most.
10Spares and Consumables Left On Site
When a crew drives out of the gate, whatever is left on site is your problem to find later. That is fine if you agreed the list, and miserable if you did not, because the next person who opens that joint will be standing in front of it with none of the right material and a shutdown already running.
The handover box
Ask for a written close-out list and check it physically before the crew leaves. For a hot joint we would want a sealed sample of the same compound batch, ideally half a kilogram or more, labelled with the batch number and cure date. Then a length of the matching cover strip, a tube of edge sealant of the same grade, spare release film, and — if the press belongs to your site — a heat blanket repair patch and a spare thermocouple. Where the press is yours, also ask the crew to prove the thermocouples before the job rather than after: a two-point check at ambient and at working temperature takes ten minutes and invalidates a whole class of excuses. If the crew is using one of our presses under a service arrangement, that check is on the sheet, and you should ask for it on any machine you own, whatever brand it is. Plants that buy in bulk and keep wholesale conveyor belts on a rack often add a small splicing kit to the same store so that the emergency repair at 3 a.m. does not depend on a delivery.
Cold-splice adhesives need dates, not just quantities
Cold bonding materials are the easiest thing on site to get wrong, because they fail quietly. Ask for the lot number and the expiry date on every can, and for the storage temperature range the maker specifies. Many cold-bond systems want the adhesive and the belt to be somewhere between roughly 15 and 30 degrees Celsius at the moment of application, and a can that has sat in a cold store overnight will not develop the strength printed on its label. Because cold splicing conveyor belt work is often done by whichever crew is closest, the discipline has to come from the purchase order: the correct adhesive grade, within date, applied inside the temperature window. Also insist that an opened can is discarded at the end of the job rather than kept in a corner for the next breakdown, because nobody can tell you how old a half-used can is. One related point that saves confusion later: wrapped V-belts, timing belts and most light-duty synchronous belts are moulded endless and are not spliced in the field at all, so any consumables order you hold should reflect that.
Are consumables inside the price or outside it
This is a pricing question dressed as a technical one. Compound, cover strip, sealant, release film, solvent, cutting blades and skive lubricant are all real costs that some contractors include and some bill on top. Neither approach is wrong, and a quote that includes everything is usually easier to manage. What matters is that the buyer can see the line. Ask for the list of what is included, then ask what a typical job would add beyond it. Where the compound is supplied by the buyer, the buyer also inherits the batch and storage problem, which is a good reason to prefer having the contractor carry it unless you have a controlled store.
11How the Invoice Is Calculated
Two quotes for the same job can differ by a factor of three and both be honest, because they are charging for different things. The way to compare them is to force each one into the same shape.
Three structures, three different risks
Most splicing work is priced one of three ways. A fixed price per splice is the simplest and puts the schedule risk on the contractor, which is why it is usually the most expensive per job and the easiest to budget. A rate per metre of belt width suits plants with many joints of different sizes, and it must state the ply count it assumes, because a 1,400 mm two-ply and a 1,400 mm four-ply are not the same job. A call-out day rate with materials on top is common for emergency work and small repairs; it is transparent, but it puts the schedule risk entirely on you, and it rewards nobody for finishing early. None of these is better in the abstract. The point is to know which one you have bought.
| Structure | Suits | Where the risk sits | What to pin down in writing |
|---|---|---|---|
| Fixed price per splice | Planned shutdowns with a known joint count | Mostly on the contractor | Definition of "a splice": width, ply count, cure type, travel, materials |
| Rate per metre of belt width | Mixed fleets with many belt sizes | Shared, with a clear unit table | The width break points and the ply increments |
| Day rate plus materials | Emergency breakdowns and uncertain scope | On the buyer | Day length, crew size, minimum call-out, materials markup |
| Inspection only | Assessing joints before a major shutdown | Low risk either way | What the report contains, and whether the fee is credited against repair work |
Travel, standby and the aborted cure
The lines that blow up a budget are almost never the splice itself. They are travel kilometres, hotel nights, a crane hire, a generator and fuel, night or weekend loading, and standby hours after an agreed window closes. Ask for each one as a unit and not as a percentage. Ask separately for the rate that applies if the crew arrives, sets up, and cannot start because the belt is not where the plan said it would be. Then ask who pays when the cure is aborted by the contractor's own equipment — the answer should be nobody but the contractor, and the clause should say so. A useful piece of arithmetic before you sign: a crew that waits four hours and then works eight is rarely cheaper than a crew that works eight and goes home, once you have counted the standby rate and the extra day rate together.
Comparing quotes without comparing apples to oranges
Put each offer into the same one-page table before anyone gets excited about a price. Belt width, ply count, number of joints, cure type, who supplies compound, included consumables, number of crew, window commitment, record documentation, acceptance test, warranty, travel and standby rates. In our experience a quote that looks 30 percent higher at the top of the page usually turns out to include the compound, the test splice and the documentation. Where the work sits close to the belt itself rather than the service around it, there is a related point worth making: plants that also buy transmission products tend to buy belt and splicing together, and a transmission belt manufacturer with its own service arm can often bundle the site visit, which changes the travel arithmetic entirely. If you are buying wrapped belts as well, ask your V-belt manufacturer the same question about site support, because it is usually the same conversation.
12Warranty, and When the Clock Starts
The last item, and the one that gets read most carefully after something goes wrong. A splicing warranty is a short document with three variables: when it starts, how long it runs, and what it excludes. Get all three onto the order and the rest is administration.
Start at restart or at sign-off, not at the invoice
Contractors commonly start the clock when the splice is cured, which is the day they are paid and not the day the joint starts working. If the belt then sits idle for three weeks because a downstream system is down, that is three weeks of warranty you paid for and never used. Ask for the start date to be the later of the acceptance sign-off or the date the conveyor returns to normal production, and write the actual date into the handover document. On a plant where a joint might be made and not loaded for a month, this single sentence is worth more than any discount the contractor offers.
Two triggers: calendar and throughput
Most splicing warranties in this industry are quoted somewhere between six and twelve months, and many of them also carry a tonnage or operating-hours cap, whichever comes first. A tonnage trigger is more honest than a calendar one for a joint that runs 16 hours a day, and a calendar trigger protects you on a conveyor that only runs occasionally. Ask for both, and ask what the throughput figure is based on. Where the belt itself is also under warranty, keep the two documents aligned so you are not left with a belt warranty that outlives a splice warranty by six months. If you want to see how those commitments are usually structured, the capability and service notes published by a conveyor belt factory are a reasonable reference point, though the exact numbers for your order always depend on the belt and the duty.
What it will not cover, stated plainly
A fair warranty will exclude impact damage from tramp metal or a large lump at the loading point, tracking problems that chafe the joint edge against a structure, operation above the rated tension, damage caused by a seized idler, and any work carried out on the joint by somebody else afterwards. Those are reasonable exclusions and refusing to accept them only slows the negotiation. What you should not accept is a blanket exclusion for every form of edge separation, because a properly made joint should survive normal edge loading for years. Ask for the exclusions to be listed by name, in the same section, rather than buried in the terms, and ask who conducts the inspection when a claim is made. Joint inspection with both sides present is the fastest route to a repair, and neither side should be asked to accept a conclusion reached alone.
13Turning the Twelve Checks Into a One-Page RFQ
All of this collapses into a single page if you set it out properly, and a one-page enquiry gets answered faster and more accurately than a long email with questions buried in the middle.Here is the shape we recommend, and it is the shape we like receiving.
The page
Four blocks, in this order. Belt data: type, carcass, ply count, width, rated tension, cover grade, service temperature, and the belt's serial or specification reference if you have it. Joint data: how many joints, where on the conveyor, hot or cold, and whether the belt is to be shortened or lengthened at the same time. Site data: available power, water, lifting, shelter, ambient range at the planned date, and the length of the shutdown window. Commercial data: the pricing structure you want, the documentation you expect, the acceptance test you will require, the warranty terms you need, and the latest date the work must be complete. Anyone quoting against that page knows exactly what they are pricing, and anyone who cannot answer it in a page probably should not be quoting.
What to attach
Four attachments cover most jobs. The original belt specification or datasheet. Three or four photographs of the splice location with a tape measure visible in the frame, which tells the contractor more about access and condition than a paragraph can. A simple line drawing or sketch showing where each joint falls. And, if there is one, the last failure report from that conveyor, because a repeat job is a different job. If your belt list is long or you are standardising several conveyors at once, it is worth starting from the range in our product catalogue so that joint counts and belt specifications are quoted against the same description. Buyers who keep a joint register often find they are also buying the same belt twice a year, and that is the moment the arithmetic on endless or longer belt runs starts to make sense — the trade-offs are set out in our endless conveyor belt benefits and applications article, and the whole set of field write-ups sits in the SINOCONVE blog.
One habit worth keeping
Keep every completed checklist with the joint register, exactly as you filled it in, including the ones where the answer was "not available". A page with three blank fields tells the next planner something useful about the site, and it tells you where to spend money before the shutdown rather than during it.

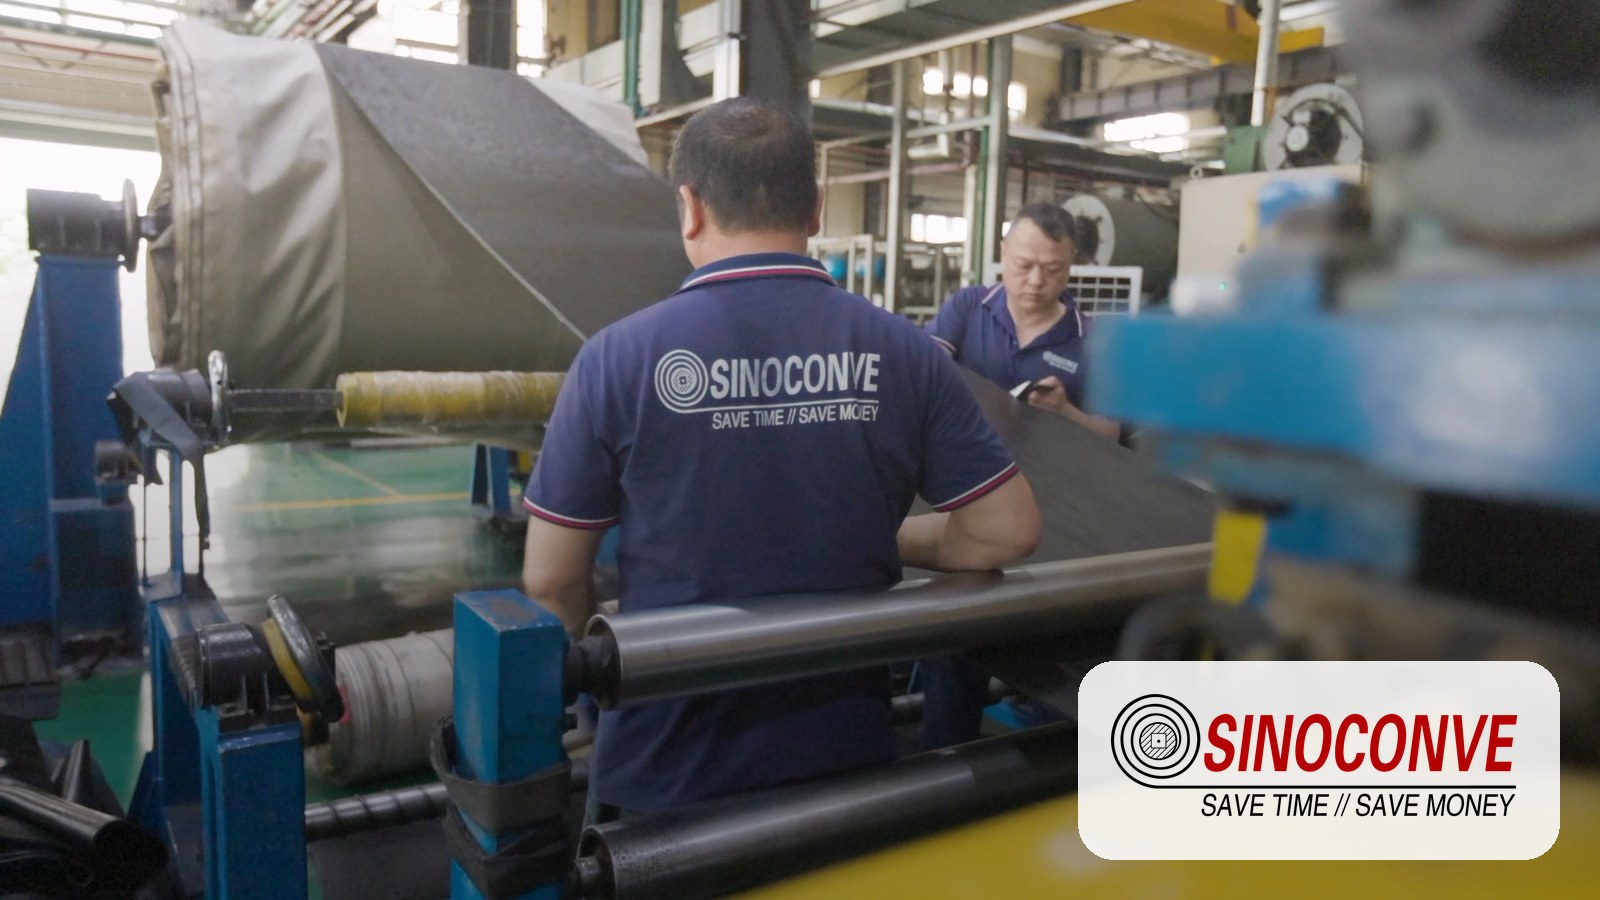
Checking a finished joint in the shop, where the light is better and the temperature is not 38 degrees.
14Questions Buyers Ask Us Before They Place the Order
How far ahead should a splicing crew be booked?
For a planned shutdown, two to three weeks is comfortable and gives everyone time to confirm the site data. For a single emergency joint on a common belt size, 24 to 48 hours is realistic in most industrial areas, and faster if the crew is already working nearby. The variable that ruins emergency response is not crew availability, it is missing site information: power, access and belt specification.
Is a fixed price per splice always the expensive one?
No. It is the one that transfers schedule risk to the contractor, and you pay for that transfer. If your shutdown window is generous and your site is well organised, a day rate will usually be cheaper. If the conveyor is critical and the window is tight, the fixed price is worth the premium.
Do I have to cut the belt to test the joint?
Only if you want a destructive peel result from that specific joint. If the belt cannot be shortened, ask instead for a witness splice made in the shop from the same compound batch on the same press settings, and for the test certificate that goes with it. On joints where the belt is being shortened anyway, the removed section is free test material and there is no reason not to use it.
Who should supply the compound, the buyer or the contractor?
The contractor, in most cases. The compound has to match the belt cover grade and it has a shelf life, and a contractor who carries their own stock controls both. If your site has a temperature-controlled store and you splice often, buying your own can save money — but then you own the batch records and the expiry dates, and a failed joint will be traced back to your store.
Can a failed vulcanized splice simply be re-cured?
Almost never, and any offer to do so should be treated with suspicion. Once a joint has been cured, cooled and put under load, the rubber in the affected area has already cross-linked. A second cure will not restore a bond that has separated; the joint has to be cut out and remade, which is why the rework clause matters more than most buyers expect.
What should I expect to see on a cure chart?
A time axis, at least two temperature traces from different points, a visible soak plateau, and a pressure value that holds through the soak rather than drifting down. Soak temperatures for fabric belts usually sit around 145 to 150 degrees Celsius. If the chart is a single flat line with one probe and a handwritten duration, ask for a proper record next time.
The belt label is gone. How do I confirm the ply count?
Cut a short offcut from the belt end, wet the cut edge and count the fabric layers, or send the offcut to the belt supplier for identification. In our experience the ply count is confirmed correctly this way more often than it is confirmed from an old order sheet, and the difference between two plies and three is a joint that behaves completely differently.
Does a cold splice need the same paperwork as a hot one?
Same principle, different fields. Cold bonding has no cure chart, so the record becomes the adhesive lot number, expiry date, the belt and adhesive temperatures at the time of application, the open time observed, and the roller used. Those five lines are what tells you later whether the bond was made inside the material's working window.
What is the most common mistake buyers make?
Ordering the splice without ordering the information. Compound batch, cure record, step length and warranty start date cost nothing to ask for and are the only things standing between you and an argument three months later. Design of the splice itself is a contractor's job. Knowing what was done to your belt is yours.
Related Products You May Need
- Rubber conveyor belt — EP and NN fabric carcass belts for general quarry and plant duty.
- EP rubber conveyor belt for higher tension and long centre distances.
- Heat resistant conveyor belt for clinker and sinter handling above 100 degrees Celsius.
- Chevron and cleated belts — profiles that change how a splice has to be cut.
- PVC conveyor belt for light and medium duty lines, along with food and packaging rooms.
- EP1000 stone crusher conveyor belt, a common reference point for aggregate duty.
- Full product catalogue if you would rather see the whole range at once.
Related Blog Posts
- Conveyor belt joint methods: a comprehensive guide — the full overview, mechanical and vulcanized.
- Mechanical fasteners versus vulcanised jointing, if you are still settling which joint type your conveyor should carry.
- Conveyor belt splice failure causes, worth reading before you write a rework clause.
- Splicing methods, costs and field tips — how the job is actually executed on site.
- Vulcanizing machine guide: modern features and tips for press selection and specification.
- Conveyor belt vulcanizing machine guide — a shorter read on machine ratings.
- Endless conveyor belts: benefits and applications when a joint is the wrong answer entirely.