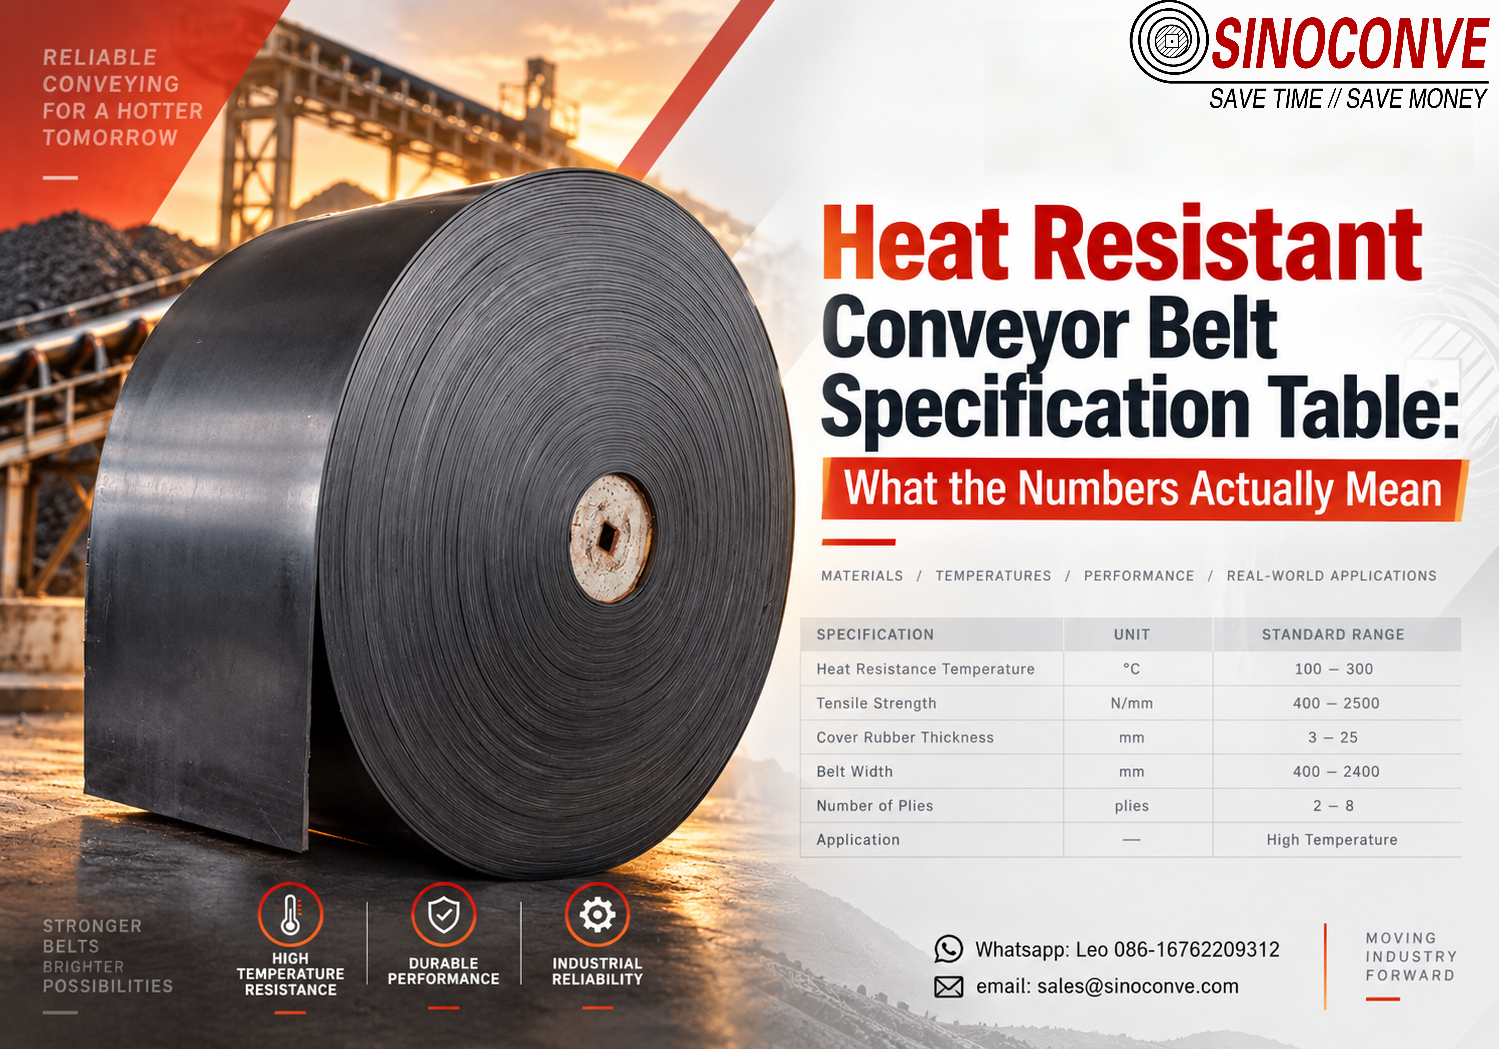
Heat Resistant Conveyor Belt Specification Table: What the Numbers Actually Mean
Read a heat resistant conveyor belt specification table in a fixed order: temperature first, carcass second, cover third. Temperature decides whether the belt survives the line at all. Carcass decides how much pull it can take. Cover decides how long it lasts. Get those three right and the remaining twenty rows are arithmetic.
One exception, stated early. If your real problem is a chemical medium rather than heat, this table will not answer it; that selection work sits in two other articles, chemical resistant conveyor belts and oil resistant conveyor belts. Everything below is about reading rows correctly.

01Read the Table in Order: Temperature, Carcass, Cover
Most buyers read a specification table the way people read a restaurant menu. They jump straight to the dish they already like, and in belt tables that dish is usually the cover grade row. It has the friendliest letters. It also answers the fewest questions. Put a Z-grade cover on a 160 °C clinker line and you are replacing the belt inside eight months, however good the abrasion figure looks on paper. Tension is held by the carcass underneath. Whether either layer is still rubber in a year is decided by the temperature column.
The Questions We Settle Before Comparing Any Numbers
Before any number is compared, we ask whose table this is and what it was written for. A conveyor belt manufacturer writing a datasheet for a cement plant answers a different question than one writing for a fertiliser shed. The same words can carry different meanings across those two documents. So the first things we settle are the ones the sheet itself cannot tell us. What is the material temperature at the loading point? Measured at the drop, not assumed from a process diagram. Then the pull. What working tension does the drive actually develop, in N/mm of belt width? And after that, what is grinding the cover away, and how fast is it doing it? Answer those and the rest of the table becomes cross-checking rather than shopping.
We see what skipping that step costs often enough. Take a quarry in the south of China. They ordered repeat belts off a single grade code for three years, then added a second crushing stage upstream. Tonnage through the transfer rose roughly 20 %. The rock arriving at the chute got coarser, so impact energy went up with it. Belts that used to last eleven months started failing at four. Nothing on the specification table had changed. The line had. That is why we treat a datasheet as a snapshot of conditions rather than a permanent verdict.
What Each Row Actually Governs
Every specification table is a set of promises made under stated test conditions. Engineers tend to read the promise and skip the conditions, which is exactly the trap. When a customer sends us a datasheet and asks whether it is "good enough", the table below is the map we work from.
| Row on the sheet | What it really governs | What buyers wrongly read into it |
|---|---|---|
| Service temperature, three values | It governs whether the compound survives the line at all. | It gets read as permission to sit at the highest of the three all day. |
| Tensile strength, N/mm | This fixes the working tension the carcass can carry. | People treat it as a proxy for cover life, or for impact resistance. |
| Cover grade, whether a DIN letter or an RMA code | Two things, strictly. A band for abrasion loss, and one for cut resistance. | It is read as a heat rating. It is not a guarantee of compound quality. |
| Cover thickness, top and bottom, in mm | It decides how many months of wear you get before the carcass shows. | Read as extra stiffness. Read as extra strength. Neither is on the sheet. |
| Elongation at break | Budget for take-up travel. That is all this row is telling you. | A higher number is assumed to mean a tougher belt. |
| Flame and antistatic data | It describes ignition behaviour, and how static dissipates. | Buyers take it as evidence about heat resistance. It carries none. |
02Cover Grade Codes: What Y, X, W and Z Actually Certify
The letters in the cover column get misread more than anything else on the sheet. They are not a quality ranking that runs from bad to best. What they describe is a band of abrasion loss measured on a rotating drum, and how wide that band is depends on the standard the belt was tested against.
DIN 22102 Grades Y, X, W and Z
Under DIN 22102, cover rubber is classified by the volume of material lost in an abrasion test. The grades run from the hardest-wearing to the most cut-tolerant. Y sits at the softer end of the ordinary range. Move along the scale to X and the loss allowance tightens; W tightens it again. Z is the tightest of the four. How much any of that matters depends on your material. Sharp, hot and moving fast, and the letter is worth arguing about. Fine and cool, and paying for Z-grade cover on a 500 t/h limestone line is money spent on a row that will never be the limiting one.
What catches people out is the number that is not there. Sales documents often print "Grade Y" alone, with no figure attached. The letter places the compound in a band after testing. Where inside that band it landed is a separate question, and the sheet is silent on it. Two suppliers can both ship "Grade W" and sit 40 mm³ apart on measured loss.
RMA Grade I and Grade II: The Same Idea, Different Yardstick
RMA Grade I and Grade II do a similar job, but the abrasion method differs and so does the scale. A quotation carrying only "RMA Grade I" is stating a band. Those bands do not line up neatly with the DIN letters. Projects mix the two systems in one comparison table more often than you might expect, especially on EPC paperwork, so somebody has to convert before the numbers mean anything. Ask which test method produced the figure. Do that before you line two rows up against each other.
The mm³ Number Depends on How It Was Measured
Abrasion loss is reported in cubic millimetres. The reference points quoted around this industry sit at roughly 90, 150 and 250 mm³, and those figures are not interchangeable, because they come out of different methods applied to different reference compounds. Two covers, one quoted at 90 mm³ and the other at 150 mm³, may be closer in service than the numbers suggest. They may also be further apart. It depends on whether the laboratory followed DIN 53516 as written, or ran a house variation instead — a different abrasive cloth, a heavier load, a specimen prepared by another procedure. DIN 53516 itself fixes the drum, the abrasive and the conditioning. A report that never states how long the sample was conditioned, how many specimens went into the result or what average was taken is a number without a unit of trust.
| Column heading on the datasheet | Value typically quoted | What it does not tell you |
|---|---|---|
| Cover grade | Y, X, W, Z or RMA I / II | Where inside the band the loss landed. It says nothing about the compound behind the code. |
| Abrasion loss | e.g. 120 mm³ | Which method produced it, or how the sample was conditioned. The specimen count is missing too. |
| Test standard cited | DIN 53516, RMA, or a house method | Whether a laboratory report exists for this batch |
| Hardness | 58–68 Shore A typical | How far it drifts after 2,000 hours at 120 °C. Most sheets stop at the as-supplied figure. |
Why Two Belts With the Same Code Wear Differently
Grade sets a ceiling on loss. It does not set a floor on life. Inside one grade, the real wear rate moves with the polymer system, how heavily the compound is filled, and the state of cure. None of that shows up in the letter. A nitrile-blend cover and a natural-rubber cover can both satisfy the same band, and then behave very differently once the material arriving on the belt is 140 °C and slightly oily. That is the point where reading a grade code as if it were a specification stops working, and asking for the compound data sheet starts.
It is also why we ask buyers to send us the actual condition rather than the grade they think they want. Our cover grades note walks through the same comparison in more detail. If wear rate rather than heat is the factor limiting your belt, the abrasion resistant conveyor belt guide goes deeper on sharp-material cases such as granite and slag.
03Tensile Strength in N/mm: Working Back to Ply Count
Tensile strength is written as a force per millimetre of belt width. That is why the row reads N/mm and not kN. The reason is practical. The same construction gets sold in 650 mm, 1,000 mm and 1,400 mm widths, so the rating has to hold good for all of them. Rate a belt at 1,000 N/mm, sell it 1,200 mm wide, and the rated total comes to 1,200 kN. That total is the number you divide by your working tension.
The Tension Lives in the Carcass, Not the Cover
Nothing in the cover row changes how much pull the belt can take. Cover rubber has almost no tensile role along the belt axis. Its job is to keep the fabric or the cords underneath away from the material, the rollers and the weather. That distinction matters, because buyers regularly try to fix a tension problem by asking for thicker cover. It does not work. It also leaves you with a heavier belt that is stiffer and harder to train. Carcass plies and cord construction are the only rows that answer a tension question.
From N/mm Back to Ply Count
Once you know the ply strength, the arithmetic is simple. A fabric ply is described by its own breaking strength in N/mm, and the grades you meet most often are EP100, EP125, EP200, EP250, EP300 and EP400. The belt rating is roughly the sum of the plies, less the small effect of the skim rubber between them. Work an example. A belt rated 1,000 N/mm is typically four plies of EP250. Rate it 800 N/mm and you are looking at four plies of EP200. Push to 2,000 N/mm and it takes eight plies of EP250. A quotation that gives only the belt rating, never the ply build, lets you reverse-engineer the likely construction. It does not let you verify the ply quality, the fabric type, or who made the fabric in the first place.
Then there is the safety factor, and this is where two quotations quietly part company. On fabric-carcass belts, the ratio between rated strength and the maximum steady working tension is typically quoted in the range of 8 to 10. Steel cord constructions usually carry a lower figure, in the region of 6.7 to 7, because cord stretches far less and the belt cannot shed load through elongation the way a fabric carcass does. None of that is law. It is convention, and the figure your project has to satisfy is whatever the engineering specification on the table says. What matters is that the buyer and the conveyor belt supplier are dividing the same two numbers.
Worked Numbers at Common Widths
| Rated strength, N/mm | Width, mm | Rated total tension, kN | Carcass that commonly delivers it |
|---|---|---|---|
| 630 | 800 | 504 | Five plies of EP125. A higher-tenacity fabric gets there in four. |
| 1,000 | 1,200 | 1,200 | Four plies of EP250 |
| 1,600 | 1,200 | 1,920 | Eight plies of EP200, or a steel cord ST1600 build |
| 2,500 | 1,400 | 3,500 | Steel cord ST2500 in a single-plane cord array |
That abrupt jump at the bottom of the table explains something buyers find odd. Above roughly 2,000 N/mm, fabric carcasses stop making sense. Steel cord takes over. There is a limit to how many plies you can add before the belt is too thick to trough properly or run cleanly through the pulleys. So if a long overland line needs 2,500 N/mm, the answer is cord, and the row worth reading is cord construction rather than ply count. Our steel cord conveyor belt material covers the cord side. The EP versus NN guide is the right companion when you are choosing between fabric families at the same rating.
An industrial conveyor belt built for hard-rock duty makes the point. The same 1,000 N/mm rating can be delivered with quite different ply arrangements. On the line, those belts behave differently. The headline number is identical.
04Elongation at Break: What It Costs You in Take-Up Travel
Elongation is the quiet row. A buyer sees a percentage, decides that more must mean tougher, and moves on. In practice this row is a budget line. It sets how far the tension carriage has to travel, and how much the belt will creep in service. It also tells you how much slack the take-up will have to swallow after the first hot week.
Break Elongation and Reference Elongation Are Two Different Rows
Elongation at break is measured at the point the carcass fails. That makes it a laboratory endpoint. It is useful for comparing fabric families and useless for setting a take-up. The number your tension calculation wants is elongation at reference load, which is the stretch measured at a defined fraction of the rated strength. Standards in the ISO 583 family typically define that fraction as one tenth of the rating. A belt that stretches 1.2 % at reference load and one that stretches 2.5 % can carry identical tonnage and still need completely different take-up strokes.
The Numbers Behind the Travel
Run the arithmetic on a 320 m centre-to-centre line. Under full load at 1.2 % reference elongation, the belt stretches roughly 3.8 m across its total length. At 2.5 %, the same line stretches closer to 8 m. That five metres has to live somewhere. It lands on a gravity tower that can drop further, or a screw take-up with enough thread, or a splice that gets cut out and re-made twice in the first year. Where the take-up was sized back when the plant ran a different carcass, this is the single most common cause of a belt that keeps running slack with no explanation anyone can find.
Elongation feeds back into tracking as well. A belt that creeps more changes its own edge tension over time, and edge tension is what the idlers are steering. Put a 1,400 mm belt on a 200 m return run and a 0.3 % difference in creep across the width is enough to pull it visibly toward one side.
Lower Is Not Automatically Better Either
The opposite error is paying for the lowest elongation on offer, then discovering the belt is brittle at the splice. Very low stretch usually means high modulus. High modulus concentrates stress. Start a loaded belt on a drive with no soft-start, and a very stiff carcass sends the shock straight into the splice and the pulley. Read elongation together with splice retention. Never read it on its own.
05Cover Thickness, Top and Bottom: Nominal, Minimum and Tolerance
Thickness rows look harmless. They are also where the last round of cost negotiation usually lands. That is why two belts that look identical on delivery last very different amounts of time.
Nominal Is Not the Same as Guaranteed Minimum
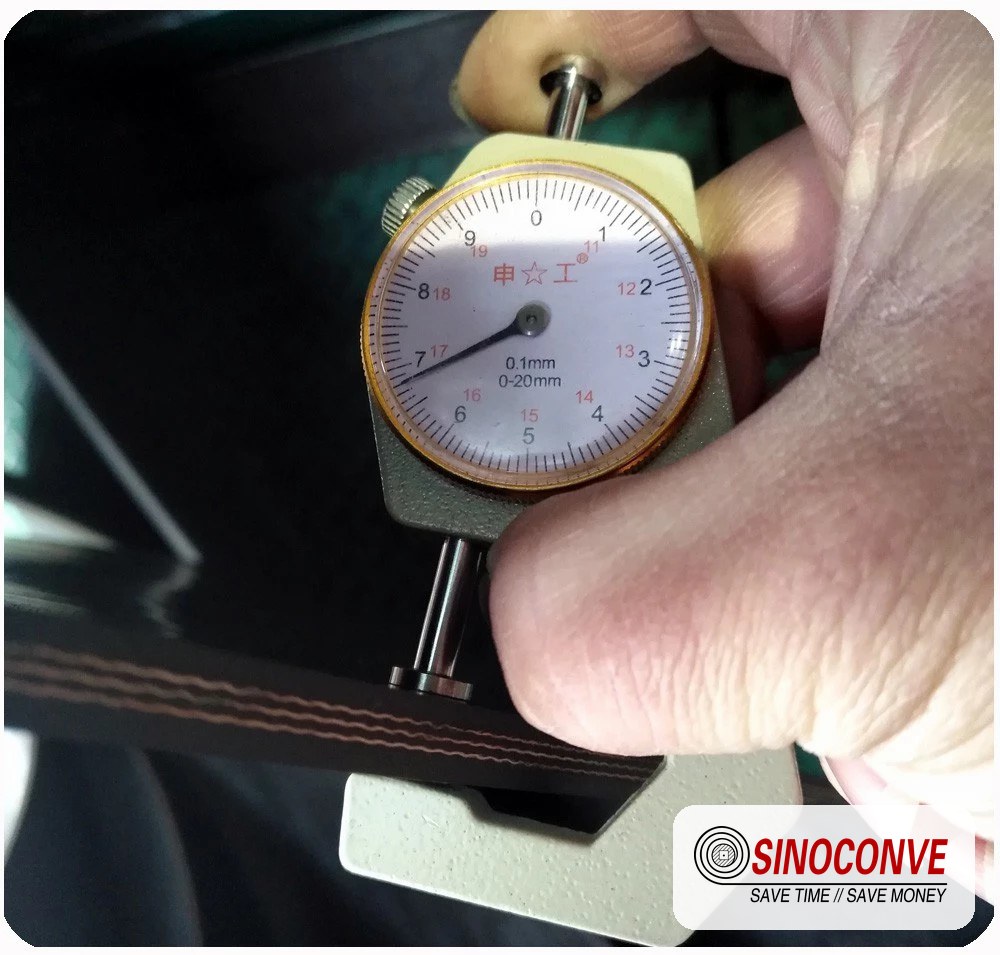
When a datasheet says "top cover 6 mm", it is stating a nominal figure. Tolerance on a calendered cover is real. The industry convention is that the nominal sits somewhere inside a permitted band, and that band is not an absolute floor. So demand a stated minimum in writing, and demand the measuring method with it. A single-point gauge, a three-point average, ultrasonic. Take a 6 mm nominal cover that measures 5.4 mm at the thinnest point in the centre of a troughing belt. Most tolerance conventions allow that, and it has already cost you 10 % of your wear life before the belt is even installed.
Why the Bottom Cover Cannot Be Shaved at Will
The pulley side is not idle. On the return run it runs against idlers, and those idlers are usually carrying the same material that is being conveyed. That means abrasion.On a driven pulley the bottom cover also carries the friction that transmits torque, because it is what the lagging grips. Thin it from 2 mm to 1.5 mm to save cost and three things change. The fabric is exposed sooner. The friction condition at the drive is no longer the one you designed for. And the belt slips more easily once the surface is wet or dusty. On steep or high-tension lines we would not accept a bottom cover below the top cover's wear-equivalent for the duty. Where the return side runs through a slurry mist, the bottom can genuinely need more cover than the top.
Total Thickness and the Troughing Consequence
In a heat-duty belt the cover is often thicker, because the compound needs bulk to slow thermal diffusion down to the carcass. That extra millimetre is not free. Total belt thickness sets the minimum pulley diameter the belt can be bent around without stressing the carcass. It also changes how the belt troughs. Add 2 mm of total thickness to a 1,200 mm belt on a 35 ° troughing set and the belt no longer reaches the troughing angle you designed for under load, so capacity drops and spillage rises. A thicker top cover ordered "for heat" moves the total thickness too. Re-check the pulley diameters at the same time.
| Duty on the line | Top cover, mm | Bottom cover, mm | What to watch |
|---|---|---|---|
| Fine dry material, cool | 4–5 | 1.5–2 | Where the tolerance sits on the thin side of nominal. |
| Coarse rock, impact at the chute | 6–8 | 2–3 | Cut resistance decides more here than the mm figure does. |
| Hot clinker or sinter, 120–160 °C | 6–10 | 2–3 | Total thickness against pulley diameter. |
| Wet return side, slurry carry-back | 5–6 | 3–4 | Expect bottom wear to outrun top wear. |
06Continuous, Peak and Instantaneous: Three Numbers, Three Contracts
This is the row buyers misread more often than any other on the sheet, and it is the row that decides whether a heat duty belt lasts four years or eleven months. A well-written table gives three temperatures. A badly written table gives one, and expects you to guess which of the three it meant.
Continuous Service Temperature
The continuous rating is the temperature the belt can live at indefinitely. Indefinitely means the working life of the belt, thousands of hours, day after day, with the compound still holding its hardness and its elasticity at the end. For an EPDM-based heat compound this figure commonly lands in the 100 °C to 125 °C band, with premium grades quoted up to about 150 °C. When a datasheet prints a single number with no qualifier, treat it as the continuous rating until the supplier states otherwise in writing. That default assumption is the safe one, because a single-number sheet written by a supplier who actually meant the peak value will be discovered only when the cover has already gone hard.
Peak Temperature
The peak rating covers repeated short excursions above the continuous figure. A kiln feed surge, a startup after a stoppage when the material in the chute has been sitting hot, a belt that runs through a radiant zone at every pass. Peak excursions are counted in minutes rather than hours, and the honest datasheets also give a total exposure budget: something like "150 °C for up to 15 minutes per event, and not more than a few events per shift" is a workable contract. A peak figure with no duration attached is not a rating; it is a number waiting to be over-interpreted.
Instantaneous Temperature
The instantaneous figure is the one-lump case: a single hot particle lands on the cover, or a temperature spike passes the measuring point once. These events are measured in seconds, and the rating describes what the belt survives without immediate charring or a hole. Values in the region of 180 °C to 200 °C for a handful of seconds are typical on high-temperature grades, and the material temperature itself can be far higher than that while the belt surface sees only a fraction of it, because contact is brief and the cover is a poor conductor. Two things get forgotten here. First, an instantaneous event still ages the compound a little; enough of them add up. Second, the instantaneous rating applies to a belt that is new. A belt with 4 mm of cover left does not have the same thermal buffer as one with 8 mm.
| Temperature column on the sheet | What the supplier is promising | Duration that makes it true |
|---|---|---|
| Continuous, e.g. 120 °C | Compound holds hardness and elasticity for the life of the belt | Thousands of hours, no duration limit |
| Peak, e.g. 150 °C | Repeated excursions are tolerated without accelerating aging beyond plan | Minutes per event, limited events per shift |
| Instantaneous, e.g. 200 °C | A single brief contact will not char or perforate the cover | Seconds, not minutes |
| No qualifier, single number | Undefined | Assume the continuous value and ask in writing |
The Rule of Thumb That Explains Why the Gap Matters
Rubber does not fail at a temperature; it accumulates damage over time and temperature together. A commonly quoted field rule is that every 10 °C to 15 °C above the continuous rating roughly halves the remaining service life of the cover. Read that again with the three numbers in mind. A line running 15 °C hot is not slightly worse off; it is on a different curve. That is the difference between a belt changed on schedule and a belt changed because the cover cracked open over a weekend.
07Dwell Time: How Long the Belt May Stay at Each Temperature
A temperature without a duration is half a number. The supplier who writes "withstands 200 °C" and stops there has left the important half on the table, because a belt that shrugs off 200 °C for eight seconds behaves nothing like the same belt held at 200 °C for eight minutes.
Three Durations, Three Different Mechanisms
At the continuous rating, what limits life is slow oxidative aging of the rubber: the polymer crosslinks drift, hardness climbs, elasticity falls, and the cover eventually cracks in a pattern that follows the troughing flex lines. The damage is cumulative and irreversible, which is why slope matters so much. At peak temperature the mechanism is the same but running at several times the rate, so a few minutes a shift is survivable while an hour a shift is not. At instantaneous temperature the failure mode changes altogether. Now it is a local thermal shock, and what protects you is the cover's heat capacity and the briefness of contact, not the compound's long-term stability. Three durations, three mechanisms, one row on the sheet.
Measure the Belt Surface, Not the Air Around It
The number that belongs in this comparison is the belt surface temperature on the carry side, taken just downstream of the loading point, at the end of the busiest shift, not the ambient temperature of the gallery. Those two can sit more than 60 °C apart. We have measured 52 °C air and 121 °C belt surface in the same clinker gallery, in the same minute, at the same station. A non-contact infrared thermometer with an adjustable emissivity setting is the tool; a fixed-emissivity unit reads dark rubber several degrees low, and a contact probe on a moving belt is a dangerous way to find out whether the belt is hot. Log the peak, not the average, and log it over a full week, because the worst shift is rarely the one you happened to visit.
Field note from our engineers: A cement plant north of Ningbo reported a specification table reading "continuous 150 °C / instantaneous 200 °C" and told us the belt ran at 200 °C "only at the transfer". When we logged the point with an infrared thermometer for a week, the cover sat at 158 °C for roughly 40 minutes of every shift, which is neither continuous in the intended sense nor instantaneous in any sense. The cover had crazed from edge to edge in nine months. The table was not wrong. The reading of the table was. Their duty needed the peak column, with a duration, and a compound change to match it.
Write the Duration Into the Purchase Order
The practical fix is unglamorous. Add two lines to the technical annex of the order: the measured belt surface temperature at the hottest station, and how long the belt sits there in a normal shift. Any competent supplier can then tell you which of their grades fits and which does not, and you have a written basis for a claim if the first belt comes back hard and cracked at 28 % of expected life. Buyers who leave those two lines out are relying on the salesman's memory of a conversation, which is not a specification.
08Chemical Resistance Is Three Variables, Not One
Sometimes a line is hot and wet. Clinker dust with wash-down water, fertiliser in a humid shed, foundry sand with a binder residue. The specification table will usually carry a line about chemical resistance, and that line is the easiest one on the whole sheet to misread, because a statement like "resistant to acids and alkalis" carries no information at all until two more variables are attached.
Concentration and Temperature Change the Answer Completely
A compound that shrugs off a 5 % caustic solution at 20 °C can be destroyed by the same chemistry at 80 °C, and moving from 5 % to 40 % can do the same thing at ambient temperature. Chemical attack on rubber is driven by concentration, by temperature and by how long the medium stays in contact. Drop any one of the three and you are reading a different test. Temperature does double duty, because it also softens the compound and speeds diffusion into the polymer, which is why a chemical duty and a heat duty together are harder than either one alone.
Dwell and Coverage: What a Splash Is Not
Contact time on a belt is rarely uniform. A drip that lands on the carry side every few seconds is continuous exposure at one spot. A wash-down spray is intermittent but frequent, and it reaches the bottom cover as well, which most evaluations forget. A five-minute soak during a shift change is not the same as a permanent film. When you read the chemical row, ask which of those three you have on your line, and write the medium, its concentration, its temperature and the exposure pattern into the annex. A supplier cannot answer a question that was never asked properly, and a claim of "chemical resistant" on a quotation is worth exactly as much as the conditions printed next to it.
This article is about reading the row; the selection itself belongs elsewhere. If the chemistry is the limiting factor on your line, the two references to start with are chemical resistant conveyor belts for the media-by-media reasoning, and oil resistant conveyor belts for hydrocarbon and vegetable-oil duties. Where the medium is oil and the plant is a recycling or scrap operation, the recycling oil resistant belt note covers the compounding choices in more depth. On our own rubber conveyor belt range, the compound family is the thing that changes from duty to duty, and it is never visible in a grade code.
09Flame and Antistatic Columns Have Nothing to Do With Heat
Two columns sit next to the temperature row on many datasheets and get mentally merged with it. They should not be. Flame behaviour and static dissipation are separate properties, tested under separate standards, and neither one tells you anything about how the belt handles 140 °C clinker.
Several Standards, Several Different Jobs
Flame retardation on a conveyor belt is assessed under ISO 340, which uses a laboratory-scale test to judge how far a flame will propagate along a sample. Antistatic behaviour is a conductivity question, and standards in the ISO 284 family typically ask for a surface resistance no higher than around 300 MΩ on a new belt, which is in the region of 3×10⁸ Ω. In the United States, underground coal work brings in MSHA 30 CFR Part 14, which is an acceptance route for flame-resistant belting rather than a performance grade. EN 12882 and AS 1332 appear on other projects for general safety and dimensional requirements. Each of those answers a different question, and a datasheet that lists them in one undifferentiated block is inviting the reader to assume that a pass in one column implies a pass in the others.
| Column | Standard or method that governs it | What it certifies | What it says about heat |
|---|---|---|---|
| Flame retardance | ISO 340, or MSHA 30 CFR Part 14 acceptance | Limited flame propagation under the test conditions | Nothing |
| Antistatic | ISO 284 family, surface resistance limit | Static charge can dissipate rather than accumulate | Nothing |
| Cover abrasion | DIN 53516, or an RMA method | Volume lost in a defined drum test | Nothing |
| Cover-to-carcass adhesion | ASTM D378 style peel testing | Bond strength between cover and carcass | Indirectly, once the value is compared after heat aging |
| Heat aging, air oven | ASTM D573 | Tensile and elongation retention after a set oven exposure | This one is the temperature row, stated as a number |
Where These Belts Are Required, and Why the Two Duties Are Separate
In our own conveyor belt factory the flame and resistance checks run as separate operations from the compound's heat aging work, because they answer separate questions. A coal handling plant needs both a flame requirement and a heat requirement met at the same time, and it is entirely possible to hold a valid ISO 340 result on a compound whose continuous temperature rating is only 90 °C. That combination is legal and, on a coal line in a warm climate, occasionally the right one. What it is not is a heat resistant belt, and a buyer who treats the flame column as reassurance about temperature has misread the sheet. The flame resistant conveyor belt manufacturer evidence note goes through the test paperwork in detail, and the coal and power plant article covers the site conditions that drive it.
10Splice Strength Retention: The Row That Is Usually Missing
Search a typical heat duty datasheet for a splice figure and you will find the rated belt strength, the cover grades and the temperature band, and then nothing. The joint that has to carry that rated strength has been left out of the document altogether. On a hot line that is the omission that matters most, because the splice is where the failures cluster.
Why the Joint Is the Weak Point at Temperature
A vulcanised splice is thicker than the belt around it. There is extra rubber, an overlap of plies or fingers, and a cure that has been run a second time on material that was already cured once. Three consequences follow. The splice runs slightly hotter, because there is more insulating compound holding heat in at the exact point where the load transfers. It ages faster, because aging is time and temperature together. And its adhesion values are the ones that were rebuilt in the field, not the ones that came out of a press at controlled temperature. Companies that buy wholesale conveyor belts from several sources and splice them on site discover this the hard way: the belt rating is comparable, and the splices are not.
Typical Retention Figures and What They Cover
The numbers that get quoted in this industry, and the caveats that belong with them, run roughly like this. A bolted or hinged mechanical fastener typically develops somewhere around 35 % to 55 % of the belt's rated strength.A properly vulcanised fabric splice is typically quoted between 70 % and 90 %, with the top of that band achievable only when step length, finger geometry, pressure, temperature and cure time are all correct. A steel cord splice can be quoted high on a static pull test and still behave differently under dynamic fatigue on a hot line, so for cord belts the figure worth asking about is retention after aging, not retention on the day of the pull test. Nobody in this industry can honestly promise a splice stronger than the belt. What you can ask for is a retention figure measured under the conditions your line actually runs.
How to Read the Figure That Is Printed
When a table does include splice data, three details decide whether it means anything. Was the sample aged before testing, or pulled cold? At what temperature, and for how many hours? And was the failure in the splice itself or somewhere else in the sample? A retention figure measured at 23 °C and taken straight from the press is a manufacturing quality check, not a service prediction, and it should not be compared against a figure measured after 72 hours in an air oven at the working temperature. Read the two rows side by side and the difference between them is, in effect, the penalty your line pays for being hot.
11Warranty, Sampling and Who Sets the Pass Mark
The last two pages of a specification document are the ones nobody reads until something goes wrong. They contain the sampling rules and the warranty wording, and between them they decide whether a dispute is settled in a week or argued for a year.
Sampling: Position, Count and Judge
When a belt is tested against its own datasheet, the first question is where the sample came from. Cut a specimen 300 mm from the belt end and you are testing the part that ran over a pulley last, not the body of the belt. Cut through a splice and you are testing the splice. The conventional discipline is to take specimens from the run of the belt well clear of the ends and clear of any joint, at more than one position across the width, and to state how many specimens are averaged and what happens if one falls below the limit. Standards in the ISO 583 family and the abrasion methods such as DIN 53516 all require the conditioning and the specimen count to be recorded, and that record is what makes a result defensible. Then the part most buyers miss: the acceptance criteria should be written by the buyer, in the purchase specification, before the order is placed. If the criteria come from the supplier's own datasheet, the supplier is grading their own work.
Warranty Wording: Look for the Exclusions First
Warranty terms in this industry commonly sit in a range of 12 to 24 months from delivery, or a stated number of running hours, whichever comes first, and the detail is always in the exclusions. Manufacturing defects are normally covered. Cover wear is not, because wear is a function of your material. Splice work carried out by a third party is usually excluded, which matters on a hot line where the splice is the weak point. Operation outside the stated temperature band is excluded almost universally, and that is exactly where a temperature log earns its keep. The clause worth negotiating is the one about measured service conditions: if the specification table states a continuous rating and the plant can show a logged surface temperature within it, a premature failure is much harder to argue away. Terms vary by project, so treat any range here as a starting point and confirm the actual wording against your own duty and drawings.
Field note from our engineers: A claim reached us on a belt that had failed at ten months against a quoted twelve-month expectation. We cut specimens 2 m in from the end, clear of both splices, took three positions across the width, and ran the abrasion and heat aging work. The rubber had aged far beyond its hours. The plant then produced a month of infrared readings showing 168 °C at the discharge chute, on a belt rated 140 °C continuous. The claim did not survive the second reading. The replacement belt did, because we changed the compound and the chute liner together. Neither side could have reached that conclusion without the sampling discipline and the log.
The Same Reading Discipline Applies to Drive Belts
Nothing in this article is specific to flat belting. A transmission belt manufacturer faces the same problem in miniature: a wedge belt datasheet carries a power rating per belt, a datum diameter range and a temperature limit for the compound, and buyers read the power rating and skip the rest. The temperature limit on a heat-exposed drive belt is written for the same reason as the one on a conveyor cover, and it fails for the same reasons when it is exceeded. If you source through a conveyor belt distributor who also carries drive belts, ask for the compound temperature limit in writing rather than accepting an ambient temperature figure for the room. As a V-belt manufacturer we have the same conversation with foundries and steel mills that we have about conveyor covers, usually in the same visit and about the same hot zone.
12Reading a Full Sheet: A 1,200 mm Clinker Line, Row by Row
Here is how the method looks on a real enquiry. A cement plant sends a datasheet for a replacement belt on a clinker line: 1,200 mm wide, 220 m centres, 900 t/h, drop point material temperature logged at 145 °C, belt surface measured at 112 °C at the busiest station with excursions to 141 °C for six to eight minutes an hour.
The Sheet as Sent
The document states a rated strength of 1,000 N/mm, a four-ply EP250 carcass, top cover 8 mm, bottom cover 3 mm, cover grade W, temperature "120 °C continuous / 150 °C peak / 200 °C instantaneous", and an abrasion loss of 120 mm³ by DIN 53516. No splice figure. No duration attached to the peak value. No elongation row.
Reading It in Order
Temperature first, and it is workable but not comfortable. A 112 °C surface against a 120 °C continuous rating leaves eight degrees of margin, and the measured excursions of 141 °C sit just under the 150 °C peak figure — but they occur six to eight minutes in every hour, which is roughly 11 % of running time spent above the continuous rating. That is not an instantaneous load, and it is not a rare event either. The question to put in writing is what total exposure at 141 °C the compound is rated for, because the number of aging hours at the peak is what will set the cover's life. Carcass second: 1,000 N/mm at 1,200 mm width is a rated 1,200 kN, and four plies of EP250 is the standard build behind it. On 220 m centres with a loaded start, we would also want the elongation at reference load before signing off the take-up stroke. Cover third: 8 mm top cover over 3 mm bottom is a sensible heat build, and the Grade W abrasion figure at 120 mm³ is comfortably inside the band, so wear is not the limiting row here. The two gaps are the ones to close in writing: peak exposure duration, and splice retention after aging.
That is the whole exercise. Four rows read in order, two written questions, and no guessing. Our own notes on supplier temperature data set out what a document should state, and the cement conveyor belt selection material covers the same line type from the plant side. The heat resistant conveyor belt range page lists the grade families this reasoning maps onto.

13Frequently Asked Questions
What is the difference between continuous, peak and instantaneous temperature on a belt datasheet?
Duration, essentially, and duration is the whole point. The continuous figure is what the compound can live at for the life of the belt. The peak figure covers short repeated excursions measured in minutes. The instantaneous figure describes a single brief contact, measured in seconds, that must not char or perforate the cover. A sheet that gives you one number has given you roughly a third of an answer.
Our datasheet lists one temperature with no qualifier. Is that safe to use?
Treat it as the continuous rating and confirm in writing. That assumption is safe in one direction: if the supplier actually meant the peak value, you will be running a belt well inside its real capacity. It is unsafe in the other direction, which is the one that catches plants, because a supplier quoting an instantaneous number as a headline will look fine on paper right up to the first hot shift.
Does a tougher cover grade letter mean better heat resistance?
No. The letters describe abrasion loss, and heat aging is a separate property of the compound. We have seen a Grade W cover go glassy in eleven months at 158 °C and a lower-graded cover hold its hardness for three years at 105 °C on the same plant, different lines. Read the temperature row and the grade row independently, then check whether the compound was chosen for heat at all.
Is a flame resistant belt also a heat resistant belt?
Rarely, and never by implication. Flame behaviour under ISO 340 and antistatic limits in the ISO 284 family are tested separately from heat aging, and a compound can hold a valid flame result while carrying a modest continuous temperature rating. Coal plants often need both properties at once, which is why the flame column and the temperature column have to be read as two separate requirements rather than one combined reassurance.
How do I get from a N/mm rating to a ply count?
Add the plies. A fabric ply is described by its own breaking strength in N/mm, so EP250 plies stack roughly as 250, 500, 750, 1,000 — which is why a 1,000 N/mm belt is commonly four plies and an 800 N/mm belt commonly four plies of EP200. Then check the safety factor your project requires, typically quoted between 8 and 10 for fabric carcasses. Above about 2,000 N/mm the arithmetic stops working and steel cord takes over.
How much take-up travel should a hot line budget for?
Enough for the reference-load elongation, plus margin for the first hot month. On a 320 m centre line, the difference between a belt stretching 1.2 % and one stretching 2.5 % is roughly four metres of slack across the belt circuit. That has to go somewhere, and the cheapest place to find it is in the design stage rather than in two unscheduled splice repairs during commissioning.
Do we really need a splice retention figure at temperature?
On a hot line, it is the single most useful number you can ask for, and it is the one most sheets omit. The splice is thicker than the belt, runs hotter in the same conditions, and carries the load through adhesion that was rebuilt in the field. A cold retention figure from the day of the press tells you the splice was made correctly. A figure after heat aging tells you how long it will hold.
Who decides whether a belt sample passes?
The buyer should, and the time to decide is before the order. Write the sampling position, the number of specimens, the conditioning and the acceptance limit into the purchase specification, then let the laboratory apply it. Where the criteria come from the supplier's own datasheet instead, the same party is effectively setting the exam and marking it.
What belongs in the technical annex of a heat duty belt order?
Four lines do most of the work: the measured belt surface temperature at the hottest station, the duration spent at that temperature per shift, the working tension in N/mm, and the medium with its concentration and exposure pattern if there is any chemistry involved. Add the pulley diameters if the cover is being thickened for heat, because total thickness and minimum pulley diameter have to agree. Everything else on the sheet can be cross-checked from there.
14Related Products You May Need
- Rubber conveyor belt
- EP rubber conveyor belt — polyester/nylon carcass with a cover compound chosen for the duty, including EPDM grades for clinker and sinter lines
- Heat resistant conveyor belt
- EP1000 stone crusher conveyor belt — where impact energy at the chute, not temperature, is what sets cover life
- Chevron conveyor belt
- V-belts for conveyor drives — read the compound temperature limit on these with the same care you apply to a cover
- Full product catalog
15Related Blog Posts
- Heat resistant conveyor belt ultimate guide 2026: types, grades and how to choose — the selection side of the same subject, once you know which rows your line actually limits
- Heat resistant conveyor belt supplier temperature data
- Heat resistant conveyor belt failure modes: root causes and field fixes — for belts already in trouble, where the damage pattern leads the investigation instead of the datasheet
- Heat resistant conveyor belts for cement plant clinker handling
- Chemical resistant conveyor belts — the concentration and temperature reasoning when a medium rather than heat is the limiting factor
- Oil resistant conveyor belt: what buyers should check first
- Heat resistant rubber conveyor belt: modern solutions