Heat Resistant Conveyor Belt Failure Modes: Root Causes and Field Fixes
A heat resistant belt seldom fails because somebody picked the wrong datasheet. It fails because the heat that actually reached the belt was not the heat everyone assumed. We have stood in clinker galleries where the air sat at 52 °C and the cover of the belt was running at 121 °C, and we have stood on lines where the monthly average was harmless while a single surge at the transfer point burned a crater through 8 mm of cover inside one shift. Those two situations need opposite answers, and the belt itself usually tells you which one you are looking at before anyone opens a catalogue.
What follows is a field manual, not a selection guide. Take the damage pattern you can see with your own eyes, work through the measurements that confirm it, match it to a root cause, then apply the fix in the order that stops the bleeding first. If your belt is still healthy and you are simply choosing a grade, the selection logic lives in our heat resistant conveyor belt ultimate guide 2026. This article is for belts that are already in trouble.

01Read the Symptom Before You Read the Datasheet
A failed belt leaves a signature, and it is written in three different places. Take the carry side that has gone glossy, hard and crazed from edge to edge: that is slow cooking, thousands of hours at a temperature nobody rated the cover for. Now look at a single black crater under the chute lip, charred at the rim with no warning anywhere else. One lump at 800 °C landing on a belt that had stopped. A cover whose edges have opened up like a frayed rope is a third animal again — tracking rather than heat, although the two usually turn up on the same line. Telling the three apart takes ten minutes with a torch, a Shore A gauge and a tape measure. Skipping it is how a plant buys the same belt twice and loses it twice.
Start With the Failure History, Not the Compound
Before we touch the belt, we ask questions, because answers narrow the field faster than any laboratory test. How many running hours did it survive, and how many tonnes moved over it in that period? Did the cover degrade over weeks, or within days of something changing on the line? Plants change things constantly and rarely connect the change to the belt: a new chute liner, a skirt that now sits closer to the surface, kiln feed pushed up by 8 %. One quarry we visited replaced a worn transfer chute and moved the impact point 400 mm upstream. The next belt lasted 11 weeks instead of the usual 9 months. Nothing about the belt itself had changed.
The Four Measurements We Take First
Four numbers, and we take them in the same order every time. First, cover hardness on the carry side with a Shore A durometer: three points across the width, three stations along the length, never within 50 mm of a splice. Second, remaining cover thickness. A depth gauge is fine on smooth rubber, but on a roughened surface we switch to an ultrasonic meter, because a mechanical probe rides the peaks and can read 2 mm proud of the true figure. Third, belt surface temperature just downstream of the load point. Fourth, the splice — is there a step at the joint, a lift, a soft spot? Read together, those four tell us whether the belt died of slow thermal aging, of one localised heat event, or of something that was never thermal at all.
As a conveyor belt manufacturer we read the same service reports coming back from mines, quarries and cement plants, and they follow a pattern: about two thirds of premature heat-zone failures trace back to a condition the plant could have measured on site with a USD 300 hardness gauge and a decent infrared thermometer.
One question that sounds bureaucratic and is not: who supplied the belt, and did the paperwork come with temperature data for the compound? Plants that buy wholesale conveyor belts on a grade name alone often cannot answer it. We have been handed quotations that read “heat resistant, high grade” with nothing measurable behind the words. If your conveyor belt distributor cannot produce a data sheet stating the continuous service temperature and the test standard behind it, assume the number does not exist.
| Damage signature you can see | Most likely root cause | First measurement to take |
|---|---|---|
| Uniform hardening, fine surface cracks across the full width | Sustained over-temperature of the whole belt | Shore A at three stations, all taken on the loaded side |
| Single crater, charred edges, often under the chute lip | Instantaneous high-temperature impact load | Peak material temperature at the drop point, logged over a full shift |
| Blister bubbles, cover lifting in patches | Trapped moisture or volatiles expanding under the cover | Tap test over the blistered zone, plus belt moisture history |
| Open cracks along both edges, edge rubber peeling back | Edge tension and tracking problems amplified by heat | Edge-to-centre hardness difference and pulley alignment |
| Splice strip torn out, fabric ends visible | Thermal mismatch between splice rubber and belt body | Splice temperature, splice age, and step condition at the joint |
02Where the Heat Really Comes From on a Hot Line
Ask a plant about its heat problem and you get one number back: the material temperature. That number is real. It is also only one of five paths by which heat reaches a belt, and on several lines we have surveyed it was not the largest one. Radiant heat from unlagged ducting and kiln shells is the second path, and in a tight gallery we have measured it contributing more than the material did. Third comes hot air inside an enclosed gallery, where a belt can sit at 90 °C with no hot material anywhere near it. Fourth, friction and abrasion at the load point. Fifth, spillage that rides the return strand for 200 m and cooks the same rubber a second time.
Continuous Heat and Instantaneous Heat Shock Are Two Different Problems
Continuous heat is a steady-state condition. The belt sits hot for thousands of hours — 6,000 to 20,000 on a cement kiln line — and what kills it is chemistry: crosslinks breaking down, plasticiser migrating out, the cover hardening and then cracking. Instantaneous shock is a different animal altogether. A lump arrives at 700 °C or above and dumps every joule of it into a few square centimetres of cover for two or three seconds. There is no time for aging. The rubber chars, or burns through, and the belt is finished on the spot. A compound built for continuous 120 °C service is not automatically right for a 900 °C impact, and the reverse is just as wrong. Any specification carrying a single temperature number is incomplete, which is the point we make in our article on what temperature data a heat resistant belt supplier should give you.
The Enclosed Gallery Trap
Enclosed galleries are the most underrated heat source we run into, and the easiest one to dismiss. One cement plant, survey day: outdoor ambient 34 °C, air inside the clinker gallery 58 °C. Nobody there had ever measured that second figure. The belt was running at 104 °C on the carry side and 91 °C on the return side — a number most plants never take, and on long enclosed runs the return side often sits within 15 °C of the carry side, so the rubber never gets one cool pass to recover. Sulfur-bearing and chlorine-bearing dust accelerates the aging further.
Field note from our engineers: On a 1,200 mm clinker belt we inspected, the plant insisted the problem was "summer heat" and asked for a higher temperature rating. Two thermocouples clamped 1.5 m and 6 m after the load point told a different story: the belt was at 131 °C at the first station and 96 °C at the second. The heat was entering at the chute, and the extra 35 °C was riding on the belt into a gallery with poor ventilation. Moving the skirt liners 60 mm off the belt and re-aiming the chute cost almost nothing and dropped the first-station reading to 112 °C.
Radiant Heat From Hot Equipment
Kiln shells, hot ducting, steam lines and dryer discharge hoods heat a belt without touching it. Radiant load falls off with distance, but in tight galleries there is often nowhere to move the belt to. On one line an industrial conveyor belt was running 300 mm from an unlagged hot duct; a simple reflective heat shield between the two cut the belt surface temperature by 14 °C and added an estimated four months of service life. Cheap fix. Rarely done.
The Drive Belts in the Same Enclosure Age With the Conveyor
We build drive belts as well as conveyor belts, and on hot installations the two fail as a pair. As a transmission belt manufacturer we have taken the same complaint twice from one plant inside four weeks: a hardened, cracked cover on the conveyor, glazed and slipping V-belts on the drive. One badly ventilated enclosure caused both. Maintenance teams generally treat them as two unrelated problems, which is why they pay for both twice.
A V-belt manufacturer faces the same rating problem a conveyor belt supplier does, and the arithmetic is unforgiving. A drive quoted for an 80 °C ambient has a very different life at 95 °C, and every start-stop cycle takes another slice, because the belt is stiffest when the enclosure is coldest and hottest when it is working hardest. So put drive inspection on the same interval as belt inspection. The drive fails second and stops the plant first.
03How We Read a Damaged Cover in the Field
Reading a cover is a skill, and it is learnable. We use three procedures and between them they cover almost every case we meet: look and feel, hardness mapping, and a cross-section cut from a scrapped length. All three fit inside a single planned stop. Budget an hour on a normal installation, two if the belt is long and the gallery is hot enough that nobody wants to stay in it.
Surface Texture, Colour and Smell
New heat-resistant cover is matt and smells faintly of rubber. Aged cover goes glossy first, then picks up the dull grey bloom of degraded polymer, and on an over-temperature line that transition usually happens inside 12 months. Fresh crazing looks like a fine silver spiderweb, shallow and only visible in torchlight held at an angle. Advanced aging cracks open properly, and once you can see fabric at the bottom of a crack the cover is already gone. Smell tells you more than people expect. Burnt points to a local heat event, acrid points to a compound or cure problem, sulfur points to the ply line. Then press a thumbnail into the cover. Healthy rubber springs back in about a second. Heat-aged rubber keeps the dent.
Hardness Mapping With a Shore A Gauge
Cover hardness carries a manufacturing tolerance of about ±5 Shore A, so a new belt reading anywhere from 60 to 70 is still inside its own specification. That is why the absolute number means very little and the change means everything. Record the as-installed figure at commissioning. If nobody did, you have no baseline, and every later argument about the belt becomes a guess. A rise of 15 to 20 points is significant aging. Past 20 points the cover has lost most of its elastic recovery and will crack under ordinary flexing. Take the readings the same way every time: same position across the width, same distance from the edge, and at least 50 mm clear of any splice.
Cutting a Cross-Section to See What the Cover Hides
Cut a 100 mm sample from a scrapped stretch and you learn more than from a month of inspection from above. Four things show up in the section. Has the ply-to-ply adhesion held? Has the cover-to-carcass bond gone brittle? Do blisters run along a ply line? And is the carcass itself discoloured? That last question settles more arguments than any other. When we cut sections from belts that failed in hot service, brown discolouration creeping into the EP or NN fabric is usually the first hard evidence of heat, and by then the owner has spent six months blaming abrasion. If you want the result to stand up, test to a standard method — ASTM D378 for carcass adhesion, ASTM D573 for heat aging — because a comparison between a heat resistant and a standard rubber belt only means something when both belts are evaluated the same way.
04Cover Rubber Failure Modes: Aging, Burning and Blistering
These three account for the majority of heat-zone cover failures we are asked to diagnose. They look different, they are caused by different physics, and they are treated differently. Confusing one with another is the single most common reason a replacement belt fails the same way.
Failure Mode #1: Heat Aging — Hardening, Crazing and Lost Elasticity
Heat aging is the slow failure. Oxygen and heat attack the rubber's crosslink network over thousands of operating hours; plasticisers migrate out, the polymer chains stiffen and the cover loses its ability to stretch and recover. The visible result is a hard, glassy surface with fine crazing that widens into a network of cracks. On the running side, flex cracks appear where the belt passes small pulleys. Because the failure develops gradually, plants usually notice it only when pieces of cover start dropping off under the structure.
The measurable judgment criteria we apply are straightforward. A Shore A rise of 15 to 20 points above the as-installed reading indicates significant aging. Tensile strength retention is the sharper test: retention above 70 % of the original value is acceptable for continued service with monitoring; a retention of 50 % to 70 % means plan the replacement; below 50 % the belt is finished regardless of how it looks. An rubber conveyor belt cover that has lost half its tensile strength has also lost most of its impact resistance, so the first large lump of material to arrive will finish the job.
Root cause is almost always an operating temperature that exceeds the compound's continuous rating, and the fix is either to move the operating point or to move to a higher-rated polymer. Ethylene propylene diene monomer rubber — an EPDM conveyor belt cover — is usually quoted in the range of about −40 °C to +120 °C continuous, with short-time excursions higher than that. An EPDM conveyor belt is the natural upgrade from SBR (typically quoted around +80 °C continuous) when the belt is genuinely running hot rather than being hit by transient shocks. If the failure is graded rather than uniform, look again at the heat sources in section 02 before you change compound.
Failure Mode #2: Burn-Through at the Drop Point
Burn-through looks obvious once it happens: a crater or hole with charred, curled edges, usually within one belt width of the chute. What starts it is an instantaneous heat event, and what makes it worse is a thin cover over an insufficiently protected carcass. Publicly stated clinker discharge temperatures are commonly quoted in the region of 200 °C to 1,400 °C depending on cooler design and position in the process, and even the low end of that range will destroy a standard cover in seconds if the material comes to rest on the surface and the belt is stopped underneath it.
The distinction between continuous and instantaneous matters enormously here. A conveyor belt for clinker handling must be specified on both axes: it needs a polymer with a respectable continuous rating and a construction that survives point heat. In practice that means a thicker cover, a heat-resistant carcass and often a breaker ply to distribute the impact load rather than letting a single lump burn into the fabric. On clinker lines we strongly prefer a belt built specifically as an EPDM conveyor belt for clinker service over a general-purpose heat belt, because the failure mechanism is different from a generic hot-material line.
Confirmation test: log the material temperature at the discharge, not the belt temperature, over a full shift including start-up. Start-up after a weekend shutdown is when most burn-throughs happen, because the first material through is the hottest and the belt is at ambient temperature expecting no load.
Failure Mode #3: Blistering and Ply Separation
Blisters are bubbles of trapped gas expanding under the cover. The gas comes from moisture in the carcass, residual solvent or unreacted compounding ingredients, or in some cases from water ingress through a damaged edge that then vaporises under the belt's own heat. The tell-tale is a set of raised patches you can hear change note when you tap them with the handle of a screwdriver.
Two causes deserve separating. Manufacturing cause: insufficient drying of the fabric before calendering, or a cure cycle that did not fully bond the cover to the carcass. Service cause: the belt is running hotter than its construction can tolerate, so the bond line degrades and moisture from wash-down or the material itself finds its way in. If blisters appear in the first two or three months of service, suspect the belt's manufacture and raise it with your supplier immediately — a conveyor belt factory should be able to show you its pressing and drying records. If blisters appear after a year or more of service, suspect the thermal duty and re-check the load-point temperatures and any wash-down practice on the line.
Never try to cut and reseal a blister in a hot zone. The patch will trap the same moisture and lift again within weeks. Mark the belt for replacement at the next planned stop, and until then monitor the blister edges for crack initiation.
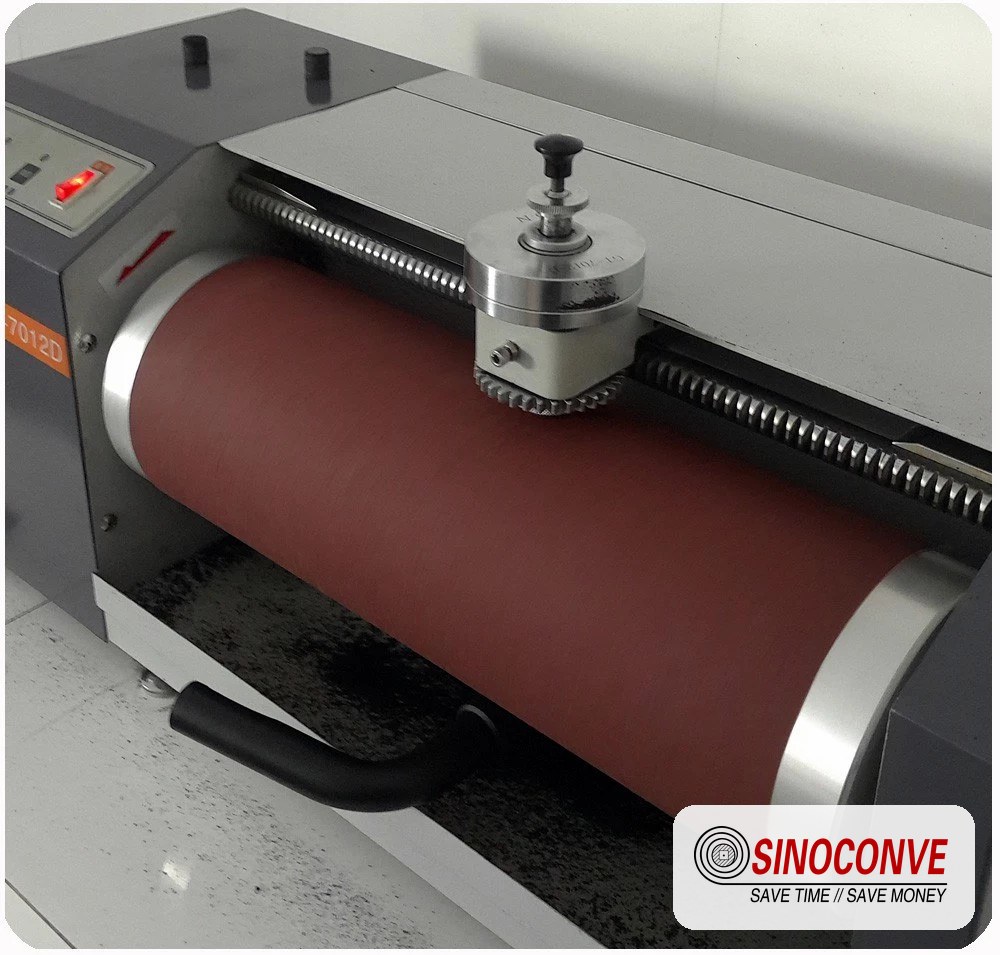
A heat-zone cover is judged by polymer, thickness and bond quality — not by colour.
05Edge and Carcass Failure Modes
The two most expensive categories of heat failure are the ones that do not look dramatic. An edge that has cracked open, and a carcass that has quietly lost strength, both allow a belt to keep running right up to the moment it tears.By comparison, a burnt cover is almost a courtesy failure.
Failure Mode #4: Edge Cracking and Edge Rubber Stripping
Heat changes the tension distribution across a belt. The carry side runs hotter than the return side, the centre often runs hotter than the edges, and on a troughed conveyor the two edges flex repeatedly around the idler junctions. When the cover compound has already hardened, the edges are the first place where the available elongation runs out. The result is a longitudinal crack 20 mm to 60 mm in from the edge, followed by the edge rubber lifting and peeling along the crack line.
Diagnostic marker: compare hardness 50 mm in from the edge with hardness at the belt centre. If the difference is more than about 8 Shore A, the edge zone is aging faster than the belt body and you have a tracking, misalignment or idler-seizure problem on top of a heat problem. Look at the edge under a torch: heat cracking runs mostly longitudinal and parallel to the edge, while mechanical damage from a misaligned structure produces gouges at an angle. Fix tracking first. A belt that is correctly centred and still cracking at the edge, with uniform hardness, is a compound problem.
Do not repair an edge crack with a cold patch and keep running in a hot zone. Repaired edges fail at the patch boundary because the repair rubber rarely matches the thermal expansion of the aged belt body. Where an edge failure has begun, the practical options are to trim and re-seal the edge with a proper vulcanised edge repair, or to schedule replacement — a solid woven or fabric-carcass belt with a reinforced edge is worth discussing with your conveyor belt supplier at the same time you order the replacement.
Failure Mode #5: Carcass Thermal Degradation of EP and NN Fabric
This is the failure mode that fools people, because the belt can look acceptable from above. The cover may be only moderately cracked while the EP (polyester warp, nylon weft) or NN (nylon warp, nylon weft) fabric underneath has already lost a large share of its tensile strength. Fabric-carcass belts lose strength in heat because the synthetic yarns themselves are affected: polyester loses a meaningful fraction of its strength after prolonged exposure above roughly 100 °C, and nylon is worse. The rubber skim between plies also ages and the ply-to-ply adhesion drops, so the belt's ability to transfer load across plies disappears.
Why this is more dangerous than cover hardening: cover hardening announces itself and degrades slowly; carcass degradation is invisible and reduces the belt's safety margin against a shock load. A belt operating at 40 % of rated breaking strength looks fine until a jam, a stalled pulley or a slug of wet material arrives, and then it breaks at or near the splice with no warning. If you are running any hot line at more than about 60 % of rated tension, sample a section of an old belt and have tensile retention measured rather than guessing.
Detection without destructive testing: watch for loss of troughability and increased sag between idlers, which indicates a softened or degraded carcass; and monitor splice integrity, since the splice is where carcass weakness shows first. Where a plant has several hot lines and no test history, the practical approach is to cut one retired belt into three samples and send them for comparative testing so you have a baseline for every future decision.
Failure Mode #6: Splice Failure With a Thermal Root Cause
Vulcanised splices fail in hot zones for a reason that has nothing to do with workmanship: the splice rubber and the belt body do not necessarily age at the same rate. If the splice uses a compound with a different temperature rating or a different cure system, the joint becomes a stiff island inside a softening belt, and the stresses concentrate at the step. Finger splices and stepped splices both suffer, but we see more failures in long step lengths where a larger volume of splice rubber has to match the surrounding belt.
The signature is a splice that opens at one or two specific steps while the rest of the joint remains bonded, usually with heat-discoloured rubber at the failure line. Pull test results generally show splice efficiency dropping below the 60 % to 70 % of belt strength that a good hot splice normally achieves. Three contributing factors are worth checking in order: whether the splice compound matched the belt's own cover compound; whether cure temperature and press time were appropriate for a high-temperature compound, since heat-resistant polymers often need different cure cycles; and whether the splice sits in the hottest part of the line, in which case relocating it may be easier than strengthening it.
Field note from our engineers: A cement plant sent us a failed splice from a 1,000 mm heat belt with a 60 °C carry-side reading and asked us to re-do the splice better. The splice was 1.8 m downstream of the load point, in the hottest band of the belt. Relocating it to the return-side slack section and re-splicing with the same compound as the cover solved a problem that had cost them three splices in fourteen months. The splice was never the fault. Its position was.
06Failure Modes That Get Misdiagnosed
Two failure modes in this cluster are routinely blamed on the wrong thing. The first is blamed on the belt's age when it is really a chemical compatibility problem. The second is blamed on the belt's flame rating when it is really a maintenance problem.
Failure Mode #7: EPDM's Weak Point — Oil and Grease Attack
EPDM is a genuinely excellent heat polymer and a poor oil polymer, and that combination catches people out. Mineral oils, diesel, hydraulic fluid, gearbox oil and most animal and vegetable oils cause an EPDM cover to swell, soften and eventually disintegrate. The swelling is not a surface effect: hydrocarbon oil penetrates the compound, breaks down the crosslink network and can increase volume by tens of percent while dropping hardness and tensile strength at the same time.
This is why we ask about oil exposure before we recommend an EPDM conveyor belt for a hot line, and it is the single most common misdiagnosis we handle. The pattern is a plant that upgraded from SBR to an EPDM conveyor belt to solve heat aging, and then watched the new belt go soft, swollen and sticky in nine months. Nothing was wrong with the EPDM. The line had gearbox oil dripping from a leaking seal 4 m upstream of the head pulley, plus spillage from a lubricated process. The belt absorbed it.
Diagnostic markers for oil attack rather than heat aging: cover hardness falls instead of rising; cover thickness increases in patches; the surface feels tacky and swells around the drip line rather than across the full width; and the damage pattern follows the oil path down the line. Heat aging does the opposite on every one of those points. Before you order another heat belt, fix the leak and consider a polychloroprene or nitrile-based cover instead — our buyer's checklist for oil resistant conveyor belts covers what to verify on the quotation. For lines that are hot and oily, the honest answer is usually a compromise compound rather than a perfect one, and it should be selected against real samples of the oil in question, not a data sheet.
On the food side the same chemistry appears with a different accent. Vegetable and animal fats attack EPDM just as mineral oil does, and wash-down chemicals add a second stress. Our notes on belting for food and packaging lines go through the compound choices for that combination, and the same logic shows up when plants in the fertiliser and chemical sector select compounds for aggressive service.
Failure Mode #8: Anti-Static and Flame Resistance That Quietly Wears Out
Two properties that are certified at the factory are not guaranteed on the belt for life. An anti static conveyor belt achieves its surface resistivity by way of conductive additives — usually carbon black in the cover compound, sometimes combined with a conductive construction through the carcass. Over time, surface contamination, a build-up of dust, rubber abrasion and the loss of the conductive surface layer all raise resistivity. A belt that measured below 300 MΩ when new can drift well above that after a couple of years in a dusty, hot environment, and nobody notices until an incident. An anti static conveyor belt is a maintenance item, not a one-time purchase.
The wording of the test matters as well. ISO 340 covers laboratory-scale flame testing of conveyor belting, and the term ISO 340 conveyor belt is often used loosely in tenders to mean "flame tested to ISO 340". That test tells you about flame propagation under controlled conditions. It does not tell you the belt's maximum service temperature, and it does not tell you the resistivity. Those are separate evaluations, typically referenced through ISO 284 for electrical conductivity, EN 12882 for the classification of belting for general-purpose and underground use, and, where a US mine is involved, MSHA approved conveyor belt acceptance under 30 CFR Part 14, which carries its own acceptance numbering and is issued against a specific product, not against a factory in general.
The most damaging misreading in this whole article is the assumption that flame resistance equals heat resistance. It does not. Flame resistance describes how a belt behaves when exposed to an ignition source; heat resistance describes how long its rubber and carcass survive a hot service environment. A belt can be an MSHA approved conveyor belt and still have a modest continuous temperature rating, and a belt with a very high temperature rating can be entirely unsuitable for a coal or dust hazard zone. Buyers who specify one and assume the other end up with failures that look inexplicable, which is why we walk through the distinction in our article on what to check on a fire resistant belt quotation.
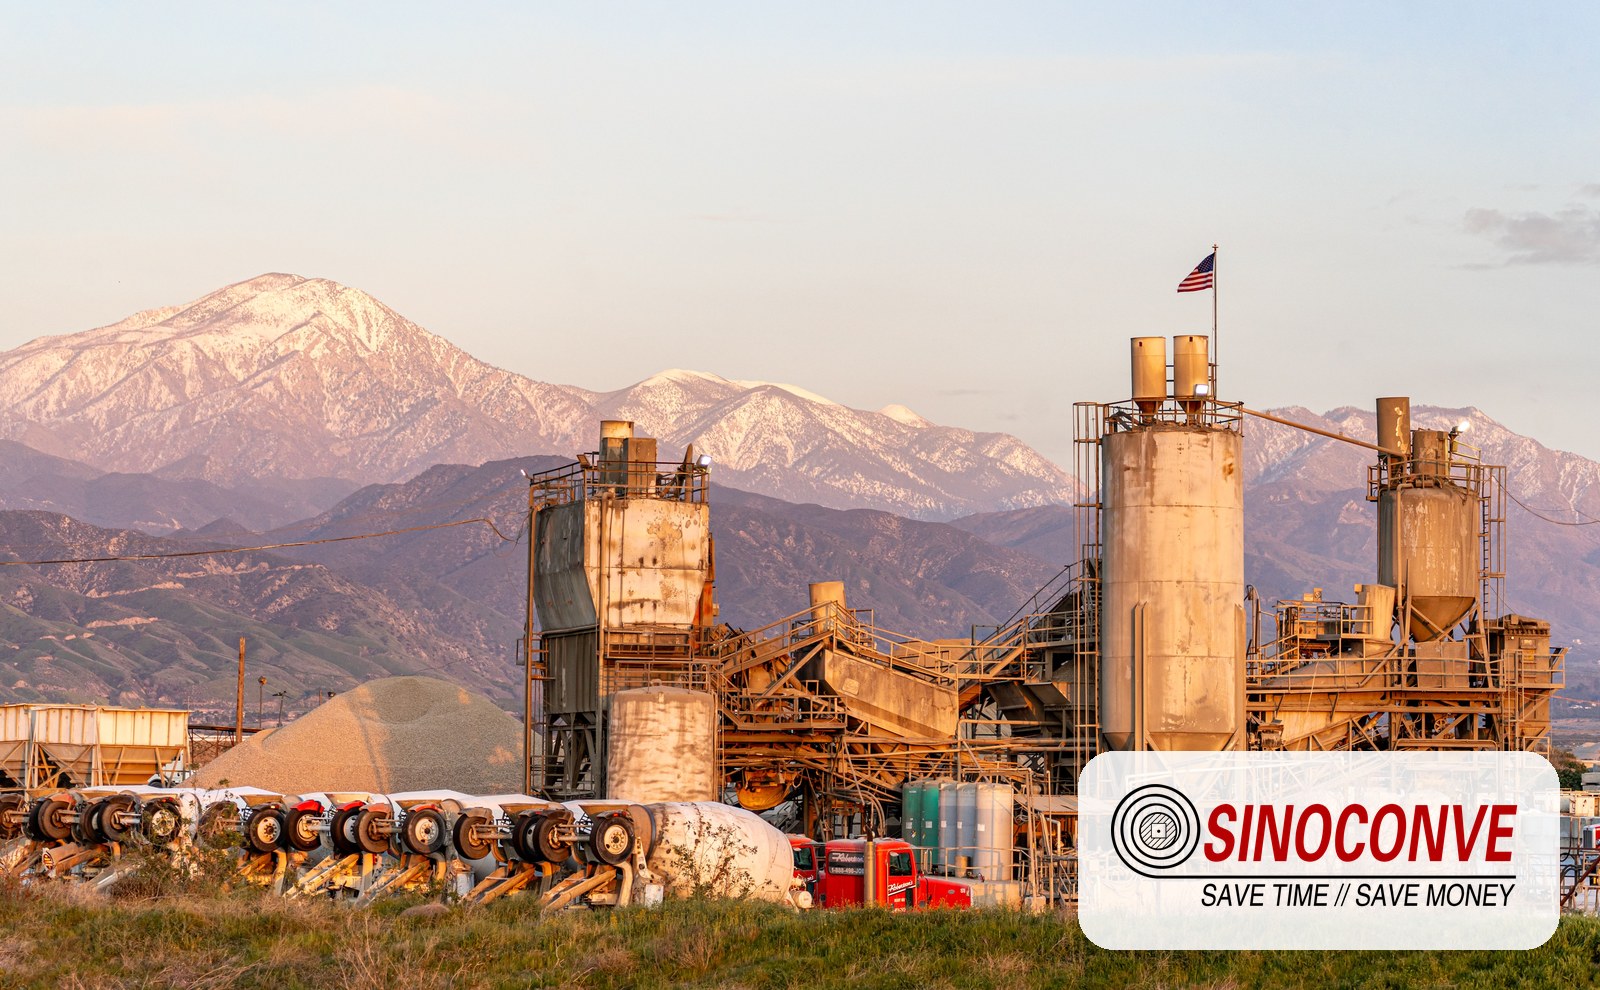
Hot clinker lines punish the load point, the edges and the return strand at the same time.
07Measurement Failure: Why Your Temperature Number Is Often Wrong
Everything above depends on knowing the temperature. If the number is wrong, every judgment built on it is wrong, and in our audits the temperature number is wrong more often than any other data point.
Failure Mode #9: Measuring Temperature in the Wrong Place With the Wrong Tool
An infrared thermometer pointed at a running belt reads a mix of belt surface temperature, reflected radiation from the surroundings and, if the viewing angle is poor, the hot material on top of it. Emissivity settings are usually left at the factory default, which is rarely correct for a black rubber surface. Readings taken from an angle across a moving belt are averaged over an unknown area. The result is a number that may be 10 °C to 25 °C away from the truth in either direction.
A contact thermocouple or a surface probe gives a more defensible reading, but only if it is applied at the right place and for long enough for the junction to stabilise — 20 seconds or more on a fast-moving belt, and never with the probe pressed so hard that friction adds heat. Where we need a reliable number we use the belt itself as the sensor: a non-contact infrared logger aimed at a fixed point, or a trailing thermocouple embedded in a belt sample run through the same path, correlated against the portable instrument.
Position matters more than instrument. The correct measuring station is 1 m to 2 m downstream of the load point, where the discharged material has transferred its heat into the cover and before ambient air and travel time have started to cool it. Measure at the discharge as well, because that is your material temperature. Measure the return strand at the furthest point from the head pulley, because that is where a belt fails to cool. And take the readings with the belt loaded at normal tonnage: an empty belt tells you nothing about thermal duty.
| Method | Typical accuracy on a moving hot belt | When we use it |
|---|---|---|
| Infrared thermometer, hand-held, factory emissivity | ±10 to 25 °C, direction unpredictable | Fast screening walk-around, never for a specification |
| Infrared thermometer with emissivity set for the actual cover | ±5 to 10 °C | Routine condition monitoring at a fixed station |
| Contact thermocouple held on the belt surface | ±2 to 5 °C with correct technique | Complaint investigation and temperature-data requests |
| Embedded or trailing thermocouple on a belt sample | ±2 °C or better | Design verification on a new line or a disputed claim |
| Thermal imaging camera, whole conveyor | Best for finding hot spots, not for absolute values | One-off survey to locate where the heat actually enters |
08Reference Data: What Each Cover Compound Can Actually Take
The ranges below are the figures typically quoted for continuous service in belt specifications and supplier literature. They are not guarantees, and they are not interchangeable between suppliers, because the same polymer family can be compounded for very different duties. Treat the table as a way to eliminate obviously wrong options, then confirm the actual compound against your measured temperature data.
Continuous Service Limits by Cover Compound
| Cover compound | Commonly quoted continuous range | Strength | Known weakness in hot service |
|---|---|---|---|
| NR (natural rubber) | About −40 °C to +70 °C | Best cut and tear resistance | Ages quickly above 70 °C; swells in oil |
| SBR (styrene butadiene) | About −40 °C to +80 °C | Good general-purpose all-rounder | Hardens and cracks in the 90–110 °C band |
| CR (polychloroprene / neoprene) | About −25 °C to +100 °C, up to roughly +120 °C for specific grades | Balances heat, oil and weather resistance | Higher cost; poor low-temperature flexibility |
| NBR (nitrile) | About −20 °C to +100 °C | Best oil and grease resistance | Only moderate heat ceiling; poor ozone resistance |
| EPDM | About −40 °C to +120 °C, with short-time peaks above that | Best heat, ozone and weather resistance | Poor resistance to oil and to fats of any origin |
Two conclusions follow from that table when you are diagnosing rather than buying. First, if your measured carry-side temperature is above 100 °C and the failed belt was SBR or NR, the failure mode was predictable and the compound is the problem. Second, if the failed belt was EPDM and the line handles anything oily, the compound may still be the problem — but for the opposite reason, and changing to a hotter polymer will make it worse rather than better.
Short-Time Peaks and the Retention Rule
Peak tolerance is normally expressed as a temperature and a duration: a belt rated for 120 °C continuous may tolerate brief excursions well above that, but the duration is measured in seconds to a minute or two, not in minutes to hours. A peak that lasts ten minutes is not a peak; it is an operating condition. Plants get this wrong at start-up after a shutdown, during a kiln upset, or when a chute plugs and hot material sits stationary on a belt for twenty minutes.
The retention rule we apply when a belt has survived one or more known excursions: check tensile strength retention before restoring full load. If retention is still above 70 %, resume normal operation and shorten the next inspection interval. Between 50 % and 70 %, reduce tonnage and plan the replacement into the next opportunity. Below 50 %, the belt is no longer capable of carrying its rated load safely and should come off. This is the same pass/monitor/replace logic we use for every heat-related decision, and it exists because "it still looks fine" is not a safety case.
Where a line has recurring excursions, our notes on modern heat resistant rubber belt solutions cover the construction changes — breaker plies, thicker covers, heat barriers — that raise peak tolerance without pretending the continuous rating has changed. If you buy in volume across several sites, it is also worth reviewing whether the specification you issue describes belting by grade name alone, because a grade name without temperature data is not a specification.
09Judgment Criteria: Deciding When a Belt Is Finished
Arguments about belt condition usually come down to two people looking at the same belt and disagreeing. Numbers stop those arguments. These are the thresholds we use when we are asked to give an opinion on whether a belt should stay in service.
Hardness, Retention and Thickness Thresholds
| Indicator | Continue in service | Monitor and plan | Remove |
|---|---|---|---|
| Cover hardness rise (Shore A vs as-installed) | Up to 15 points | 15 to 20 points | Above 20 points |
| Tensile strength retention after heat exposure | Above 70 % | 50 % to 70 % | Below 50 % |
| Remaining cover over the carcass at the load point | More than 70 % of original | 40 % to 70 % of original | Less than 40 % of original |
| Ply-to-ply adhesion after cut section | Fabric tears before the bond fails | Partial bond failure, no separation | Visible separation or delamination |
| Splice condition | Flat, no step, no lift | Slight step or edge lift, retorque and watch | Corded fabric visible, opening at a step |
Test Methods That Turn an Opinion Into Data
Standards exist precisely so that a supplier and a plant can agree on what "aged" means. ASTM D573 covers the heat aging of rubber in an air oven, and it is the reference most commonly cited when a retention figure is quoted. ASTM D378 and ISO 583 address fabric-carcass adhesion and total belt thickness respectively. DIN 22102 and RMA Grade I / Grade II set cover grade frameworks that are widely used in tenders, while AS 1332 does similar work for Australian projects. Fire and conductivity behaviour is handled separately through ISO 340 and ISO 284, and underground acceptance in the US through MSHA 30 CFR Part 14.
When a plant sends us a sample and asks for an opinion, we ask for three things: the as-installed hardness record, the measured service temperature at the load point, and at least two cut samples from different stations. With those, the retention figure does the arguing. Without them, everyone involved is describing a feeling.
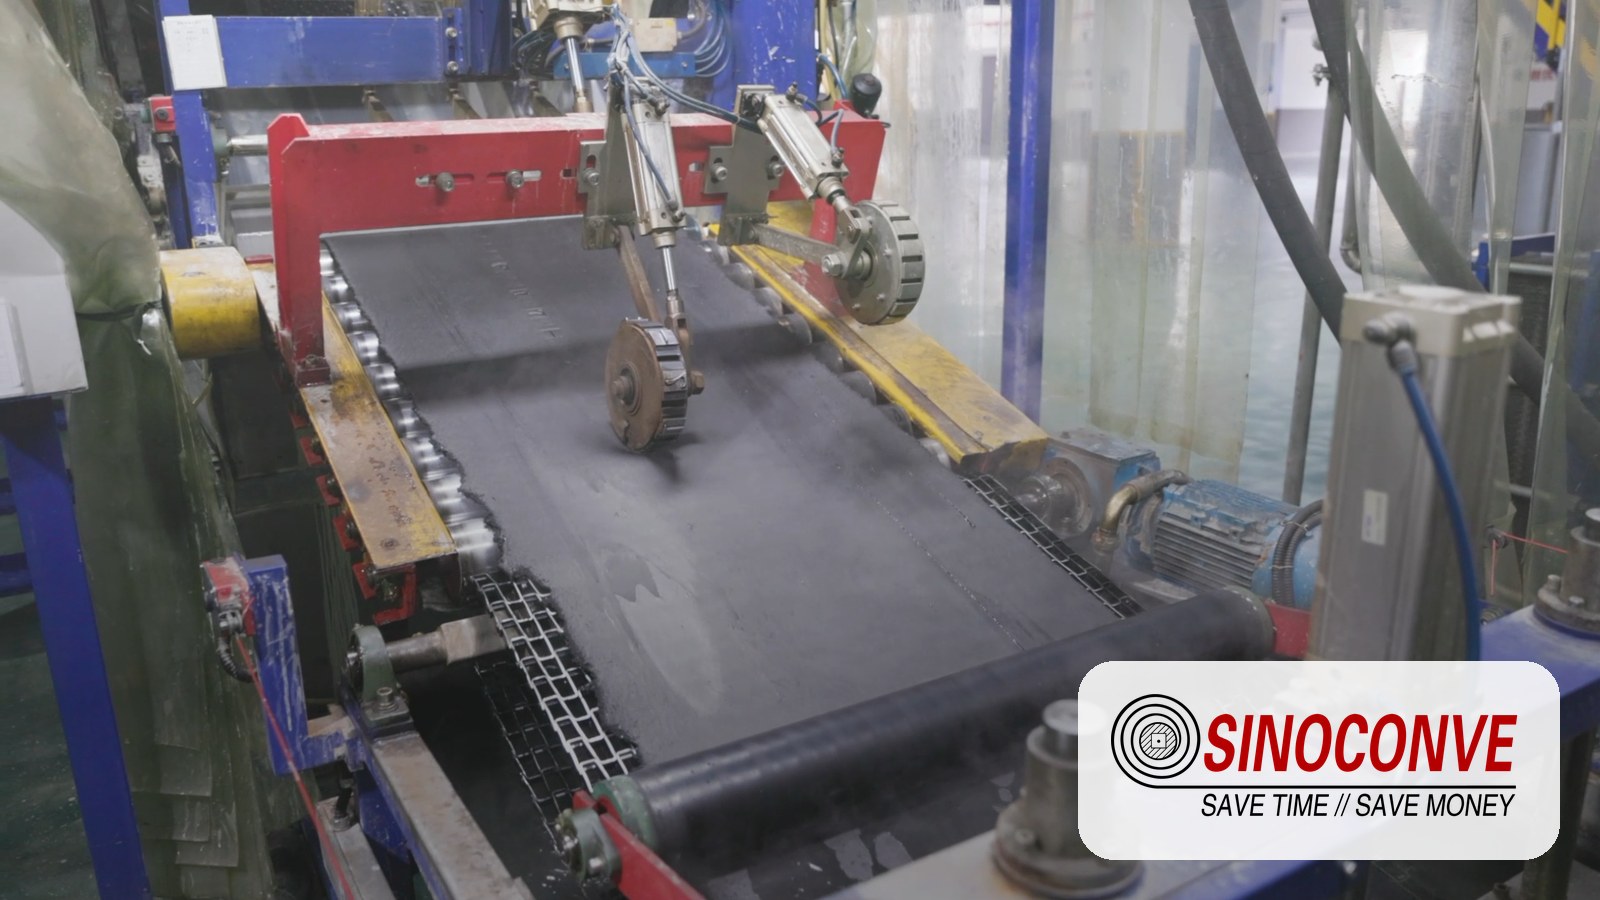
Hardness and remaining cover thickness, read at the same three stations, are the fastest way to grade a heat-damaged cover.
10Short-Term Fixes: Buying Weeks Without Fooling Yourself
Short-term fixes exist to keep a line running until a planned stop. They are legitimate engineering, provided everyone understands that none of them restore the belt. What they do is slow the rate of damage so the replacement happens on your schedule instead of at 3 a.m.
Fix A: Cut the Heat Entering the Belt
This is the highest-value move and the least expensive. Re-aim the chute so material lands in the direction of belt travel and at the belt's centreline rather than at an angle across it. Lift skirting rubber so it clears the belt instead of dragging on it. Add a wear liner where the material stream currently bounces. Reduce the drop height if the design allows, because a shorter free fall means less impact energy and less dust. In our experience a well-aimed chute can lower the peak belt temperature at the load point by 10 °C to 20 °C, which on a belt that is marginally over its rating can double the remaining life.
Fix B: Reduce the Load on the Damaged Section
Derate the conveyor. Running a heat-damaged belt at 70 % of design tonnage reduces both the thermal input and the mechanical stress, and it buys time almost proportionally. On a clinker line we would rather see the operator slow the feed by 20 % for four weeks than have the belt fail during the four weeks. If the damaged zone is localised, note where it is on the belt and check it every shift so you catch crack growth before a tear starts.
Fix C: Cool the Belt Where It Is Safe to Cool
Water sprays help and they also cause the blistering described in failure mode #3. The compromise is to cool the return strand, not the carry side, and to use a fine mist rather than a jet so that water flashes off before it soaks in. Air movement is safer still: a correctly placed fan in an enclosed gallery can drop the belt's return-side temperature by 5 °C to 8 °C for very little cost. On belts with electrically conductive covers, keep the water away from the drive end and the earthing connections.
Fix D: Repair Discipline in the Hot Zone
Use a vulcanised repair or a properly cured splice — never a cold patch — and position it away from the hottest band of the belt. Where a section of cover is missing, fill it with a repair compound matched to the cover and re-check it at 48 hours, one week and one month. Two of those three checks should show no change; if the repair keeps lifting, the belt is beyond repair and the time is better spent on ordering. Any belt carrying a hot load should also have a fire detection or at least a heat-trip arrangement, and it must be tested, not merely installed.
11Long-Term Fixes: Change the Design, Not Just the Belt
Every short-term fix above is a schedule, not a solution. The long-term answer is to remove the condition that killed the belt. These are the four levers that matter, in the order we would pull them.
Fix E: Move to the Compound That Matches the Actual Temperature
If the measured carry-side temperature is between 90 °C and 120 °C, SBR is the wrong compound and an EPDM cover is usually the right one. If it sits between 80 °C and 100 °C with oil present, CR is more often the sensible compromise than EPDM. If it sits above 120 °C continuously, no standard rubber compound will give long life and the discussion has to move to construction and heat shielding, not polymer. Where a plant has to buy several grades for different lines, it is worth consolidating through one distributor relationship so that the temperature data for each grade travels with the belt.
For chemical plants and fertiliser lines, compound selection has to satisfy a second set of demands at the same time, and we cover that separately in our article on compound selection for fertiliser and chemical plants. The heat-resistant choice there is usually a compromise rather than a clean win.
Fix F: Change the Construction
Two belts made of the same compound can behave completely differently. A thicker cover over the load zone absorbs more impact energy before the carcass sees it. A carcass with better heat resistance protects the strength layer, which is what actually keeps the belt from breaking. On clinker and sinter lines, a breaker ply laid under the cover spreads a point load across a wider area and is the single most effective change we can make to a conveyor belt for clinker service. Cost increase is real but usually far below the cost of an extra belt change per year plus the production loss around it.
Fix G: Add a Barrier or a Heat Shield
Where radiant heat is a contributor, a reflective shield between the hot source and the belt is cheap, quick and effective. Where the material itself is the problem, the options are an insulating layer under the load point, a short run of heat-resistant slat or pan conveyor at the discharge, or a water-cooled section. Any of these changes the duty on the belt from "hot at the load point only" to "uniform and manageable", and uniform duties are the ones belts survive.
Fix H: Redesign the Transfer Point Properly
The transfer point is where most of the heat and most of the damage enters. Get the material moving in the direction of the belt, land it at the centreline, control the velocity so the stream does not slide across the belt, minimise free fall, support the belt with the right idler spacing and impact idlers, and keep the skirt clearance to a few millimetres. When these are right, the belt no longer needs to be exceptional. When they are wrong, even an excellent belt fails, and that is the situation behind a large share of the complaints we investigate. The same principle applies when the line feeds a crusher or handles blast rock, which is why our notes on belting for mining and quarrying operations treat the transfer point as a primary design item rather than an accessory.
12Repair, Replace or Re-Engineer: A Decision Table
Bring the measurements from sections 08 and 09 to this table and the decision makes itself. If two rows disagree, the more conservative row wins.
| Situation | Immediate action | Next shutdown | Permanent fix |
|---|---|---|---|
| Hardness up 12 points, tensile retention 78 %, cover 80 % remaining | Keep running, shorten inspection interval | Re-measure and record the trend | Improve ventilation in the gallery |
| Localised burn-through crater under the chute | Stop, vulcanise a repair away from the hot band, derate feed | Replace the damaged section or the belt | Thicker cover, breaker ply, chute redesign |
| Widespread crazing with retention between 50 % and 70 % | Reduce tonnage, order the replacement now | Install the new belt, keep the old as a spare section | Upgrade compound and confirm the temperature data |
| Cover soft, swollen and tacky in a drip pattern | Fix the oil leak immediately | Replace with an oil-resistant cover | Eliminate the leak source and review lubrication practice |
| Edge cracks plus an 8+ point hardness difference edge to centre | Fix tracking and replace seized idlers | Vulcanised edge repair or belt replacement | Review idler condition programme and belt training |
| Splice efficiency below 60 % after less than 12 months | Re-splice with the cover compound and relocate the joint | Verify cure cycle for the high-temperature compound | Set splice position standards for hot lines |
13What We Need From You to Quote a Replacement
A replacement belt that repeats the failure was not a replacement. It was a repeat purchase. The gap between a four-month belt and a four-year belt usually comes down to what reaches us with the first enquiry, and the whole list takes about twenty minutes to collect on site.
The Data We Ask For
Start with the belt itself: width, length, ply count, and the original specification if anyone can still find it. Then the duty. What is the lump size, and how many tonnes per hour actually cross the belt on a normal shift? Now the temperatures, and this is where most enquiries fall down. We need the material temperature at the discharge and the belt temperature 1 m to 2 m after the load point, both taken under normal load rather than at idle. What is the ambient in the gallery? Does anything oily, fatty, acidic or alkaline touch the cover? Is the installation underground or in a classified dust zone — that single answer decides whether you need an anti-static and flame-rated build. Finally, give us the history: how many belts in the last two years, and exactly where each one failed.
When a plant supplies these numbers, we can usually identify the failure mode from the desk before a sample arrives, and we can tell the difference between a belt problem and an installation problem. That matters commercially as much as technically: nobody wants to pay for a higher-grade belt to compensate for a misaligned chute.
Photos and Samples
Three photos will save a week of email. Shoot the failed zone with the chute in frame, so we can see where the material actually lands. Shoot the belt surface from directly above with a tape measure or a boot in shot for scale. Shoot the edge. If the same failure has happened twice, add a 100 mm cut sample from the failure and a second cut from a healthy station 50 m further along the line, bagged and labelled separately. We keep the list short on purpose: the goal is to remove guesswork, not to generate paperwork. Shorter queries about grades, lead times and documentation sit on our frequently asked questions page, and the measurement side of everyday belt selection is covered in our overview of how high temperatures affect conveyor belt life.
If you take one habit away from this article, take the measuring habit. Write the as-installed cover hardness of every belt into the same log you already keep for tonnage. Then, once a month, take two readings: carry side 1 m to 2 m after the load point, and the return strand at its furthest point from the head pulley. Note the tonnage that passed during the shift. Six months of that gives you a trend line, and a trend line turns every future failure argument into a five-minute decision. No instrument we can sell you is cheaper than a pencil.

14Frequently Asked Questions
How fast does a heat resistant belt age at 120 °C?
Faster than most plants expect. At a genuine 120 °C, expect measurable hardening inside 6 to 12 months and a hardness rise of 15 points or more within two years. Every 10 °C above the rated limit roughly halves the time to that point, so a belt quoted at 100 °C and run at 120 °C does not fail a little early. It fails at roughly a quarter of the life you planned for. And if that carry-side number is real, on a general-purpose heat grade, stop shopping for a belt. The belt was never the part that needed changing.
Can we run an EPDM conveyor belt on a line with oil mist or drips?
No — not unless you are happy with a six-month belt. An EPDM conveyor belt is the right answer for heat and the wrong answer for hydrocarbon oil, and it fails in the opposite direction to heat aging. The cover swells, softens and turns tacky instead of hardening, and with steady drip contact we have seen that start inside a few weeks. Fix the leak first, then put a CR or NBR-based cover on the oily sections. If the whole line is both hot and oily, send us the oil sample and we will pick the compromise.
What is the difference between ISO 340 conveyor belt testing and MSHA approval?
What is the difference? They are not competing standards, they answer different questions. An ISO 340 test describes how a belt sample behaves when a laboratory flame is applied to it, and buyers use the phrase ISO 340 conveyor belt as shorthand for flame-tested belting in tenders. MSHA approval under 30 CFR Part 14 is a US acceptance for belting in underground mines, issued against one specific product rather than against a factory. Neither one states a maximum service temperature. Neither replaces a conductivity test to ISO 284.
Does a fire resistant belt also tolerate clinker temperatures?
Not automatically, and this is one of the most expensive assumptions on a clinker line. Flame resistance and heat resistance are separate properties, so a belt can hold a perfectly valid flame certificate and still be a 90 °C belt. Carry 1,200 t/h of 200 °C discharge on that and it is gone inside a season. Ask for both numbers separately and in writing, and remember that surviving point impact is a construction question, not a rubber question: thicker cover, heat-resistant carcass, breaker ply.
Where exactly should we measure material temperature on the conveyor?
Two places, and both of them matter. Material temperature at the discharge or the chute, and belt temperature 1 m to 2 m after the load point — far enough for heat to have moved into the cover, close enough that ambient air has not already taken it back out. Then add the return strand at its furthest point from the head pulley, which on a 200 m enclosed gallery often reads only 10 °C to 15 °C below the carry side. Take all of it at normal tonnage. An empty belt tells you nothing at all.
How much hardness rise is acceptable before we replace a belt?
Up to 15 Shore A points above the as-installed figure is usually acceptable if you keep monitoring it. Between 15 and 20, start planning the replacement — that is the band where we watch covers go from crazed to properly cracked inside a single campaign. Above 20 points the cover has lost most of its elastic recovery, and the ±5 Shore A manufacturing tolerance means the whole comparison only works if somebody wrote the original number down. No baseline, no comparison.
Why did our splice fail after only four months in the hot zone?
Three causes cover almost every four-month splice we are asked about, and they are worth checking in this order. Did the splice compound actually match the belt's cover compound? We see mismatched rubber more often than any other single cause, and the joint then ages at a different rate from the belt on either side of it.Was the cure cycle set for a standard compound instead of a heat-resistant one? Or does the splice simply sit in the hottest band on the belt, within 2 m of the load point? That last one is a layout problem rather than a splicing problem. Move the joint; it is cheaper than a stronger splice.
Do we need an anti static conveyor belt in a dust-hazard transfer house?
Usually yes, if the material is combustible and the zone is classified. An anti static conveyor belt is specified so that charge cannot accumulate on the surface, and the threshold most specifications apply is a surface resistance below roughly 300 MΩ when the belt is new. That number is not permanent. Dust build-up, abrasion and slow loss of the conductive surface layer all push resistance up, and we have watched belts cross the limit inside 18 months in a dusty transfer house. Re-test periodically. A certificate from the day of delivery says nothing about this year.
Can we keep running a belt with blistered cover until the next shutdown?
Usually yes, but with conditions, and the first one is not negotiable. Mark the blistered zones so the next shift can see whether they are growing. Check the edges for crack initiation every shift, and take the load down if the blisters sit under the impact point. Keep wash-down water off the carry side, because that is what feeds them. And never cut and patch a blister; the repair traps the same moisture and lifts again within a month. If a blister overlaps a splice or opens into the carcass, you are out of the run-to-shutdown category and should be planning the change-out.
15Related Products You May Need
- Rubber conveyor belt — EP and NN carcass, heat, abrasion and oil grades
- EP rubber conveyor belt — polyester/nylon carcass with an EPDM or CR cover, which is usually our answer for a 120 °C line moving 900 t/h
- EP1000 stone crusher conveyor belt — for hard rock and high impact
- Chevron conveyor belt — profiled surface for inclined lines carrying hot, loose material
- V-belts for conveyor drives
16Related Blog Posts
- Heat resistant conveyor belt ultimate guide 2026: types, grades and how to choose — start here if you are still at the specification stage and nobody has failed yet
- Heat resistant conveyor belts for cement plant clinker handling
- Oil resistant conveyor belt: what buyers should check first — read this before accepting an EPDM cover on a line with drips
- Fire resistant conveyor belt buyer's check
- Heat resistant conveyor belt supplier temperature data — what a data sheet should state, and what it should not
- How high temperatures affect conveyor belt life and performance