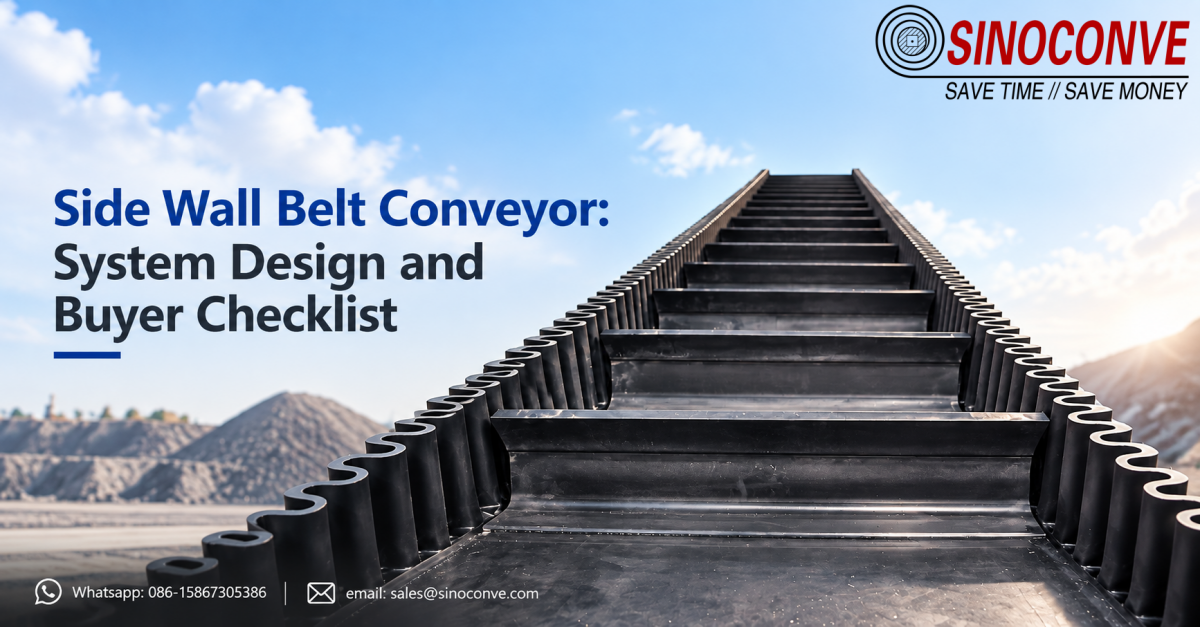
A side wall belt conveyor is a bulk-handling machine whose rubber belt carries molded corrugated side walls and cross cleats, so the belt forms a flexible pocket that holds material on a steep incline instead of letting it slide back. In our shop we call the belt itself a sidewall conveyor belt, and the complete machine a side wall belt conveyor; that distinction matters the moment you write a specification. Where a standard troughed belt tops out near 18 degrees, a sidewall conveyor climbs at 45 to 60 degrees, and vertical-lift units run at 90 degrees. This article covers the machine and the system around it, from route layout and infeed to tensioning, tracking and the documents a buyer should demand before sign-off.
01How a Steep-Incline Machine Replaces a Transfer Tower
One sidewall unit can climb from a primary crusher discharge straight to a silo top, and that single run is the whole commercial argument for the machine. Every transfer point you delete takes a chute, a set of impact idlers, a dust-collection tie-in and a standing spill problem away with it. At a quarry near Ningbo we replaced four inclined troughed conveyors and three transfer stations with one 58-degree unit, which removed eleven leak points from the weekly wash-down list.
Capacities we size most often land between 50 and 600 tonnes per hour on belt widths from 500 mm to 1,600 mm, and the machine has to be laid out around the worst material the plant will ever throw at it rather than the average sample in the design report. Three mechanical jobs then have to be solved together, and they interact. The belt must hold the load through the transition from horizontal to steep. The return strand must survive the walls folding past it, and the take-up has to keep enough tension that a fully loaded belt does not slip.

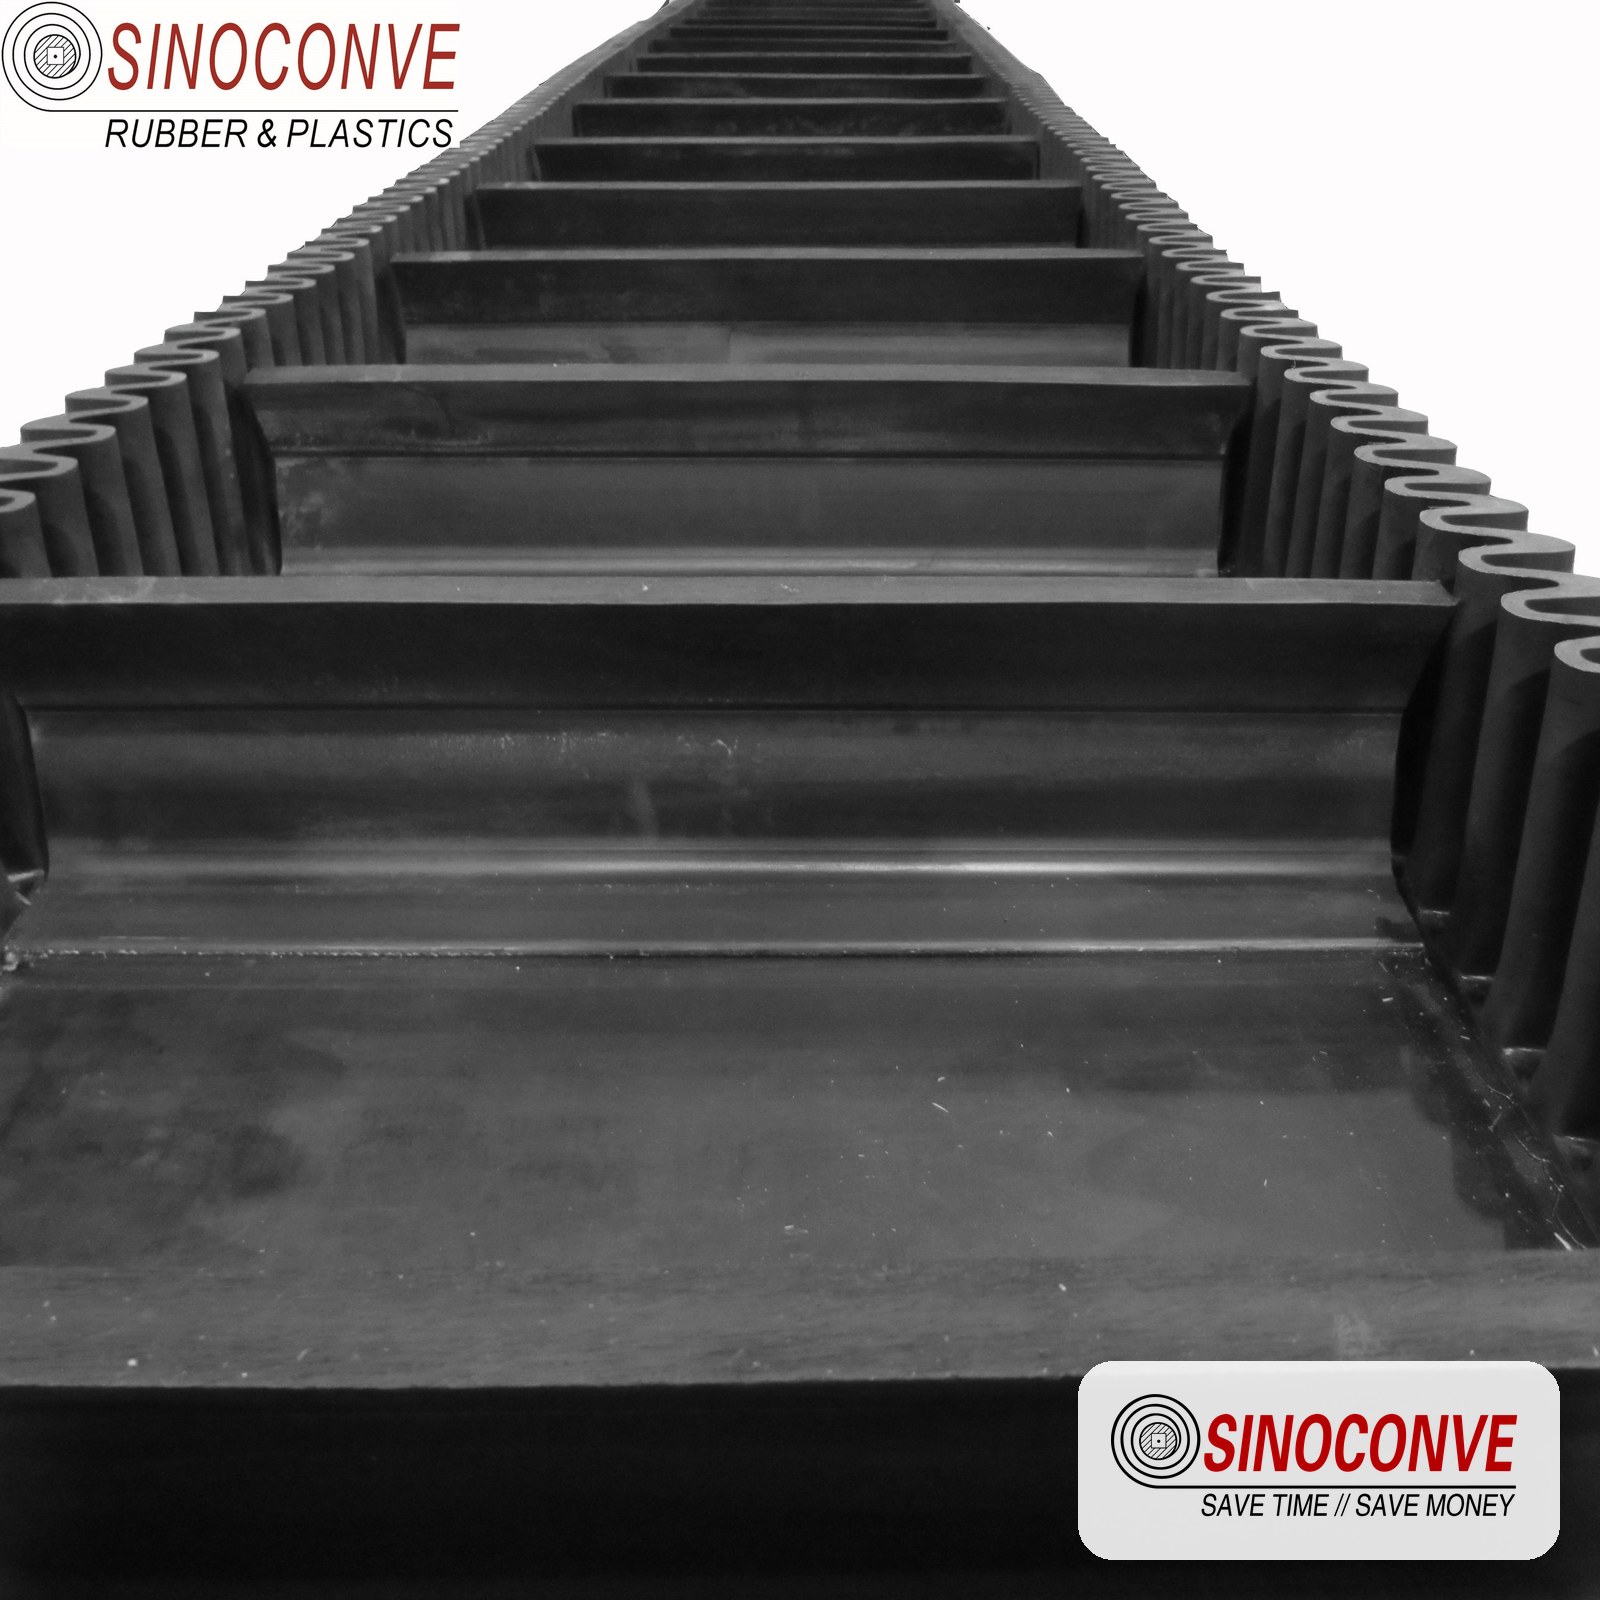
A single steep-angle unit replacing several inclined troughed belts and their transfer towers.
02Layout Forms and Route Engineering
Almost every real installation is a combination of three gentle transitions. Material is loaded on a horizontal or lightly inclined section, the belt curves upward through a convex arc, runs at its working angle, then flattens through a concave arc into the discharge point. The arcs are where the machine is won or lost. A convex arc that is too tight lifts the side walls away from the carrying idlers and opens the pocket; a concave arc that is too tight pinches the walls and grinds them against the rollers on every pass.
Horizontal, Inclined and Vertical Combinations
You can run one machine through all three attitudes in a single continuous line, which is usually what a brownfield site needs because there is no room for an extra tower. The transition radius depends on belt width, the side wall height, the belt's own flexibility and the tension carried at that point in the run. Our engineers ask the belt maker to confirm the minimum convex and concave radii in writing for the exact belt before the structural drawings are frozen. Skipping that step is the single most common cause of a wall that peels away from the base belt in the first year.
A vertical section at 90 degrees is possible, but it changes the loading logic completely. There is no room for a normal feed chute at the bottom of a vertical lift, so material is usually metered in through a short horizontal lead-in of two to three metres before the belt turns up. Without that lead-in, the pocket is still half empty when the belt starts climbing and the load slides back against the cleats.
Single Steep Unit or Multi-Stage Transfer
The choice between one steep machine and a chain of inclined belts is not only about capital cost. It is about how many places the material can spill, how much dust collection you must build, and how many drives need attention every week. A single unit concentrates all of that into one maintenance route, which most plant managers prefer once the machine is running well. The trade-off is that a single large unit has no redundancy, so some operators deliberately keep a parallel troughed route.
| Route arrangement you are likely to consider | Duty that this arrangement suits best | Constraint you must respect in the layout |
|---|---|---|
| Horizontal feed, one long single incline, horizontal discharge suits most quarry pit-to-stockpile runs. | Fixed material, steady tonnage and a clear straight-line space between two fixed points. | The incline angle is fixed by the belt and wall height, so the civil route must fit that geometry. |
| Steep incline plus a short vertical rise at the top is used where a silo or bin must be reached over an obstruction. | Tight urban or port sites where no intermediate transfer tower can be built at all. | A short horizontal lead-in is mandatory before the vertical section so the pocket is full when it turns. |
| Two or three moderate sidewall units in series spread the lift across shorter, cheaper structures. | Very long lifts where a single belt would need an impractical wall height or tension. | Each extra transfer point adds a chute, a spill risk and one more place that needs dust control. |
| A reversible or shuttle layout lets one sidewall belt serve two discharge bins on the same head structure. | Plants that store the same product in two silos and want to fill either one on demand. | Reversing a loaded steep belt demands a heavier take-up and a very careful control interlock. |
Tying the Machine Into the Process
Where the conveyor sits in the flowsheet decides more than the structure. If it follows a crusher, the feed is coarse and the impact load on the loading zone drives the idler choice. If it feeds a screen or a silo, the discharge chute and the belt speed must be matched so the stream is not thrown against the far wall. We have seen a perfectly good sidewall unit throw material five metres past a chute mouth because the head pulley speed was set for a flat belt and never revisited.
Drive power also climbs steeply with angle, because the belt is now lifting the full product height rather than only overcoming friction. A rule we apply early in a project is to sketch the load-lift component first, then add friction and start-up margin, and only then pick the gearbox. Leaving that lift term until the electrical package is tendered is a reliable way to end up with a motor that cannot start a loaded belt, and by then a conveyor belt distributor can sell you a bigger drive, but the structure is already poured.
03Infeed Design Without Off-Center Loads or Impact Damage
Feeding a sidewall belt is harder than feeding a flat one, because the pocket is only as useful as the way it is filled. Material that lands off-center pushes the belt sideways at exactly the point where the walls are tallest, and the belt answers by wandering toward the low side. Design the loading zone so the stream lands in the middle of the pocket, traveling in the same direction as the belt, at roughly belt speed or a touch above it. Anything slower rubs the material along the base belt, and anything thrown in sideways invites a tracking problem.
Getting the Load Centered in the Pocket
Two things control centering: the incoming chute geometry and the vertical drop from the previous stage. A chute that discharges at an angle will bias the stream to one wall no matter how well the structure is aligned. We usually ask for a dead-box or a curved spoon at the chute outlet, so the material lands softly rather than spraying across the belt. On rock duties, a chain curtain or a rock box built up in the chute slows the material before it reaches the belt and takes most of the impact energy out.
The drop height deserves a number, not a guess. On one cement plant job the feed dropped 1.4 metres onto a 1,000 mm belt and the operator was replacing loading-zone idlers every six weeks. We cut the drop to about 400 mm with a slanting chute and added impact rollers under the loading point, and idler life stretched past a year. If your site already has heavy impact damage in a loading zone, our notes on loading zones cover the roller side of that fix.
Skirtboards, Wear Liners and Loading-Zone Support
Skirtboards on a sidewall belt do a different job than on a troughed belt. They are not holding a trough shape; they are confining the stream until belt speed has taken hold of the material. Because the side wall runs close to the skirt, the clearance has to be set generously, typically 15 to 25 mm, and the skirt rubber must be soft enough not to press the wall down. A hard, tight skirt is a common cause of wall abrasion in the first 20 metres of the run.
Under the loading point the belt needs real support. A sidewall belt carrying a deep pocket of rock is heavy, and unsupported belt between idlers will sag and pull the walls inward. Use closely spaced impact idlers or, on short heavy-duty machines, a flat supporting pan with a low-friction top surface. That surface has to be smooth, because the cleats and the wall base pass over it on every revolution and a rough edge will shave the wall root within months. Replacement rollers are also discussed in our conveyor roller guide if you need the wider picture.
Field note from our engineers: On a 42C clinker corridor in summer we measured a 30 mm belt wandering 40 mm to the left only when the feed chute was more than half full. The belt was not at fault at all. The chute had a bent wear plate that threw the stream off-center once the flow rate passed 120 tonnes per hour. Straightening the plate cured a tracking problem that three site teams had blamed on the belt.
04Discharge, Chutes and Return-Side Residue
The discharge end is where a steep belt gives back its energy, and it needs as much attention as the loading point. Material leaves the pocket at the head pulley with the belt speed, so the trajectory is set by speed rather than by angle. Match the chute mouth to that trajectory and the stream lands where you want it. A discharge chute set too far back will make the stream clip the chute lip and drop material back onto the return strand.
Chutes That Do Not Throw Material Back
We size the discharge chute a little wider than the belt and set the rear lip just clear of the belt edge, so material is collected rather than deflected. On a vertical-lift machine the discharge is sudden and the chute becomes a small hopper, so build it with a replaceable wear liner and a generous inspection door. Cleaning access matters more than people expect: a chute you cannot open is a chute that plugs, then overflows onto the walkway during a shift change.
Residual material is the quiet problem on every steep belt. Even a well-run machine leaves a thin film of dust and fines on the belt after discharge, and on a steep profile that film can cling until the belt has turned horizontal on the return side, where it drops into the return structure and eventually rubs the side walls. Scrapers on a sidewall belt must sit where the belt is flat and the walls are clear, and be forgiving enough not to damage the cleats as they pass. Where scrapers cannot reach, a wash or air-blast point is the practical fallback; our guide to belt cleaning methods covers those options.
Where the return strand carries fines back toward the tail, the residue either falls into a collection trough or, worse, migrates under the belt and wedges against a return roller. That wedged material is abrasive and it wears the wall root from the outside, which is the last place most maintenance teams think to look. A simple rubber flap near the tail, plus a weekly inspection of the first ten metres of the return run, catches most of it. Keeping dust out of the machine also reduces the load on every scraper, which is why we often specify a dust-resistant conveyor belt compound for chronic carry-back duties.
05Return Run, Take-Up and Why Tension Matters More
On the return side the side walls hang downward, and that single fact drives the whole support design. A troughed belt returns on flat idlers and never touches them with anything but its own cover. A sidewall belt returns with two corrugated walls reaching down toward the structure, so the return rollers have to catch the belt body while leaving the walls free. If a return roller catches a wall, the wall folds, cracks along the base, and the belt is scrap.
Supporting the Folded Return Strand
Two return arrangements are common, and the right one depends on wall height. A pair of flat return rollers set close together, one each side of the belt centre, supports the belt body while the walls hang into the gap between them. A single wide roller with the walls passing on the outside works on shallow-wall belts but is unforgiving if the belt tracks even slightly off. Tall-wall machines almost always use the split-roller approach because it tolerates more misalignment before a wall is pinched.
Return roller spacing on a sidewall belt is tighter than on a comparable troughed belt, because the belt is less stiff across its width and the hanging walls add a twisting load. We normally start at 1.0 to 1.2 metres and adjust after the first week, watching for the belt edge sagging between rollers. Choose rollers with sealed bearings for dusty duties, and our notes on a sealed conveyor roller for fine dust explain the bearing details.
Take-Up Travel and Take-Up Method
A sidewall belt is more sensitive to tension than a flat belt, and there are two reasons. First, the walls and cleats stiffen the belt, so it needs more force just to wrap the pulleys cleanly. Second, the elastic stretch of a stiff belt is smaller, so a small loss of tension moves the belt much closer to slipping. A take-up that would be fine on a troughed belt will usually let the belt slip on a cold, fully loaded start.
Give the take-up real travel. A useful working figure is 1.5 to 2.5 percent of the centre distance, and we often ask for more on long, steep machines where the belt runs hot and the structure moves with temperature. Screw take-ups suit short units because they are cheap and simple, while gravity or hydraulic take-ups suit long, heavily loaded machines because they hold tension constant as the belt stretches and settles. Whichever you choose, verify that the take-up can be adjusted while the machine is running, because one you can only touch during a shutdown will never be kept correct.
06Tracking: Why a Tall Wall Reacts So Strongly to Side Loads
A sidewall belt runs straighter than most people expect once it is set up, but it is far less forgiving than a flat belt when something goes wrong. The walls act like two tall fins, and any lateral force has a long lever arm to work with, which is why a machine that tracks perfectly empty can run off to one side the moment it is loaded unevenly.
Why a Tall Wall Amplifies Every Side Load
Picture the cross-section. A flat belt sitting on a roller is stable because its centre of mass is low and the roller crown gives it a self-centering tendency. Now stand a 200 mm wall on each edge and the belt behaves like a beam with two vertical ribs. A small tilt in a roller, a lump of rock caught under one edge, or a stream of feed landing off-center all push against those ribs, and the resulting side force is multiplied by the wall height. A 120 mm wall is manageable, but a 300 mm wall on the same belt will amplify the same misalignment well past the point where a training idler can correct it.
Loading is usually the trigger, not the cause. We have walked dozens of steep belts that tracked perfectly on a test run and then drifted after commissioning, and in most cases the belt was never the problem. The roller frame was out of square, the feed chute had shifted, or the structure had settled unevenly. Check those first, and our notes on EP belt tracking cover the same diagnostic order.
Alignment Tools and Correction Methods
Training idlers work on a sidewall belt, but they have to sit on the belt body only, never touching a wall. Angle them slightly in the direction you want material to move and they will nudge the belt back over a few revolutions. Do not over-correct: a training idler set at too steep an angle on a stiff belt will fight the take-up and wear the belt edge. On steep machines we often fit training rollers on the return side as well, because that is where a wandering belt first reveals itself.
Pulley crowning and pulley alignment come before any training idler. A head and tail pulley that are not parallel will move the belt to one side regardless of how many training rollers you bolt on. Check the frames with a laser or a taut string line, then check them again after the first loaded run. On one port installation a 3 mm shim under the tail pulley bearing solved a drift that two weeks of idler adjustment had failed to touch, and the hardware details are set out in our summary of roller and pulley supply.
| Symptom you will see on the machine | Usual root cause behind the symptom | First action you should take on site |
|---|---|---|
| Belt drifts only when the feed rate climbs above half capacity. | The incoming chute throws the stream off-center as the flow grows heavier. | Check chute wear plates and the stream position at full load, not empty. |
| Belt runs to one side on the return strand but is straight on top. | Return rollers are out of square or one has seized and turned into a plough. | Spin every return roller by hand and replace any that drag or wobble. |
| One wall shows a shiny wear stripe along its base within weeks. | A return roller or structural edge is grazing the wall on every pass. | Find the contact point and open the clearance before the wall root cracks. |
| The belt slips and squeals at the drive on a cold, loaded start. | Take-up travel is exhausted or the tension has dropped as the belt settled. | Re-tension to spec and confirm there is still usable take-up travel left. |
07Maintenance, Wall Replacement and Local Repairs
Nobody plans to replace a side wall, but every site eventually does. The wall is a wearing part in the same sense that a cover is a wearing part, and treating it that way keeps a good machine running for years instead of months. The trick is to catch damage early, because a wall caught at the base can often be repaired in place, while a wall that has torn through the base belt means removing the whole belt for a shop splice.
Replacing a Worn Side Wall Section
Walls fail in a predictable pattern. The base where the wall meets the belt cover cracks first, usually after the wall has been flexed repeatedly over a transition arc that was tighter than it should have been. Cleat corners chip next, especially on hard rock duties where a lump wedges between the cleat and the skirtboard. If you find cracking along the wall base over several metres, the cause is rarely the belt itself; recheck the convex and concave radii and the return roller clearances before ordering a replacement.
A short section of wall can be replaced with a hot or cold bonded patch, provided the damage is confined to the wall and has not reached the base fabric. The patch must match the wall compound and durometer, and the splice area has to be cleaned back to sound rubber before bonding. On a belt handling hot clinker, a cold patch will rarely survive, so hot bonding is the safer route even though it takes longer. If the belt also needs a full-length joint, plan the wall repair and the belt splice in the same shutdown.
Local Repairs and Realistic Spares
Local repair kits are worth keeping on the shelf, but they are not a substitute for planning. A repair that holds for six months is a good repair; one that fails in a fortnight usually means the underlying alignment problem was never fixed. The most commonly missed maintenance item is not the belt at all: it is the structure around it. Bolts on the skirt, the chute and the return roller brackets work loose on a steep, vibrating machine far faster than on a horizontal one, and a quarterly torque check prevents more belt damage than any amount of belt inspection. Where the machine runs in abrasive rock service, our guidance on abrasion-resistant belts for steep-angle conveying covers the compound choices that stretch both cover and wall life.
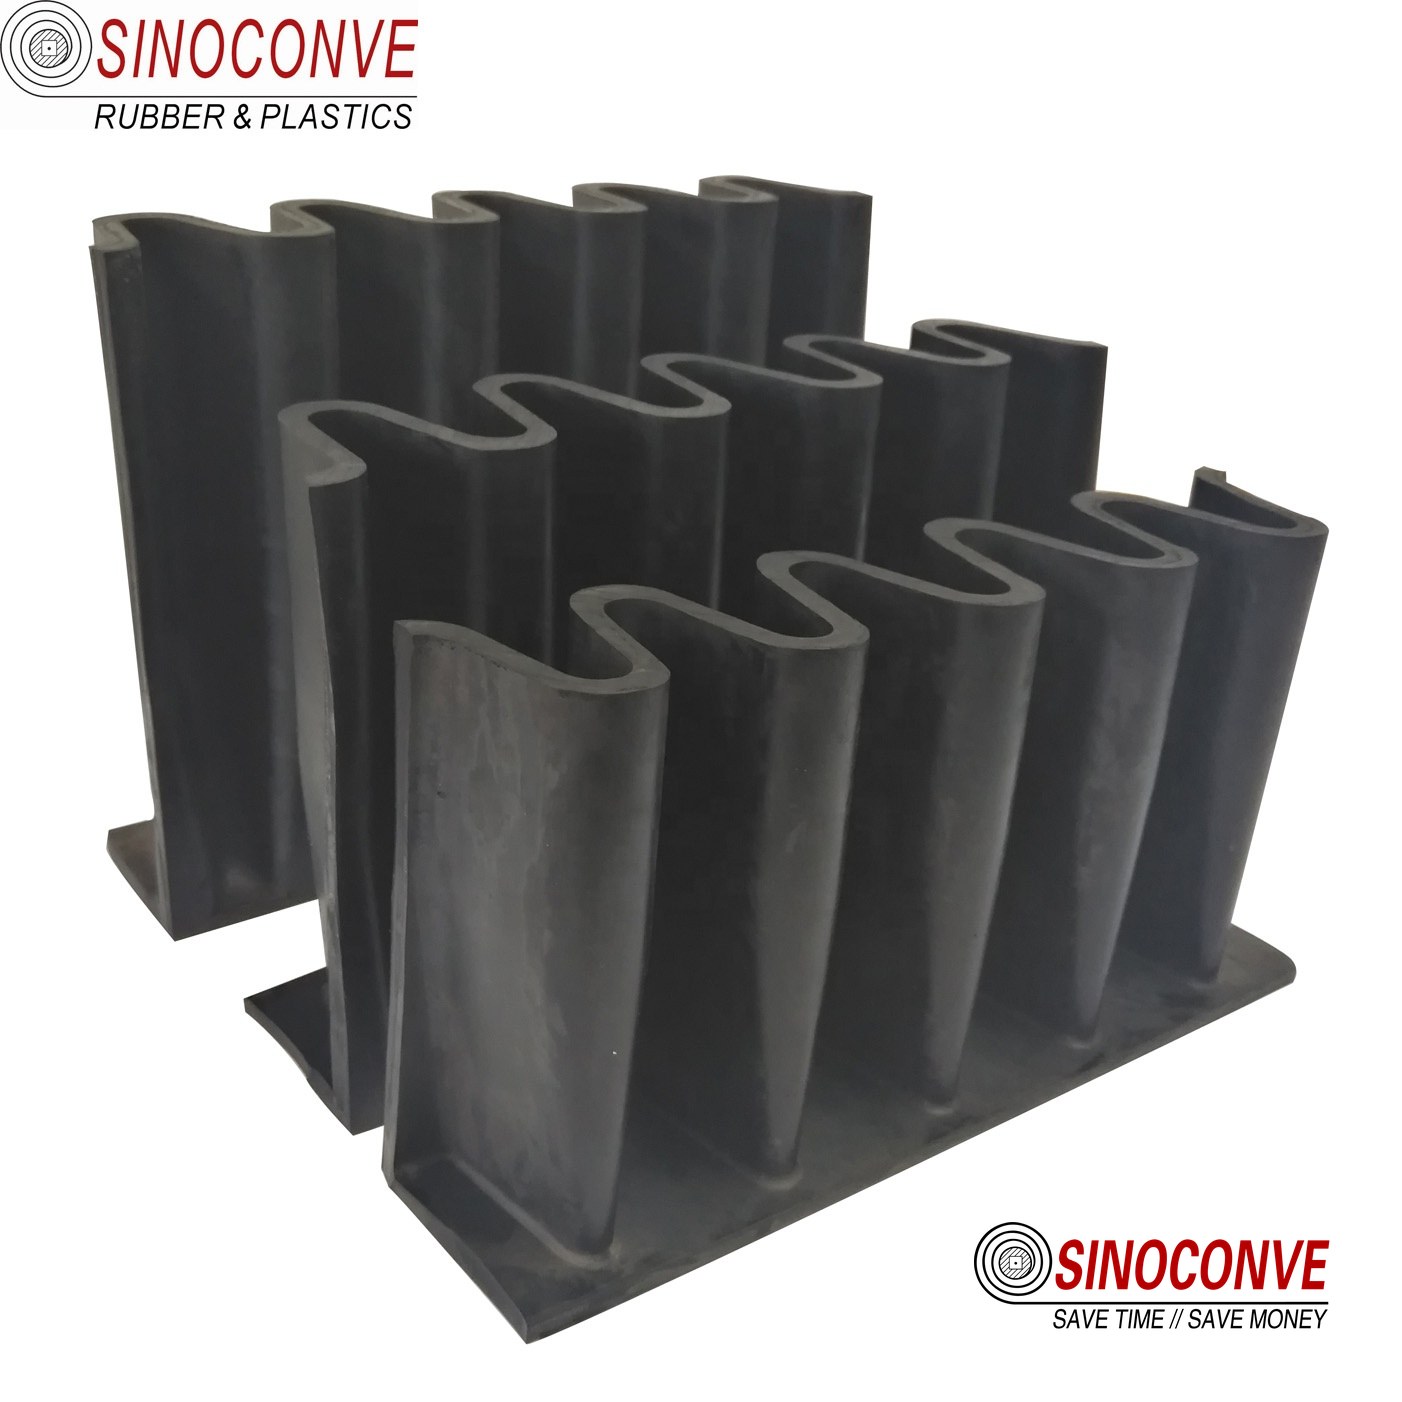
Wall base and cleat corners are the first places to inspect on a steep-angle machine.
08Side Wall Belt Conveyor vs a Standard Troughed Belt
The honest answer is that neither machine is better in the abstract. A sidewall belt wins on steep ground and tight footprints; a troughed belt wins on flat runs and long distances, where its simplicity and low cost per metre are hard to beat. The decision usually comes down to how much vertical rise you have to cover in how little horizontal space. Once the required angle passes about 25 degrees, the troughed belt starts needing help, and past 35 degrees a sidewall machine is usually the only sensible single-machine option.
Where the Steep Machine Earns Its Place
Footprint is the clearest win. A sidewall machine lifting 40 metres needs a fraction of the horizontal length a 16-degree troughed belt would need, which matters on a constrained port terminal or a plant hemmed in by public roads. The second win is the transfer count, since every transfer the troughed route needs brings its own chute, impact zone, dust pickup and spill point. Enclosure is the third, because one steep machine can be clad and vented as a single unit.
| Decision factor that shapes the choice | What a side wall belt conveyor offers | What a troughed belt with transfers offers |
|---|---|---|
| Ground space needed to reach the same lift height | Very little, because the belt climbs at 45 to 60 degrees and can go vertical if required. | A long inclined run, often three to four times the horizontal length of the steep option. |
| Number of transfer points and spill risks | Usually just the feed and the discharge, which keeps dust control simple and cheap. | One transfer per level change, each adding a chute, an impact zone and a dust pickup. |
| Maintenance cost and spare-part commonality across the plant | The belt itself is a specialized item with walls and cleats, so spares are less common. | Standard belts, idlers and pulleys are interchangeable across the whole plant. |
| Energy and running cost per tonne lifted | Higher on the incline because the machine is genuinely lifting the load against gravity. | Lower per belt, but each transfer adds its own drive and its own idle running losses. |
Where the troughed route wins is equally clear. Standard belts and idlers are cheap, stocked everywhere and understood by every maintenance fitter on site. A sidewall belt is a specialized product, and although any reputable rubber conveyor belt maker can supply one, the spare must match the original wall height and pitch or the pocket changes. On a very long, very flat run a troughed belt will also use less energy per tonne, because it is not fighting gravity with a heavy, stiff, walled belt.
One more point rarely shows up in a bid comparison but always shows up in the maintenance log: how easy the machine is to inspect on a wet Tuesday. A sidewall belt concentrates its wearing parts into one short run, while a chain of troughed belts spreads them over several hundred metres and several drives. Choosing a conveyor belt manufacturer is also about who will still be reachable when you need a matching wall section three years from now.
09Retrofitting a Troughed Line to a Sidewall Belt Line
Converting an existing troughed line is more involved than swapping the belt, because the structure, the drive and the take-up were all sized for a flat belt on a gentle angle. The belt is the easy part.
What Has to Change Before the Belt Arrives
Start with belt width and the idler frame. A sidewall belt of the same width often needs a narrower idler frame than the troughed belt it replaces, because the pocket does the containing and the belt does not need to be troughed into a deep curve. That usually means new carrying idler frames and new return rollers, and possibly new pulley faces if the belt width changes. Do not assume the old frames can be re-used at a steeper angle; the loading zone geometry in particular usually has to be rebuilt.
Then look at the drive. Raising the incline from 16 degrees to 50 degrees adds a large lift component to the power demand, and the existing motor and gearbox may be short of it. Run the numbers again on start-up torque, not just running power, because a loaded steep belt is hardest to start rather than hardest to run. Bring in an experienced conveyor belt supplier on the belt specification early, because the belt's minimum transition radii feed straight into the structural drawings.
Finally, plan the cleaning and the return. The old line's cleaning equipment was chosen for a flat belt and will not necessarily suit a walled one, and the return structure has to accept hanging walls instead of a flat belt. If the original line handled a hard, abrasive product, the new machine should use a heavier cover and wall compound, and an industrial conveyor belt built for stone crusher duty is a good reference point for the cover grade such a retrofit needs.
10Drive, Power and Start-Up Loads on a Steep Profile
A steep belt is hardest to start and easiest to run, which is the opposite of how many people size a drive. The resting load on an inclined carrying strand can be very large, and the motor has to break it loose before the belt moves at all. Size the drive for the start-up case with a full belt, then check that the running case does not overload the gearbox once the belt is up to speed.
Matching the Drive to the Lift
The lift term dominates as the angle steepens, and it scales with tonnage, height and gravity rather than with belt length, which is why two machines of the same length can have very different drives once one of them climbs. Add a soft-start or a variable-frequency drive on large steep units, because a gentle ramp-up protects both the belt and the gearbox and reduces the shock on the take-up.
The drive train itself is usually conventional: a motor through a gearbox to the head pulley, with a backstop to stop a loaded belt rolling backward when the power trips. That backstop is not optional, because a loaded steep belt that runs backward will fill the tail with material and can snap a take-up within seconds. Where the motor is remote from the gearbox, power is transmitted by shaft or by belt drive, and this is where a reliable transmission belt manufacturer matters. Matching wrapped or cogged belts to the duty is a job in itself, and our notes on V-belt manufacturer selection cover the profile choices for industrial drives of this size.
11Buying and Acceptance: Documents and Site Checks
A sidewall machine is really bought as two packages that must match: the structure with its drive, and the belt itself. Most disputes we see after commissioning are about a mismatch between what the structure assumed and what the belt actually needs, and fixing that in the contract is far cheaper than fixing it with a crane and a shutdown.
Documents to Request With the Offer
For the machine, ask for the general arrangement drawing, the transition radius confirmation, the idler and pulley layout, the drive calculation including start-up torque, and the take-up travel available. For the belt, ask for the construction data sheet, the cover grade with its abrasion and tensile figures, the wall height and cleat pitch, the minimum pulley diameters, and the joint specification. A belt maker who cannot state the minimum transition radii for their own belt in writing is not ready to supply a steep machine, however good they are on a flat one.
Ask, too, who stands behind the joint. A sidewall belt has at least one full-width splice, and its quality decides whether the belt survives its first year. Confirm whether the belt arrives with a vulcanised endless joint, a field splice, or a mechanical fastener, and who performs it, then split the warranty so the belt and the joint are covered together. If you are sourcing several machines, deal with a supplier who can also quote wholesale conveyor belts across the range, because a single relationship is easier to manage than four.
What to Verify on Site Before Sign-Off
Site verification is where the paperwork meets the steel. Run the machine empty first and watch the belt over an entire revolution, paying attention to the transition arcs rather than the straight sections. Then load it to rated capacity and repeat. Some faults only appear under load, and a machine that tracks beautifully empty can still drift the moment the pocket fills.
| Item you need to accept formally | Document or evidence you should hold | How you verify it on site yourself |
|---|---|---|
| Frame and pulley alignment across the whole machine | General arrangement drawing with the tolerance notes for square and level. | Measure head and tail squareness with a laser or string line before running loaded. |
| Belt construction, cover grade and wall dimensions | Construction data sheet, cover grade figures and the minimum pulley diameters. | Measure wall height and cleat pitch on arrival and compare them to the sheet. |
| Joint strength and the method used to make it | Joint specification plus a record of who made it and when. | Inspect the splice visually and confirm it runs evenly through the pulleys under load. |
| Take-up travel and the ability to hold tension | Take-up calculation showing the range for the belt's elastic stretch. | Load the machine cold, confirm no drive slip, and check travel left in reserve. |
| Loading zone, skirts and chute geometry at full flow | Loading and discharge drawings with the wear liner details noted. | Watch the stream at rated capacity and confirm it lands centered in the pocket. |
One last check costs nothing and saves a lot: confirm the spare parts list is real. Ask which consumables the machine uses, how long the supplier typically holds them, and whether the wall section is stocked or made to order. A belt made in a factory that also stocks the matching wall and cleat sections is far easier to live with over a ten-year life than one whose spare comes from another continent on a six-week lead time, and a short visit to the conveyor belt factory tells you more about that than any brochure.
12How This Article Fits With Our Sidewall Belt Guide
We have written about sidewall belting twice now, from two different angles, and it is worth being explicit about which page answers which question so you do not have to read both to find one number. This article deals with the machine: routes, transitions, loading, discharge, take-up, tracking, maintenance and procurement. The companion page deals with the belt body: how the pocket's capacity is calculated, the shape of the wall and cleat profile, and the ways a belt body typically fails.
Which Page Answers Which Question
If your question is how much material a given pocket will hold at a given belt speed, or how the wall profile changes the effective cross-section, the answer lives in our guide to the flexible sidewall conveyor belt and its construction. If your question is where to put the machine, how tight the transition arcs can be, how to feed it without drift, or what to check before sign-off, you are in the right place. The two pages meet at exactly one point, the transition arc: we specify how tight it can be for the machine to work, and the belt article explains how the belt body copes with that flexing.
Readers still weighing the belt type itself may also find the comparison between chevron and cleated belts useful, since the choice between a patterned surface and a walled pocket sits right alongside the machine decision. For steep-angle work in abrasive rock, our heavy-duty rubber belt for mining notes cover the cover grades that hold up in that service.
13Field Mistakes We See Again and Again
After enough site visits, the same five or six errors turn up on steep machines, and every one of them is avoidable at the drawing stage. The most expensive is a transition arc chosen from a catalogue rather than confirmed against the specific belt, which leads to walls peeling away from the base within the first year. The second is a loading zone designed for a flat belt and reused unchanged, which centres the stream well enough on a gentle angle and then fails once the machine is steep and the pocket is deep.
The Fixes Are Usually Cheap Before Start-Up
Take-up travel is the third repeat offender. A machine that slips at the drive on cold mornings usually has a take-up near the end of its travel, and oversizing it at the design stage costs a little steel and saves a rework. The fourth mistake is return roller clearance: a bracket left a few millimetres too low will graze the wall base on every pass, and the damage looks catastrophic by the time anyone notices.
The fifth and last is spares. Sites that keep a matching wall section, a matching adhesive, a few return rollers and one spare training idler on the shelf recover from a belt incident in a shift, while sites that do not wait weeks for a part. On a machine that may be the only route from the pit to the stockpile, that difference in recovery time is worth far more than the shelf space it costs to hold the spares. If you are comparing offers, a supplier who can also act as your long-term conveyor belt distributor for the whole plant is usually the one worth keeping.

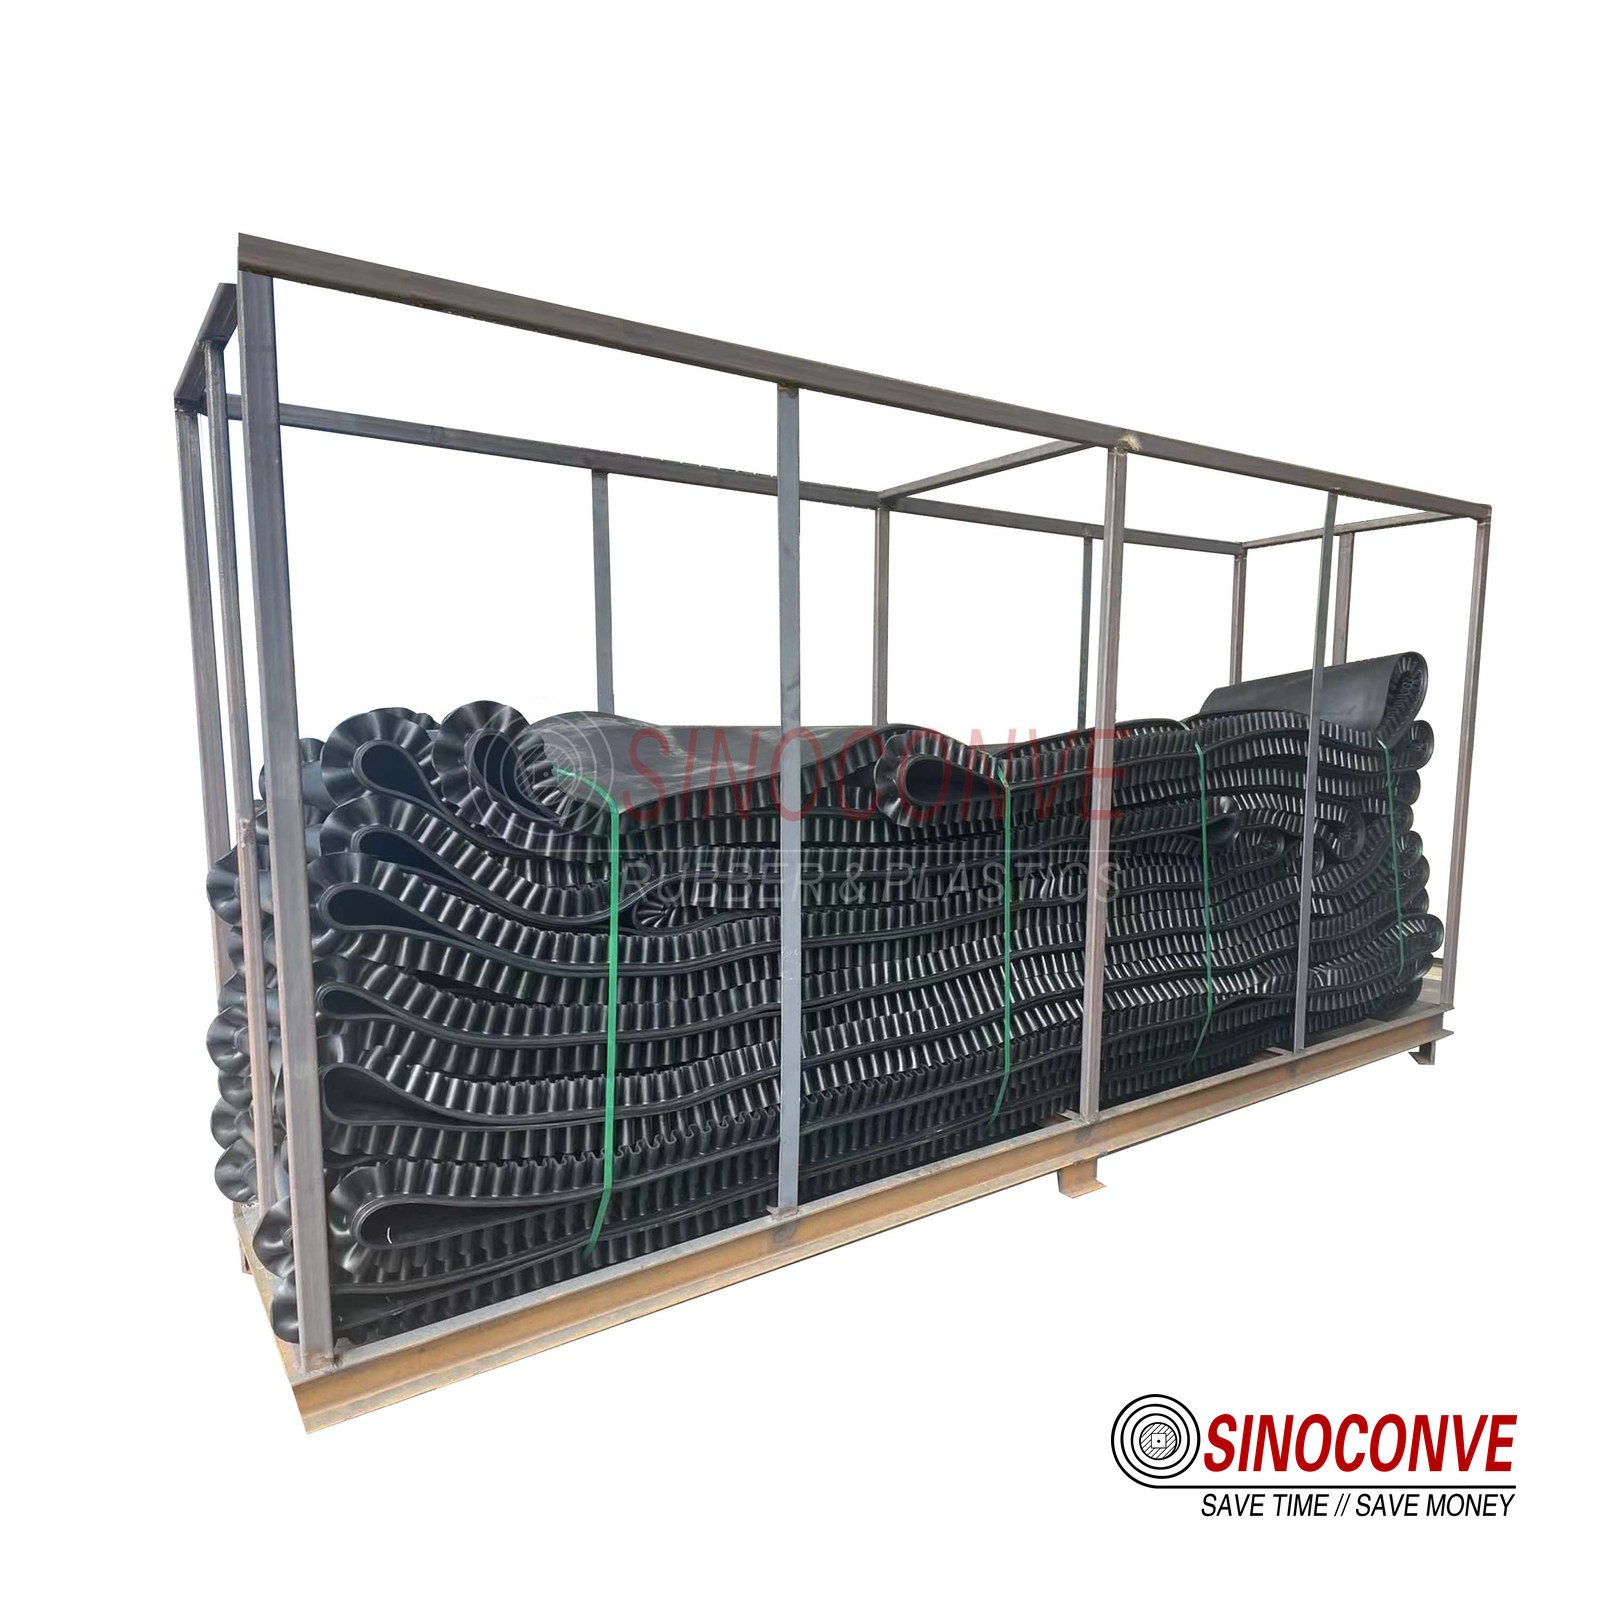
Route layout, transition arcs and the loading zone decide how well a steep machine performs.
14Frequently Asked Questions
What is a side wall belt conveyor?
It is a bulk-handling conveyor whose belt carries two corrugated rubber side walls plus evenly spaced cross cleats, forming a moving pocket that holds material on a steep incline. Because the pocket contains the load, the machine can climb at angles a flat belt cannot reach. The belt is the sidewall conveyor belt; the complete machine, with its structure, drive and take-up, is the side wall belt conveyor.
How steep can a sidewall conveyor go?
Most installations run between 45 and 60 degrees, and a vertical-lift arrangement can run at 90 degrees. The practical angle is set by the material's internal friction, the cleat pitch and the wall height, so a sticky clay will behave differently from dry, rounded gravel.
What is the difference between a cleated belt and a sidewall belt?
A cleated belt has raised cross bars on the belt surface but no side walls, so it still depends on the troughed shape of the belt to stop material spilling sideways. A sidewall belt adds the two continuous corrugated walls, which turn the belt into a genuine pocket and let it run far steeper. In practice a cleated belt is often enough for 20 to 30 degrees, while a sidewall belt becomes the better choice once the angle passes roughly 35 degrees. Some machines combine both features, using cleats inside walls on very steep or vertical runs.
How do you maintain sidewall belts?
Watch the wall base and the cleat corners first, because that is where cracking begins. Keep return roller clearances generous so nothing grazes a hanging wall, and check the fixing bolts on the structure every quarter. Re-check belt tension during the first month and again after any sharp temperature change.
When should I use a sidewall conveyor instead of a troughed belt?
Reach for a sidewall machine when the lift angle is steeper than about 35 degrees, when the footprint is tight, or when a chain of troughed belts would need several transfer towers that you would rather not build.
Can a sidewall belt conveyor run vertically?
Yes, although a purely vertical machine needs a short horizontal lead-in so the pocket is full before the belt turns upward. The discharge also becomes a sudden hopper transfer, so the chute has to be built for impact rather than for a smooth throw.
How do you join a sidewall conveyor belt?
Almost always with a vulcanised splice, made as an endless joint in the shop or in the field.
What causes a sidewall belt to run off track?
An off-center feed is the most common trigger, closely followed by out-of-square pulleys and rollers that have seized. Tall walls amplify every side force, so a misalignment that a flat belt would shrug off can send a sidewall belt all the way to the frame. Check pulley parallelism and the feed stream before you touch a training idler. On the return strand, a single dragging roller is often the whole story.
What belt widths and capacities do these machines use?
Belt widths commonly run from 500 mm to 1,600 mm, with capacities in the range of 50 to 600 tonnes per hour depending on the material and the angle.
Related Products You May Need
- Chevron and sidewall belting for steep-angle conveying
- Rubber belt stock for quarry, cement and port duty
- EP fabric-carcass belting in common widths
- Carrying, return and impact rollers for the machine
- The full SINOCONVE product catalogue