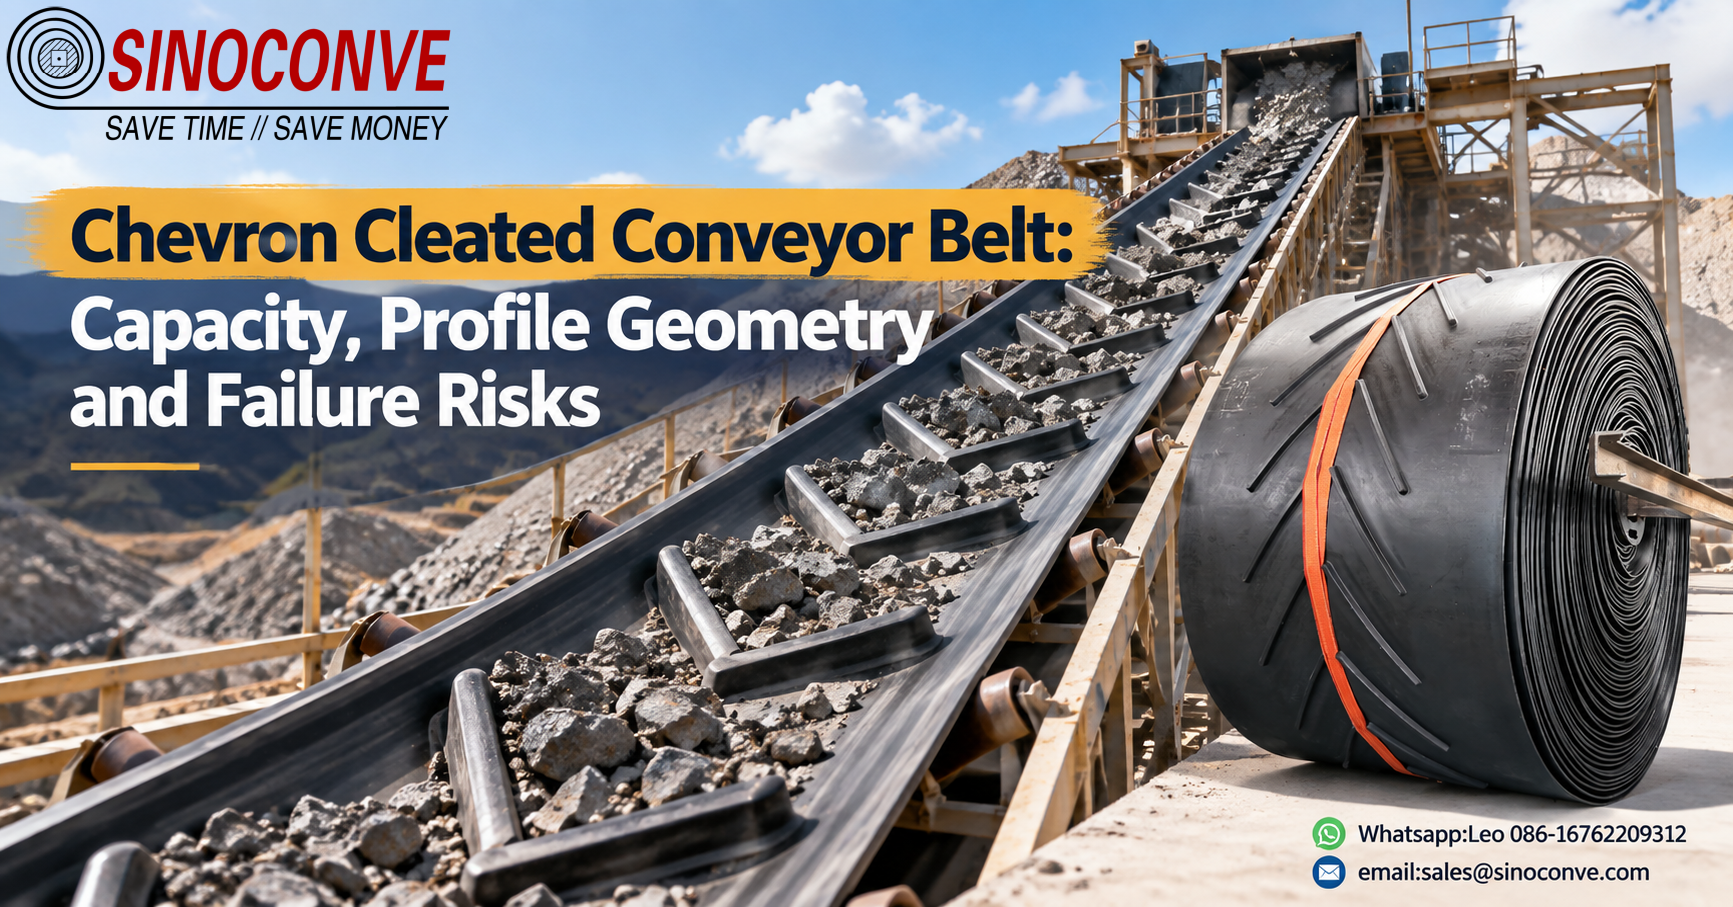
Ask three buyers how much a chevron cleated conveyor belt will carry on a 20 degree incline and you will get three numbers, and none of them will be about this project. Capacity on a slope is set by the incline angle, by the stable bed depth the material forms on the running surface, and by the fraction of that surface the molded pattern genuinely protects. All three can be measured before the order goes out, and once you have them the extra tonnage is arithmetic rather than opinion.
Most pages written on this subject list the advantages of a chevron belt and stop there. This article treats the belt as a geometry problem instead. It works one capacity example that you can recompute from four figures on your own drawing, and then it spends at least as much space on the way a pattern fails as on the tonnage it adds, because a cleat that cracks at its root costs a whole belt and a lost shift.
Two boundaries before we start. This is not a steep-angle system article, so we will not size your transfer tower, choose your drive or lay out your chute. It is also not a catalogue of pattern families, which is a separate subject. What follows sits one level inside both, on the numbers that link cleat height, pitch and profile to the tonnage you can defend on a drawing.

01A Chevron Belt Is a Geometry Decision, Not a Catalogue Line
Walk along any incline at a quarry and you can usually read from the ground what went wrong. Material is lying on the walkway under the belt, or the belt is running wide because somebody wound up the tension to stop a slip, or the pattern has worn into a row of rounded bumps that holds nothing at all. In every one of those scenes the belt was bought as a product rather than specified as a geometry, and the cheapest moment to correct that was before the purchase order was signed.
Three numbers define a pattern completely, and they do different jobs. Height above the cover, pitch measured along the belt, and the angle the cleat sweeps across the width. Height raises the ceiling on the load, because nothing can sit higher than the tallest obstruction holding it back. Pitch decides how often that obstruction appears in front of a moving particle. The sweep angle decides whether the cleats funnel material to the centre line or leave two open channels along the edges for it to escape.
Why Only Height Adds Volume Directly
Of the three, only height adds carrying volume on its own. A 40 mm cleat on a 150 mm pitch can hold a bed roughly 40 mm deeper than the same carcass with a smooth cover, and 40 mm is a large fraction of a typical incline bed. A 25 mm cleat does the same job only when the pitch is short enough that no particle gathers speed between one cleat and the next. That is the detail most quotations skip.
We would rather argue about pitch at the drawing stage than about carryback three months later. Ask each supplier for the pitch they intend to mold and the reason for it. A supplier who answers with a number is quoting a geometry. A supplier who answers with a pattern name and a colour is quoting a catalogue line. As a conveyor belt manufacturer we keep the geometry on the order acknowledgement so nobody has to remember it later.
What Capacity Means Once the Pattern Is Vulcanized In
The number that matters is not the rated capacity of a flat belt of the same width. It is the tonnage the belt still holds after the incline has taken its share, and those two figures differ by a wide margin. A flat 1,000 mm belt that handles 600 t/h on the level does not deliver 600 t/h up an 18 degree slope, because the bed forms shallower and less stable and every particle that leaves the pile rolls back toward the tail.
A pattern changes that bed, and the size of the change is computable. That is the argument of the next section. Two belts of the same width, carcass and cover can differ by more than fifty percent in delivered tonnage once the geometry changes, and the difference shows up on the weight bridge rather than on the data sheet.
02The Capacity Equation You Can Recompute Before You Order
There is nothing exotic in the arithmetic below, and any maintenance engineer who can read a drawing can repeat it in ten minutes.
Step One: The Carry Section Without a Pattern
Start with the bed a flat belt would hold on the slope in question. On a 1,000 mm belt the usable loading width is about 800 mm, and a freely piled load settles into a rounded trapezoid whose area is close to 0.75 of the rectangle that encloses it. That gives a shape constant of 0.6 m per metre of belt width, so capacity is 0.6 times bed depth times belt speed times bulk density.
The one figure you cannot take from a handbook is the depth the material actually holds on your angle. Above roughly 20 degrees a 0-40 mm crushed limestone will not keep a deep pile, so we normally use 45 mm as the stable depth near 18 degrees. Those are our own field readings, and a plant that can measure its own bed should replace them.
At 1.6 m/s with limestone quoted at 1.4 t/m3, the combined constant becomes 0.6 x 1.6 x 1.4 x 3600, or 4,838, so capacity in tonnes per hour is 4,838 multiplied by the bed depth in metres. At 45 mm that is 218 t/h, the flat reference, and it is usually well below whatever a catalogue promised.
Step Two: Turning the Pattern into Protected Bed Depth
A cleat does not lift the whole bed. It protects a short length of belt behind itself, and outside that length the material still sits on an unprotected slope. Our working rule for that protected length is cleat height divided by the tangent of the incline angle, so a 25 mm cleat on an 18 degree incline shields about 77 mm of belt behind it. Divide that by the pitch and you have a coverage fraction, capped at 1.0. Effective bed depth is then the flat depth plus cleat height multiplied by coverage.
Change the pitch and the same 25 mm cleat moves from 38 percent coverage to 100 percent. Nothing about the rubber changed. Only the geometry did.
Field note from our engineers: At an aggregate plant in Zhejiang we surveyed a 1,000 mm incline for two shifts. The existing 25 mm chevron on a 200 mm pitch held a bed we could read as 55 mm, and fines still trickled down the ramp onto the return strand. The lane measured 258 t/h. After the plant fitted 40 mm cleats on a 150 mm pitch on the same frames, the same haul came in at 371 t/h with a drier return strand. The pitch, not the rubber, was the fix.
| Operating case | Cleat height and pitch | Protected length and coverage | Effective bed depth we would use | Recomputed capacity at 1,000 mm and 1.6 m/s | Change against the flat belt on the same slope |
|---|---|---|---|---|---|
| Flat reference at 18 degrees | Smooth cover, with no cleats molded into the running surface at all. | Not applicable, since there is no obstruction to shield the bed behind it. | 45 mm, taken from our field readings on this material at this angle. | 218 t/h, the baseline every pattern case below is measured against. | Reference case, and far below the level rating the same belt would show. |
| Light pattern at 18 degrees | 25 mm cleat height on a 200 mm pitch along the length of the belt. | L works out at 77 mm, so coverage reaches 0.38 of the surface. | 55 mm, made up of the 45 mm bed plus 9.6 mm of retained height. | 264 t/h, a real gain but a modest one for the cost of the pattern. | About 21 percent more than flat, and the return strand usually still runs wet. |
| Heavier pattern at 18 degrees | 40 mm cleat height on a tighter 150 mm pitch along the belt. | L comes to 123 mm, giving coverage of 0.82 across the surface. | 78 mm, combining the same 45 mm bed with 32.8 mm of height. | 376 t/h on the same frames, drive and belt speed as the reference. | Roughly 73 percent more than flat, which is where the design earns its cost. |
Read the table downwards and two things stand out. Doubling cleat height while tightening pitch nearly quadruples the benefit, because both terms in the coverage fraction move in your favour at once. A pattern can also be too generous for its slope, since coverage that has already reached 1.00 only adds peel load at the root. Our notes on abrasion resistant conveyor belts for quarry and steep angle conveying cover the material side of this argument.
03Profile Geometry: What C, V and Multi-V Actually Change
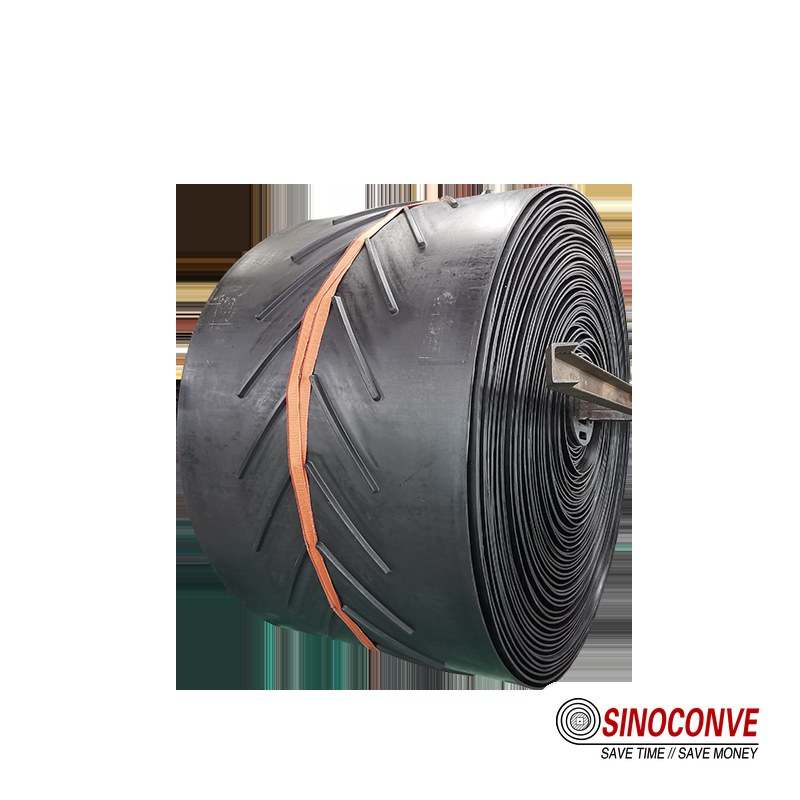
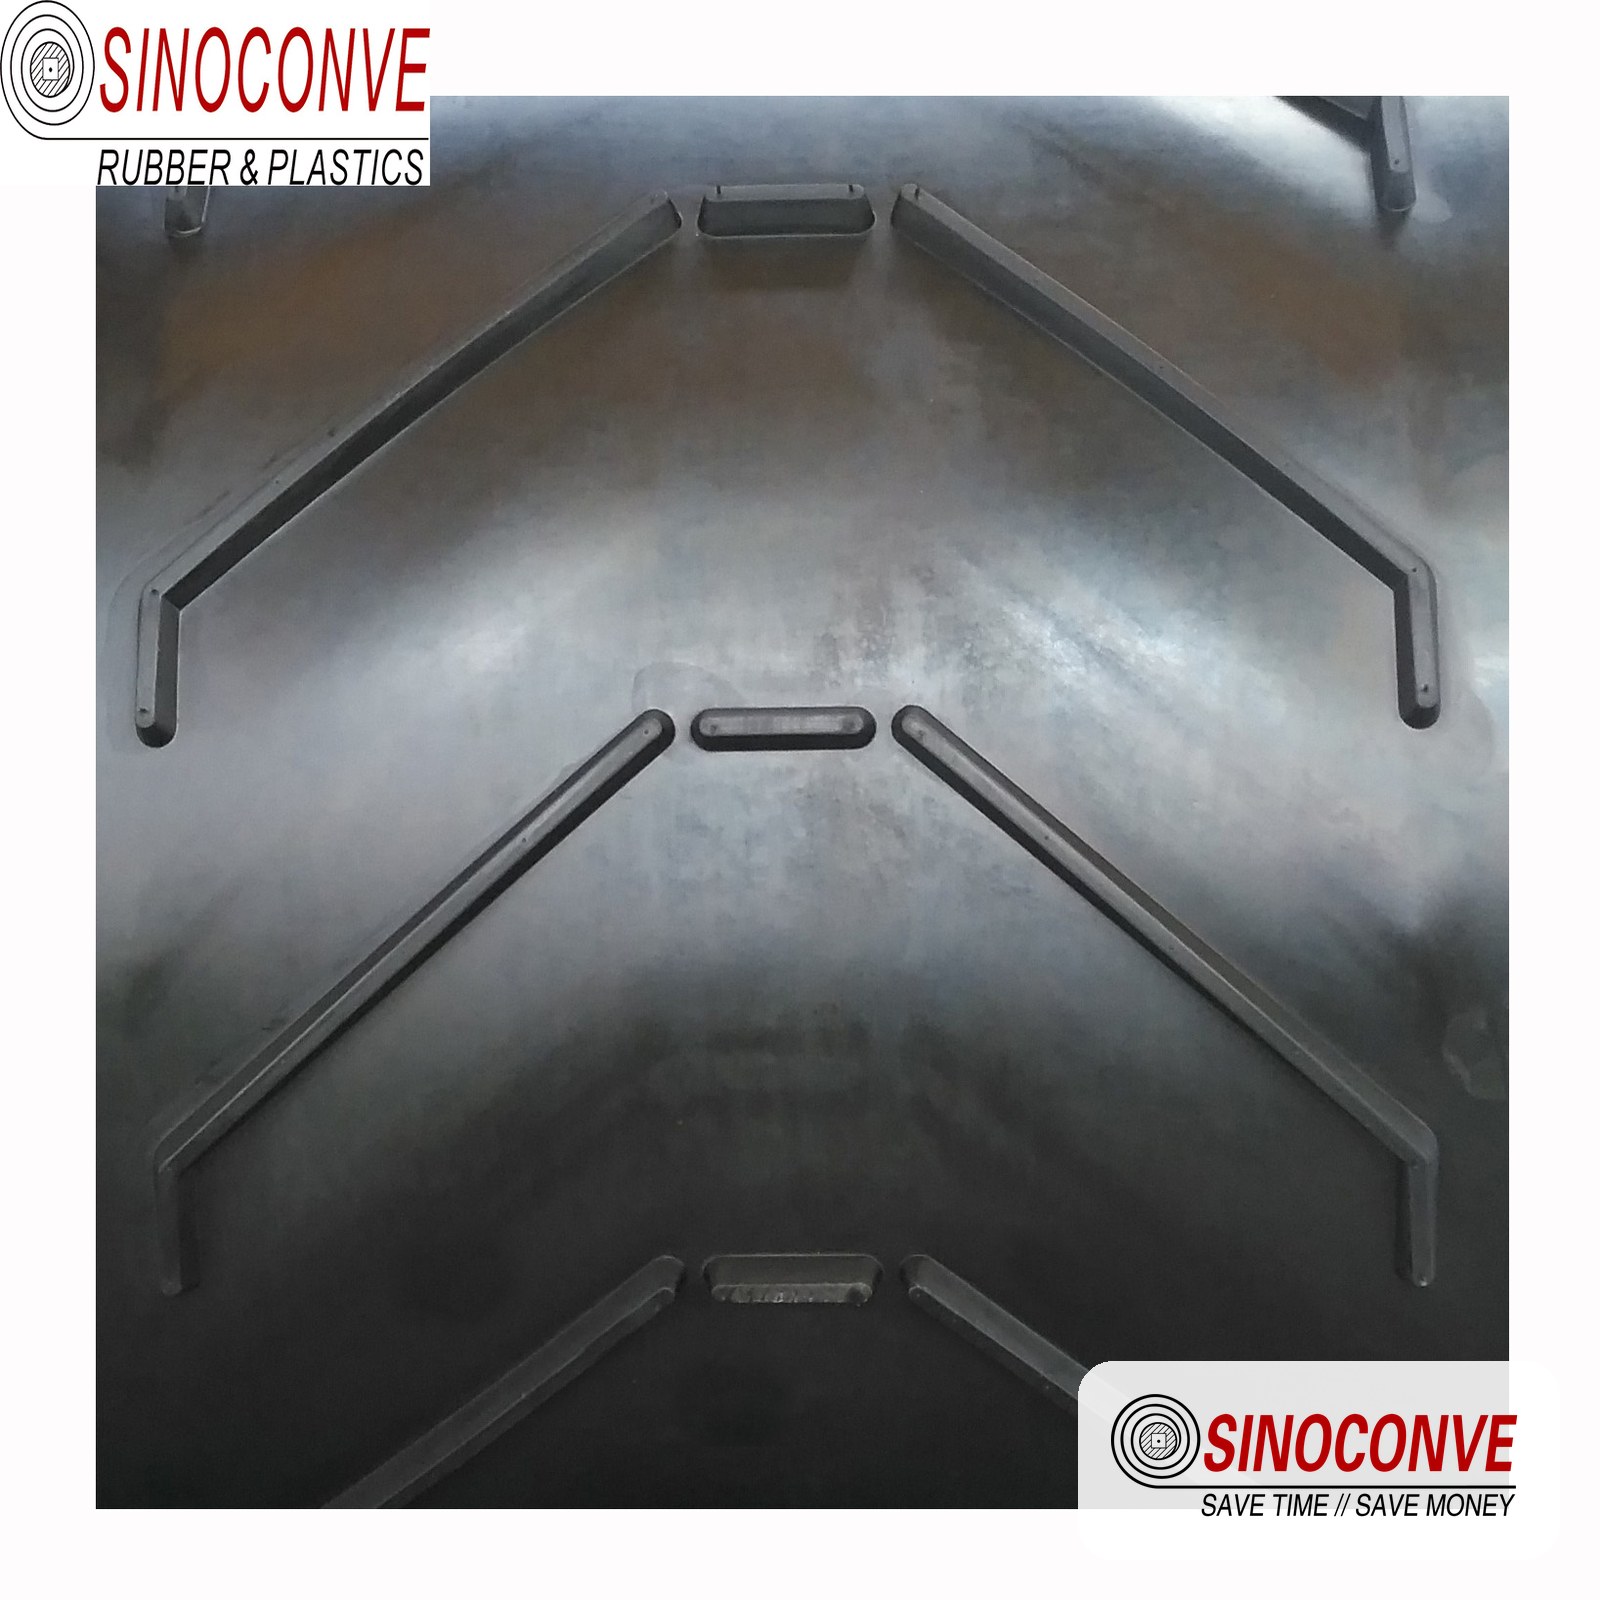
Three profile families cover almost every incline we quote. An open V, the classic chevron, runs a single cleat diagonally across the belt and reverses it to form a V pointing along the direction of travel. A closed C profile uses a shorter, curled cleat that forms a pocket instead of a wall. A multi-V or stacked rib packs several shallow cleats into a repeating group, supporting the bed at short intervals without one tall obstruction.
How Each Profile Loads the Carcass
Those shapes load the belt differently, and that is the part worth understanding. A tall open V concentrates peel load along two long diagonal joint lines, efficient for retention but demanding on the bond at the cleat root. A closed C spreads the same retention over a shorter, more curved foot, so tip wear stays lower while the pocket fills with damp fines more readily. A multi-V distributes load across many small anchors, gentle on the carcass and hard on the cleaning system, because every rib gives a scraper blade something to catch.
The sweep angle matters too. Patterns laid at a shallow angle across the belt guide material firmly toward the centre line and leave a wider clean margin at each edge, which is what you want on a belt that tracks imperfectly. Patterns laid near the perpendicular hold slightly more material near the edges and make edge damage more likely on a belt that wanders. If your incline already runs a little wide, favour the gentler sweep and buy tracking reliability rather than the last few tonnes.
Sizing Height, Pitch and Edge Margin Together
Height and pitch cannot be chosen independently, because coverage depends on both and the edge margin depends on the sweep. On a 1,000 mm belt we normally leave 75 mm to 100 mm of plain cover at each edge, so the skirt rubber and the belt edge are not fighting a cleat and a scraper has somewhere to sit. That margin is the first line a purchasing engineer deletes to save a few percent.
| Profile family | Shape across the belt | Height we normally mold | Pitch that suits it | Edge margin we leave | Where it earns its place |
|---|---|---|---|---|---|
| Open V (chevron) | A single diagonal cleat reversed to form a V along the travel direction. | Between 15 mm and 40 mm, with 25 mm the most common figure. | Usually 200 mm to 400 mm, and shorter pitch always adds retention. | About 75 mm to 100 mm of plain cover at each edge. | The general incline duty most quarries actually run. |
| Closed C profile | A shorter curled cleat forming a pocket rather than a wall. | Typically 20 mm to 35 mm from the cover to the tip. | Denser than an open V, often 150 mm to 250 mm along the belt. | Still 75 mm to 100 mm, since the pocket needs a clear shoulder. | Damp or fine material that needs a pocket, not a wall. |
| Multi-V or stacked rib | Several shallow ribs grouped into a repeating set along the belt. | Each rib often only 10 mm to 20 mm tall inside a group. | Group pitch is often 300 mm to 500 mm along the belt. | A little wider, commonly 100 mm, because the ribs need cover. | Moderate slopes where a tall single cleat would face impact. |
One consequence is worth stating plainly. If the retention you need can only be reached with a tall, densely pitched profile, the honest conclusion is often that the incline is too steep for a flat-backed belt. A belt sold through any competent conveyor belt distributor will come with a pattern specification, but a pattern specification cannot rescue a geometry the profile was never designed to hold.
04Matching Cleat Height to Belt Thickness and Ply Count
A cleat is a lever, and the belt underneath it is the anchor. The taller the lever and the harder the material pushes against it, the larger the pull at the root, and that pull has to be carried by the cover thickness and the ply structure of the carcass. Put a 40 mm cleat on a light two-ply body and the geometry works on paper while the bond at the root works loose in the first season.
Why a Tall Cleat Needs a Heavier Carcass Under It
The minimum cover we are comfortable molding a cleat onto scales with cleat height rather than belt width. For a 15 mm to 25 mm cleat, a top cover of about 4 mm to 6 mm is usually enough, and a two-ply EP carcass handles the peel load on a 1,000 mm or 1,200 mm belt. Move to a 30 mm or 40 mm cleat over abrasive rock and we would rather see 6 mm to 8 mm of cover and three plies, or a steel cord carcass on the widest belts, because the root then has more polymer to grip and a stiffer base to resist flexing at every pulley pass.
This is not only a strength argument. A stiff carcass under a tall cleat keeps the geometry honest, because a belt that flexes sharply over a small pulley opens the angle at the cleat root slightly on every revolution, and that repeated opening is what eventually cracks the tip of the bond. Where the incline is short and the pulleys are large, the same cleat on a lighter body can last for years. Where the incline is long and the pulleys are small, the heavier structure pays for itself within one belt life.
The same logic applies to the whole specification, not just the pattern. A quarried load that is heavy on impact and abrasive at the edges wants its carcass and cover chosen for that duty first, with the cleats added afterwards. Our work with plants running an industrial conveyor belt on a crusher discharge starts from the impact and tension side of the problem, because a pattern cannot compensate for a carcass that was too light from the beginning.
05Design Criteria: Incline and Material Mapped to Pattern Parameters
The table below is the one we keep next to the phone, deliberately coarse because a fine table would pretend to a precision that no enquiry supports. Use it to narrow the conversation, then confirm the numbers against the actual material and frames.
How to Read the Incline and Material Grid
Read across the incline you have, not the incline you wish you had, and read down the material you see on the belt on a wet Monday. The two together usually point at one row, and the note on that row tells you what to check before the pattern is confirmed. If your case falls between two rows, choose the more conservative pattern and revisit it after the first material survey, because a pattern one step too light causes a return strand full of fines.
| Incline band on the drawing | Material that behaves well there | Pattern parameters we would propose | Belt body to carry that pattern | What to check before you confirm |
|---|---|---|---|---|
| Up to 12 degrees | Graded aggregate, clinker and most dry ore fractions up to 40 mm. | A shallow 15 mm to 20 mm cleat on a long 300 mm pitch. | A standard two-ply EP carcass with a 4 mm to 6 mm cover. | Confirm that a flat belt with a good cover would not already suffice. |
| 12 to 18 degrees | Dry crushed limestone, quarry fines and screened stone. | A 25 mm to 30 mm cleat on a 200 mm pitch, in V or C profile. | Two plies still work, though a 6 mm cover improves cleat life. | Check the smallest pulley, since a tall cleat limits bending. |
| 18 to 24 degrees | Dry, coarse material that will not slump between the cleats. | A 35 mm to 40 mm cleat on a 150 mm pitch with a firm sweep. | Three plies or a steel cord body, with 6 mm to 8 mm of cover. | Verify the cleaning system, since a dense pattern and a scraper conflict. |
| 24 to 30 degrees | Only dry, coarse, free-flowing material, and even then with margin. | A 40 mm cleat at the shortest pitch the profile tolerates, about 120 mm. | A heavy multi-ply or steel cord body, with larger pulleys. | Ask whether the incline can be reduced or a sidewall belt used instead. |
| Above 30 degrees | Essentially nothing a flat-backed patterned belt will hold. | No pattern we would recommend, because the geometry is too steep. | Move to a corrugated sidewall or pocket belt instead. | Check the moisture, because damp fines will slide on any pattern here. |
Notice what the grid does not contain, which is any row where the answer is simply a bigger pattern. Above about 24 degrees the pattern stops being the mechanism doing the work, and a plant that keeps adding cleat height is buying peel load rather than tonnage.
06Where the Pattern Fails: Root Cracks, Stripping and Wear
Patterned belt fails differently from flat belt, and the failures are easier to predict because they start at the cleat. Six mechanisms account for nearly everything we are asked to examine, each leaving a signature that points back at a specification decision.
Root Cracking and Accelerated Tip Wear
Root cracking begins as a fine line where the cleat meets the cover, usually on the uphill face first, and grows until it becomes a visible split that lets water and fines into the bond. The usual cause is a cleat that is tall relative to the cover beneath it, so the root opens slightly at every pulley pass and eventually fatigues. The fix is not a different rubber, but more cover under the root, a stiffer carcass, or a shorter cleat on a wider pitch.
Tip wear is the slower cousin of root cracking, and it turns a good pattern into a decorative one. Every cleat tip is exposed to the moving load and to any abrasive passing over it, so a 25 mm cleat can wear to 15 mm within a year on sharp, dry rock. Coverage has by then dropped by forty percent, and the plant quietly loses tonnage with no visible drama. Checking cleat height with the same gauge used at acceptance is the cheapest tonnage measurement a maintenance team can make.
Stripping, Delamination and Impact Damage
Stripping is a bond failure rather than a wear failure, and it usually appears as a cleat lifting cleanly from the cover at one end before peeling along its length. It is more common where cleats were bonded after the belt was cured instead of molded during vulcanization, and more common again where the belt runs over a pulley smaller than the cleat geometry tolerates. Once a cleat lifts at one corner, the load gets under it and the rest follows within a few shifts.
Impact damage concentrates wherever material is dropped rather than placed. A rock landing on a cleat face from a metre above prints a sharp dent at the root, and that dent becomes the crack initiation site months later. This is why a loading zone on a patterned belt usually wants impact rollers and a softer, thicker cover, which is the subject of our material on heavy duty rubber conveyor belt duty in mining.
| Failure mode | How it first shows up on site | Root cause we usually find | What we change on the next belt |
|---|---|---|---|
| Root cracking | Fine lines along the cleat base, worst on the uphill face. | Cleat height out of proportion to the cover and ply beneath it. | Thicker top cover, an extra ply, or a shorter cleat. |
| Cleat stripping | A cleat lifting at one end and peeling along its length. | A bonded rather than molded cleat, or a small pulley in the loop. | Molded-in cleats and a pulley check against the cleat height. |
| Tip wear and flattening | Cleats rounding off, with measured height falling across a season. | Abrasive dry material with a cover grade too soft for the duty. | A harder, more abrasion resistant cover, checked by wear test. |
| Rollback and carryback | Fines under the incline and a gritty return strand that will not clean. | Coverage fraction too low, so material travels between cleats. | A tighter pitch and taller cleat, or a shallower incline. |
| Cleaner interference | Scraper blades chattering, wearing fast or grabbing the cleats. | A conventional scraper set against a pattern it cannot clear. | A rotary or counter-weighted cleaner, or a clear cleaning band. |
| Splice disruption | A bump or open seam at the join, with cleats misaligned across it. | Cleats vulcanized through the splice instead of cut back around it. | A stepped splice with a defined cleat-free zone on the drawing. |
The pattern is only one variable in all six rows. Cover grade decides three of them, carcass stiffness decides two, and the cleaning and splicing arrangements decide the rest. That is why we treat pattern geometry as part of a wider rubber conveyor belt specification rather than as a decoration applied to a finished roll.
07Rollback, Carryback and the Return Strand
Shedding material back down an incline is the failure that pays for itself every hour, because it damages the return strand, the rollers and the floor at the same time. It is also the failure most often described as a belt problem when the real cause is a coverage fraction that was never calculated.
Quantifying What Slides Back
Take the 18 degree case with the light pattern. Coverage is 0.38, so 62 percent of the running surface between cleats offers no obstruction to a particle that starts to roll. On a 220 t/h lane carrying dry limestone with perhaps forty percent passing 5 mm, that unprotected area lifts the return strand load by a small fraction of throughput. We routinely see 0.5 t/h to 1.2 t/h of material on the return side of a badly patterned incline.
The relationship is not linear, and this is the part worth holding on to. Raising the cleat from 25 mm to 40 mm while pulling the pitch from 200 mm to 150 mm does not simply add fifty percent more retention. It moves coverage from 0.38 to 0.82, and that jump rather than the extra fifteen millimetres of rubber is what dries the return strand.
The Return Strand as the Best Diagnostic You Have
The return strand is the cheapest instrument on the whole conveyor. If it is dry, the coverage fraction is adequate for the material and the slope. If it is damp or gritty, the pattern is losing material and the amount tells you roughly how much tonnage you are leaving on the floor. Reading it takes no instrument at all, which is why we ask every customer with an incline complaint to photograph the return strand first.
Where the return strand is carrying material, cleaning has to be designed around the pattern rather than added to it. Our notes on return side belt cleaning explain why a dirty return side deposits material on every roller it touches, and readers specifying a full cleaning system will find our overview of conveyor belt cleaning methods and schedules useful for the cases where a scraper is the wrong tool. In a dusty plant the escaping fines are also a housekeeping and ignition concern, and the belt detail that reduces them is covered in our material on dust resistant conveyor belt construction.
08Interference: Scrapers, Idlers, Pulleys and the Splice
A pattern on the top face changes what every piece of hardware around the belt has to do. The cleaning system has to clear obstacles, the rollers support a surface that is no longer flat, and the splice has to pass through all of it without a bump. These are the interfaces where a well-chosen pattern is undone by equipment specified for a smooth belt.
Cleaning Systems Against a Patterned Surface
A conventional pre-cleaner blade set against a chevron pattern is a bad match. The blade rides up over each cleat, drops back into the trough behind it, chatters, and wears in a scalloped pattern that removes almost no material. What works better is a rotary cleaner or a counter-weighted arm that rides over the cleats and still presses into the valleys between them, combined with a clear band at each edge. If the plant owns a fixed scraper it does not want to replace, the honest answer may be a narrower pattern that leaves a wide, flat cleaning track.
Water and air cleaning become more attractive once a pattern is present, because neither cares about height changes, but both add moisture to the material, which an incline dislikes. For the broader design logic, the case where a scraper simply will not work is set out in our article on conveyor belt cleaner design.
Pulleys, Idlers and Where the Pattern Must Stop
The drum pulleys at each end must be large enough for the belt to pass with its cleats intact, and a cleated belt needs a larger minimum pulley than the same carcass with a smooth cover. On a 40 mm cleat we usually want pulleys of at least 500 mm unless the profile is designed to fold. A frame with 320 mm pulleys and a tall pattern is a root-cracking failure on a schedule we can almost predict.
Carrying idlers need the same attention, because a pattern cannot be supported by a flat roller set at the spacing that suits a smooth belt. The sizing logic is in our conveyor roller guide and load ratings note, and the matching hardware is on our conveyor roller product page. Where the pattern fails to hold material, sealed rollers are worth the premium, as described in our article on sealed conveyor rollers for fine dust, and where the load is dropped rather than placed, impact rollers at loading zones protect the cover and the cleat roots.
The pattern also has to stop somewhere. Cleats cannot run through the splice without being cut back, because a cleat crossing the joint changes the splice thickness and turns a flat join into a bump that grows. We plan a cleat-free zone of 150 mm to 250 mm on each side of the splice centre line and cut the pattern back on a taper rather than a square edge. The joint itself is then a normal vulcanized splice sized to the belt's rated tensile strength, made the way we set out in our conveyor belt splicing guide.
One more interface catches people out at the drive end of a small incline unit. Where the motor drives through a short V-belt rather than a direct coupling, the profile and groove geometry have to match the load, as on any other drive, which is the discipline any transmission belt manufacturer applies. Because we mold patterned belt and build drive belt on the same site, a buyer can have the incline body and the drive end matched by one V-belt manufacturer before either is shipped.
09Procurement and Incoming Acceptance for Patterned Belt
A patterned belt is harder to inspect than a flat one, because the thing you most need to measure is hidden in the geometry rather than the material. The checks below catch a bad batch before it goes onto the frame, and every one can be done with a gauge and a tape in under an hour.
What to Write on the Order and What to Measure on Arrival
Put cleat height and pitch on the order acknowledgement with a tolerance, not just a nominal figure. A 25 mm cleat quoted as minus one millimetre may arrive at 23 mm across a whole batch, and coverage quietly falls by eight percent before the belt has run a single shift. Ask for the peel value at the cleat root in N/mm, the test it was measured by, and the same figure on the certificate that travels with the belt. A supplier who cannot state the peel value is not measuring it.
Cold flexibility matters more than most buyers expect, because a patterned belt in a northern quarry or a cold store will crack at the cleat root long before the cover wears out if the compound is not rated for the temperature. Abrasion resistance is a separate property with its own test, and it belongs on the certificate rather than in a marketing sentence. Our guide to what a conveyor belt splicing buyer should check before ordering covers the joint side of this in more detail.
| Acceptance check | How we do it on a delivered belt | What we treat as acceptable | What we do when it misses |
|---|---|---|---|
| Cleat height and pitch | Gauge ten cleats at random and count the pitch over a metre. | Height inside tolerance and pitch within a few millimetres of the drawing. | Raise it before fitting, because coverage depends on these two numbers. |
| Root peel strength | Read the certificate, and peel a cleat from the supplied test length. | The value in newtons per millimetre stated on the order. | Reject the batch rather than risk a stripped cleat in month one. |
| Cover hardness and thickness | Check with a durometer and gauge at five positions. | Hardness inside the agreed Shore A band and cover thickness as quoted. | Ask for a replacement, since thin cover under a tall cleat cracks. |
| Abrasion resistance | Compare the certificate figure against the plant limit for that duty. | Wear loss inside the agreed range, with the test method named. | Escalate before installation, because wear cannot be added later. |
| Cold flexibility | Bend a cleat sample over a former at the lowest site temperature. | No cracking or crazing at the root, on the grade matched to the site. | Change the compound, because a brittle root fails in the first cold snap. |
| Splice and cleat-free zone | Measure the flat zone each side of the join, then bend the sample. | A stepped splice with the agreed clear length and no cleat crossing it. | Re-make the joint at the factory, not on the tensioned frame. |
Buyers who keep patterned belts as spares should buy them from stock rather than to order, in the way most wholesale conveyor belts are supplied, because an incline that is down while a special width is molded costs far more than the stock holding avoided. Our conveyor belt factory page walks through how the plant runs its own incoming checks. For a mixed programme, a conveyor belt supplier who can quote the patterned belt, the flat belt underneath it and the rollers between them from one works removes much of the interface risk discussed above.
10When a Chevron Belt Is the Wrong Answer
We turn down pattern enquiries regularly, and we would rather explain the reason here than repeat it on the phone. A patterned belt is a specific tool for a specific geometry, and five situations make it the wrong tool even though it will physically carry material for a while.
Five Cases Where We Decline to Quote a Pattern
The first is an incline beyond roughly 25 to 28 degrees on a flat-backed belt. Deepening the pattern to chase that angle loads the cleat root faster than it adds capacity. The second is high moisture in a fine material, where the water carries the load past the pattern regardless of height. That is a dewatering problem, and no geometry fixes it without a screen or a dewatering box upstream.
The third case catches people who have never run a chevron belt. With a sticky or clay-bearing material the pockets between the cleats pack solid, and once they are full the belt behaves like a smooth one that is heavier and harder to clean. We have seen a 40 mm pattern on a wet clay feed fill into an almost continuous ridge within a fortnight. If your material hangs together, test it on a pattern before you buy one.
The fourth is a long, gently inclined conveyor with a generous width and a skirted loading zone. There a flat belt with the right cover and a well-designed load point will often carry more for less money, because a pattern costs tonnage in cleaning effort and pulley diameter while adding almost nothing to a bed that is already stable. The fifth is hot material. Where a clinker or sinter duty pushes the temperature above roughly 120 degrees Celsius, the compound has to be chosen for the heat first, and the pattern becomes a secondary constraint.
None of that means a pattern is rarely useful. It means the decision belongs on the geometry, and the geometry belongs in the enquiry. On a mining incline with a competent loading zone and dry rock, a well-matched pattern is still the most economical way to hold the bed, as set out in our material on mining and quarrying applications. On a port installation handling dry bulk on a moderate incline the same logic applies with a heavier body, and our notes on port bulk material handling and on a steel cord conveyor belt body describe where the extra stiffness is worth paying for.
11The Two Questions That Decide the Pattern
Everything above collapses into two questions, and we ask them before anything else. How small is the tightest pulley the belt has to pass, and what does the material look like in the wettest week of the year? The first sets the maximum cleat height and the minimum pitch the frame tolerates, because a belt that cannot pass its own pulleys is not a belt at all. The second sets the coverage fraction that will actually be needed, because a pattern that holds dry screened stone will hold nothing at fifteen percent moisture.
Get those two answers and the rest of the geometry follows from the tables in this article. Miss either one and the supplier is guessing, which is precisely how two plants with identical drawings end up with different tonnage. We have quoted the same nominal belt into a dry pit and a wet pit and delivered two different patterns, and the difference in tonnes beat the difference in price.
If a supplier does not ask those two questions, that tells you something about the supplier. A patterned belt is one of the few belt products where the field outcome depends on numbers the buyer holds and the seller does not, so a quotation that arrives with no question attached was assembled from a catalogue rather than from your incline.
12Putting the Numbers into Your RFQ
You do not need to send us a drawing to get a useful answer. Six figures will do. Send the belt width, the incline angle, the tightest pulley diameter, the belt speed, the bulk density, and the smallest and largest particle sizes you expect. Add the moisture condition in words if you cannot give a figure, and add the throughput you actually need rather than the throughput the frame was sold with.
With those in hand we will recompute the coverage fraction, tell you the cleat height and pitch we would mold, and say plainly whether the incline is too steep for the answer you were hoping for. That reply is cheaper than finding out on the ramp.

13Frequently Asked Questions
How much more can a chevron belt carry than a flat belt on the same incline?
It depends on the coverage fraction, not on the cleat alone. On our worked example at 18 degrees, a 25 mm cleat on a 200 mm pitch lifted capacity from 218 t/h to 264 t/h, about 21 percent. A 40 mm cleat on a 150 mm pitch on the same frames took the lane to 376 t/h, roughly 73 percent above the flat reference. The second belt is not twice as tall. It is four times better covered.
Can I calculate this myself before I ask for a quote?
Yes, and we would rather you did. Use a shape constant of 0.6 m for a 1,000 mm belt, multiply by the bed depth in metres, the belt speed and the bulk density, then convert to tonnes per hour. Add cleat height times coverage, where coverage is the protected length divided by pitch, capped at 1.0.
What cleat height suits an 18 degree incline?
For dry crushed rock we usually land between 25 mm and 40 mm, with the choice driven by the pitch rather than by height alone. If the frame forces a long pitch, a taller cleat is the only way to keep coverage up; if the pitch can be shortened, a modest cleat does the same job with less peel load at the root.
Why does a chevron cleat crack at its root?
Because the cleat is a lever and the flexing happens underneath it. A tall cleat on a thin cover over a light carcass opens slightly at the root every time the belt passes a pulley, and after enough passes the bond fatigues into a fine line along the cleat base. More cover, an extra ply, larger pulleys or a shorter cleat all attack the same problem.
Can a chevron belt be spliced in the field?
It can, and it must be planned for at the drawing stage. Cleats are cut back on a taper each side of the joint to leave a flat zone, usually 150 mm to 250 mm, so the splice can be stepped and vulcanized normally. A cleat running straight through a joint always shows a bump that wears the cleaner and the roller in front of it.
Do I need a different cleaner once I fit a pattern?
Usually, yes. A fixed pre-cleaner blade chatters over the cleats and clears very little, so a rotary cleaner or a counter-weighted arm that follows the profile is the normal answer. Where the cleaning system cannot change, we sometimes narrow the pattern to preserve a clear track at one edge. A wash system sidesteps the geometry problem but adds water, as our notes on conveyor belt spray cleaning explain.
When should I choose a sidewall belt instead?
Any time the incline passes roughly 25 to 28 degrees on a flat-backed belt, or whenever the material is fine and wet enough that a pattern cannot hold it. A corrugated sidewall contains the load rather than obstructing it, which is the right mechanism on a steep, high-capacity route. The aggregate side of that decision is covered in our material on belt selection for quarry crusher duty and on EP belt selection for stone crusher and aggregate plants.
What tolerance should I accept on cleat height?
Tight enough that the coverage fraction you calculated survives the season. A nominal 25 mm cleat landing at 23 mm across a whole batch costs roughly eight percent of the retention you paid for, and wear continues in service, so treat cleat height as a wearing dimension. Measure it at acceptance and again a year later with the same gauge.
Related Products You May Need
- Chevron and patterned conveyor belts molded with the cleat height and pitch your incline geometry calls for.
- Rubber conveyor belts in abrasion, heat, oil and flame resistant grades for incline and level duty.
- EP rubber conveyor belts where a two or three ply carcass has to carry cleats without flexing.
- Steel cord conveyor belts for long, heavy inclines where a fabric carcass is not stiff enough.
- Conveyor rollers including impact and sealed designs suited to the dirty return side of a patterned belt.
- Heat resistant conveyor belts for inclined duties that also see hot clinker or sinter.
- V-belts for the drive end of short incline units with an indirect transmission.
- Full product catalogue covering patterned, flat, steel cord and light belt families built at one factory.
Related Blog Posts
- Abrasion resistant belts for quarry and steep angle conveying: matching cover grade to an inclined, abrasive duty.
- Abrasion resistant conveyor belts for quarry and aggregate: how wear limits are set and checked.
- Rubber conveyor belt cover grades: what the wear, cut and heat classes actually mean on a drawing.
- EP belt selection for stone crusher and aggregate plants: carcass choice from the loading zone outward.
- Return side belt cleaning: why a patterned incline that sheds material punishes every roller behind it.
- Conveyor belt cleaning methods and schedules: where a fixed scraper stops working and what to use instead.
- Conveyor belt cleaner design: rotary, counter-weighted and pre-cleaner arrangements compared.
- Conveyor belt spray cleaning: designing a wash system that a patterned surface can survive.
- Conveyor belt splicing guide: joint methods, costs and field tips for cleated and flat belts.
- Conveyor belt splicing buyer checklist: twelve points to confirm before a joint is ordered.
- Heavy duty rubber belts for mining efficiency: impact, abrasion and the loading zone on a hard duty.
- Steel cord rubber conveyor belt durability: when a stiff carcass is worth the extra weight on an incline.
- EP conveyor belt tracking guide: correcting drift before a wandering belt damages its pattern and edges.