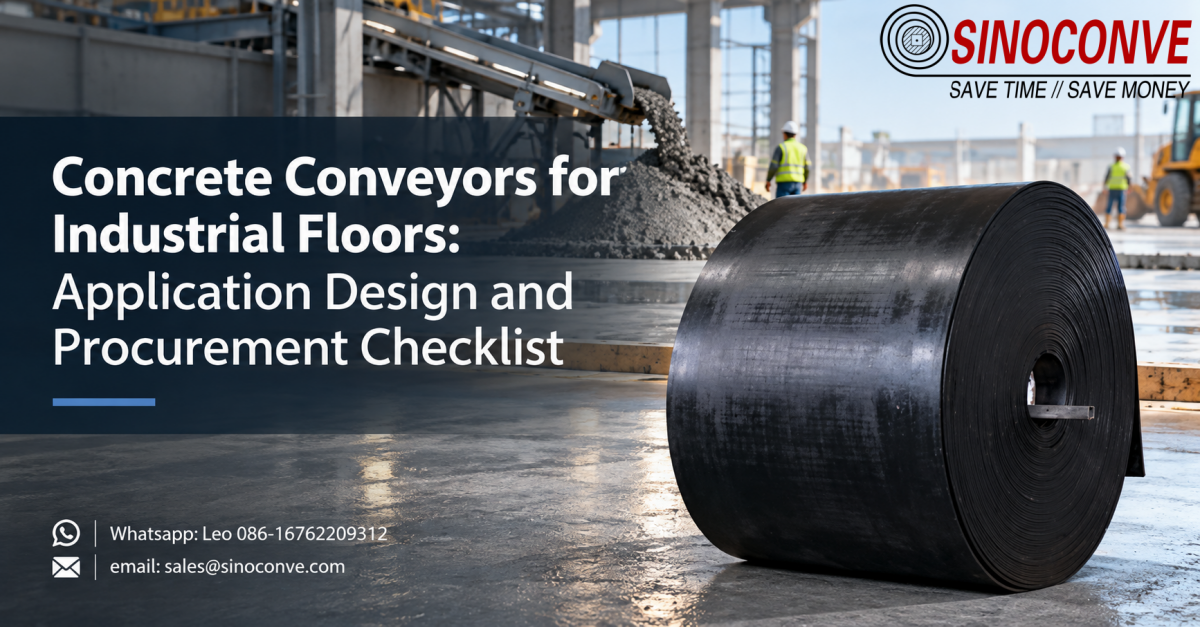
Concrete conveyors for industrial floors are a placement tool, not a bulk materials line. They move fresh ready-mix from the truck, through a doorway and across a slab, during the two to four hours before the mix stiffens, inside a building that keeps making product all around them. This page deals with that job: how we zone a floor pour, how slump and aggregate size decide the belt, how width and speed are sized from cubic metres per hour, and what a buyer has to inspect before accepting the system.

01Two Concrete Duties That Should Never Share One Specification
Two concrete duties reach our quotation desk looking almost identical on paper. The first is site materials handling, where belts and mobile systems feed ready-mix or aggregate across an open works area, between stockpiles, and into a batching point. The second is what this article covers, and it is a different animal: placing concrete inside a workshop or a warehouse, onto the floor slab itself, under a roof that is already built and around plant that is already running. The outdoor duty is forgiving. Trucks can wait, rain is the only real ceiling, and a re-route costs an hour of diesel. The indoor duty is not forgiving at all, and buyers who fold the two into a single specification usually meet the difference on pour day.
Site handling is organised around material flow, which means how much aggregate arrives, where it is stockpiled, and how ready-mix reaches the forms. A floor pour is organised around building constraints instead, because the mix is fixed by the structural engineer and the only free variables left are access, clearance and time.
Two duties, one invoice, two completely different answers
Set the two duties side by side and the split is practical rather than academic. An outdoor aggregate line can run a 900 mm belt at 1.5 m/s up a 15 degree incline while nobody worries about the dust. Those same figures inside a plant are nonsense. The run is often only 30 m long, the personnel door clears 2.5 m, the cross aisle has to stay open for a forklift, and the line next door must not stop for the afternoon. We are a conveyor belt manufacturer based in Ningbo, and we quote both duties, which is precisely why we ask which one you are describing before we open a catalogue.
Clearance is the first thing we measure on site, well before throughput. A frame needs headroom above the load, room left and right for skirt rubber and a walking strip, and a discharge height that clears the formwork while still letting the crew reach the mix with a vibrator.
The four constraints that make an indoor pour different
Four constraints decide the design, and they rarely arrive in the same order twice. Clearance fixes the frame section and the steepest usable incline. Access fixes belt width, because the unit has to pass a door and turn a column. The curing calendar fixes the pour window, since the surrounding plant keeps running and the placement has to finish inside a shift or a quiet weekend. Living production fixes protection, noise limits and the wash-down routine. Treat those four as inputs, and the belt, the drive and the layout follow from them in a straight line. Treat them as afterthoughts, and the system gets rebuilt on site by people who did not design it.
Field note from our engineers: At a food plant in the Yangtze delta we were asked to quote a 650 mm belt for a 40 m slab pour. The loading bay door measured 2.4 m clear and there was a 90 degree turn three metres inside it, so we specified a 500 mm modular frame that two men could break into 3 m sections by hand. The wider belt moved more cubic metres per hour on paper, and it would never have reached the slab.
The belts, rollers, skirt rubber and drive units we build for placement duties of this kind are listed in our full product catalogue, and the pages behind it carry the width, ply and cover data a designer needs before the frame is ordered.
02Zoning a Floor Pour From Discharge to Clean-Up
A floor pour is a sequence, and every sequence has handover points where work quietly goes wrong. The practical way to plan one is to divide it into six zones, then decide for each zone which machine does the work and what the conveyor must guarantee at its edge. Once the zones are fixed, the conveyor length, the number of times it has to be moved and the wash-down points almost design themselves.
The six zones of a floor pour
We use the same table on every floor job, because the arguments on site are always about the same four columns. The last column matters most, and it is the one nobody writes down.
| Zone | What the crew is doing while the belt runs | Equipment that normally carries the zone | What the conveyor must guarantee at its edge |
|---|---|---|---|
| Ready-mix discharge | The truck chute or pump hopper releases mix at the target rate while one operator works the gate and watches the first dry batch out of the drum. | Truck chute feeding a receiving hopper with a 200 mm grizzly bar set over the belt. | A centred, steady feed with no surge that lifts the belt clear of its troughing rollers. |
| Conveying and pumping | The mix travels across the building to the active pour front, either on the belt or inside a pipeline if a boom pump has been brought in. | Mobile belt conveyor, incline section, telescopic section, or a boom pump with 125 mm pipe. | Constant speed so the ribbon of concrete does not thin and start to segregate on the run. |
| Placing and spreading | Two or three men drop the mix in even lifts of about 200 mm and pull it forward with rakes and a screed board. | Discharge head with a short skirt, sometimes a spreader or a light bull float. | A discharge that can be aimed and stopped without dropping a heap of aggregate in one spot. |
| Vibration | Needle vibrators consolidate the lift against formwork, around plinths and behind embedded anchor boxes. | Poker vibrators on 380 V, one or two units working the pour front. | Nothing at all, except that the belt must not be standing on the slab just placed. |
| Curing | The crew covers the slab, sprays a curing compound or lays wet hessian, then keeps foot traffic off it for the specified period. | Curing compound sprayer, polythene sheeting or water-retaining covers. | A conveyor that can be moved off the pour area without being dragged across fresh concrete. |
| Clean-up | Everything that touched cement paste is washed before the paste sets, and the belt is run empty for two or three minutes to shed carryback. | Water hose, scrapers, shovels and a 200 litre wash-down tank on the mobile frame. | A belt surface and skirt design this crew can genuinely wash in the window available. |
Where the conveyor physically sits on the plan
Zone planning decides layout, and layout decides almost everything else. On a slab pour the conveyor cannot be parked on the area it has just filled, so the run has to sit on finished hard standing, on a mat of timber, or on rails beside the pour front. That single rule drives the frame type, because a unit that has to be lifted and re-set every 6 m of progress is a very different purchase from one that stays still for the whole shift.
The plan has to be drawn before the quotation is priced. Mark the truck standing position, the door the mix comes through, the columns it has to miss, the aisle the forklift still needs, and the direction the pour front travels. Roughly one floor job in three reaches us with the truck route already blocked by the formwork layout, and the fix on the day is always slower and dearer than a redraw on paper.
The hardware behind each zone is ordinary conveyor engineering, and most of it is on the shelf of any established conveyor belt supplier, which is why an experienced buyer can price a floor-pour system from a drawing rather than from a site visit. What is not ordinary is the duty. Where an outdoor aggregate job might tolerate a heavier, slower frame, an industrial conveyor belt that has to thread a doorway and turn inside a working plant is judged on clearances, washability and the time it takes to move, so a lighter and more modular frame usually wins even when a heavier one would carry more.
03How Slump and Aggregate Size Choose the Conveying Method
Slump is the number that usually decides whether a belt or a pipeline does the work, and it is decided long before anyone in purchasing is asked. A stiff mix at a 40 mm slump sits on a belt like damp gravel and will travel up 18 to 20 degrees without complaint. A wet, pumpable mix at 180 mm slump behaves like porridge and runs off the same belt the moment the incline passes about 12 degrees.
Reading slump before you choose between a belt and a pump
Belts win when the pour is flat or gently inclined, when the run is under roughly 60 m, and when the mix can be held somewhere between 60 mm and 120 mm slump. Pumps win on long horizontal runs, on high lifts, and wherever the structural engineer has already frozen the mix at a pumpable 160 mm to 200 mm for a boom. What that means in practice is that the conveyor choice follows the mix design rather than the other way round, and a buyer who wants to change the conveyor has to change the mix with the engineer's agreement, not the belt order on its own.
A stiffer mix is usually the better floor, because every 25 mm of added slump costs roughly 8 kg to 10 kg of extra water per cubic metre and about 1 to 2 percent of 28 day strength. The belt then has to carry that stiffer ribbon without the edges slumping, which is a cover and skirt question rather than a frame question.
Aggregate top size, cover hardness and the puncture risk
Top size for a floor mix is usually 20 mm to 40 mm, and much of it is angular crushed stone rather than gravel. That angular stone is the main threat to a rubber conveyor belt on a concrete duty, because a hard corner landing on a soft cover presses in and stays there. Once an aggregate particle is embedded it acts like a small chisel on every later pass, and it also thickens the belt locally, which is a classic cause of a belt that will not hold its line.
We specify cover hardness in the region of 60 to 65 Shore A for placement belts, and we keep the free fall at the load point under about 500 mm, because embedment scales with drop height far more than with belt speed. Below the load point a set of impact rollers and a rubber-lined chute lip do more for belt life than any increase in cover thickness, and they cost less than the extra compound.
One detail catches out first-time buyers. The mix that reaches the slab is not the mix that left the drum, because every metre of travel sheds a little paste and water, and the ribbon can arrive 5 mm to 10 mm thinner. Crews normally run one trial load to set the discharge gate.
04Belt Construction for Concrete Placement Duty
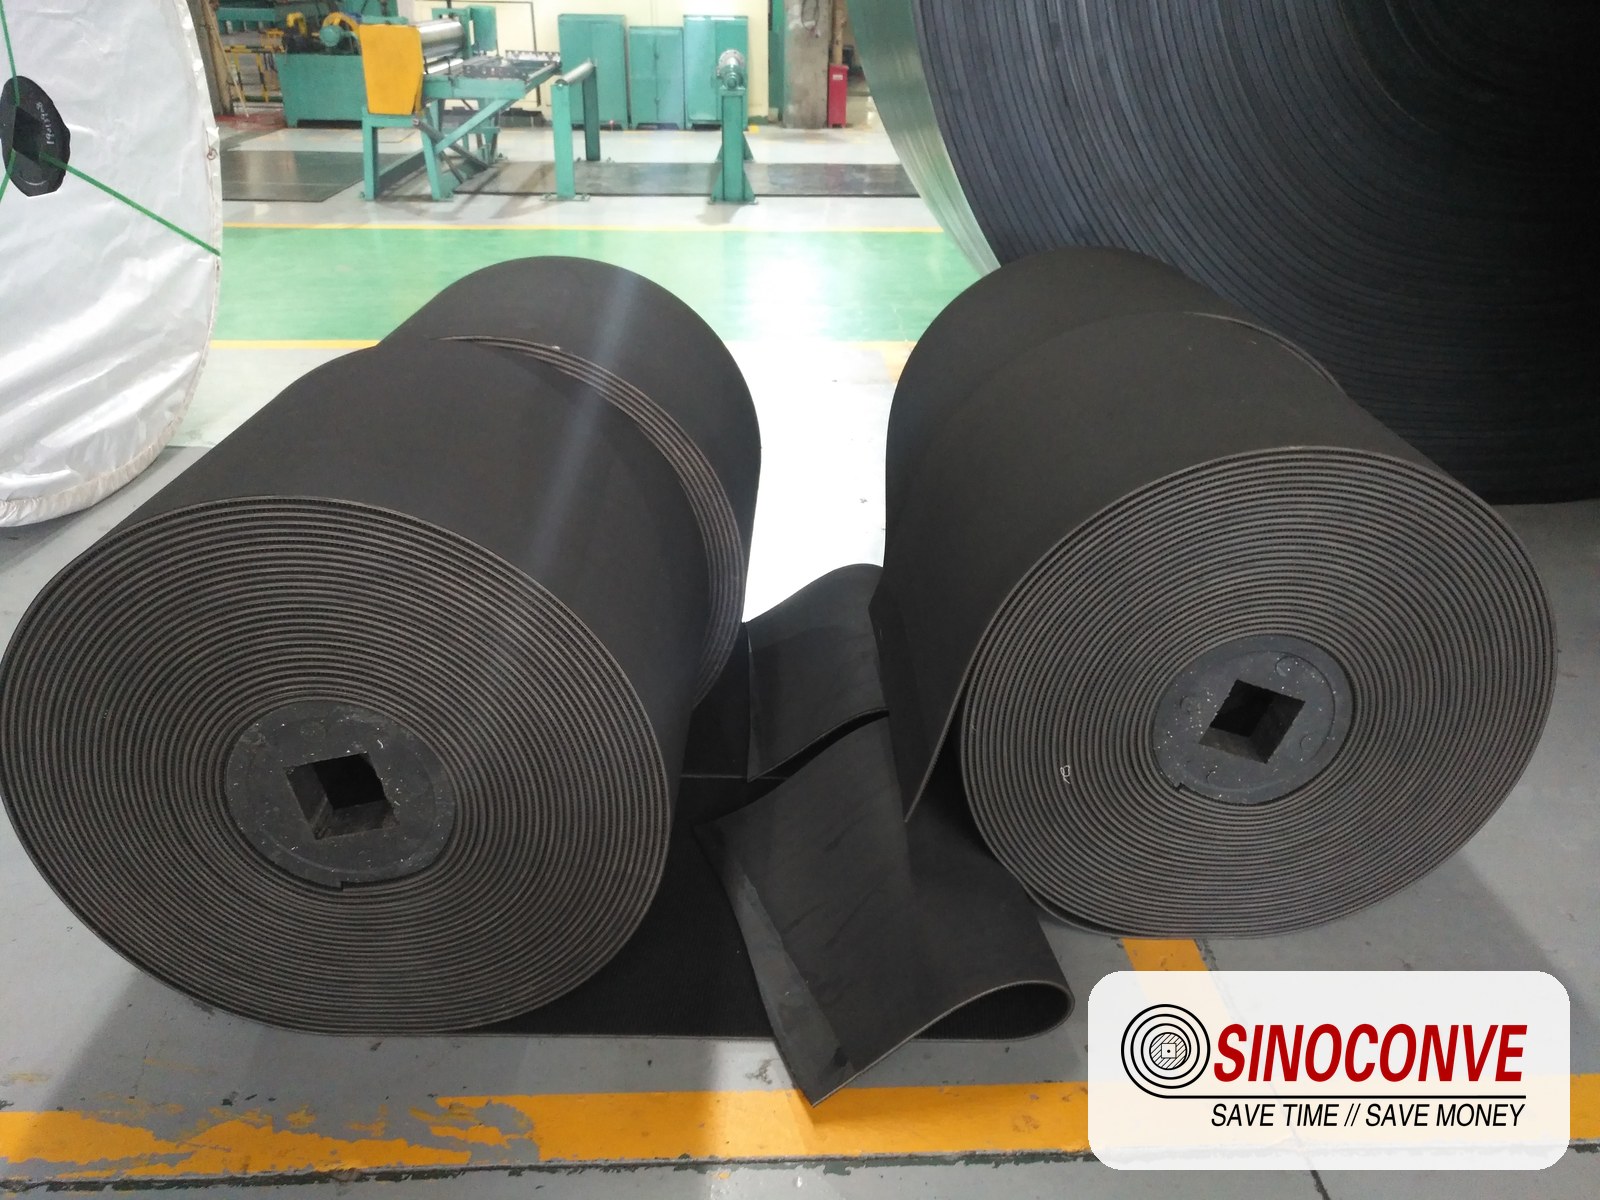
A placement belt carries a wet, alkaline, abrasive and adhesive ribbon at slow speed without shedding its paste, which is a duty no aggregate belt is ever asked to perform. The requirements that follow are not exotic. They are ordinary belt properties pushed to a different balance point, and buyers who read them as a standard product code get a belt that works for the first pour and disappoints by the twentieth.
Alkali, abrasion and tear: the three cover demands
Fresh cement paste sits at roughly pH 12.5 to 13, which is alkaline rather than acidic, and it is warm, often 25 to 32 degrees Celsius straight out of the drum. A cover compound that resists alkali hydrolysis and holds its hardness at that temperature will outlast one chosen only for abrasive rock. Overlaid on the chemistry is plain wear: sand and fine aggregate grind the cover every metre of travel, so an abrasion figure in the region of 90 cubic millimetres under DIN 53516 is the sensible target and 150 cubic millimetres is the practical limit for a short-life duty.
Tear is the property that surprises people. Coarse aggregate is not a smooth loading, it is a series of point loads, and a fabric carcass with a high tear value resists a stone that has found its way into a fold or under a skirt lip far better than a thin high-tensile carcass. The cover grades we would normally compare for this work are set out in our note on rubber conveyor belt cover grades, and the short version is that an abrasion-resistant cover with adequate tear resistance beats a cheap general-purpose one on every floor pour we have measured.
Cleanability, splice strength and a leak-proof skirt interface
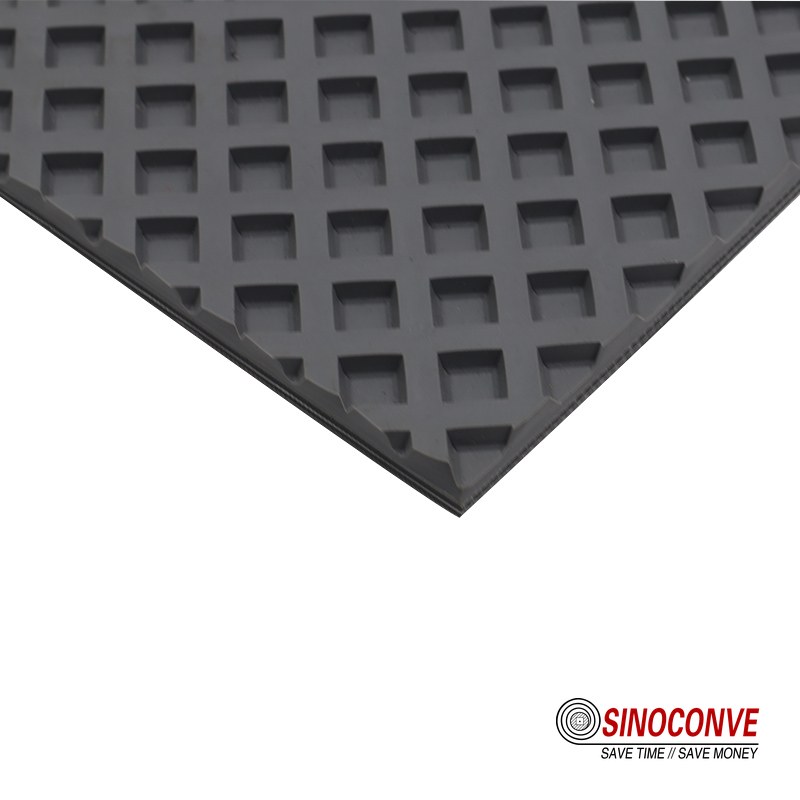
Cleanability sounds soft until you watch a crew scraping set concrete off a ribbed surface at the end of a shift. Smooth covers wash down in a few minutes; rough-top and deeply patterned covers trap paste in every groove, and the trapped paste sets hard and then acts as an abrasive on the return side. For placement duty we recommend a smooth cover with a low-friction finish and scrapers that can be lifted clear for washing.
Splices deserve their own line in the specification. A mechanically fastened joint on a concrete belt leaks paste from the first load, and the fasteners themselves pull out under the combination of moisture and vibration. A vulcanised step splice is the standard answer, and the work behind it, including step length, lay-up and cure, is described in our guide to conveyor belt splicing methods. We expect a cured splice to reach at least 85 percent of the belt's rated tensile strength, and we test a sample on every batch.
| Belt property | What we write on a placement-belt order | Typical figure or reference we work to | Why a floor pour punishes a weak choice |
|---|---|---|---|
| Alkali resistance | Cover compound rated for prolonged contact with fresh cement paste at working temperature. | Paste pH of about 12.5 to 13 and a mix temperature of 25 to 32 degrees Celsius. | A cover that softens in paste loses hardness first and grip second, then wears through fast. |
| Abrasion resistance | Wear-resistant cover with a stated maximum loss figure on the certificate. | Around 90 cubic millimetres as the target under DIN 53516, with 150 as the outer limit. | Sand in a floor mix grinds the cover continuously along the whole run, not only at the load point. |
| Tear resistance | Fabric carcass selected on tear value rather than on tensile class alone. | Tested to ISO 34 or the equivalent the supplier certifies, with the result on the sheet. | A trapped stone tears a low-tear carcass along the edge and the damage spreads with every pass. |
| Cover hardness | A hardness band quoted with a tolerance, not a single figure. | 60 to 65 Shore A with a tolerance of plus or minus 3 on the delivered belt. | Too soft and aggregate embeds, too hard and the belt loses the surface grip that steadies the ribbon. |
| Surface finish | Smooth cover, no fabric impression and no deep pattern on the carrying face. | A finish the crew can hose down and squeegee inside a fifteen minute window. | Paste trapped in a pattern sets hard overnight and then scratches the belt on the return side. |
| Splice and skirt seal | Vulcanised step splice plus a skirt rubber that closes the gap at the load point. | Splice strength of at least 85 percent of the rated belt tensile with a cure record. | Every leak at the skirt is lost cement and a weak layer of laitance at the edge of the slab. |
Belt length is worth one paragraph of its own, because it is the most common source of a second order. The belt has to be long enough for the take-up to reach correct tension on day one and still have travel left after six months of stretch, and short enough that the tail pulley is not sitting where the crew needs to stand. We add the take-up allowance to the measured run and state it on the drawing rather than leaving it to the fitter.
Why this matters to a purchasing department is simple arithmetic. A placement belt that is washed properly and spliced correctly lasts several pours across several projects, so the cost per cubic metre placed falls sharply with each job. Buyers who buy on unit price and then replace the belt every third floor are paying twice, and the second payment is hidden inside the maintenance budget that nobody examines. We make belts for this duty as a conveyor belt factory with our own curing and splicing capability, and we also quote wholesale conveyor belts for contractors who put the same specification across several sites.
05Equipment Combinations and Their Interfaces
No single machine places a floor slab. A working arrangement is a feeder, one or two conveying sections and a discharge, and the reliability of the whole thing depends on the joints between them rather than on the capacity of any one unit.
Mobile, incline and telescopic configurations
Mobile radial conveyors are the default for large open slabs because one unit can sweep a fan of placement without being rebuilt.Incline sections earn their place over formwork and around plinths, and they are the combination most likely to be mis-set, because an incline that is fine for a 100 mm slump mix will spill a 180 mm one. Telescopic sections solve the problem of a pour front that walks away from the feed every ten minutes, which is exactly what happens on a long strip pour.
| Machine form | Typical working envelope we see on site | Where it fits a floor pour best | Interface requirement on the belt side |
|---|---|---|---|
| Mobile radial conveyor | A 12 m to 18 m boom on wheels, swinging through 180 degrees around its own base | Wide open slabs where the placing crew can follow the discharge head on foot | A tail hopper that accepts a chute discharge without the belt surging off centre |
| Incline section | A 15 to 20 degree climb for a stiff mix, dropping to about 12 degrees as slump rises | Lifting mix over formwork, kerbs, plinths and services already cast into the floor | Cleated or sidewall belt where the angle cannot be held inside the slump limit |
| Telescopic section | A 6 m to 10 m extension stroke that advances the head without moving the base frame | Long strip pours and bay pours where the working face advances metre by metre | Rollers and a belt path that stay aligned through the full travel of the extension |
| Feeding from a boom pump | A 125 mm pipeline discharging into a hopper at 60 to 90 cubic metres per hour | Buildings where the truck cannot enter and the pump has to stand outside the doors | A receiving hopper with a grizzly and a gate, sized to absorb a pipeline surge of several seconds |
| Discharging into a pump hopper | A belt feed into the hopper of a trailer pump for the last 20 m of distribution | Deep bays or undercrofts where a belt cannot reach the far corner on its own | A discharge chute that keeps the pump hopper roughly half full instead of dumping in slugs |
Drive, control and the parts nobody puts on the drawing
The drive package on a placement conveyor is small, usually a few kilowatts, which is exactly why it gets under-specified. A variable frequency drive earns its cost by letting the operator slow the belt while the pour front is consolidated and speed it up when a truck is waiting, with no change of pulley. On an incline section a hold-back device is not optional.
Rollers and idlers need the same attention they would get on a dusty line, and often more, since the return side of a concrete belt collects paste rather than dust. Sealed bearings, impact rollers under the feed and self-aligning rollers on the return run are the three items we are asked to add after the first pour, and it is cheaper to specify them the first time. The selection logic is the same as for a heavy granular duty, and the load ratings in our conveyor roller range cover the sizes used on these frames.
Suppliers matter here more than on a pure rock line, because a placement conveyor is often needed on a short lead time and in a specific width. A conveyor belt distributor who holds stock locally can be more useful than a distant factory on a repair, provided the stock belt meets the alkali and cleanability requirements above. On the transmission side of the same plant, mixers, compressors and fans are driven by V-belts, and a reliable transmission belt manufacturer is worth keeping on the approved list for the same reason: a stopped compressor stops the pour.
06Capacity Check: From Cubic Metres per Hour to Belt Width and Speed
Sizing a placement conveyor is a two step sum that any buyer can repeat on a calculator, and doing it openly prevents most of the arguments that follow a slow pour. The first step is a material conversion, and the second is a geometry check on the belt.
The two-step capacity calculation
Step one turns a volume rate into a mass rate. Multiply the required pour rate in cubic metres per hour by the density of the fresh mix, which for normal weight floor concrete sits in a band of 2,350 to 2,450 kilograms per cubic metre; we use 2.4 tonnes per cubic metre for planning. A 60 cubic metre per hour pour therefore weighs 144 tonnes per hour, or 40 kilograms per second. Step two turns the volume rate back into belt geometry using the product of usable load width, carried layer depth and speed, each in metres or metres per second, multiplied by 3,600. Usable load width on a 30 degree three-roller trough is about 0.75 of belt width, and the carried layer is capped near 0.10 m because a deeper ribbon slumps over the trough edges and spills.
Worked example for a 48 m by 20 m slab
Take a plant floor 48 m by 20 m at 200 mm thick, which is 192 cubic metres, and add eight equipment plinths of 1.2 m by 1.2 m by 1.0 m, another 11.5 cubic metres. Round the order to 205 cubic metres. At a target of 60 cubic metres per hour the placement itself takes 3.4 hours, and the mass rate is 144 tonnes per hour. On a 500 mm belt the usable width is 0.375 m and the layer is 0.10 m, so the cross-section is 0.0375 square metres. Required speed is 60 divided by 3,600 times 0.0375, which is 0.44 metres per second, so we specify 0.50 m/s and get 67.5 cubic metres per hour, a margin of 12.5 percent over the target. Belt loading at that setting works out at 90 kilograms per metre of belt, which a 500 mm EP belt handles in a 30 degree trough provided the load point has impact rollers.
The same sum is worth running the other way, because it shows why a wider belt is not automatically better here. An 800 mm belt would need only 0.28 m/s to carry the same 60 cubic metres per hour, and that is below the practical floor of roughly 0.35 m/s where scraper setting, tracking and drive control start to misbehave on a short frame.
Pour window and continuous supply check
The pour window is the harder constraint of the two. A six hour window that includes an hour of setting up and an hour of finishing leaves four hours of placing, and 205 cubic metres fits that comfortably at 60 cubic metres per hour. Continuous supply is the check that fails more often. With 8 cubic metre truckloads the job needs 26 loads, and at the design rate the batching plant has to deliver 7.5 loads an hour, one truck roughly every eight minutes. With a 25 minute round trip that needs four trucks in rotation and one standing by. If the cadence slips to one truck every fifteen minutes the delivery rate falls to 32 cubic metres per hour, and the belt has to slow to match or the slab stops early.
Field note from our engineers: A contractor in Zhejiang ran the numbers on paper and ordered a belt for a 90 cubic metre per hour rate, which was the pump's rating rather than the plant's delivery rate. The batch plant could only sustain 55 cubic metres per hour over the day, so the belt ran at two thirds of its calculated speed for the whole pour and the mix sat a little too long at the load point. The belt was correct; the design rate was not.
07Cold Joints and the Supply Discipline That Prevents Them
Where a cold joint actually forms
A cold joint is not caused by the concrete being bad, and it is not caused by the belt being slow. It forms when the leading edge of a placed lift has stiffened enough that the next lift cannot knit into it, and at 25 degrees Celsius that window is measured in tens of minutes rather than hours. The practical rule we pass to site supervisors is to keep the pour front moving so that no part of the placed surface is more than about 30 minutes old before the next lift arrives on top of it. Everything else about a floor pour is negotiable; this is not.
Two habits protect the window. Place in strips or bays so the crew works back towards its own fresh edge rather than racing a long front, and hold a small buffer of mixed concrete, either a hopper on the conveyor or one truck at the gate, so a ten minute delay at the batching plant does not empty the belt. A third habit costs nothing and saves a whole bay. Never stop for a break with a half finished bay in front of you.
The discipline should extend to the plant around the pour. Compressors, mixers and ventilation fans on the same site are usually V-belt driven, and a belt that nobody stocked can stop the air supply in the middle of a placement. As a V-belt manufacturer we would rather see a spare belt on the shelf than a service call during a pour window.
08Field Risks on a Floor Pour
The risks that damage money on a floor pour are not dramatic. They are small leaks and small stones, repeated a few hundred times an hour, and their cost shows up in the slab finish and in the belt invoice for the next project.
Mortar leakage, mis-tracking and aggregate embedment
Mortar leakage at the skirt is the first thing to watch. If the gap between the skirt rubber and the belt is wider than the largest particle of fine aggregate, paste runs out under the edge, the mix at the slab edge loses cement, and the lost paste then travels back on the return belt as carryback. Carryback on a concrete line behaves worse than dust, because it cures, builds on the return rollers, changes their diameter, and the belt starts to wander. The fixes are covered in our conveyor belt tracking guide, and most tracking faults on a wet line start at the load point rather than at the pulleys.
Aggregate embedment is the second risk and it is almost always a load point problem. A 40 mm angular stone dropped onto a soft cover presses in and rides around the circuit, scratching the belt and the idlers. Impact rollers, a rubber lined chute lip and a controlled drop are the cure, and the same reasoning that governs a heavy bulk duty applies here in miniature.
Wash-down between pours
Cleaning is not housekeeping on this duty, it is belt protection. Paste that sets on the carrying face becomes an abrasive layer, and paste that sets on the return side grinds against every idler the belt touches. The cleaning routine, including when a scraper is the wrong tool and a wash is the right one, is described in our guide to conveyor belt cleaning methods. What we tell crews is to run the belt empty for two or three minutes, hose the face and the skirt area while the paste is still soft, and leave the frame dry. On a warm day the usable window is about two hours, and after that the concrete wins.
Field note from our engineers: A precast plant left a placement belt loaded over a long weekend. By Monday the return side of the belt had a 3 mm crust of set mortar that had baked onto the covers, and every idler in the first 8 m of the return run had a flat spot. The belt was still serviceable after a wet scrape, but the rollers were not, and the repair cost more than the belt.
09Traffic, Curing Lifts and Temporary Crossings
The final constraint on a floor pour is the calendar, because a slab that is finished on Friday is still not a road on Monday. The surrounding plant usually cannot wait, so the layout plan has to assume that people and vehicles will keep moving around the fresh work.
How long before a forklift can cross the slab
At a normal 20 degrees Celsius, a 200 mm slab reaches roughly 70 percent of its 28 day strength at about seven days, and that is the point at which light wheeled traffic is usually allowed with care. Loaded forklifts and heavy plant normally wait fourteen days or more, and the decision should be made with cube tests rather than with a calendar. Formwork on plinths can normally be struck after 24 to 48 hours, but the top surface still needs the full curing period. Protection is cheap and simple. Steel plate bridges or timber mats across doorways, barrier tape and a written route keep vehicles off the fresh pour, and a single set of crossing boards costs far less than repairing a scuffed bay.
10Design Mistakes We Keep Finding on Floor Slabs
The mistakes we correct most often
Six faults appear again and again on the drawings we review. The most expensive is a belt sized from a pump rating instead of the plant's delivery rate. Next is a frame that has to be lifted every few metres because nobody checked whether the pour front would outrun the discharge. A third is a rough-top cover chosen for grip and then blamed for the set concrete it traps. Then come the missing buffer hopper, which turns a ten minute delay into a cold joint, the absence of a hold-back on an incline section, and a skirt gap wide enough to pass a 10 mm stone and the paste behind it. Every one of them is cheaper to fix on a drawing than on a slab at three in the morning.
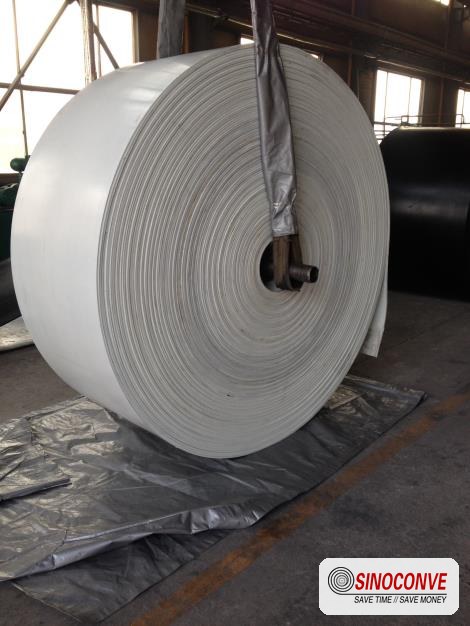
A modular frame that can be re-set by hand suits indoor pours better than a long fixed boom.
11Procurement Checklist and Acceptance Criteria
An order for a placement conveyor is only as good as the enquiry behind it. This is the list we want to receive, and the evidence we expect to hand back.
What to put in the enquiry
| Item to specify | What the buyer should state in writing | Evidence the supplier should return |
|---|---|---|
| Belt specification | Carcass type and ply, tensile class in N/mm, cover thickness, cover hardness band and the maximum abrasion loss figure. | A mill certificate naming the figures, with the abrasion test result under DIN 53516. |
| Belt length and take-up | The measured run, the splice allowance and the stretch margin left for the take-up frame. | A dimensioned drawing with the belt length and the remaining take-up travel marked on it. |
| Frame and transfer | Clear height available, doorway width, maximum section weight the crew can move by hand and the incline needed. | A layout drawing showing the sections, their weights and the direction the frame is re-set. |
| Skirt and seal | The largest fine aggregate particle in the mix, so the skirt gap can be closed below it. | The skirt rubber grade, its thickness and the adjustment range on the clamps. |
| Drive and control | Required speed range, whether a variable frequency drive is wanted, and the site voltage and phase. | The motor and gearbox nameplate data, the speed range achieved and the hold-back device fitted. |
| Clean-down provision | The wash-down window available between pours and whether the crew has water and a drain close by. | Scraper type and lift arrangement, plus the clean-down steps written into the manual. |
Acceptance tests at handover
| Acceptance check | How it is carried out on site | Pass criterion we sign against |
|---|---|---|
| Empty run and tracking | Run the belt empty for fifteen minutes and watch both edges along the whole frame. | The belt holds within 30 mm of the centreline at every point of the run. |
| Loaded run and rate | Run one full truckload through and time the discharge against a measured receiving tray. | The measured rate is within five percent of the figure on the order. |
| Splice condition | Inspect both splice edges after a full loaded run and check the cured step for gaps or ridges. | No paste extrusion, no lifted edge and a cure chart supplied for each splice. |
| Skirt leakage | Place a load and inspect the floor beneath the loading zone and along the return belt. | No fresh paste trail under the frame and no build-up on the return rollers. |
| Discharge and spread | Watch one lift placed at the far end of the reach with the crew working normally. | The mix lands in a controllable heap, with no segregation of coarse aggregate at the head. |
| Clean-down | Have the site crew wash the frame after the trial load following the manual. | The belt face, skirt and return run are clean within the stated window without dismantling. |
A machine that tracks perfectly when empty and sheds no paste under load has almost no other way to disappoint you.
12How This Page Differs From Our Other Concrete Articles
We already publish a page on concrete conveyor belts for site materials handling, and it answers a different question. That article treats ready-mix and aggregate as material to be moved around an outdoor works area, and it is organised around batching, stockpiles and yard movement. It says little about placing concrete onto a floor inside a building, because that is not what it is for. This page starts where that one stops, at the factory door.
The dividing line is the constraint set. Outdoors the variables are material flow and weather. Indoors they are clearance, doorway width, aisle traffic, the pour window and neighbours who keep producing while you work. The same wear questions still apply once the mix is moving, which is why we point readers to our note on abrasion-resistant belt selection for aggregate duty when wear is the dominant risk rather than clearance.
13Standards, Test Evidence and Documentation
When standards are cited on a placement-belt order, we work to what those standards normally require rather than to a clause number we invent. DIN 22102 is the usual reference for cover grades, ISO 340 covers flame resistance where it applies, ISO 284 covers surface resistivity, and DIN 53516 is the abrasion test most mills quote for cover wear. Abrasion class is often written as RMA Grade I or Grade II, and carcass tear results against ISO 34. Where a covered building needs a flame-resistant belt, EN 12882 or MSHA 30 CFR Part 14 are the references normally named.
The paperwork that should come with the belt is short. The shipment should carry a mill certificate giving the tensile, cover and abrasion figures, a drawing set showing belt length and take-up allowance, a cure chart for every vulcanised splice, and a manual covering tensioning, tracking and clean-down. Store all four against the belt tag number so the next pour starts from a known baseline.

14Questions We Get Asked Before a Floor Pour
Can we place concrete on an ordinary rubber conveyor belt?
Yes, with two caveats. The belt has to be built for alkali contact and for washing, and the splice has to be vulcanised rather than mechanically fastened. An ordinary aggregate belt with a general-purpose cover will place concrete, and it will do it once before the cover softens and the paste starts to stick.
What belt speed makes sense for placing concrete inside a building?
Between 0.4 and 0.6 metres per second for most indoor pours, with a variable frequency drive so the operator can slow down while the crew consolidates and speed up when a truck is waiting. Speeds above about 1.0 m/s on a wet mix throw paste off the edges and thin the ribbon.
Is a concrete pump always better than a belt conveyor?
No, and the answer usually follows the mix design rather than the equipment catalogue. A pump wins on long horizontal runs, high lifts and mixes already specified at 160 to 200 mm slump with a 125 mm pipeline on site. A belt wins on flat or gently inclined runs under about 60 m, on stiff mixes that would be difficult to pump, and wherever the plant wants to control the placement rate independently of a pump operator.
How do we stop mortar leaking out under the skirt board?
Close the gap below the largest fine aggregate particle in the mix, and keep the skirt rubber in contact with the belt without pressing it hard against it. A 10 mm stone will find a 12 mm gap. Adjustable clamps and a soft strip solve this cheaply, and the tell-tale is a paste trail on the floor under the loading zone.
Why do mechanical fasteners fail on concrete belts?
Because they leak from the first load. Paste finds every fastener hole, the joint opens slightly under load, and the combination of moisture and vibration pulls the fasteners out one at a time. A vulcanised step splice is the standard answer, and it is the single change that most improves belt life on this duty.
What slump range is safe to carry on a belt?
From roughly 60 mm to about 120 mm on a horizontal run, and tighter on an incline. No frame geometry will hold a 180 mm mix on a 15 degree climb.
How does coarse aggregate damage a placement belt?
By pressing into the cover at the load point and staying there. Once a 40 mm angular stone is embedded, it acts as a cutting tool on every pass and it thickens the belt locally, which is enough to start a tracking fault. Impact rollers and a shorter drop are the practical cure.
When can a forklift drive over the new slab?
Light wheeled traffic at about seven days at 20 degrees Celsius, heavy loaded plant at fourteen days or more, and both decisions should be confirmed with cube tests rather than with a calendar. Temporary steel plate crossings over doorways and along the pour route cost very little compared with repairing a scuffed bay, and they let the rest of the plant keep working while the slab cures.
Do we really have to wash the belt after every pour?
Every pour, yes. Set paste on the carrying face turns into an abrasive layer and set paste on the return side grinds the idlers. The whole job takes about fifteen minutes while the concrete is still soft, and considerably longer once it has cured.
Related Products You May Need
- Rubber conveyor belt in wear-resistant and alkali-tolerant cover grades for concrete placement duty.
- EP fabric conveyor belt in standard tensile classes for short indoor runs and modular frames.
- Conveyor rollers and idlers including impact and self-aligning versions for wet, paste-heavy return runs.
- Chevron and cleated belt where an incline is steeper than the mix will hold on a smooth cover.
- V-belts for plant drives to keep mixers, compressors and fans running through the pour window.
- Full product catalog covering belts, rollers and transmission products for construction and plant duty.
Related Blog Posts
- Rubber belt cover grades explained — how abrasion, cut and heat ratings are written and what they mean.
- Conveyor belt splicing guide — methods, cost structure and the field practice behind a reliable joint.
- Belt cleaning methods and schedules — when a scraper is the answer and when a wash-down is.
- Belt tracking field guide — the load point checks that come before anyone adjusts a take-up.
- Return side belt cleaning — why the dirty side of the belt decides roller life.
- Abrasion-resistant belts for aggregate — wear selection when rock, not clearance, sets the limit.
- Splicing buyer's checklist — twelve points to verify before a splice order is placed.
- Dust-resistant belt supply — how fine material changes belt and roller selection.
- Heavy-duty rubber belts in mining — what hard working conditions do to cover and carcass.
- Inside our conveyor belt factory — the curing, splicing and testing capability behind every order.