Rubber Conveyor Belt Buyer's Checklist: 12 Things to Verify Before You Order
A purchase order for a rubber belt is a one-page document and a three-year commitment. We have watched that mismatch cost plants a great deal of money. The PO says "EP200, 1,200 mm, 4 ply, 6+2, X grade" because that is what the last one said. Sixteen weeks later a hundred and eighty meters of belting arrives at the gate, and the receiving clerk has no way of knowing whether any of it is what was paid for. Nothing on the pallet is obviously wrong. Almost nothing about it can be checked with a tape measure and a torch.
So this is not another page about the factors to consider. There are plenty of those, and several of them are ours. This is a checklist of twelve actions you can actually perform on a chairlift of paper, a sample, and a delivered roll. Each item states what to request or measure, which line of which standard or report you are looking at, the acceptance figure we would sign off on, and how to handle a miss before the belt leaves the factory rather than after it is loaded onto your structure. Work through all twelve before you raise the PO and you will remove most of the ways a belt purchase goes sideways.

The document you order from should read like a test plan, not a wish list. Where our own data sheet has a gap, we say so on the quotation. As a conveyor belt manufacturer, we have no interest in winning an order with a number we cannot measure, because the argument comes back to us in month nine. If the how-to-choose conversation is what you need first, our separate page on rubber conveyor belt types and grades covers it. The selection detail lives there. Verification lives here.
01Verify the Specification Sheet Before You Verify Anything Else
Everything downstream in this checklist depends on one page of paper. If that page is loose, no inspection at the receiving gate can save the order, because there is nothing to inspect against. We ask for four data fields in writing before we quote, and we ask for them in units, not adjectives.
The four data fields that decide the order
The rated tensile strength of the carcass, stated in N/mm of belt width. Not "heavy duty." Not "premium." A figure. The number of plies and the fabric type behind them, EP or NN, written as an abbreviation that both sides understand. The cover grade and the standard it is claimed against, DIN 22102 or RMA. And the total belt thickness with its tolerance, which is where the cover thicknesses hide and where most disputes begin.
Ask for the same four fields twice, once on the quotation and once on the mill test certificate, and compare them when the belt lands. You are not being difficult. You are creating the paper trail that makes a claim possible.
| Data field | Format to demand | Acceptance figure we quote | Red flag |
|---|---|---|---|
| Carcass tensile strength | N/mm, e.g. EP200 = 200 N/mm | Nominal rating, confirmed by mill certificate | A range instead of a figure |
| Ply count and fabric | e.g. 3 ply EP, or 4 ply NN | Matches the tension calculation on file | "Standard construction" |
| Cover grade | DIN 22102 W / X / Y / Z, or RMA Grade I / II | Grade stated with top and bottom thickness | Grade named without the standard |
| Total thickness | mm, e.g. 6+2, with tolerance class | Within the tolerance in the standard you named | Cover thickness quoted "approximately" |
Read the cover grade line without guessing
A grade letter on its own means almost nothing, because the same letter is used differently by different standards and a belt can be W on top and something else underneath. What you want written down is the grade, the standard, and the two cover thicknesses, in that order. The difference between a grade X and a grade Y top cover on a 1,200 mm belt is not decoration. It decides how many megagrams of sharp granite the surface will absorb before the carcass is exposed. Our separate article on rubber conveyor belt cover grades walks through the DIN and RMA tables line by line if you need the detail. The buyer's move is simpler: make the supplier commit to one table and one letter.
Field note from our engineers: a cement plant once sent us a PO with the cover grade written as "abrasion resistant, as before." Their previous belt was a grade X. The quarry had moved from limestone to a harder clinker blend with a lot more grit in it, and "as before" failed in eleven months. Same belt, worse duty. Two lines on a sheet would have caught it.
What a vague sheet costs you in real numbers
Take a 1,200 mm conveyor moving 600 tonnes per hour on a two-shift schedule. If a wrong cover grade costs you six months of service life out of a thirty-month expectation, and a belt change takes eighteen hours of lost production at that rate, you are buying that mistake twice — once in the premature belt, once in the shutdown. The sheet is free to get right. That is why it is item one.
We have never met a maintenance team that regretted spending an hour on that page, and we have met plenty that regretted skipping it. A rubber conveyor belt is a three-year commitment written on a one-page document, and an EP conveyor belt ordered on a soft specification costs exactly the same as a good one. The money is not saved on the sheet. It is lost there.
The commercial number that hides here is not the belt price, which most buyers already negotiate hard. It is the difference between a belt that meets its stated rating and one that merely resembles it. Our notes on the rubber belt price factors explain where manufacturers trim cost when a specification is left soft, and those are exactly the lines this checklist exists to pin down.
02EP or NN: Decide From Measured Behavior, Not From Habit
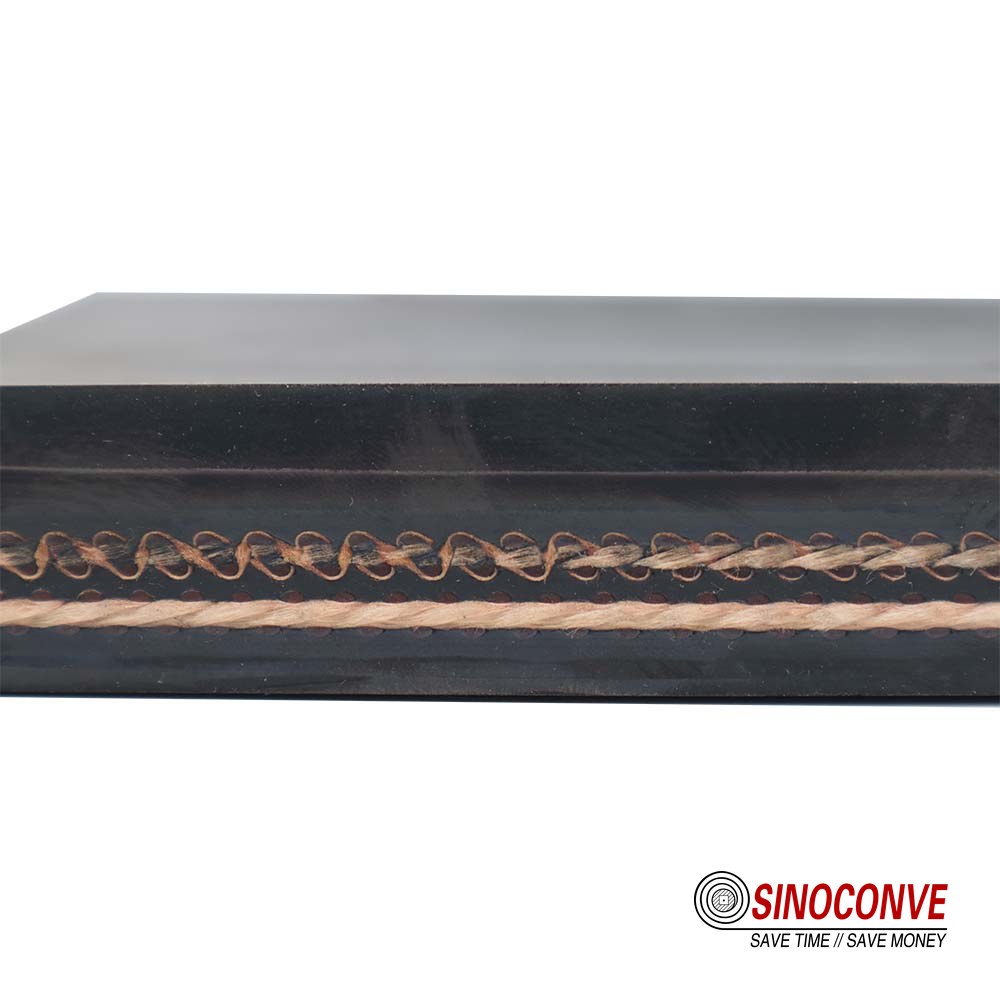
This is the decision most often made by geography. Buyers in one market default to EP because that is what their distributor stocks. Buyers in another stay on NN because the plant standard says so. Both fabrics are legitimate. They simply behave differently under water, under shock and under stretch, and the difference shows up in measurable numbers you are entitled to ask for.
What an EP carcass does measurably better
Polyester warp and nylon weft. The polyester takes the tension, and polyester does not care much about moisture. Wet testing on EP keeps a high proportion of the dry strength, typically quoted in the mid-nineties percent range, and that matters on washing plants, port terminals, and any conveyor where the belt runs wet for weeks at a time. The second advantage is stretch. A standard EP carcass at working tension holds elongation to about 1.5 percent or less, which is the number that makes long, high-tension routes possible without an unreasonable amount of take-up travel.
What an NN carcass does better, and where it wins
Nylon in both directions gives a more forgiving belt. It stretches further, absorbs impact better at the loading point, and costs less per meter. On a short conveyor, on a recycled-aggregate line with a bad chute, on anything where the belt is cheap to change and abuse is unavoidable, an NN fabric belt is a rational choice. What it is not is a substitute for EP on a long, wet or high-tension run, where the extra elongation turns into take-up problems and the moisture sensitivity turns into a strength question.
| Property you can test | EP (polyester / nylon) | NN (nylon / nylon) |
|---|---|---|
| Elongation at rated tension | About 1.5% or less on standard EP | Materially higher, and more take-up travel |
| Wet strength retention | High; the polyester warp is not moisture sensitive | Lower retention, and the gap widens with time wet |
| Impact tolerance at the chute | Good, falls off fast on very large lump size | Better; the nylon gives more before it tears |
| Typical price relative to EP | Reference point | Lower per meter at the same ply count |
| Splice behavior | Stable geometry, holds step length well | Softer, more creep at the joint under tension |
Ask any conveyor belt supplier for the wet-to-dry strength ratio and the elongation figure as tested numbers rather than brochure language. A supplier who can produce them within a day is a supplier who knows the carcass. One who answers with a synonym for "good" is not.
Field note from our engineers: at a port stockyard handling wet iron ore fines, a customer replaced three consecutive NN belts inside twenty months before calling us. Shore hardness on the covers was fine, abrasion was fine, the carcass was simply growing. Lost take-up travel was the visible symptom. We moved them to EP with the same cover grade and the same ply count. Same tonnage, four times the service interval. Nobody had tested the fabric.
Get the comparison onto one sheet
If you are weighing the two for a specific conveyor, the side-by-side treatment on our page comparing EP vs NN conveyor belt carcass is built for exactly that decision, and it goes further into the weft and warp mechanics than we need to here. Decide the fabric on the duty, not on the warehouse.
03Ply Count and Tension: Four Plies Is Not Automatically Stronger
This is the single most common misunderstanding we deal with on incoming enquiries, and it usually arrives phrased as a request: make it four ply instead of three, because the belt keeps failing. More plies do not add strength unless the type number changes with them. The plies only decide how the same rated load is divided.
Work backward from N/mm, not forward from habit
Start with the belt rating you need, not the ply count you like. Take the maximum steady running tension on the conveyor, divide by the belt width in millimeters, and you have the working tension in N/mm. Multiply that by the design factor your site uses for textile carcass belting — ten to one on breaking strength is the figure normally applied on a fabric belt, and it is the one we ask for in writing — and you have the minimum nominal rating the belt has to carry. Then pick the type number and the ply count that provide it. An EP200 at three plies spreads roughly 67 N/mm across each ply. The same EP200 at four plies spreads about 50 N/mm, and those are two different belts with the same name on the invoice.
Write that result down before you open a catalogue, because it is the figure the delivered belt will be judged against. When a plant asks us to review an EP conveyor belt selection, the first thing we do is check whether the rating on the drawing clears the calculated working tension once the design factor is applied. Everything else about the order is secondary to that comparison.
| Carcass type | Ply count | Nominal rating | Load per ply | Where it belongs |
|---|---|---|---|---|
| EP100 | 2 to 3 | 100 N/mm | 33 to 50 N/mm | Short in-plant runs, low tension, light duty |
| EP200 | 3 to 4 | 200 N/mm | 50 to 67 N/mm | Aggregate and cement secondary conveyors |
| EP400 | 4 to 6 | 400 N/mm | 67 to 100 N/mm | Mainlines, long lifts, high-tension fabric duty |
If the route is long enough that the calculation pushes past what fabric can carry at a sane ply count, the answer is not more plies. It is a different carcass family. The trade-off between the two is set out in our comparison of fabric versus steel cord conveyor belt construction, which is where the crossover normally sits.
What extra plies buy, and what they cost you
Adding a ply at the same type number is a fatigue decision, not a strength decision. The per-ply load drops, so each fabric layer works further from its limit, and the belt tolerates impact and flexing better. That is a real benefit on a crusher discharge where 300 mm rock arrives in bursts.
The bill for it arrives elsewhere. A four-ply belt is thicker, heavier, harder to trough, and it resists bending around a small pulley more. On a 630 mm diameter snub pulley, the extra ply can raise the strain at the splice edges more than the reduced ply loading saves you. And every extra ply is one more step in the splice, which lengthens the joint and the shutdown that makes it. If you are already running a three-ply design and want more margin, the honest options are a higher type number at the same ply count or a longer step length in the splice. Our field guide on the four fabric ply conveyor belt construction covers the impact-versus-flex trade in more depth, and it is worth reading before you change the drawing.
Write the design factor into the purchase order
Put the required rating in N/mm, the ply count, the fabric, and the design factor on the PO. Then write the minimum breaking strength you expect the delivered belt to test at, in kN across the full width. For a 1,200 mm EP400, that is 480 kN nominal, and a mill test should land on or above the nominal figure, not somewhere in the region of it. When the number is in the PO, the argument about whether the belt was compliant stops being an opinion. On our industrial conveyor belt data sheets you will find the rating stated this way, which is the format to ask for from anyone you buy from.
04Cover Grade and Abrasion Loss: Fix the Acceptance Number
Cover grade is where a specification most often goes soft, because "abrasion resistant" sounds like a specification and is not one. What you need is a grade letter, a standard, and an abrasion loss figure you are prepared to accept, measured by a named method. Everything else about the cover is negotiation.
The abrasion number that belongs in your acceptance criteria
The method to name is the rotating drum abrasion test, DIN 53516, which reports loss of volume in cubic millimeters. Lower is better. The figures normally quoted against DIN 22102 cover grades put the high-wear-resistance cover at or below roughly 90 mm³, the standard abrasion-resistant grade near 150 mm³, and general-purpose covers up to around 250 mm³. Heat-resistant grades are not sold on abrasion at all — they are sold on how much of their tensile strength and elongation they keep after days in an oven, and on their rated continuous temperature. If your supplier quotes you an abrasion number for a heat cover, ask what the number was measured against.
| Grade | Character | Abrasion loss, typically quoted | Duty it earns its price on |
|---|---|---|---|
| DIN 22102 W | High wear resistance | At or below about 90 mm³ | Sharp granite, crushed basalt, sinter and coke |
| DIN 22102 Y | Abrasion resistant | Around 150 mm³ | Aggregate, gravel, sand and general quarry duty |
| DIN 22102 X | General purpose | Up to about 250 mm³ | Coal, grain, cement, low-abrasion bulk |
| DIN 22102 Z | Heat resistant | Not the selling point | Hot clinker, sinter, foundry sand, up to high temperature duty |
| RMA Grade I | High abrasion resistance | Stated against the RMA test, lower loss band | North American specs, hard rock and ore |
| RMA Grade II | Standard resistance | Higher loss band than Grade I | General bulk handling where cost per meter leads |
Notice how the letter changes with the standard. A belt described as Grade I under RMA is not the same product as grade Y under DIN 22102 even at a similar abrasion figure, because the test methods and the acceptance bands differ. Name one standard in the order and hold the supplier to it. If your site works in a market where wholesale conveyor belts arrive under several different classifications, keep the DIN and RMA tables side by side and record which one each belt was bought against.
Measure cover thickness on arrival, not from the drawing
You do not need a laboratory for this one. A portable ultrasonic thickness gauge, or a simple caliper on a cut sample, gives you the top cover and the bottom cover separately. Sample at five points across the width and every ten meters along the roll, and write the numbers down. A nominal 6+2 belt means six millimeters of top cover and two millimeters of bottom, and ISO 583 is the standard normally referenced for belt thickness measurement and its tolerance classes. The tolerance is not unlimited, and the delivery is not compliant simply because the total thickness is close.
Two millimeters of bottom cover sounds generous until you remember which face runs on the idlers. On a belt with a scraper, the bottom cover is exposed to the blade every revolution. That is why a 6+1.5 order so often comes back as 6+2 — and why you should order the bottom cover you actually need rather than accept the mill's default.
Field note from our engineers: an aggregate plant had a belt failing at eighteen months with the top cover still half intact. The failure was on the bottom face, under the return idlers, at the point where the skirt rubber was pinching. Bottom cover measured 1.4 mm against a 2 mm order. Nobody had checked it on arrival because the top looked new. Two hundred yuan of gauge work at goods-in would have caught it while the claim was still open.
What a failed abrasion result is worth in money
Put a value on it before you buy. If a cover is rated at 90 mm³ and the delivered compound tests at 150 mm³, you should expect roughly two-thirds of the wear life you budgeted, and that is the difference between a thirty-month change-out and an eighteen-month one. On a 180 meter, 1,200 mm belt that is a real number, not a rounding error. The test itself is cheap and can be run on a sample cut from your delivered roll before installation. Ask for it when the duty is abrasive and the order is large.
For the full picture of what each grade was designed to survive, our page on cover grade selection for rubber conveyor belts goes deeper than this checklist needs. Here, the deliverable is one line in the PO: grade letter, standard, abrasion figure, and top and bottom thickness.
05Dimensions, Tolerances and the Cut Length Calculation
A belt that is two meters short is scrap, and a belt that is six meters long is an invitation to cut it on site with a knife and lose a splice's worth of strength. Getting the length right is arithmetic, and the arithmetic is easy to get wrong when it is done from memory at the end of a site visit.
Calculate the cut length from the center distance
Measure the center distance between the head and tail pulley, multiply by two, then add the wrap around both pulleys — roughly half the circumference of each pulley for a typical two-pulley arrangement — and then add allowances. The allowances are where orders fail. A vulcanized splice consumes between about 1.5 and 3 meters of belt on a fabric carcass, because the stepped joint has length and the belt has to be pulled together over the press. Take-up travel has to be left in the middle of its stroke, not at the end, so plan for at least one full meter of adjustment on a long conveyor and proportionally less on a short one. And if the belt is going onto an existing structure with the take-up already positioned, measure where the counterweight actually sits before you calculate anything.
| Item in the calculation | Rule of thumb | Why it bites |
|---|---|---|
| Center distance, doubled | Measure on site, both directions | Drawings and reality differ after a plant upgrade |
| Pulley wrap allowance | About half the circumference per pulley | Underestimating on a large head pulley shortens the belt |
| Splice consumption | 1.5 to 3 m on fabric carcass | Grows with ply count and step length |
| Take-up allowance | At least 1 m on a long conveyor | Without it you re-splice inside the first year |
| Tolerance on the delivered length | Typically quoted within half a percent | On 200 m that is a meter either way, so state your preference |

Tolerances to check at the gate with a tape
Width tolerance on textile belting is normally quoted as a percentage of nominal with a minimum band, and a 1,200 mm belt that arrives at 1,188 mm will not track on a structure designed for 1,200. Check width at three points along the roll. Check squareness of the cut ends by measuring the diagonals — a belt end that is 15 mm out of square will make the jointed belt steer from day one. And check that the roll is wound the way you asked, because reversing roll direction on site is a two-crane job on a wide belt.
Our team does this arithmetic for customers every week, and we would rather do it three times than have a belt cut on a quarry floor. If you are ordering across a language or unit gap, the checks on how industrial buyers verify belts bought overseas are a useful companion to this section, particularly on units and documentation.
One length or two? Decide at the enquiry stage
A fabric conveyor belt ordered in a single length removes one splice from the system, and every splice you do not make is a joint that cannot fail and a shutdown that does not happen. Beyond about 300 meters, or where transport and handling make a single roll unmanageable, two lengths with a planned joint become the sensible answer. What is not sensible is discovering at the gate that the roll is 6 tonnes and the only crane on site is not certified for it. Decide this when you request the quotation, not when the truck arrives.
How a supplier handles that conversation is a useful signal on its own. A conveyor belt factory that works the roll plan through with you is thinking about your installation; one that answers only with a weight and a price is thinking about the container. Ask three questions before you confirm: how will the EP conveyor belt be wound and on what core, what is the maximum roll weight, and who signs the packing list. The answers tell you how the delivery will go.
06Ply Adhesion: How to Take a Sample and What to Compare
You can buy a belt with a perfect carcass rating and a cover that will peel off it in the first month, and the failure will look like abuse. Ply adhesion is the number that tells the two apart, and it is the test most often missing from a factory report that otherwise looks complete.
Ask for adhesion in N/mm, by method
Adhesion between plies, and between the cover and the first ply, is measured as a peel force in newtons per millimeter of width. ASTM D378 is the standard test method normally cited for textile-reinforced belting, and ISO 252 covers the same ground in metric practice. Typical acceptance figures quoted for textile carcass belting sit in the mid-single digits — around 4 to 5 N/mm between plies and higher from cover to carcass — but the exact figure depends on the construction and on the standard you bought against. Do not accept "good adhesion" or a pass/fail stamp without the numbers behind it.
| Test | What it protects | Sample to request | Failure mode if it is ignored |
|---|---|---|---|
| Ply to ply, ASTM D378 | Carcass integrity under repeated flexing | Full width strip, 1 m from the belt end | Internal delamination, belt grows and tracks badly |
| Cover to carcass | Cover retention over idlers and at scrapers | Same sample, top and bottom faces | Cover stripping, exposed carcass, rapid wipe-out |
| Heat aging, ASTM D573 | Whether the compound survives the duty temperature | Aged coupons, strength and elongation retention | Hard, cracked covers on hot material duty |
Cut the sample from the right place
Adhesion varies along a belt. We ask for samples taken at least one meter in from the end, full width, and we prefer two samples from different rolls if the order spans more than one. A sample cut from the first meter of a production run tells you about the mill setup at start-up, not about the belt you are going to receive. If a third-party laboratory is doing the test, the sample should be cut and witnessed by your own inspector or the freight forwarder, sealed and labelled with the roll number. Otherwise there is no chain from the belt to the report, and a report without a chain is unenforceable.
Compare, do not merely accept
Put the delivered adhesion figures next to the figures on the quotation and the figures in the standard. Three columns, same row. When a supplier knows you will do that, the compound does not get rushed. When a serious manufacturer signs off on their own test certificate, they do so because the numbers were seen. That is the posture to look for: not a promise, but a measured line in a document they are willing to put their name to. Our page on selecting a rubber conveyor belt factory partner covers what else separates a mill from a trading desk.
07Edges, Edge Cover and Sealed Cuts
The edges of a belt are the part that touches everything: skirt rubber, structure, misaligned idlers, and the flanges of pulleys. Edge damage is the leading first symptom of a belt that is being mistreated, and edge cover is what decides whether the failure stays cosmetic or reaches the carcass.
Cut edge or moulded edge, and how much edge cover
A moulded edge belt has rubber formed around the outside of the carcass, so the fabric is encapsulated. A cut edge belt has the plies visible at the sides. Moulded edges cost more and resist edge abrasion and moisture ingress much better. Where you have a belt running against structure, on a curved route, or in wet conditions, edge cover is worth the price. Ask for the edge cover width in millimeters, and check it on the delivered belt with a steel rule — a target of roughly 20 to 30 mm of rubber beyond the carcass is a common specification, and a supplier who cannot state the figure has not thought about it.
When the cut end really does need sealing
Belt ends that will be vulcanized are sealed by the splice itself, and there is no separate job to do. Belt ends that will be mechanically fastened benefit from a sealed cut, because fasteners create paths for water to reach the plies. Where a belt is being shortened on site, the new cut edge should be sealed with a compatible compound before the belt goes back into service, especially in a wet plant or a wash box. This is a small job that is often skipped, and the cost of skipping it appears as delamination from the edge inward, six to twelve months later, in a belt that was otherwise fine.
Tie edge condition to tracking before you blame the belt
Edge wear on one side only is almost never a belt fault. It is a tracking or alignment fault, and it will destroy any belt you fit while it remains. Before ordering a replacement, check pulley alignment, idler skew and loading symmetry. If you buy through a conveyor belt distributor who does site visits, ask them to look at it — and if they will not, that tells you something about the relationship you are about to depend on. The mechanical side of the conveyor and the belt are one system, and the edge is where the two meet.
One more edge-related item that belongs in the order documents: the direction the belt was manufactured to run. Some constructions, particularly those with a profiled or chevron top cover, are directional. If the drawing does not say which direction, ask. Fitting a directional belt the wrong way round is a full reversal on site, and on a 1,400 mm belt that is a shift's work with two machines and a lot of care around the carcass.
08Decide the Splice Before You Order, Not After
Splice method is not a maintenance decision that happens three years later. It is determined by the carcass you buy, and if the carcass is wrong for the only splice method available on your site, you find out at the worst moment. This is why the joint belongs in the enquiry, on the same page as the belt specification.
Ply count sets the step length, and step length sets the shutdown
A vulcanized fabric splice is built from stepped plies. Each ply gets a step, and the total splice length is roughly the step length multiplied by the number of plies, with an overlap allowance. That means an EP400 conveyor belt at five plies can need a joint two and a half times as long as an EP100 conveyor belt at two plies. Longer joint, longer press time, more consumables, more hours of a stopped plant. If the only window you have is a twelve-hour Sunday shutdown, the ply count is a scheduling input, not just a strength number.
| Carcass / ply count | Typical step length per ply | Total joint length, order of magnitude | Practical splice method |
|---|---|---|---|
| EP100, 2 ply | About 150 mm | Around 300 to 400 mm | Cold bond or hot; fasteners viable as a bridge |
| EP200, 3 ply | About 200 mm | Around 600 to 750 mm | Hot vulcanized, press required |
| EP200, 4 ply | About 200 mm | Around 800 to 1,000 mm | Hot vulcanized, longer cooling cycle |
| EP400, 5 to 6 ply | About 250 mm | Around 1,250 to 1,600 mm | Hot vulcanized, planned shutdown only |
Those step lengths are field practice rather than a substitute for the splice drawing your supplier should provide for your actual carcass. The point for the buyer is that the numbers are visible at the quotation stage. Ask for the splice drawing with the belt quotation and you will know in advance whether the joint fits your shutdown window.
Four things to lock into the order documents
First, the splice method, named.Second, the retention figure the supplier is willing to state in writing for that method on that carcass — the proportion of rated strength the joint is expected to give back. Third, whether you are buying consumables, press time, or a splicing crew, because those are three different prices and three different levels of risk. Fourth, the step template for your carcass, cut to your ply count, not a generic drawing from a catalogue.
If you take none of the other advice on this page, take this item. Joints fail on geometry far more often than on material. Our guide to conveyor belt splicing methods and costs sets out the method selection in detail, including what each one costs in consumables and press hours. Read it before you sign the belt order, not after.
Field note from our engineers: we once quoted a 5-ply EP400 belt for a mainline where the customer had a 900 mm wide press and a nine-hour window. The joint needed was 1,400 mm long. They bought a 4-ply EP400 design instead, which reduced the joint to about a metre, and accepted a shorter belt life in exchange for being able to maintain it with the equipment they owned. That is a legitimate trade. It only works if it is made before the order.
One more consideration that belongs at this stage: the belt does not exist in isolation. A plant buying belts and drives in the same project should buy them from people who talk to each other. We supply transmission belt manufacturer lines alongside our belting for exactly that reason, so the belt data and the drive data are reviewed against the same duty figures rather than arriving from two catalogues. Our V-belt manufacturer range covers classical, narrow and banded profiles sized on those same figures, which is the practical version of the same argument.
09Factory Test Report or Third-Party Report: Which One, and How Old
Every mill issues a test certificate with a belt. Some are a genuine record of measurements taken on your roll. Others are a template with the order number changed. The difference matters most when something fails, because that is the document your claim will stand on.
The line items a usable report has to carry
A report you can act on identifies the roll, the production date, the belt width and length, and then the measured values: carcass breaking strength, elongation, ply-to-ply and cover-to-carcass adhesion, cover hardness, abrasion loss, and the cover and total thicknesses. For a flame-resistant order, add the flame test result and the standard it was tested to. For an EP200 conveyor belt going into a hot clinker duty, add the heat aging result after the aged-condition test. A certificate showing only "conforms" and a signature is not a report; it is a statement, and statements do not survive contact with a loss adjuster.
| Report line | Factory self-test | Third-party witness / lab | What to accept |
|---|---|---|---|
| Carcass breaking strength | Routine on every production batch | Typically sampled per shipment | Meets or exceeds nominal, roll number shown |
| Adhesion values | Frequently summarized rather than stated | Requested explicitly when it matters | Numeric, with the test method named |
| Abrasion loss | Compound test, not belt specific | Cut from the delivered belt on request | Inside the band for the grade you ordered |
| Dimensions | Width, length, cover thicknesses recorded | Checked at pre-shipment inspection | Within the quoted tolerance, signed by the inspector |
| Report validity | Should be tied to your batch, not to last year | Dated at inspection, before shipment | Dated within the production window of your order |
How old is an acceptable report
Our rule is simple. A report is valid for the production batch it was taken from, and for a stored compound it should be no older than twelve months, because rubber changes in the warehouse. If the document you receive predates your order, it is describing someone else's belt. Ask for the batch certificate. Where a plant has had trouble with a particular supplier, or the belt is going into a MSHA-regulated underground application or an EN 12882 flame-resistant duty, spend the money on a pre-shipment inspection by a named third party. It is a small percentage of the order value and it moves the argument from opinion to measurement.
Inspect before shipment, not after unloading
Once the belt is on your site, the supplier's leverage and your own are different, and a container that has crossed an ocean cannot easily be sent back. Inspection at the plant, while the belt is still in the supplier's hands, is the point of maximum leverage. On larger projects, that inspection is normally folded into the pre-shipment checklist that also covers packing, marks and documents — and it is where the next item in this list gets verified.
When you buy belts and drives in one package, the same logic applies to the accessory lines, and the same standards of documentation should be expected. Our page on V-belt manufacturer ranges sets out what we publish for those drives, including the data we are prepared to certify against a specific order.
10Packing, Roll Direction and Shipping Marks
Logistics damage is the most expensive failure nobody inspects for, because it happens after the numbers have all passed. A belt can leave a factory perfect and arrive with a crushed edge on the outer wrap, and the argument about who owns that damage will consume more management time than the belt cost.
Roll direction and core specification
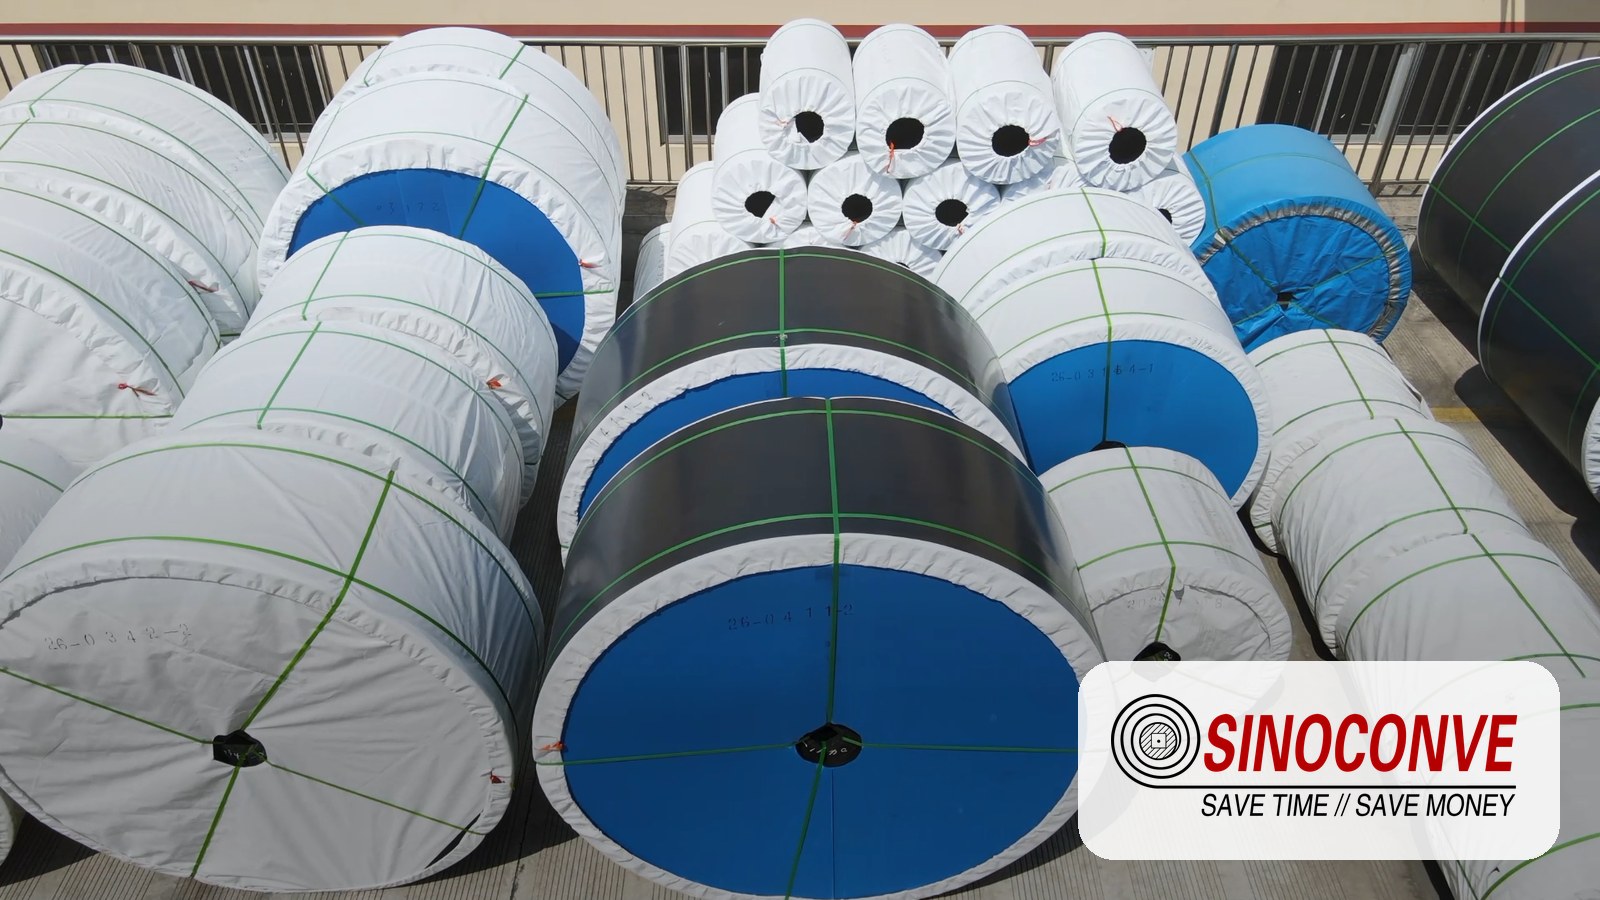
An EP conveyor belt roll has a top face and a bottom face, and the way it is wound determines whether the belt can be paid out directly onto the structure or has to be flipped. Winding with the top cover out means the belt can be pulled off the roll in the direction it will run. Winding with the top cover in means the belt must be turned, and turning a 1,200 mm, 6-tonne roll requires lifting equipment and space that many plants do not have at the transfer point. Specify the winding direction in writing, and specify the core — diameter, material and whether it is a steel or wooden core — because a crushed core turns a payout into a cutting job.
State the roll length limit that your site can handle, too. A 200 meter roll of heavy belting can be a two-crane lift, and if the site cannot do it, the belt arrives and sits. Better to build the order as two rolls with a planned joint and a splice drawing than to have the delivery blocked at the gate.
Packing specification and shipping marks
Ask for the packing method in the quotation: inner wrap, outer wrap, whether the roll is banded, whether ends are protected with board or rubber, and whether the belt is on a pallet or cradle. Then ask for the shipping marks. Every roll should carry a mark that ties it to the packing list, and the mark should show the belt width, the length, the carcass type and the ply count. On a multi-roll shipment of EP200 conveyor belt and EP400 conveyor belt, an unmarked roll means an unloading crew guessing at which roll goes to which conveyor. That guess can cost a whole shift.
Documents that travel with the belt
The documents you need at goods-in are the packing list tied to the roll marks, the test certificate for each roll, the splice drawing, the storage and handling note, and the installation instructions. If a belt is going to sit in a warehouse for six months before installation, the storage note matters: out of direct sun, off the ground, on a cradle so the roll does not flatten, and away from ozone sources such as welding equipment and certain electric motors. Rubber that is stored badly ages before it ever runs a tonne.
11Warranty and the Claim Boundary: Read It Before You Need It
Every belt comes with a warranty, and almost nobody reads the sentence that says when the clock starts. That single line decides whether a failure in month thirty is covered or whether it happened four days after the coverage ended. It costs nothing to clarify at the quotation stage and a great deal to argue about later.
When the warranty clock starts
There are three common starting points, and they are not equivalent. Counted from the date of shipment, the warranty burns while the belt is in a container and then in your warehouse. Counted from delivery at site, it burns while the belt waits for a shutdown window. Counted from commissioning, it starts when the belt actually goes into service, which is the fairest of the three for a belt that may sit for months — and it is the one to ask for on a large project where installation is phased. Expect a cap either way: a duration in months, plus a limit stated as a running hours figure or a tonnage moved, whichever comes first. Our own quotations state both.
What quietly voids a claim
The usual list is short and predictable. Splice work carried out to a geometry other than the drawing supplied. Installation tension set above the calculated figure, which flattens the carcass and opens the joint. Storage in direct sun for a year, or a roll left standing on end so the edges flatten. Overloading beyond the rated capacity the belt was selected for — and this is the one that is easiest for a supplier to demonstrate from your own production records. On an EP400 conveyor belt running a mainline, the difference between the design tonnage and a peak-shaving campaign can be enough to fail a belt early, and the data will show it.
Field note from our engineers: a customer claimed on a belt that had failed at nineteen months. The site had run it for the first four months with the counterweight fully extended, because the take-up had been assembled short. Every tonne in those four months went through the carcass at a tension the joint should never have seen. The claim was not dishonourable — the plant genuinely did not know. But the installation record, when it was finally produced, settled the discussion in ten minutes.
Keep the evidence pack from day one
Four documents decide most claims. The commissioning record, showing installation date, tension setting and pulley alignment. The goods-in measurements, including cover thickness and width. The production tonnage history for the conveyor over the warranty period. And the inspection log, showing that the belt was looked at rather than merely run. None of this is bureaucratic padding. If you have those four things, a legitimate claim on a fabric conveyor belt is settled on facts. If you do not, it is settled on goodwill, and goodwill is not a specification.
Spare capacity is part of the warranty discussion
Ask yourself what happens on the day the belt fails, not whether it will. If the plant holds no spare, the replacement lead time becomes the outage length. That is why a second, shorter belt for the same circuit — or a stored length of the same specification — belongs in the capital plan rather than the emergency budget. The standard production lead time is around thirty days from drawing confirmation, and an urgent order can sometimes be compressed, but a shutdown should never depend on it.
12Total Cost of Ownership: Turn the Twelve Checks Into One Number
Twelve checks are useless if they stay as twelve separate arguments. The way to make a belt decision stick inside a company is to convert it into a single cost figure that the finance team already understands — cost per tonne conveyed. Then every one of the checks above becomes a line in the same model, and the conversation stops being about brand preference.
Build the model on four inputs
Belt cost delivered to site, including freight and duty. Expected service life in hours at the actual duty, which for a well-specified fabric belt on moderate duty lands somewhere in the 5,000 to 12,000 hour band, and on a harsh abrasive duty at the lower end of it. Belt change duration in hours, multiplied by the cost per hour of lost production. And the cost of the failures that a better belt prevents — splice repair callouts, idler and skirt damage from a mistracking belt, cleanup labour.
| TCO line | Buyer's input | Checklist item that moves it | Effect of getting it wrong |
|---|---|---|---|
| Belt cost per meter | Quoted price, landed | Items 1, 4, 5 | Cheap belt, soft spec, short life |
| Service life in hours | From duty, grade and carcass | Items 2, 3, 4, 6 | Under-specified carcass ages fast |
| Change-out cost | Hours down, cost per hour | Items 5, 8, 10 | Wrong length or joint prolongs the stop |
| Unplanned repair callouts | Historical average per year | Items 6, 7, 8 | Edge and adhesion failures turn into emergency work |
| Compliance and claim risk | Cost of one uncovered failure | Items 9, 11 | A voided claim is a full-price belt |
Convert to cost per tonne and compare like with like
Divide the total cost of ownership over the expected life by the tonnes conveyed in that life, and you get a number with units the plant already uses. Two belts quoted twenty percent apart can invert completely once the change-out hours and the callout history are in the same row. Worked on a 600 tonne per hour conveyor, an extra ten hours of shutdown is 6,000 tonnes of production — a figure that dwarfs most of the price difference between a general-purpose cover and a high-abrasion one.
The same discipline applies to the comparison across type numbers. A high-tension route running an EP100 conveyor belt will change belts several times in the life of a plant that would have made one purchase of an EP400 conveyor belt. The EP100 to EP400 range explains how the higher type numbers get their fatigue life, and it is worth reading when the tonnage per hour is climbing, because that is when the cheap belt stops being cheap.
Which of the twelve items move the number most
In our experience, three do most of the work: the cover grade and abrasion acceptance, the tension and ply calculation, and the splice decision. Those three set the expected life and the length of the average interruption. The remaining nine are mostly about avoiding surprises — length, packing, documents, marks, warranty wording. They are cheap to get right and disproportionately expensive to get wrong. That asymmetry is the whole argument for running a checklist rather than signing what the last quotation said.

Send us the twelve answers and the site duty, and our engineers will turn them into a belt specification, a splice drawing and a cost per tonne figure you can put in front of your finance team. We are a conveyor belt factory in Ningbo, China, with our own forming, curing, testing and splicing capability, and we publish the data we are prepared to certify. If your application is aggregate or crushed stone, the specific selection notes for that duty are in our article on EP conveyor belt selection for stone crusher and aggregate plants. For the full range of constructions, covers and profiles we make, the multilingual catalogue opens at our catálogo de productos.
13Frequently Asked Questions
What should I check first when I buy a rubber conveyor belt?
The specification sheet first — we will not quote a belt without one. Four fields matter at the top: carcass rating in N/mm, ply count and fabric type, cover grade with the standard it is claimed against, and total thickness with its tolerance. Everything else in this checklist is just verification against that page. No sheet, nothing to verify.
Is a four-ply belt stronger than a three-ply belt?
Not automatically. An EP200 belt is rated 200 N/mm in three plies or in four; the extra ply spreads the same load over more layers and buys fatigue and impact tolerance, not tensile strength. Capacity comes from the type number, so move up the range for that. Add a ply only when you have measured that you need the durability, because it also adds thickness, weight and splice length.
What abrasion figure should I accept for an abrasive duty?
Name the test, then the number: DIN 53516 reports volume loss in mm³, we treat at or below roughly 90 mm³ as a high-wear cover, a general-purpose grade usually lands between 150 and 250 mm³, and an abrasion figure with no method and no grade beside it is worth ignoring.
How much extra belt should I order for the splice and take-up?
Budget 1.5 to 3 m of belt for a vulcanized splice on a fabric carcass, and more as the ply count rises. Add a metre of take-up travel on a long conveyor, and set the counterweight mid-stroke rather than at the end of its adjustment. Delivered length is normally quoted inside half a percent, so decide in advance which side you would rather be wrong on. Slightly long is the safer side.
Do I need a third-party test report or is the factory certificate enough?
How often do you actually buy this belt? For repeat orders from a supplier you know, the factory batch certificate is usually enough, provided the measured values carry your roll numbers rather than a generic pass stamp. On a first order, a high-value order, a flame-resistant specification or an underground installation, we recommend third-party inspection before shipment, while the belt is still in the supplier's hands and your leverage is highest. A report older than your purchase order tells you about somebody else's belt.
When does a belt warranty usually start?
Wording decides it. Shipment, delivery at site, commissioning — the three versions are not worth the same. Commissioning is the one to ask for, especially on a phased project. Ask what caps the months as well, because a running-hours figure or a tonnage limit usually bites first. Then get it written into the order confirmation, not left in a conversation.
Why does roll winding direction matter?
Because the alternative is turning a 1,200 mm roll on site, and that means lifting gear at the transfer point plus a splice crew standing idle. Wound with the top cover outward, a belt pays out in the direction it will run; wound the other way, it has to be reversed before it goes on. So specify winding direction, core type and the maximum roll weight your site can lift. It costs nothing on the order. It saves a shift on the day.
Should the splice be decided when the belt is ordered?
Yes, and at quotation stage, not at installation. Ply count and carcass type fix the step geometry, the joint length and the press time. A five-ply EP400 can want a joint past a metre and eight hours in the press, longer than many shutdown windows allow, so ask for the splice drawing with the quotation and confirm the retention figure in writing.
How long should an EP belt last?
On moderate duty, with the specification right and inspections actually happening, 5,000 to 12,000 operating hours is a fair band for a fabric belt. Abrasive, wet or high-impact duty sits at the bottom of it. Treat the range as an order of magnitude rather than a promise, because cover grade, loading and splice quality move it more than the carcass does. And if a belt dies well inside that band, look upstream of the belt: chute, skirt rubber, tracking, specification.
Can one supplier provide the belt, the splice and the drives?
That is how we prefer to work. The belt data, the splice drawing and the drive figures then get checked against one set of duty numbers instead of arriving from three catalogues. We build fabric and steel cord belting, specialty constructions, splicing consumables and V-belt drives, and we will walk the twelve checks with your maintenance and procurement people before the order goes in. Where a site uses local splicing labour, we send the consumables and the carcass-specific step template, so the crew works to your belt and not to a generic drawing.
Related Products You May Need
|
EP100 to EP400 carcass, and the range we quote most often once a belt runs above 800 N/mm. |
Rock, sand, gravel, clinker — 2 to 6 plies, cut to your length. |
For inclines past about 18 degrees, where wet or loose material starts sliding back. |
|
Classical, narrow and banded V-belts. |
Every construction, cover grade and profile we make, in six languages. |
Send belt width, length and duty. Most quotations go back within one working day. |
Related Blog Posts
- Rubber conveyor belt ultimate guide 2026: types, grades and how to choose — the selection teaching that sits behind this checklist.
- Rubber conveyor belt cover grades explained — the DIN 22102 and RMA tables in full, with the abrasion bands in mm³.
- EP vs NN conveyor belt guide — why an NN carcass loses strength faster than EP once the belt runs wet.
- Conveyor belt splicing: methods, costs and field tips — how the joint is chosen and priced, from a 300 mm finger splice to a stepped joint past 1.2 m.
- Rubber conveyor belt price guide — where the money actually goes in a belt quotation.
- EP conveyor belt selection for stone crusher and aggregate plants — duty notes for the belts that work hardest: 4-ply EP, 12 mm cover, impact idlers every second frame.