Chevron Conveyor Belt Failure Modes: Root Causes and Field Fixes
A chevron belt rarely dies in one shift. It goes down in stages that are easy to miss if you only look at the top cover from the walkway. A hairline split opens at the base of one rib, the split walks sideways under the next set of troughing idlers, and six weeks later a crew in a 42°C clinker gallery is fishing rib chunks out of a transfer chute with a hook. We have pulled profiled belts out of service at exactly that point more times than we can count, and in nearly every case the evidence for what went wrong had been sitting on the belt for months. Nobody measured it.
So this page is the diagnostic half of the job, not the selection half. It is aimed at maintenance engineers, mill planners and buyers who already run a chevron, sidewall or pocket belt and now have to answer a narrow question: is this damage a patch, a re-pattern, or a new belt before the next shutdown window closes? Below you will find the failure modes we see most often in quarry, cement, coal and terminal duty, the measurements that separate a nuisance from a countdown, and the field fixes that actually hold. If you are still at the buying stage, start instead with our chevron belt types, grades and selection guide, because pattern choice determines roughly half of the failures described here.

01Why Profiled Belts Fail Differently From Flat Belts
On a flat belt the carcass does the work and the cover simply protects it. Once you vulcanize rubber ribs onto that same carcass, you have created a row of stiffeners standing 5 to 25 mm above the surface, and every one of them is a stress riser. The strain at the fillet where a rib meets the cover is not the same as the nominal running strain in the fabric plies. In most cases we measure local strain at the rib root two to four times higher than the strain in the flat zone between ribs, and that ratio is what drives the whole failure pattern of a profiled belt.
Three consequences follow, and they explain why the inspection checklist for a chevron or sidewall belt looks nothing like the checklist for a plain rubber conveyor belt of the same width. First, the top cover wears unevenly: the rib shoulders take the abrasion, not the flat land between them. Second, cleaner blades, skirt rubber and even return idlers now hit a surface with 20 mm of relief on it, so mechanical interference becomes a failure mode in its own right. Third, damage concentrates in repeating zones aligned with the pulley and loading geometry, which is why the same belt position fails again after a repair that only addressed the symptom.
Sidewall belts add a second joint family. A corrugated sidewall is bonded along the belt edge, and the transverse cleat is bonded across the base, so a pocket or elevator belt is really a composite structure with hundreds of meters of bonded seam running around it. Failures there are usually seam failures, not cover failures. As a conveyor belt manufacturer we build both the flat carcass and the profiled top, which is useful diagnostically: when a rib root tears out with clean rubber still clinging to the base, the joint was good and the load killed it. When the rib peels off with a glossy, dust-contaminated footprint, the joint was never right.
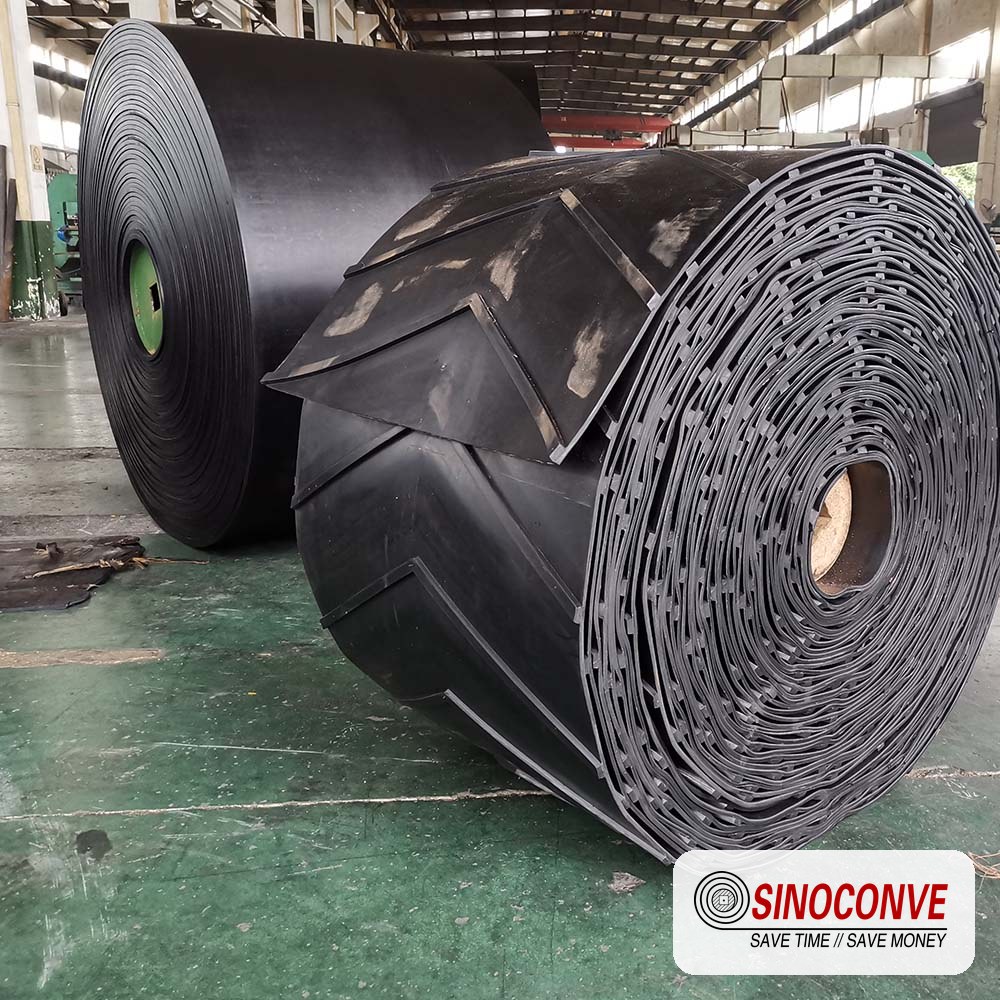
A molded chevron conveyor belt before service. Note how the rib root fillet, not the rib face, is the load path.
Field note from our engineers: One of our service engineers keeps a 150 mm steel rule and a 30 mm depth gauge in his jacket, nothing else. On a three-month visit to a limestone operation he walked 400 m of incline in one shift and flagged 11 rib positions from a single measurement: rib height loss against the original callout. Nine of the eleven were on the loading third of the belt. That is the whole method — measure one thing, on the right third of the belt, before the failure has a chance to become a production event.
02Our Field Diagnosis Sequence, Step by Step
We do not start by taking the belt out. We start by watching it run, because roughly a third of the failures described in this article leave a visible clue only while the belt is moving: rib tips rubbing a skirt board, a scraper blade lifting the belt off the return roller, a splice that snaps up as it passes the head pulley. Shut the line down first and that evidence disappears with the tension.
Run it, then stop it, then map it
Walk the full length on both sides with the belt loaded at normal tonnage if the plant allows it. Listen at the loading point. Then stop, lock out, and map the damage by position rather than by count: left or right edge, carry or return side, and distance from the tail pulley in meters. A failure map is far more useful than a damage list. Three torn ribs spread over 200 m is an abrasion and pattern problem. Three torn ribs inside the same 6 m window is a loading or pulley geometry problem, and changing the cover compound will not fix it.
What we put on the report
Every inspection ends with the same eleven numbers and judgments, so that a technician six months later can compare like with like. Rib height is measured against the original callout — 5, 10, 15, 20 or 25 mm depending on the profile — with a depth gauge or a straight edge laid across the ribs. Cover thickness is checked at three points per cross-section: crown, rib shoulder, and the flat land between ribs. Hardness goes in as well. A 55 to 65 Shore A cover is the common working band for profiled rubber belts, and a reading that has climbed 8 points since commissioning tells you the compound has hardened and is now a cracking risk rather than a wearing risk.
| What we measure | Instrument | Typical healthy reading | Action threshold |
|---|---|---|---|
| Rib / chevron height | Depth gauge or straight edge | Within 15% of original callout | Above 30% loss — re-select pattern |
| Rib root crack length | Crack scale, 1 mm graduation | No crack longer than 5 mm | Above 25 mm or through carcass |
| Cover thickness at rib shoulder | Ultrasonic gauge | 70% or more of nominal | Thin enough to expose breaker ply |
| Cover hardness | Shore A durometer | 55–65 Shore A | Rise of 8 points or more since commissioning |
| Sidewall base bond line | Visual under raking light | Continuous, no shadow line | Any visible opening or moisture staining |
| Cleat pitch spacing | Tape measure over 10 pitches | Within 3 mm of nominal (200/300/400 mm) | Stretched or bunched pitch at splice |
| Adhesion check (destructive sample) | Peel test on a 200 mm cut sample | Bond values near the original specification | Below roughly half the original value |
Two things about that table are worth underlining. Ultrasonics on a profiled belt are awkward, because the ribs scatter the transducer, so we read cover thickness in the flat lands and treat the rib shoulders as a visual judgment by an experienced hand. And the adhesion test costs you a 200 mm piece of belt, which is why we only pull a sample when a delamination is already visible. It is a confirmation test, not a survey tool.
If you buy belts through a local conveyor belt distributor, ask for the original rib height and cover callout in writing on the delivery documents. Diagnosis without a baseline is guesswork, and we have watched plants replace a perfectly serviceable profile because nobody could remember whether the ribs were originally 15 mm or 20 mm. Twice now we have seen a plant replace two belts in a row because the paperwork from the previous chevron belt supplier stopped at the invoice. It also helps to know what a competent conveyor belt supplier should hand over with a profiled belt: profile drawing, compound hardness, cover grade, splice method, and the design rib height. Any conveyor belt factory that cannot produce those four items for a chevron order is not a good long-term partner for a steep-angle line.
03Failure Mode 1: Rib Tear-Off at the Root
This is the classic chevron failure and the one that ends lines. The rib itself is usually intact. What has gone is the fillet that connects it to the cover, and once that fillet is severed the rib is held on by little more than surface friction until a scraper or a chute lip takes it off at full belt speed.
Where the first crack starts
Look at the upstream face of a rib on the loaded carrying side, at the point where the rubber curves into the top cover. That tangent point is where the crack begins in most cases, and it starts as a 2 to 4 mm split that only opens when the belt bends over a pulley. A running belt hides it. A stopped belt under reduced tension hides it too, which is why we check with the belt tensioned and, where possible, with the bent section open over the pulley. Probe it with a thin feeler or a scriber. If the split is deeper than 5 mm, mark the position with paint and photograph it against a tape measure, so that the next inspection can measure growth instead of arguing about whether it got worse.
The 25 mm line and the three-rib rule
Not every torn root means a new belt, and maintenance teams tend to swing between replacing too early and too late. These are the thresholds we work to on site, and they have held up across enough campaigns that we now write them into inspection procedures.
| Rib root condition | What it means mechanically | Field action | Typical interval |
|---|---|---|---|
| Hairline split, under 5 mm, one or two ribs | Fillet strain, no carcass involvement | Mark, photograph, re-inspect | Every 500 running hours |
| 5–25 mm, isolated ribs, still bonded along one side | Localized fatigue at the root | Hot-vulcanized fillet repair or rib replacement | Prepare within 2 weeks |
| Over 25 mm, or three or more ribs inside a 1 m window | Zone-level overload, not random damage | Replace a 2–3 m belt section; find the load source | Next planned stop |
| Crack reaches the fabric plies or the carcass bulges | Carcass integrity compromised | Plan full-belt replacement with splice survey | Within 4 weeks, monitored weekly |
Why the root tears: the three real drivers
Driver one is pulley diameter. A profiled belt with 20 mm ribs effectively behaves like a thicker belt at the pulley, and a head or tail pulley sized for a flat belt will over-bend the rib roots every revolution. Several hundred thousand bending cycles later, the fillet fails exactly where the fatigue math says it should. Driver two is take-up travel — a gravity take-up that runs near the end of its stroke gives you a slack return run, which lets the belt slap and the ribs hammer the idlers. Driver three is the one people argue about: excessive belt speed through the loading zone. Above roughly 3 m/s a chevron belt starts flinging material at the loading point instead of carrying it, and the impact of rebounding lumps lands directly on the rib roots. In most cases, holding a profiled belt to 1.0 to 3.5 m/s is the practical working band, and the upper end wants close attention to chute design.
04Failure Mode 2: Cleat Wear-Off and Rib Height Loss
Gradual wear is the failure mode that nobody reports, because nothing breaks. The belt simply stops doing the job. Fine material that used to ride an incline at 18° starts rolling back, the operators add a second person to shovel the return pile, and eventually somebody notices the line is running at 60% of design tonnage. Meanwhile the belt looks fine from the walkway.
The 30 percent rule
Measure the rib height in the loading third of the belt, in three places per rib face, and compare against the original callout. Once a rib has lost more than about 30% of its height, the material pocket it forms is too shallow to hold the load on the incline, and grab capability falls off quickly. A 15 mm rib worn to 10 mm still looks substantial, but it is holding only two-thirds of the pocket volume it was specified for. Past 50% loss we stop calling it wear and treat the belt as functionally spent, regardless of how much cover thickness remains. Reclaiming the top cover by grinding is not an option here: you cannot rebuild a rib in the field and expect the same bond as a molded or hot-vulcanized profile.
Shoulders first
Wear does not arrive evenly. The rib shoulder — the leading corner on the loading side — loses 2 to 3 mm for every 1 mm lost on the rib crown, because that corner meets the stream at the steepest angle and takes the abrasion first. A pattern reading "shoulders gone, crowns still sharp" is a normal abrasion signature and points to compound selection. A pattern of one-sided wear along the whole belt is a tracking problem, which is a different failure mode and no compound will save you from it. For high-silica and hard-rock duty we usually move to a higher-abrasion cover grade and, where the profile allows it, a slightly lower rib with a wider base — the extra base width spreads the impact and the shorter rib has less lever arm. Our abrasion-resistant cover selection guide for quarry duty covers the grading choices in detail.
Hardness outside the working band
Cover hardness in the 55 to 65 Shore A range is where most profiled rubber belts are specified, and the number is a trade, not a target. Go softer, say 50 Shore A, and the rib shoulder abrades faster under sharp, angular rock. Go harder, 70 Shore A and up, and the rib resists abrasion well but starts to crack at the fillet in cold weather and on undersized pulleys. If you operate in a cold climate, ask about cold-flexible compounds and check the low-temperature behavior against ASTM D573-style heat and aging data rather than relying on a room-temperature durometer reading taken in summer.
05Failure Mode 3: Cleat-to-Cover Delamination
Delamination is a bond failure, and it is the one failure mode where the belt's history matters less than the belt's manufacturing record. A profiled belt is built by curing rubber ribs onto a finished cover, and the quality of that interface is decided in the press, not on the conveyor. This is exactly why we insist on specifying the splice and profile method in writing when buying an industrial conveyor belt for a profiled application: a hot-vulcanized molded rib and a bonded-on rib look identical in a warehouse photograph.
Factory bond loss versus field aging
The two look similar on a photograph and nothing alike in the hand. Bond failure from manufacture shows a rib that peels away with a glossy, low-friction footprint on the base, dust or talc trapped in the interface, and damage distributed across the whole belt length including the sections that never saw hot material. Field heat aging shows the opposite: the bond holds where the belt runs cool and lets go in the hot zone only, usually on the carrying side within a few meters of a hot clinker or sinter discharge, and the exposed base rubber is hard and slightly cracked. The tell is the distribution. Sample four points, one at the cold end of the line, and compare.
The peel numbers worth asking for
Adhesion between a molded rib and the cover is typically quoted in the 7 to 12 N/mm band depending on compound and construction, and a reading below roughly half the original specification is a structural problem rather than a cosmetic one. Ask your supplier for the value at order stage. If you are already in service with no baseline, cut a 200 mm sample from a cool, undamaged section of the belt, keep it clean, and have both interfaces tested: the cover-to-carcass bond and the rib-to-cover bond. If the rib interface is significantly weaker than the carcass interface, the profile was the weak link from day one. That is a production question for your belt source rather than something a patch will answer, and it is a question any chevron belt supplier should be able to answer from press records instead of from memory.
The fix, and when not to bother
Small delaminated areas — a rib corner lifted over 100 to 200 mm — can be cut back to sound rubber, cleaned, primed and re-cured with a hot repair patch, and that holds well if the surrounding bond is sound. Larger lift-ups covering several consecutive ribs almost never stay fixed, because the failure follows the splice line around the belt and the repair simply relocates the crack tip. When we see more than five consecutive ribs lifting, we stop patching and start specifying, and at that point it is worth re-examining whether the belt was a hot-vulcanized profile or a bonded-on accessory — the answer usually decides whether you buy from the same source again.
06Failure Mode 4: Mistracking and One-Sided Rib Chewing
Mistracking is rarely the disease.It is the multiplier that turns a small problem somewhere else into destroyed ribs. A profiled belt has a structural reason to track badly that a flat belt does not: the ribs and sidewalls change the effective cross-section along the belt, and any transverse asymmetry in the profile pulls the belt sideways as it runs. Run a chevron belt with a splice that is 3 mm out of square and you will find the outside edge of every rib shaved down like a pencil in a sharpener.
Reading the wear stripe
Rub the edge of the belt with a gloved hand and look at where the cover is polished. A stripe 10 to 15 mm wide along one edge, with the cover worn through at the same repeating interval as the rib pitch, means the belt is riding the structure — usually a misaligned idler, a bent stringer, or a skirt board that has dropped. A chewed pattern that starts and stops, always in the same 20 m of the line, points at the structure rather than the belt, and the correct response is to laser-align the idlers and re-shim the skirt rubber instead of buying anything. We have seen a plant replace a $4,000 profiled belt three times on a line where the actual problem was a tail pulley 12 mm out of square with the head pulley. No belt survives that.
One-sided rib damage also has a sneaky second cause on steep lines: the material stream. If the chute discharges 300 mm off the belt centerline — easy to do when a wear liner is replaced and the choke is not checked — the load sits on one side, that side runs lower under the troughing idlers, and you get a permanent tracking bias plus one-sided rib abrasion. Both symptoms, one cause. Fix the chute first, then look at the running gear. Our comparison of profiled versus flat belts and how each behaves on a line goes through the structural differences that drive misalignment, and it is worth reading before you decide the profile itself is the problem.
Field note from our engineers: A coal yard asked us to quote a new chevron belt because the old one was "cutting itself" on the right side. We measured instead of quoting. The wear stripe stopped dead at 62 m and started again at 84 m, exactly the span of a walkway support that had been welded in during a modification. The belt was not the problem; a gusset plate was 8 mm inside the belt line and caught the rib shoulders twice per pass. Total repair cost: one cutting disc and a Saturday morning. We still supplied the belt nine months later, but for a different incline and for the right reason.
07Failure Mode 5: Carryback, Return-Side Build-Up and Cleaner Interference
Here is the failure mode that surprises buyers, because the belt damage is inflicted by the equipment meant to protect it. On a flat belt a scraper blade rides a smooth rubber surface. On a chevron belt the same blade meets a row of 15 mm ribs travelling at 2.5 m/s, and the blade does one of three things depending on how it is set. Set too light, it passes over the ribs and leaves carryback that packs the return side. Set too heavy, it digs in and peels ribs off at the root. Set with the right relief and a stiff enough mount, it does its job — but only for a pattern and pitch it was set up for.
Why a standard blade tears blocks off
A tungsten-tipped primary scraper is designed to hold a constant blade-to-belt angle with a controlled tip load, typically a few tens of newtons per blade segment. Encounter a rib and the effective interference jumps by the full rib height at once, which is a step load rather than a ramp. Rubber absorbs that for a while; then the mount fatigues, the blade nose creeps into the belt, and the blade starts machining the rib shoulders. The damage looks like a clean, evenly machined cut across rib after rib along the whole belt length — completely unlike impact damage, which is localized. If your scrapers are slicing ribs evenly, the fix is cleaner design, not belt replacement.
Return-side build-up and what it costs
Carryback on a profiled belt is worse than on a flat belt for a simple geometric reason: the pocket between two ribs holds material that never gets scraped off. On a 1,200 mm wide belt running 900 t/h with a 6 mm residual layer, that is a surprising tonnage of fines travelling back to the tail pulley every shift, packing out the return strand, wearing the pulley lagging, and eventually fouling the take-up. We measure it rather than estimate it — sweep a 1 m length of return belt with a brush and weigh the material. Anything over roughly 1 kg per meter of belt is worth a cleaner review. Common fixes on profiled belts include a rotary brush cleaner on the return strand, a return plow ahead of the tail pulley, and, for sticky duty, moving the primary cleaning function to a secondary position with a wider relief on the blade. Bulk terminals have their own version of this problem, and our article on steep transfer, spillage and belt selection in bulk terminals takes it further for ship-loader duty.
Belt speed drives carryback
Carryback does not scale linearly with speed. Doubling belt speed roughly doubles the mass thrown off the belt at the head, but it also cuts the dwell time available to any scraper and increases the turbulence in the chute. On profiled belts above about 2.5 m/s we start to see carryback become a structural issue rather than a housekeeping one. If your line was designed for 1.6 m/s and the process team has quietly pushed it to 3.0 m/s for tonnage, the rib damage and the spillage under the head pulley are probably the same story. A wholesale conveyor belts program built around a standard speed class is not a reason to keep running this one fast; the profile belt has a narrower working envelope than the flat belt it replaced.
08Failure Mode 6: Sidewall Corrugation Cracking at the Base
Corrugated sidewall belts fail in a way that is almost invisible until it is expensive. The corrugation base, where the rubber bellows is bonded to the edge of the base belt, sees a full compression-extension cycle every time the belt wraps a pulley: the corrugation closes on the inside of the bend and opens on the outside. Run a 120 mm sidewall at 2 m/s over a 500 mm pulley and that base flexes hundreds of thousands of times a month. Rubber fatigue is not a mystery; it is arithmetic.
What the crack looks like, and what it is not
You are looking for a dark line or a fine split parallel to the belting along the base of one or more corrugations, usually starting where a corrugation meets the base on the carrying side. It is often mistaken for a score mark from a stray bolt. The test is simple: flex the corrugation by hand and watch whether the line opens and closes. A score mark stays the same width. If the line opens, it is a fatigue crack and it is bonded deep. Left alone, it eventually communicates with the inside of the seam, and once material fines get into that crack the bond line fails progressively along the belt. Sidewall heights of 40, 60, 80 and 120 mm are the common callouts, and the taller the wall, the larger the bending moment at that base — so a 120 mm wall on an undersized pulley is a design mismatch, not bad luck.
Two other things decide how fast this goes. Temperature matters: a wall that is fine at 25°C ambient can turn brittle and crack in a week if the plant is running cold material or sits below freezing at night, which is why we recommend a cold-flexible compound for walls in those conditions. And the bolted-versus-vulcanized question matters: a hot-vulcanized corrugated wall is continuous, while a mechanically bolted wall has a line of fastener holes ready to start cracks. For most steep-angle duty we build walls vulcanized to the base, and our overview of corrugated sidewall belting for very steep conveying explains where that choice bites. For background on the geometry itself, sidewall belt construction for inclined transport is a useful companion read, and the argument for walls over long inclines when floor space is tight is laid out in steep-angle conveying with a small site footprint.
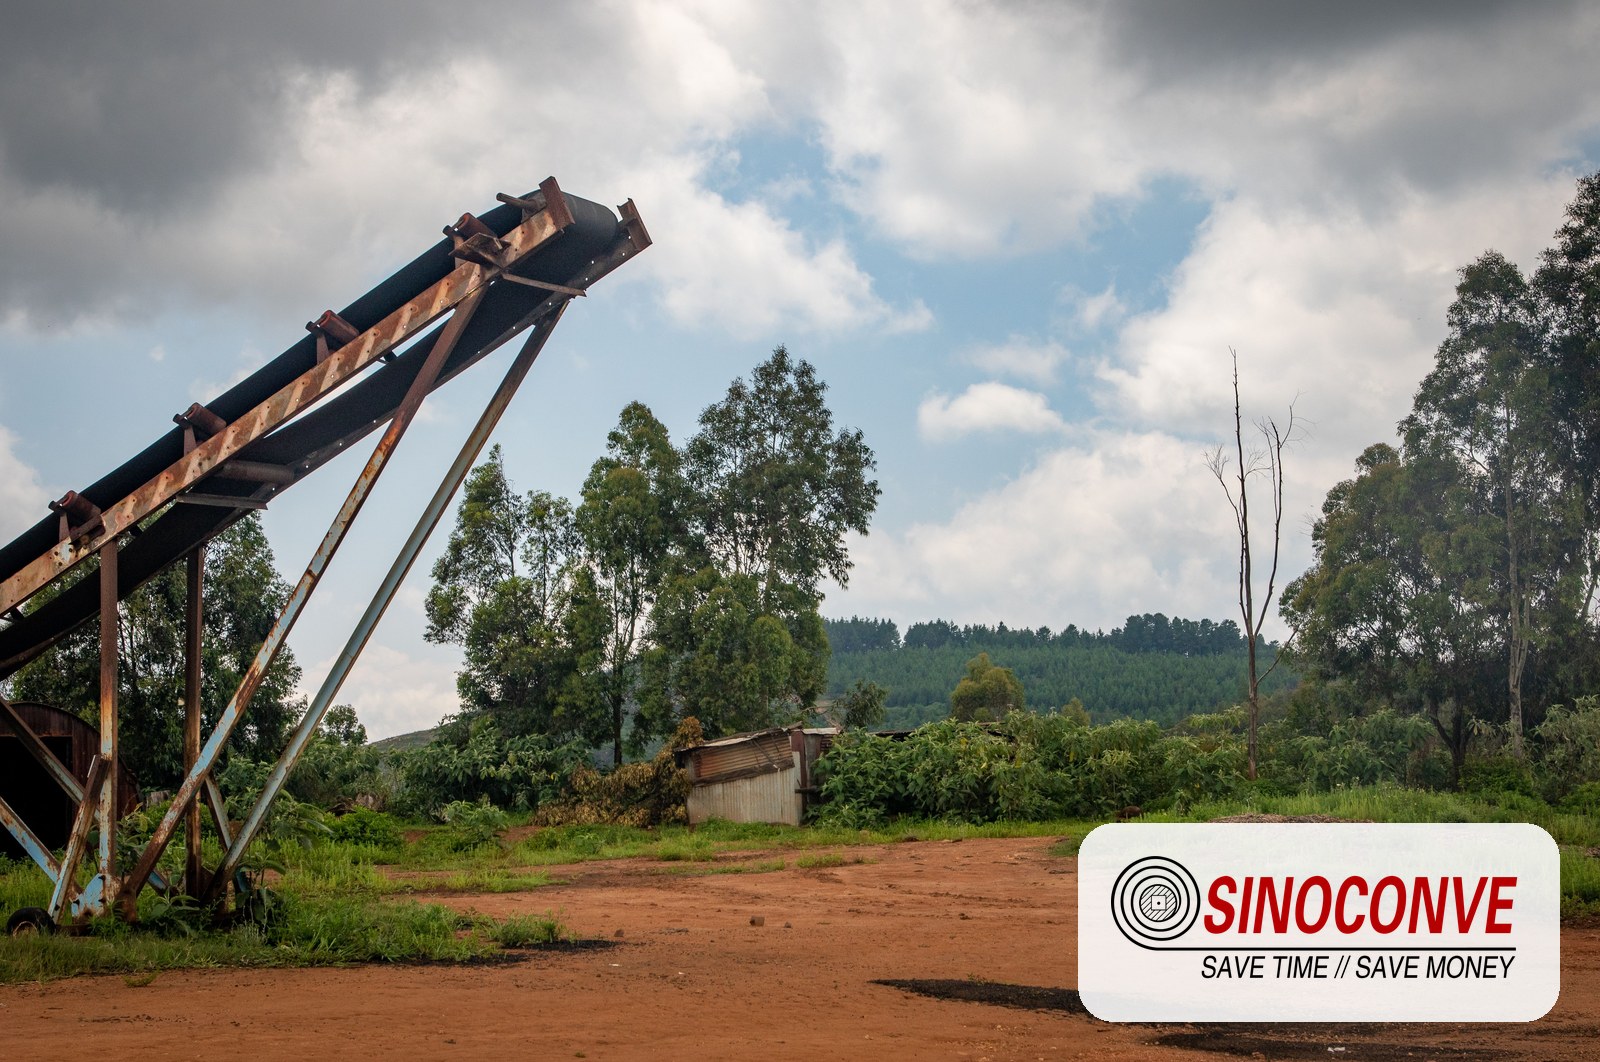
A steep-angle installation. Sidewall height and pulley diameter have to be chosen together; a tall wall on a small pulley is a fatigue test rig.
Prevention is a pulley and geometry decision
If you are specifying, keep the sidewall height within what the pulley diameter can carry, and confirm the transition to the incline rather than assuming the supplier knows your layout. If you are already running and see the first base cracks, the intermediate fix is a cold-bonded repair strip along the base of the affected corrugations, which buys months rather than years. We are also a V-belt manufacturer and run the same rubber compounding and press capacity for drive belts, which is one reason we push hard on compound choice in cold service: the difference between a sidewall that survives a winter and one that cracks is often just which compound the factory picked.
09Failure Mode 7: Transverse Cleat Seal Failure and Sidewall Roll-Out
On a cleated belt built for bulk handling, the transverse cleat and the two sidewalls form a three-sided box, which is what makes a pocket conveyor belt able to lift material at angles a ribbed belt can only dream about. That box is only as good as its corners. The junction where the cleat meets each sidewall is a bonded T-joint, and it is the single most likely place on the entire belt for material to force its way in.
How material gets in, and why it never gets out
The failure sequence is predictable. A fine, damp material — filter cake, washed sand, clay-bearing ore — packs into the corner during loading. Every pass around the head pulley, the pocket empties and the pack-out remains as a thin compressed film. Because the belt flexes at the pulley, the film works its way 5 to 10 mm into the joint like a wedge. From that point the joint opens a little each week, more material enters, and the corner eventually fails outward. A pocket conveyor belt in this condition usually shows sidewall walls rolled outward at the top — the wall is not strong enough to resist the internal pressure the trapped material is generating. Rolling outward is the symptom. The joint breach is the cause. Do not straighten the wall; open the joint and clean it.
| Observation at the corner | Likely mechanism | Practical field response |
|---|---|---|
| Damp pack-out in corner, joint intact | Material characteristics, not a defect | Add wash-down or change loading so the pocket self-clears |
| Joint opens under hand pressure, fines inside | Bond breach, progressing | Cut back, clean, hot-bond the corner before the next campaign |
| Sidewall rolled outward at the top edge | Internal pressure from trapped material | Repair joint, then review cleat pitch and wall height |
| Whole cleat lifted across its width | Cleat-to-base bond failure plus overload | Selective replacement, then re-check pocket volume vs tonnage |
Cleat pitch is the variable most people leave alone and should not. Pockets pitched at 200, 300 and 400 mm carry very different volumes and load the joint very differently, and a 200 mm pitch on a sticky material means a shallow pocket that packs out faster. A larger pitch with a correspondingly taller wall often self-clears better, which is counter-intuitive until you watch one run.
10Failure Mode 8: Loading Section Impact and Broken Transverse Cleats
Broken cleats are almost always a loading problem wearing a belt-shaped costume. The transverse cleat is the stiffest element on a sidewall or pocket belt, and it takes the full force of a falling lump before the base belt has a chance to deflect. If the chute drops material 2 m onto a belt with 400 mm cleat pitch, every large lump is essentially a hammer blow delivered at a point, and cleats break at the joint to the base rather than bending.
Why a sidewall belt must have a graduated loading section
This is the single most common specification error we see in retrofits, where somebody replaces a flat belt or a chevron belt with a sidewall belt on the same structure. A flat belt can be loaded with a fairly short skirt and a generous impact zone; a bolted-down skirt with a 40 mm clearance will simply catch a 120 mm sidewall or a 60 mm cleat as it goes by and destroy either the belt or the chute. The loading section of a sidewall belt has to be graduated: the walls have to be given clearance at the entry, the skirt rubber has to be lifted above the wall height, and the material has to be introduced in the direction of travel rather than dropped vertically through the pocket line. When people ask why a sidewall belt costs more to install than the belt it replaces, this is the reason. The belt is not the expensive part. The loading geometry is.
Impact numbers we work with
Two figures do most of the work. First, free-fall height at the loading point: keep the drop from the chute lip to the belt surface as short as the chute geometry allows, and in most cases design for well under 1.5 m, with impact idlers under the loading zone at a pitch of 300 to 400 mm rather than the standard 1,000 to 1,200 mm carrying spacing. Second, lump size against cleat pitch: a nominal top size of 150 mm lump against a 300 mm cleat pitch gives a reasonable ratio, while the same lump against a 200 mm pitch means lumps are bridging two cleats and loading the joints in shear. On an elevator conveyor belt lifting sharp, heavy rock, the impact zone is where the belt will first show distress, and it is worth building that zone with thicker cover and closer impact support even if the rest of the run is standard. The same principle governs quarry and aggregate duty generally, and our notes on sidewall belts in quarry and bulk handling go into the chute details. Compounding know-how transfers across product families too: we have been a transmission belt manufacturer for as long as we have built heavy conveyor belts, and some of the impact-resistant compounds we now run on profiled belts came out of drive-belt work in the same laboratory.
Field repair of broken cleats
A cleat broken at one joint can be removed, the joint cleaned back to sound rubber, and a replacement cleat hot-bonded in place. That works when breaks are isolated and each one is 100 m from the last. When an elevator conveyor belt arrives with 20 cleats broken in the first 30 m, the loading point is dumping material at a rate and angle the belt was never sized for, and the honest answer is that the belt is fine and the chute is wrong. We have quoted replacement belts in that situation and then talked the customer into fixing the chute first; the second belt lasted four years.
11Failure Mode 9: Chevron Belts on Convex and Concave Curves
Profiled belts dislike curves, and most of the failures in the first three months on a new incline trace back to a vertical curve that was drawn on a layout without the profile in mind. On a convex vertical curve — the crest where a line transitions from an incline to horizontal — the belt's top surface is in tension, so the ribs are pulled apart at their roots. On a concave curve it is the reverse: the profile is compressed, ribs butt against each other, and the cover between ribs is squeezed while the edges lift. Both cases put additional stress on the profile that flat-belt design calculations do not capture.
The added stress, in practical terms
On a convex curve, a rib passing the crest is momentarily asked to span a curve rather than run flat, and the strain at the root rises with the ratio of rib height to curve radius. A 20 mm rib over a 25 m convex radius is comfortable. The same rib over a 6 m curve will show root cracking within weeks, particularly if the belt is also being asked to run at 3 m/s. Practically, this means the crest radius often has to be enlarged when a line is converted from flat belt to profiled belt, and if you cannot enlarge it, the profile has to come down in height or the line has to run slower. Both are legitimate field fixes. Ignoring the curve and changing the rubber compound is not.
Do the corrugations need to be taller?
Not usually, and this is where a lot of money gets spent for nothing. When a sidewall belt under-performs on a curve section, the instinct is to specify a taller wall to stop material rolling over the edge. That makes the base bending moment worse and typically accelerates corrugation base cracking. The better move is to check the transition geometry and the idler arrangement through the curve, and only then change the wall height. Where the site genuinely needs more capacity at the same incline, the honest options are a wider belt or a slower one, not a taller wall. If you are weighing wall height against incline angle, the trade-offs on a belt for inclined transport and its anti-slip behaviour are set out in more detail, including when a ribbed belt is a better answer than a walled one.
12Failure Mode 10: Pattern Mismatch — Open-V, Closed-V, U-Shape or Sidewall
Half the "failures" we are asked to investigate are not failures at all. They are a belt doing precisely what it was built to do, on a duty it was never matched to. A pattern that grips beautifully on dry crushed granite will pack out and slide on wet, clay-bearing fines at the same angle, and no amount of maintenance will change that. The belt is not worn out. It is wrong.
Open-V (also called a broken or staggered V) is the general-purpose profile. Its independent ribs drain water and shed sticky material reasonably well, which is why it dominates on outdoor aggregate, sand and gravel duty where the material can be wet one day and dusty the next. Closed-V, where the chevron runs as a continuous unbroken V across the belt, grips harder and is the better choice when the material is dry and free-flowing and the angle is steep; its weakness is that it traps moisture and fines in the closed pocket and can carry water uphill as a thin film. U-shape and full-pocket profiles add a deeper cup, and at that point you are moving toward sidewall behavior without a wall. The failure signatures differ by pattern, and that signature is usually the giveaway.
| Pattern | Best material condition | Characteristic failure signature | Usual max incline |
|---|---|---|---|
| Open-V | Mixed, occasionally wet, free-flowing | Even shoulder abrasion; rollback on wet days | 18–22° in most cases |
| Closed-V | Dry, uniform, free-flowing | Water and fines trapped in the pocket; rib tips worn flat | 25–30° typically |
| U-shape or full pocket | Dry to slightly damp, needs deep pocket | Pocket pack-out; cleat-to-base bond failure | 25–30° typically |
| Sidewall with cleats | Any, including wet and sticky, when contained | Corrugation base cracks; corner joint breaches; roll-out | Up to 90° for vertical lifts |
Two or three of these grades can be sitting in the warehouse as "the same chevron belt", which is why a stop-by-stop comparison of a failed belt against a working one on the next line is often the fastest diagnosis there is. If you have a mixed fleet from several sources — and a plant that has bought through a local chevron belt supplier for years often does — label the stock by profile and keep the drawing with it. An open-V belt fitted where a closed-V was intended will under-perform by a wide margin at anything past 20°, and the maintenance team will spend months chasing a phantom wear problem. If you are specifying replacement for steep bulk duty, our notes on chevron belts in steep bulk handling duty cover the pattern and grade combinations we quote most often.
13Failure Mode 11: Wrong Cleat Pitch, Height and Belt Speed
Even with the right pattern, the numbers can be wrong, and errors here cause the slowest, most confusing kind of failure: a belt that works acceptably for two years, then stops working without ever showing damage. The three variables interact, so treat them together.
Pitch against lump size
Cleat and rib pitch has to be larger than the largest reliable lump you expect at the loading point, or lumps bridge across profiles and either roll back or jam. Typical callouts are 200 mm for fine and friable material, 300 mm for general aggregate, and 400 mm where the top size runs 150 mm and above. A 200 mm pitch in a primary crushed-rock duty is a common and expensive mismatch: the profile pockets fill instantly, the belt behaves like a smooth belt with a rough surface, and the operator reports that "the chevron belt does not grip". Measure the top size, then pick the pitch.
Height against incline
Profile height sets how much material the rib can hold back. A 5 mm rib on a fine product at 12° is plenty; a 25 mm rib on wet 80 mm rock at 30° can still be overwhelmed if the pocket is too shallow relative to the load depth. The working envelope we see most often looks like this.
| Belt type | Typical profile height | Practical incline | Practical belt speed band |
|---|---|---|---|
| Open-V chevron | 10–20 mm | 18–22° | 1.0–2.5 m/s |
| Closed-V chevron | 15–25 mm | 25–30° | 1.0–2.5 m/s |
| Sidewall belt, base + cleats | 40–120 mm wall | 30–60°, to 90° vertically | 1.0–2.5 m/s |
| Deep-pocket elevator type | 60–120 mm wall, 300–400 mm pitch | Vertical and near-vertical | 1.0–2.0 m/s in most cases |
The speed column is the one that gets ignored. A ribbed or walled belt is a belt with obstructions on its surface, and every obstruction has a speed at which it stops helping. In general terms, profiled belts run best between 1.0 and 3.5 m/s, and the upper half of that band belongs to clean, dry, well-designed installations with generous chutes. Push a chevron belt past about 2.5 m/s on a wet material and you will see the load migrating to one side of the belt even when the running gear is straight, because the ribs deflect material sideways instead of carrying it. Past 3 m/s the rib roots are taking a repeated impact load, and the failure returns to Mode 1. For conveyor belt for steep conveying duty specifically, slower is nearly always better: a 1.5 m/s belt at 25° moves the same tonnage as a 3.0 m/s belt at 18° on a narrower structure, and it does it with a fraction of the profile damage. If you are converting a line to conveyor belt for steep conveying, ask the question the other way round — what is the lowest speed that meets the tonnage target, rather than how fast the existing drive will go. A belt for inclined transport that runs 40% slower will typically outlast the faster alternative by a comfortable margin, provided the incline is within the envelope above.
14From Diagnosis to Fix: The Retrofits We Specify Most Often
Diagnosis is only worth the walk if it changes what you do. Four fixes account for the large majority of the profiled-belt failures we are called out to, and only one of them involves buying a new belt.
Cleaner retrofit
If ribs are being machined evenly, replace the primary scraper with something that can tolerate relief. Rotary brush cleaners work well on profiled belts because the brush conforms to the ribs, and a secondary scraper mounted further down the return strand with a spring or pneumatic relief will clear the majority of fines without ever meeting a rib at full interference. Budget a full day of production time: the cleaner position, the tip load and the blade relief all have to be set with the belt running, and a scraper that is set up on a stationary belt will be wrong the moment it is loaded.
Loading section rebuild
This is the fix with the best return and the worst politics, because it costs capital and stops production. Drop height down, chute gradient aligned to the belt direction, impact idlers at 300–400 mm pitch across the loading zone, skirt rubber lifted above the profile height, and a choke that puts the material on the belt centerline. On a sidewall or elevator belt, add the graduated entry. Plants that rebuild a loading section properly typically report clean ribs eighteen months later; plants that only replace the belt report the same damage in six months.
Re-pattern and re-height the belt
If measurement shows the profile was wrong rather than damaged — 30% height loss, pitch too small for the lump size, open-V on a 26° incline — then the answer is a new belt to a corrected specification, and the correction should be documented so the next purchase does not repeat it. When you re-specify, ask for the profile drawing and the cover grade in writing. If you are dealing with a chevron belt supplier who quotes "chevron belt, 800 mm, 3-ply" with no profile data, you have no way to verify whether this purchase repeats the last mistake.
Repair versus replace
Our rule of thumb: repair while damage is local and the surrounding material tests sound by hand, replace when damage is a pattern. Three ribs damaged at comparable spacing along the whole belt is a pattern. Repairing it is a schedule, not a fix, and you will be back on site in three months with a bigger bill and a shorter shutdown window. The decision is easier if you keep a damage map from every inspection, because then you are comparing against your own history rather than a supplier's opinion.
Field note from our engineers: A sand plant in a wet climate had gone through four closed-V chevron belts in two years with our competitor and was about to change supplier on price. We measured rail height loss at 34% average and noted that the material was running at 9–12% moisture. Both the profile family and the pitch were wrong for wet feed, not the brand. They moved to an open-V belt with a 300 mm pitch, kept the same drive, and the next belt ran past 30 months. Pattern and pitch beat brand every time on steep duty.
15Inspection Schedule, Spares and the Next-Order Specification
Most of the failures in this article take between four and twelve weeks to develop from a measurable defect into a production event. That is a comfortable window, provided you inspect on a schedule rather than after something goes wrong. The interval should follow the duty, not the calendar convenience.
| Duty | Rib height check | Full profile inspection | Bond and splice survey |
|---|---|---|---|
| Aggregate, ambient | Every 500 h | Quarterly | Annually |
| Cement or clinker gallery | Every 300 h | Every 1,000 h | Every 2,000 h |
| Wet or sticky material | Every 300 h | Every 1,000 h | Every 2,000 h |
| Sidewall or pocket belt, vertical lift | Every 250 h | Monthly at the loading zone | Every 1,500 h |
For spares, keep at least one rib or cleat repair kit per belt size with the correct compound and cure time, a spare splice kit with the right ply rating, and a documented baseline of the original profile dimensions. That last item sounds trivial and is the one most often missing. Profiled belts are consumables, and treating a maintenance-critical rubber sidewall belt as an efficiency-critical asset means recording its original geometry the day it is installed.
When you write the next order, insist on six items: profile type and rib or chevron pitch, rib height and tolerance, cover grade and hardness, carcass construction and ply rating, splice method, and the maximum recommended belt speed for the profile. If free-draining aggregates are involved, ask for a steep-angle layout review alongside the belt quote, because the failure modes described here are cheaper to design out than to repair. And if you are working through a chevron belt supplier rather than direct, make sure those six items appear on the purchase order, not just on the drawing. Field failures are frequently a document failure first.
16Failure Mode to Root Cause to Fix: One-Page Matrix
Print this and take it on the walk. It is the version of the previous fifteen sections that fits on a clipboard, and it is arranged by what you actually see rather than by what caused it.
| Symptom on the belt | Root cause we expect | Field fix | Typical downtime |
|---|---|---|---|
| Crack at rib root, ribs still attached | Undersized pulleys, excessive speed, bending fatigue | Patch if under 25 mm; reduce speed; plan section or full replacement | 1 shift for a patch |
| Ribs missing in patches along whole belt | Cleaner blade interference or chute lip contact | Reset or replace cleaners; check chute clearance | Half a shift if the belt survives |
| Ribs worn to 70% height or less | Abrasion exceeding compound grade, or pattern under-specified | Re-specify with higher abrasion grade and taller rib | Planned stop, 1–3 days |
| Rib lifted off with glossy bond footprint | Manufacturing bond defect | Raise with supplier; verify peel value on a sample | Planned, with claim lead time |
| Delamination only in the hot zone | Heat aging of the cover and interface | Move to a heat-resistant grade; remove the heat source if possible | Planned replacement |
| One side of the ribs chewed or polished | Tracking fault, chute off centerline, structural obstruction | Align idlers and pulleys, re-center the load, remove the obstruction | 1–4 h |
| Heavy carryback under the head pulley | Scraper set too light for the profile; speed too high | Rotary brush and relief scraper installation | 1 day |
| Fine split along the sidewall base | Corrugation fatigue, tall wall on small pulley, cold brittleness | Cold-bond strip as interim; correct wall to pulley ratio next order | 1 shift interim fix |
| Sidewall rolled outward at the top | Corner joint breach; material trapped in the pocket | Open, clean and re-bond the corner; review pitch and pocket volume | Planned stop |
| Cleats broken at the loading zone only | Impact from drop height and lump size; insufficient impact support | Rebuild the loading section; add impact idlers; reduce drop | 2–5 days with chute work |
| Root cracking only at a crest or valley curve | Vertical curve radius too tight for the profile height | Enlarge the curve radius, lower the profile, or reduce speed | Engineering stop |

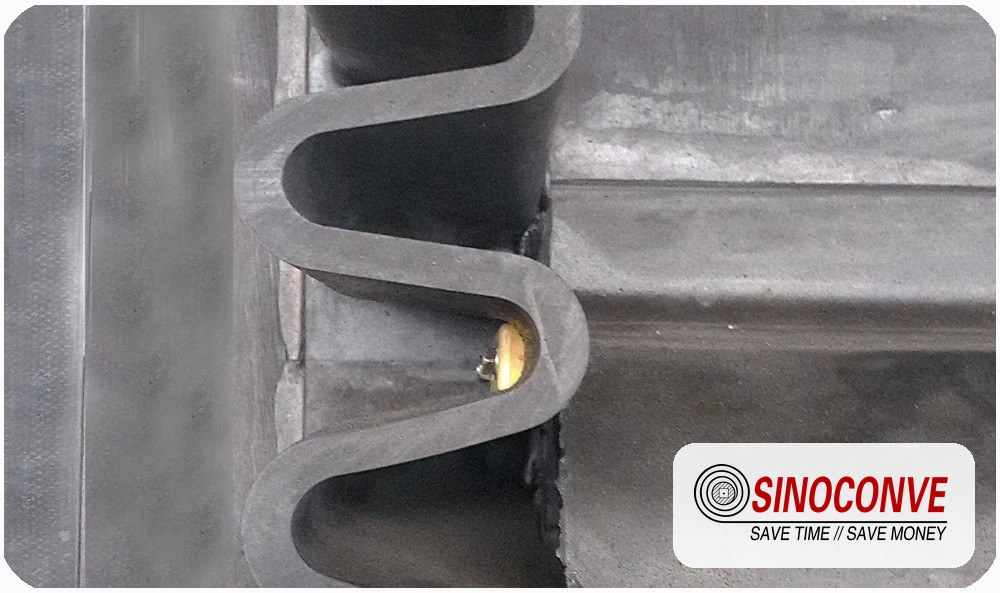
Rib height and bond line, measured where the damage actually starts. A depth gauge, a rule and a notebook will find most of the failures in this article.
17FAQ: Chevron and Sidewall Belt Failure Questions
How much rib height loss is acceptable before we should replace the belt?
Once a rib has lost more than roughly 30% of its original height, the pocket it forms is too shallow to hold the load at the design incline, and grab capability drops quickly from there. Between 30% and 50% you can usually keep running if you reduce the incline or accept lower tonnage. Past 50% the belt is functionally spent, even though the cover may look serviceable. Measure in the loading third of the belt, because that is where loss appears first.
Our chevron belt sheds ribs near the head pulley. Is that a belt fault?
Rarely. Ribs that come off in a repeating zone near the head pulley almost always indicate mechanical interference: a scraper blade set too deep, a chute lip that has dropped, or a pulley that is undersized for the profile height. Check the clearance at the head pulley with the belt tensioned, and check the blade tip load.If the ribs are being cut rather than torn, the damage is being done by equipment.
Can we repair a torn chevron rib in the field, or does it need to go back to a shop?
Field repair is realistic for local damage. Cut the rib or fillet back to sound rubber, clean and dry the surface, prime, and cure a hot repair patch or a replacement rib section with a portable press. What you cannot do in the field is restore the molded bond quality of the original profile, so treat field repair as a way to get to the next shutdown, not as a permanent solution. If more than a handful of ribs are affected across the belt length, replacement is usually cheaper than repeated repairs.
Why do our scrapers destroy the ribs instead of cleaning the belt?
Because a ribbed surface steps the interference up by the full rib height in an instant. A blade set to a constant tip load on a flat belt will overload when a rib arrives, which fatigues the mount and eventually lets the nose creep into the rubber. The usual answer is a cleaner designed for profiled belts: a rotary brush on the return strand, or a spring or pneumatic relief scraper positioned further from the head pulley where the belt is more stable and the ribs are less of an obstruction.
The material is rolling back even though the ribs look fine. What changed?
Something other than the belt. In our experience the three usual suspects are moisture content, lump size distribution, and belt speed. Fine wet material behaves like a lubricant under a profile that was selected for dry feed, and an increase in top size will bridge a pitch that used to work. Look at the feed first, then at speed. A line that has been sped up from about 1.6 m/s to 3.0 m/s for tonnage will often shed its load on inclines that it handled comfortably before.
When should we use a sidewall belt instead of simply going to a steeper chevron pattern?
Above roughly 30°, or whenever the material is wet, sticky or light enough to be blown off a ribbed surface, we stop pushing the chevron family and move to a sidewall or pocket belt. Walls up to 120 mm and cleat pitches of 200, 300 or 400 mm contain the material instead of relying on friction and rib interference. The trade is that sidewall belts need a graduated loading section and better pulley geometry, so the installation cost is higher even when the belt length is shorter. For a vertical lift there is no realistic chevron alternative.
Our sidewall has rolled outward at the top edge. Do we need a new belt?
Not immediately, and straightening the wall will not help. Roll-out means material has forced its way into the cleat-to-wall corner joints and is exerting internal pressure on the wall. Clean the joints, cut back and re-bond where the bond has opened, then look at the material and the pocket dimensions. If it repeats within one campaign, the pitch and pocket volume are wrong for the duty and the belt needs re-specifying rather than another repair.
Does a profiled belt need a different pulley diameter from a flat belt of the same carcass?
Yes, and this is one of the most frequent specification gaps. A 20 mm molded rib effectively adds thickness at the bend and raises the strain at the rib root every revolution, so a head or tail pulley sized on flat-belt practice can be undersized for a profiled belt. If you are converting a line, confirm the pulley diameters against the profile height before the belt is made, not after the first root cracks appear at month two.
How do we tell a manufacturing bond failure from wear and tear on a delaminated rib?
By where the damage sits. A manufacturing bond problem shows up along the whole belt length with a glossy, dusty interface footprint. Heat aging or service overload shows up in a defined zone, usually the hot or heavily loaded third, with the surrounding rubber hard or cracked. Cut a sample from a cool, undamaged section and have the rib-to-cover interface tested. If that value is well below the original specification, the belt left the works weak, and the conversation belongs with your supplier.
What information should we put on the next order to avoid repeating this failure?
Six items: profile type with pitch, rib or sidewall height with tolerance, cover grade and hardness, carcass and ply rating, splice method, and the maximum recommended speed for the profile. Add the material top size and moisture range. A supplier quoting a chevron belt by width and ply count alone cannot show you that the previous failure has been designed out, and the second belt tends to fail the same way as the first.
Related Products You May Need
- Chevron / patterned conveyor belt for inclined conveying
- EP fabric carcass rubber conveyor belt
- General purpose rubber conveyor belt range
- Full conveyor belt product catalog
- V belts and transmission belts
Related Blog Posts
- Chevron Conveyor Belt: Types, Grades and How to Choose
- Chevron Conveyor Belts for Incline Anti-Slip Duty
- Sidewall Conveyor Belts for Inclined Transport
- Corrugated Sidewall Conveyor Belt for Steep Conveying
- Cleated Conveyor Belt Selection for Bulk Handling
- Abrasion Resistant Conveyor Belt Guide for Quarry Duty