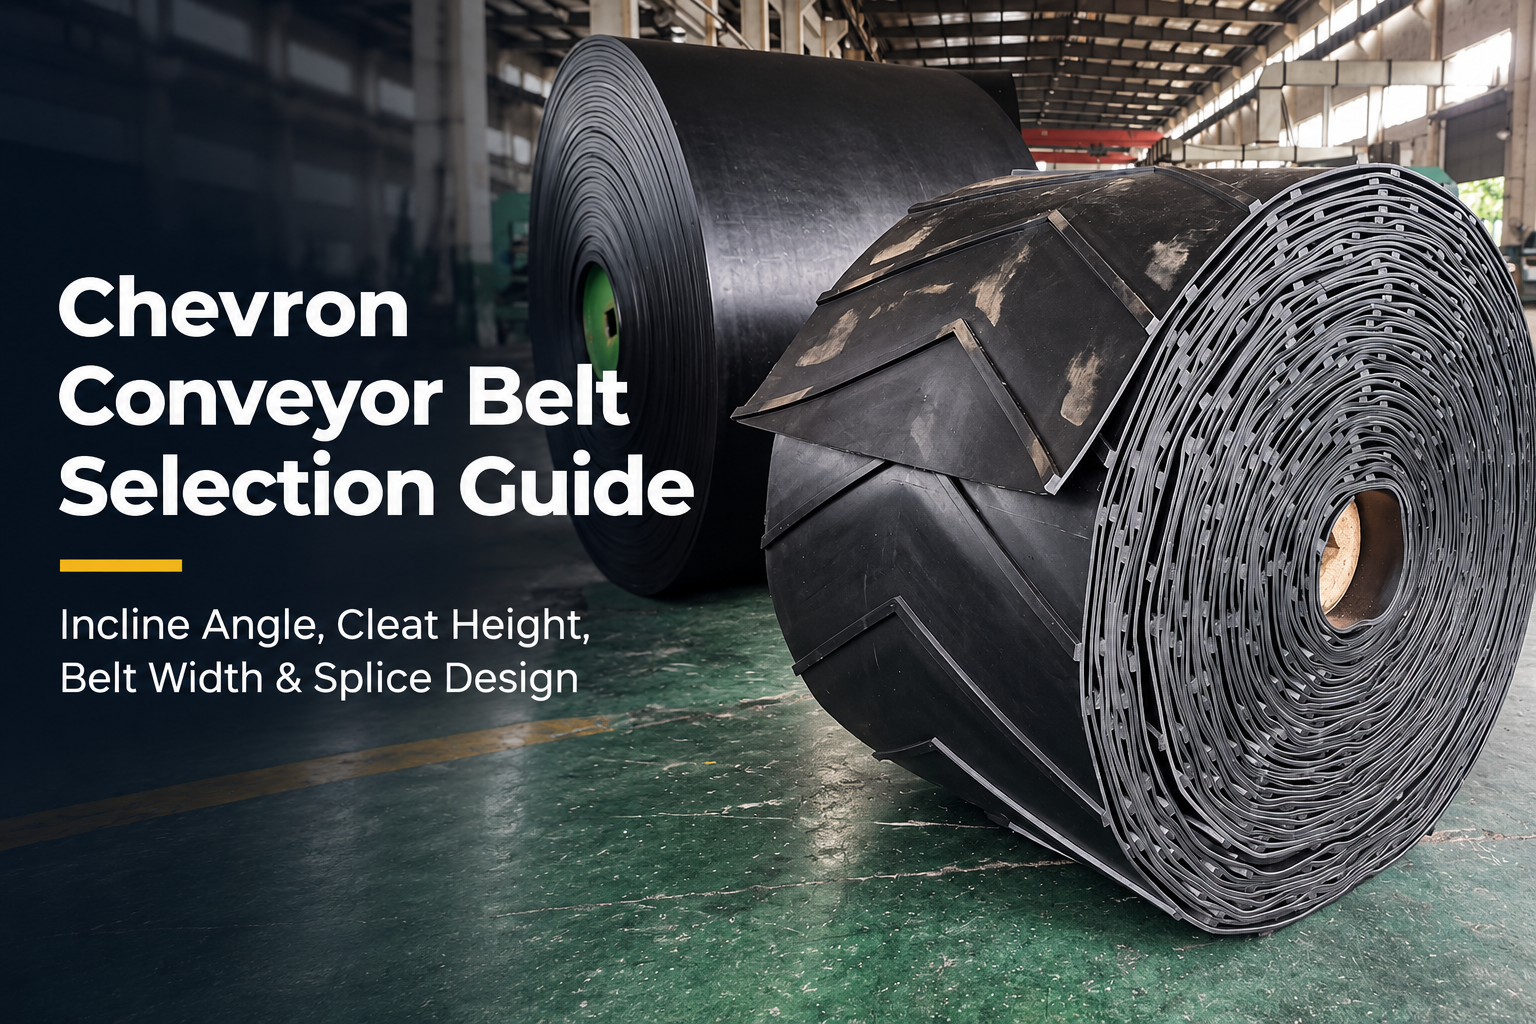
A chevron conveyor belt is a rubber belt with a raised V-shaped pattern molded into the carrying cover. Those few millimeters of extra rubber do a lot of work. They decide whether your material climbs a 25° incline or slides back down the chute every time the feed surges. We mold these patterns most weeks, and the questions that land from quarries and cement plants are always the same four: which pattern, how high, which belt width. And then the splice, which is where the raised rubber gets in the way of everything.
This guide answers them with the numbers we use in our own selection work. Three standard chevron patterns and their real dimensions. An inclination-to-pattern matrix. How chevron, T-cleat and herringbone actually differ, and where a corrugated sidewall conveyor belt beats any open pattern. Then the field problems — carryback, spillage, splice misalignment — that decide whether the belt runs three years or three months.
Short version, since you're probably reading this before a morning meeting. Below roughly 16° you rarely need a profile at all. Between 16° and 32°, a chevron pattern sized to your lump size does the work. Above 32° to 35°, or any time the load is wet, fine and free-flowing, we usually steer the customer toward a sidewall belt instead. Everything else is detail, and the detail is what the next eleven sections are about.

01When You Actually Need a Profiled Belt
The incline angle on the general arrangement drawing is only half the story. What holds material on a slope comes down to friction at the contact surface against the angle it has to fight. Dry, angular crushed stone has a static angle of repose around 35°. On a clean, dry two-ply belt the effective friction coefficient sits between 0.35 and 0.40. That works out to a holding angle of roughly 19° to 22°. Put that belt on a 16° incline and you've got margin. Push the same belt to 26° with the same stone and the top layer starts creeping backward, one roller at a time, until the whole burden unloads itself back down the chute.
We looked at a 500 mm chevron line last spring where the incline was 22° on paper and 27° after the discharge chute was modified. The belt had been specified off the drawing, not the pit. Nobody had measured it since commissioning.
Before quoting a profiled belt we ask four questions. True incline angle. Lump size range. Surface condition of the material. And how much take-up travel the structure still has. That last one catches people out more often than the first three combined. A chevron cover is thicker and stiffer than a plain cover, so the belt needs a bit more take-up stroke to run at the same tension. If the take-up already sits at ninety percent of its travel, we say fix the take-up first. Then we can talk about rubber.
The 16-degree threshold, and why it moves
Sixteen degrees is a working line, not a law. Below it, a smooth belt normally handles the load if the material is dry and the feed is steady. Above it, the profile earns its cost. But the line moves with the material. Wet sand. Coal fines below 6 mm. Fertilizer prills, and sugar, and wood chips that nobody expects to be a problem. All of them slide on a smooth cover at 14° to 16°. A film of water half a millimeter thick can cut available friction nearly in half. We've walked into plants where a belt ran eight years without a problem, then started slipping after a wash plant was commissioned upstream. The belt didn't change. The feed did.
So we measure two things on site before recommending a pattern. The actual incline from horizontal, taken at the steepest section between the tail pulley and the discharge — not the average written on the drawing. And the moisture on the belt itself. That sounds fussy until you remember that material which is dry in the stockpile is often wet by the time it's been through a spray bar or a dewatering screen.
When a smooth belt is still the cheaper answer
A profiled belt isn't free and it isn't universally better. Four situations push us back toward a plain cover. Reversing conveyors are one. The chevron pattern is directional, so running it backward makes the raised rubber scoop material under the belt instead of carrying it. For a two-way belt you want a herringbone or diamond pattern, which is symmetrical, or no pattern at all. Belt cleaners are another problem. A standard tungsten-tipped scraper can't follow a chevron cover. The blade rides up on the cleats, then drops into the valley, chattering and leaving streaks. Segmented blades help. So does a rotary brush. Or a polyurethane scraper mounted further back.
The third is capacity. The raised pattern eats part of the trough cross-section, so a profiled belt carries roughly 15 to 20 percent less material than a smooth belt of the same width at the same speed. Buyers who ignore this end up ordering the next width up, which costs more than the pattern itself. The fourth is pulley size. Because the pattern adds local thickness, the minimum pulley diameter goes up by about one size step, and on short head-and-tail conveyors there may not be room.
We're a conveyor belt manufacturer that molds the pattern into the cover during vulcanization rather than gluing strips on afterward. So the cleat geometry we quote is the geometry that leaves the press. If you already run an inclined line and want a second opinion on whether the profile is doing any real work, our field guide to inclined and anti-slip chevron belt selection covers the diagnostic side of the same question in more detail.
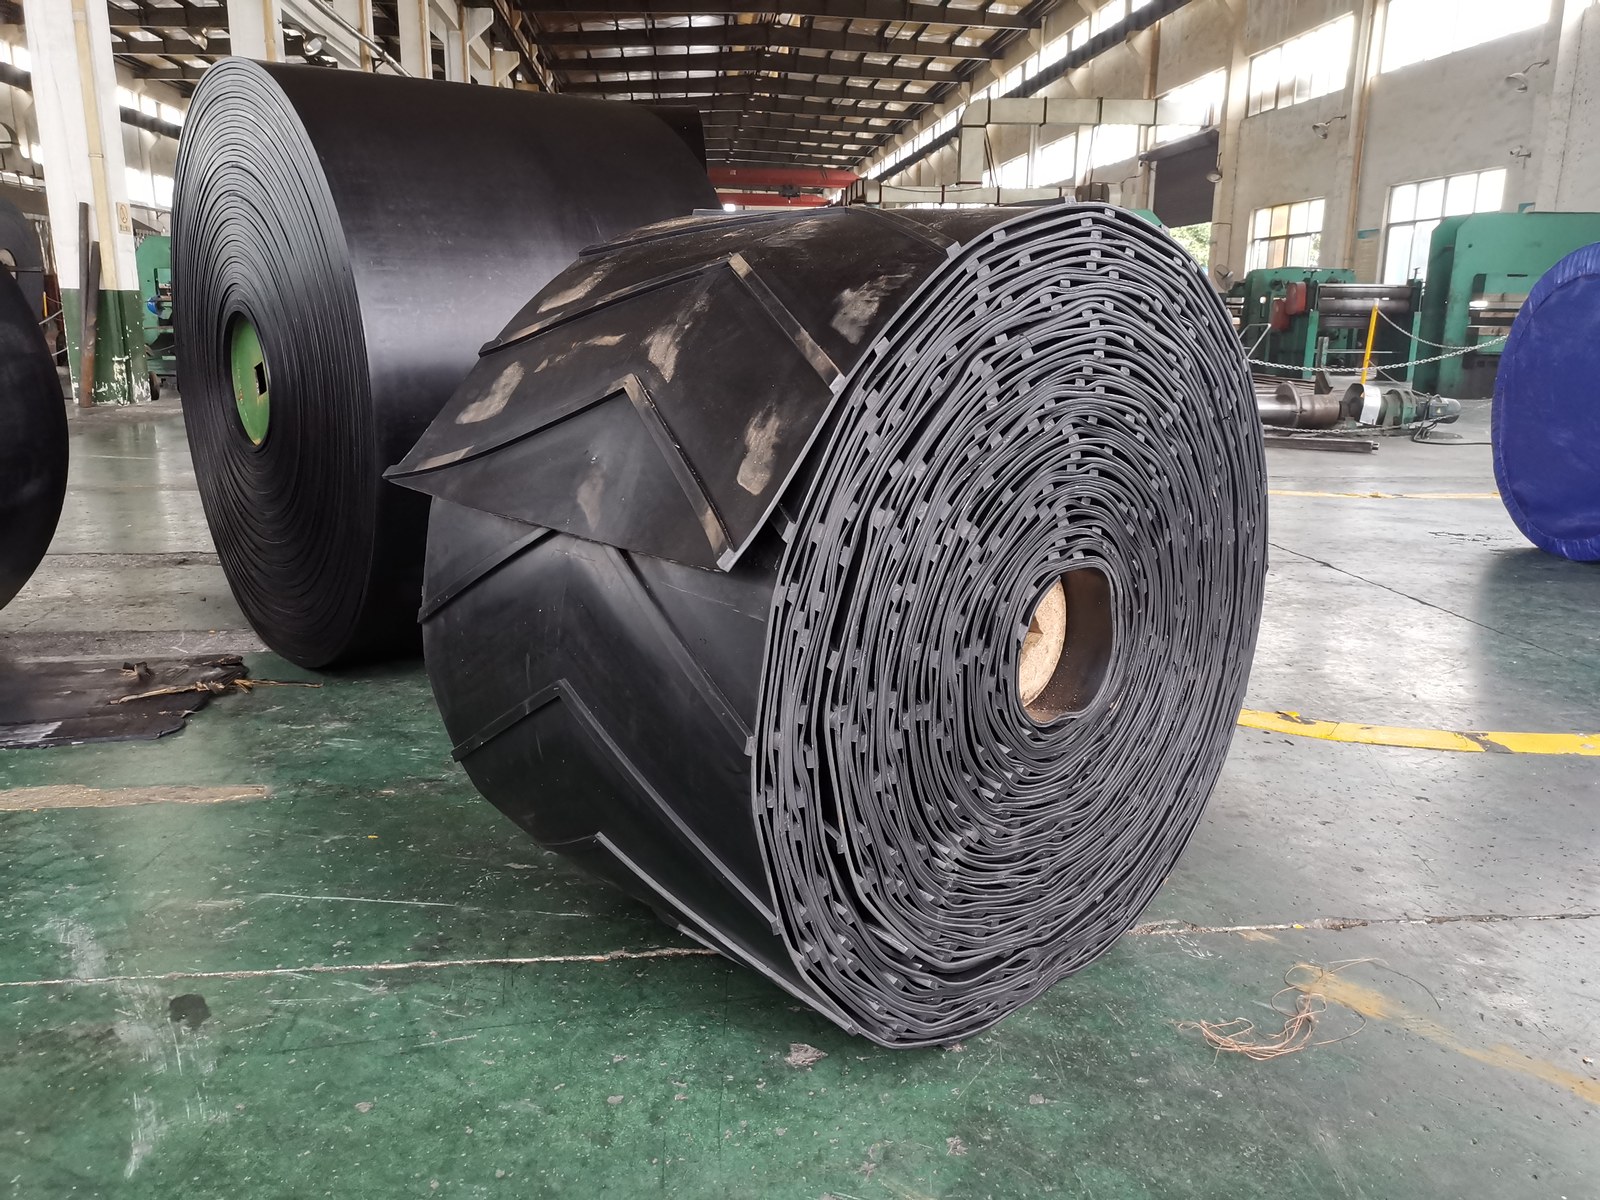
A finished chevron roll in our warehouse: V-shaped cleats molded into the carrying cover, edges trimmed square for a clean splice.
02Chevron Pattern Table: C5, C10 and C15 Dimensions
Chevron patterns are usually named by a C-number that refers to cleat height in millimeters. That convention isn't universal. Some plants order a "C10" and receive a 10 mm cleat with a 160 mm pitch. Another supplier ships a 10 mm cleat at 250 mm pitch and calls it the same thing. Two belts, same label, different grip. That's why we quote the three numbers separately — height, base width and pitch — and why our order confirmations always carry a pattern drawing the customer signs off.
Here's a case that still stings. A fertilizer plant bought C10 chevron for a 240 mm pitch drive, tight against a short centre distance. The replacement arrived at 160 mm pitch, same C10 label, same price. Cleats too close together. Valley never drained. The line carried wet prills for four months before anyone connected the two facts.
The table below lists the dimensions we hold for the three standard patterns. Treat the values as our standard tooling, not as a global standard. Confirm against the drawing for anything outside the listed belt widths.
| Pattern | Cleat height | Cleat width at base | Pitch (centre to centre) | Belt width range | Typical duty |
|---|---|---|---|---|---|
| C5 | 5 mm | 10 mm | 100 mm | 300 – 1200 mm | Dry fines, sand, fertilizer, 16°–20° |
| C10 | 10 mm | 16 mm | 200 mm | 400 – 1400 mm | Crushed stone 0–30 mm, wet coal, 20°–26° |
| C15 | 15 mm | 20 mm | 250 mm | 500 – 1600 mm | Lump ore, clinker, 26°–32° |
| C25 / C32 (high pattern) | 25 – 32 mm | 25 – 30 mm | 300 – 400 mm | 650 – 1800 mm | Steep transfer, up to about 35° |
| Herringbone / diamond | 5 – 15 mm | 10 – 20 mm | 100 – 250 mm | 400 – 1600 mm | Reversing belts, shuttle conveyors |
Standard SINOCONVE pattern dimensions. Wider belts, non-standard pitches and dual-pattern covers are made to order; final geometry is confirmed on the approved drawing.
What the C-number does not tell you
The number describes height only. A 10 mm cleat with a 200 mm pitch gives you five contact lines per meter of belt. The same 10 mm cleat at a 300 mm pitch gives you three, and now the material has to bridge a longer unsupported span between grips. For heavy lump ore a longer pitch is usually fine, because the lumps interlock with each other. For dry sand or urea prills it isn't. Those behave almost like a liquid and flow off the shortest available path. When a customer tells us their existing chevron belt slips, our first check is the pitch. Not the height.
Cleat height against lump size
As a working rule, cleat height should be at least one third of the largest consistent lump, and never less than the 95th percentile of the fines fraction. Run a 5 mm cleat under 80 mm rock and the rock simply rolls over the pattern. Run a 32 mm cleat on a bed of 0–3 mm sand and you've paid for height you can't use, plus a taller pattern that makes cleaning harder and eats pulley diameter. The sweet spot for a mixed 0–30 mm feed on an average quarry incline is a 10 mm cleat with a 200 mm pitch. That's the single most common specification we ship.
Cover grade goes with it. On abrasion-duty stone we pair the pattern with an abrasion-resistant cover, DIN 22102 grade Y or better. The bottom cover stays thin enough to keep the belt flexible over the troughing idlers. Buyers who source through a conveyor belt supplier that stocks only one cover grade usually end up trading pattern life against cover life. They aren't the same thing. A chevron can wear flat in two years while the carcass is still sound. Or the cover holds its edge while the plies start separating at the splice.
Construction follows the duty, not the pattern. For a typical inclined aggregate line at 300–500 t/h we build on EP fabric plies, 3 to 5 plies depending on tension, with 6 mm of top cover over the cleat root and 2 mm underneath. Heavier duty — primary crushed basalt, ROM ore, high drop heights — moves to steel cord construction. That's another family altogether, and one we cover separately. If your existing industrial conveyor belt is a 4-ply EP1000 running at 1.6 m/s, the profile upgrade is normally a straight swap on the same pulleys, provided the minimum diameter is respected.
03Inclination to Pattern to Cleat Height: The Selection Matrix
Most selection tables stop at the angle. In practice three variables move together — incline, pattern and cleat height — and you can't fix one without checking the other two against the material. The matrix below is the version we hand to our own application engineers. It assumes a reasonably controlled feed with a proper skirtboard, and a loading point that puts material onto the belt in the direction of travel.
| Incline from horizontal | Profile | Cleat height | What decides the final call |
|---|---|---|---|
| 0° – 14° | Smooth cover | 0 mm | A pattern costs money and reduces capacity; leave it out |
| 14° – 18° | C5 or herringbone | 5 mm | Wet feed, high fines content, variable feed rate |
| 18° – 24° | C10 | 10 mm | Lump size above 40 mm needs a longer pitch, not more height |
| 24° – 30° | C10 or C15 | 10 – 15 mm | Belt width and pulley diameter; check capacity de-rating |
| 30° – 35° | C15 or C25 | 15 – 25 mm | Consider sidewall if the feed is fine and wet |
| Above 35° | Corrugated sidewall | Profile plus 60–120 mm walls | Enclosed cross-section beats any open pattern |
A worked example from a quarry incline
A customer in the aggregate business sent us a 24° incline, 1,000 mm wide, carrying washed granite 0–30 mm at about 400 t/h, with a 1.8 m drop onto the belt at the loading point. Their existing plain rubber conveyor belt was an EP400, four plies, 6 mm top cover, running at 1.6 m/s. Material was sliding back in wet weather.
We took the angle, the peak lump size and the moisture, then walked the matrix. Twenty-four degrees, wet, 0–30 mm: C10 with a 200 mm pitch. Belt width and tension stayed where they were, because the tension calculation doesn't care much about a profile. The mass of the cleats adds a bit of rotating weight and nothing more. What changed was the minimum pulley diameter, which moved up one step to keep bending stress on the cleat root under control, and the capacity, which we de-rated by about 18 percent. At 400 t/h on a 1,000 mm belt there was enough headroom. No change in width was needed.
Two details made the difference between a working installation and a return visit. First, we asked for the take-up position with the belt installed and tensioned; it sat at 62 percent of travel, which left room for the stiffer cover. Second, we specified a segmented urethane cleaner instead of the plant's existing single blade, because a blade wide enough to span 1,000 mm can't follow a chevron valley. Honestly, that cleaner choice is often the difference between a belt that runs dry and one that carries a return-side mess for years.
The same logic applies to the drives on the same structure. We're also a transmission belt manufacturer, and it's common to find the incline conveyor being replaced in the same shutdown as the screen and the crusher drive. If the mechanical scope is bigger than one belt, ask for a single order and a single delivery date. Splitting it usually costs more in freight than it saves in unit price.
04Chevron vs T-Cleat vs Herringbone
Three profile families dominate industrial use, and people quote them interchangeably far too often. They aren't interchangeable. Each one solves a different problem, and picking the wrong family is the most expensive mistake in this whole subject. You don't discover it until commissioning.
Chevron — also called V-cleat, or just profile — is a V-shaped rib that forms a point in the direction of travel. The angle of the V feeds material toward the center of the belt and keeps the load away from the edges. That's why chevron belts spill less at the edges than a straight-cleat belt on the same incline. T-cleat is a straight rib across the belt, usually bonded or molded in a heavier section. It gives a harder bite when the material is heavy and blocky. Herringbone is a double-V pattern with the ribs pointing both ways, symmetrical about the center line, so the belt grips in both directions of travel. On a reversing shuttle conveyor, herringbone is the only one of the three that works.
| Feature | Chevron (V) | T-cleat | Herringbone |
|---|---|---|---|
| Direction of travel | One way only | One way only | Both directions |
| Lump size it handles best | 0–80 mm mixed | 80–300 mm blocky | 0–60 mm |
| Behaviour with fines | Good, valleys drain | Poor, fines sit behind the rib | Fair |
| Belt cleaner | Segmented or brush | Segmented, hard to clean | Segmented or brush |
| Splice difficulty | Moderate | High | Moderate |
| Typical use | Inclined aggregate, coal, cement | Run-of-mine ore, demolition | Shuttle, stacker, reversing lines |
Where the choice really gets decided
Two questions settle it. Does the belt ever run in reverse? If yes, the answer is herringbone or nothing.Is the feed blocky run-of-mine material with lumps over 100 mm? If yes, T-cleat or a very heavy chevron with a long pitch, because a fine-pitch V-pattern simply disappears under large rock. Everything else is an aggregate line, and on aggregate lines chevron wins. Cheaper to buy, easier to clean, and it spills less at the edges.
We keep all three families on the same tooling line, which matters when a plant runs a mixed fleet and wants one delivery. As a wholesale conveyor belts source for several trading houses, we ship chevron, T-cleat and herringbone in the same container when the widths match. It keeps the customer's spares inventory simple. It also keeps one pattern drawing valid for the whole site.
If your application is a cleated rather than a profiled belt — tall molded cleats for elevation rather than grip — we wrote a separate comparison of cleated conveyor belt selection for bulk handling that covers the taller side of the same family.
05Chevron vs Corrugated Sidewall: When to Change the Belt Type
At some point on every steep project the discussion shifts. The customer asks for a chevron belt with a taller cleat, and the honest answer is that no pattern will hold the load. That's when a corrugated sidewall conveyor belt takes over. The design is different in kind. Two corrugated rubber walls are vulcanized to the edges of the belt, and cross-cleats are fixed between them, forming a series of open boxes. The material sits inside a box, not on a slope. Which is why the practical limit moves from around 30° to 35° for a good chevron installation up to as much as 90° for a properly designed sidewall belt on suitable material.
We always explain the trade before quoting. A sidewall belt costs more per meter. It needs its own pulley design with flanged discs to keep the walls vertical, plus carefully aligned transition idlers. More vertical space at the head and tail too, because the walls can't bend over a small pulley. Those are real costs. What you buy in return is a fully enclosed cross-section that won't spill on the return strand and won't scatter material at 45°. It will also hold a fine, wet, free-flowing product that a chevron belt would shed within the first hour.
A simple decision rule
We use three tests, and they aren't equally weighted. First, angle: above 35°, sidewall. Second, material: fine, wet or fluid-like below about 10 mm, sidewall, even at 25°. Third, height and footprint: if the incline has to fit into a short space because there's no room for a long, gentle conveyor, sidewall again, because it lets you build steeper and shorter. If none of the three applies, a chevron belt is cheaper to buy, cheaper to install and easier to splice.
Material always outweighs angle. A 28° incline carrying wet sand needs a sidewall belt. A 38° incline carrying dry 20 mm crushed rock will often run perfectly on a C25 chevron. We've seen both mistakes, in both directions, on customer sites. The first one we get called out for is nearly always the wet-sand case.
What changes on the conveyor itself
Moving from a chevron belt to a sidewall belt isn't a belt swap. You need flanged pulleys, at least two on the head and one at the tail, sized so the corrugated wall passes cleanly. You need side roller idlers that support the belt where it isn't troughed, because a sidewall belt runs flat through most of its length and carries its load inside the boxes rather than in a trough. The loading point has to be arranged so material lands inside the boxes instead of on top of the walls. And you need a different approach to cleaning, because the walls and cross-cleats make a return-side scraper impossible in the usual position.
As a conveyor belt distributor we would rather sell one right belt than replace one wrong belt, so we ask for the layout drawing before we discuss price. If a chevron belt will do the job, we say so, even when the sidewall option carries a higher unit price. Our sidewall conveyor belt range covers wall heights from 40 mm to 120 mm with matching cleat pitch, and the corrugated sidewall conveyor belt guide walks through wall height and cleat pitch selection in detail.
06Port and Bulk Terminal Conveying
Port conveyors are a different duty from a quarry incline, and the difference isn't the tonnage. It's the material mix and the weather. A terminal handling iron ore fines, coal, fertilizer, grain and clinker from the same berth will run the same belt system against five different products in a single week. Some arrive dry and dusty. Some come wet out of the hold. And some — petroleum coke, for instance — are abrasive, oily and fine at the same time. That's the environment where a profiled belt earns its keep, or turns into a maintenance liability.
Two applications dominate. The first is the boom and transfer conveyors on a shiploader or unloader, where the belt runs at a steep angle over a short distance and any slip means material dropping into the harbour. The second is the stockyard incline between the yard conveyor and the stacker, often built at 18° to 26° to fit the available footprint. In both cases the belt is usually wide — 1,200 mm to 1,800 mm — and the tension is high, so the profile has to be molded onto a heavy carcass, not a light one. Which is the part most quotations get wrong.
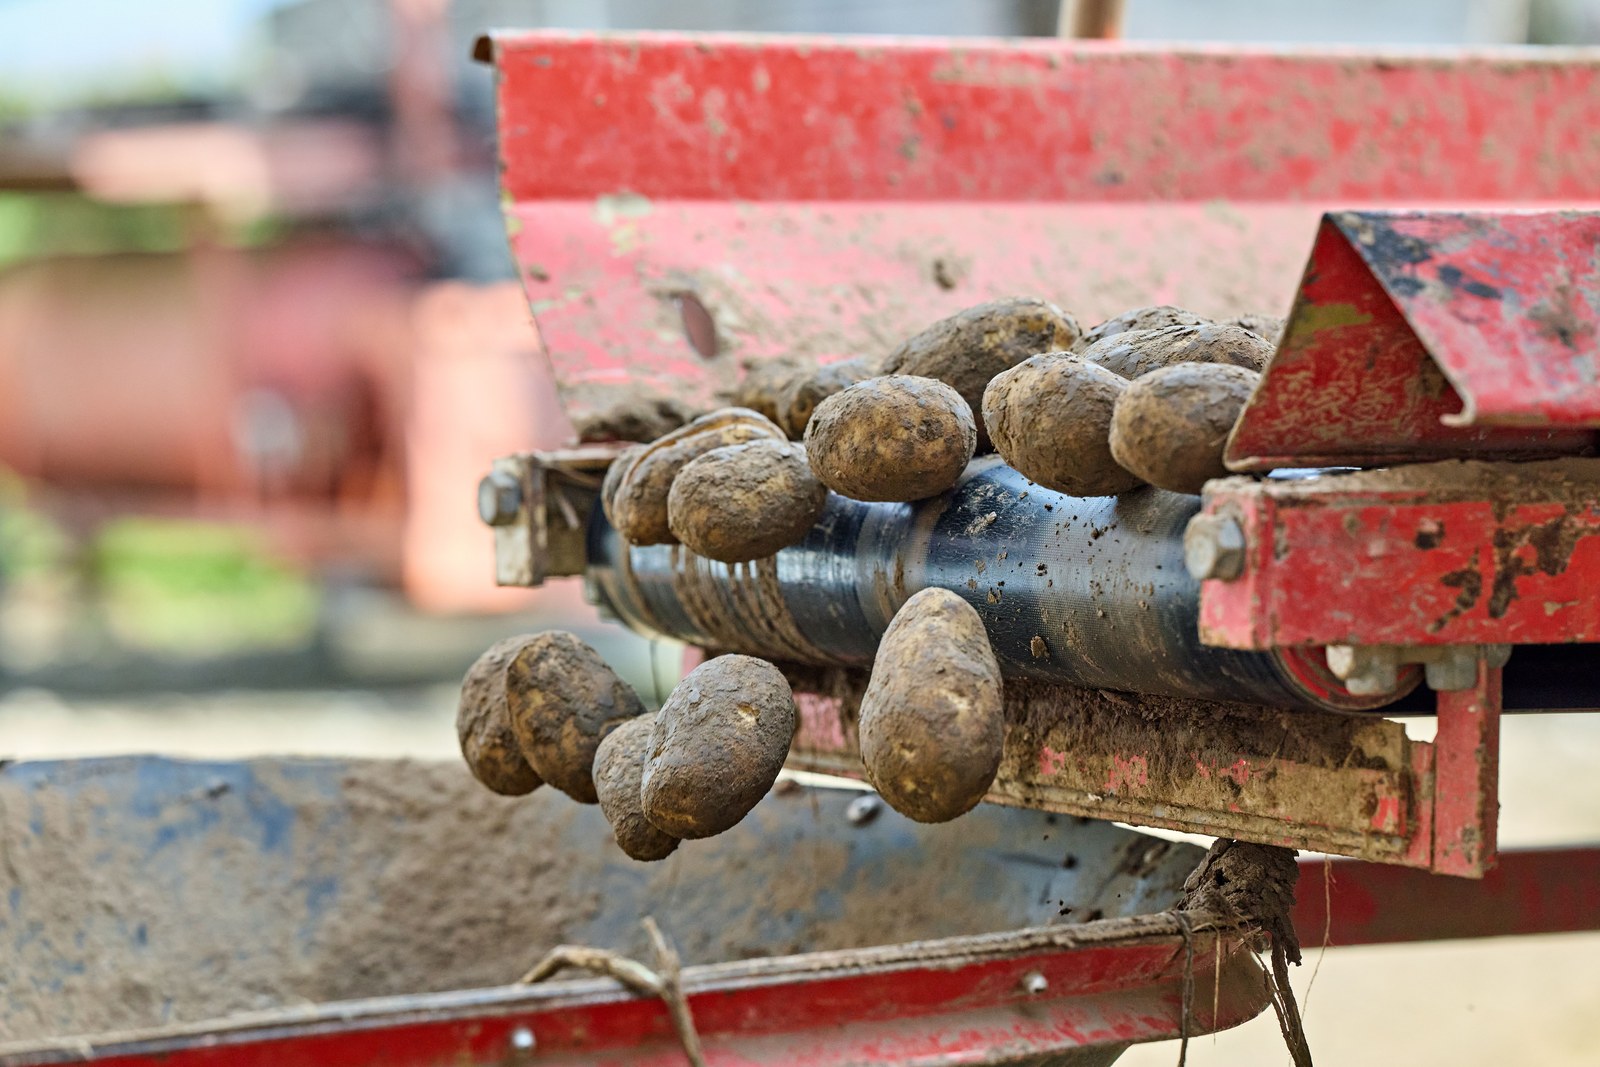
Transfer point on an inclined chevron belt: the V-pattern centralises the load and holds it through the steepest section.
What we specify differently for port duty
Three changes compared with a quarry belt. Cover grade goes up, because salt air, oil traces and fine abrasive ore attack the cover from day one; we normally specify an abrasion-resistant cover with a minimum 6 mm top cover, and often 8 mm on the loading section. Ply count goes up for the same reason. We check the tension calculation against the starting condition rather than the running condition, because a loaded stockyard incline starts against a full belt. And the pattern pitch goes up, because terminal material is frequently wet and sticky, and a tight pitch fills with fines between the cleats and stops draining.
Terminals also tend to buy in volume, against a specification written by an engineering consultant. That specification is usually written around DIN 22102 or an equivalent AS or SANS standard, and it will name cover grades and tolerance classes. Our advice to any terminal procurement team is to add three lines to it: the pattern height and pitch. The minimum pulley diameter allowed for the pattern. And the splice method expected. Without those three lines, two suppliers can quote "C10 chevron" and deliver belts that behave nothing alike.
We build for terminal work at our own plant, and the reason is traceability. As a conveyor belt factory with ten production lines, eight for fabric carcass and two for steel cord, we can hold a port project on one line from carcass build through pattern molding to final inspection. That matters when the inspector wants to see the same batch number on the calendered ply, the finished belt and the test report.
The drives around the belt
It's worth saying something about what sits behind the pulley. Port conveyors have large drives, and those drives usually run on V-belts or on multi-ribbed belt sets, not on the conveyor belt itself. A terminal replacing the incline belt is often also re-belting the drive packages on the same machines. We're a V-belt manufacturer as well as a belt supplier, so a boom conveyor order frequently turns into a mixed order. Wrapped V-belts for the drives and rollers. The pattern drawings for the incline section.
That combination is more useful than it sounds. The drive belt and the conveyor belt fail on different clocks. A maintenance planner who keeps both in the store avoids the classic situation where an expensive conveyor belt sits idle for a week waiting on a forty-dollar belt for the gearbox drive.
07Splicing a Profiled Belt: Alignment and Vulcanization
A plain belt splice has to line up the plies and hold tension. A profiled splice has to do that, and also make the pattern continue across the joint. Get the pattern alignment wrong and the belt runs short on one edge. It drifts on the pulleys, and the cleats wear unevenly for the rest of its life. We've had a 1,200 mm chevron belt come back after four months for exactly that reason. The splice was two pitches out and the joint walked sideways into the skirt rubber every revolution.
There are two acceptable methods. The first is a stepped splice with the cleats cut back on both ends, so the pattern stops cleanly on each side of the joint with a short plain section. That's the standard method for narrow belts and for site splicing without a pattern mold. The second is a spliced pattern, where the joint is made between cleats and the pattern is restored after vulcanization using a matching mold or a cold-bond repair kit, so the pattern is continuous across the joint. Use this one for long belts, for belts that must not have a pattern gap, and for anything wider than about 1,400 mm, where a gap creates a real capacity dip. The method that doesn't work is a plain splice butted straight across a chevron cover. We've seen it tried.
Step-by-step, the way our technicians do it
Mark the splice center on both ends of the belt. Measure from a cleat, never from the belt end, because belt ends are rarely cut square and a repeated pattern gives you a far better reference than a trimmed edge. Cut the steps to the ply count: three steps for a three-ply belt, four for four, each one long enough to develop the joint. We work to at least 200 mm per ply on heavy duty. We'd rather have 250 mm and a longer press time than a short joint that fails in the field.
Then align, and align on the pattern. Bring the two ends together and check the cleat line across the full width with a string line at four points. Not two. Two points can be satisfied by a twisted belt. Sand the step surfaces until the rubber is bright, brush and vacuum the dust, apply the cement and let it flash off completely. Rushing this step is the single most common cause of a splice that opens early. Then place the uncured cover strip, close the press and run the cure cycle.
Cure parameters and the pattern problem
Cure temperature and time depend on the rubber compound and the joint thickness, and the pattern makes the joint thicker than a plain splice by the cleat height. On a 15 mm C15 cleat, that's a meaningful increase in heat path. Our own cure data for standard pattern compounds runs around 145°C to 150°C at the platen, with a dwell that follows the compound data sheet, and we always supply the specific curve for the batch with the belt. Don't use the plain-belt curve on a profiled belt. The joint will look cured at the surface and be under-cured at the cleat root, which is exactly where it will fail.
Three practical checks after the press opens. First, the pattern: sight along the belt with the cleats up and confirm the V-points are in line across the joint. Second, hardness: a durometer reading across the joint should sit within a few points of the parent belt cover. Third, edges: run a hand along both edges of the joint and feel for a step. A step of more than half a millimeter will find the skirt rubber within a week.
If you're splicing on site rather than in our workshop, send us the pattern dimension from a cleat rather than from the belt end, and tell us the ply construction and the cover grade. We'll send the pattern drawing, the step layout and the cure schedule with the belt. Field splicing is entirely practical when the geometry is known in advance. It becomes expensive when the technician is measuring a pattern for the first time with the belt already hanging on the structure.
08Carryback, Spillage and Belt Cleaning
Carryback is the slow tax on a profiled belt. Material sticks to the cover, rides around the head pulley and drops off somewhere it isn't wanted, usually under the incline where clearance is tight and nobody can reach it with a shovel. On a flat belt the fix is a scraper. On a chevron belt the scraper can't follow the pattern, so the fix has to be designed differently, and at the same time as the belt rather than after commissioning.
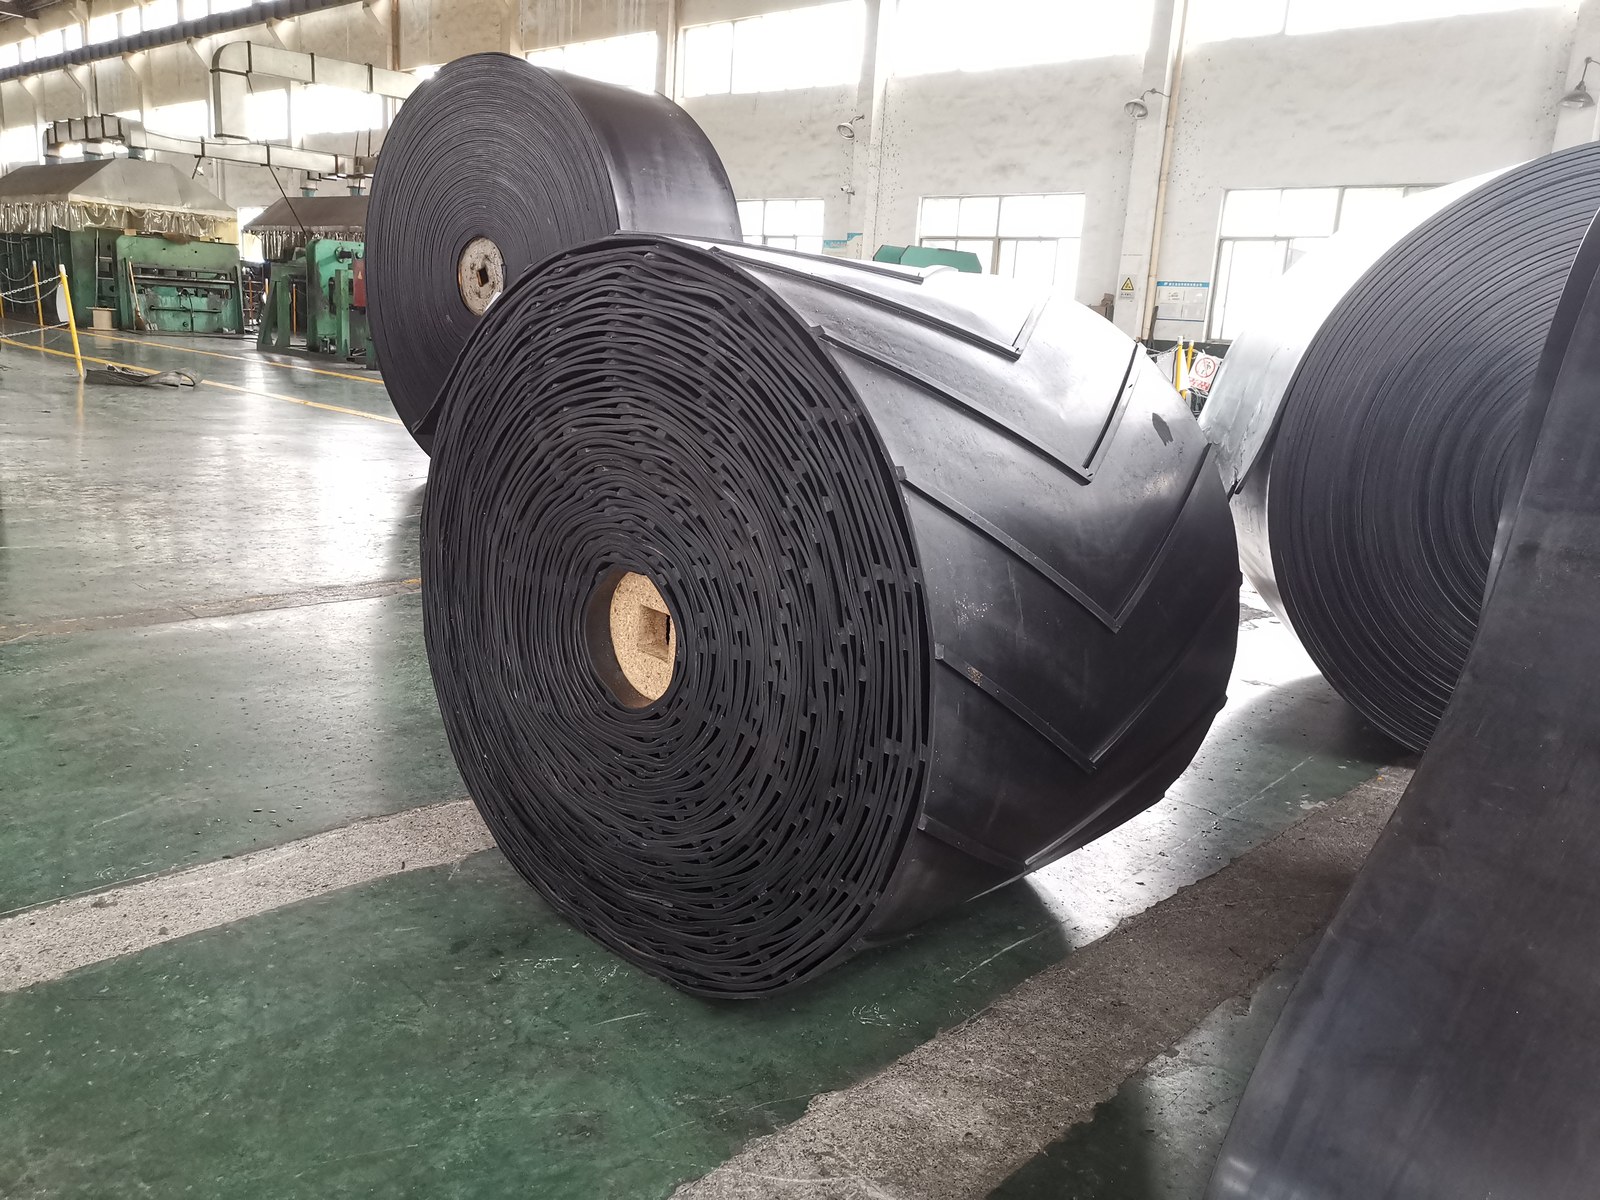
Finished chevron rubber belt rolls before dispatch; the bottom cover stays smooth so cleaners and idlers behave predictably.
Where carryback actually comes from
Four sources, in our experience, in descending order of how often they turn out to be the real cause. Wet fines small enough to key into the valley of the pattern, which then can't be scraped. An under-sized head pulley where the belt doesn't open the curve enough to release the load. A loading point that puts material onto the belt at high speed and lets the fines compact into the cover. And least often, a worn cover that has lost its surface and grips the fines mechanically.
That order matters, because the answer is rarely "buy a better scraper". If the feed is wet and the product is under 5 mm, no cleaner will hold the belt clean. The fix is upstream. A better transfer chute, or a dribble chute that places fines underneath the coarse material. A dewatering step, where the process allows it. We've watched plants spend more on cleaner hardware in one year than a chute modification would have cost, and still lose the same tonnage to spillage.
Cleaner options that work with a pattern
Three configurations work. A segmented primary cleaner, where each segment is narrow enough to follow the belt between cleats, mounted on a spring-loaded arm so it floats over the pattern. A rotary brush, driven from a small motor or from the return pulley, which sweeps the valleys without needing to follow the profile. And a secondary cleaner positioned where the belt is flat on the return run, picking up what the primary missed.
What doesn't work is a single wide blade. Nor a plow, nor a counterweighted scraper tuned for a flat belt. A rubber lagged roller in place of a cleaner is a reasonable fallback for coarse material with little adhesion, but it won't help with wet fines.
Spillage and edge control
Spillage on an incline comes from three places. At the loading point, where the skirtboard seal has to cope with a pattern taller than a plain cover; the skirt rubber has to be set to clear the cleat, which leaves a gap that fines can pass. On the incline itself, where the load shifts to one side because the belt isn't tracking or the feed is off-center. And at the discharge, where the trajectory changes as the load leaves a patterned surface with slightly different release geometry.
Our standard answers are boring and effective. Wider skirt rubber with a longer wear strip. An adjustable feed chute that lets the operator center the load. A small amount of side guide where the belt enters the incline section. Skirt rubber that is too hard is the most common single fault we find on site, because it abrades the cleats at the edge and the gap opens further. Softer compound, longer strip, checked and reset at every shutdown.
One more thing worth checking on any inclined line with a profile: the return strand. If the pattern faces down on the return run, it can rub on the return rollers only at the cleat crests, which wears them into the belt and creates a lot of noise. Design the return idlers to support the smooth side and you solve it. This is a layout decision, and it costs nothing when it's made at the drawing stage. We mention it in every conveyor roller quote that follows an incline project.
09Selection Checklist and How to Write the RFQ
Most of the expensive mistakes we see start with a one-line inquiry: "Need chevron belt, 1,000 mm, 30 meters." That message can't be quoted accurately, and any supplier who quotes it is guessing. Here's the checklist we ask customers to fill in, followed by a short RFQ format that gets you a firm price and a drawing on the first pass.
The nine-point checklist
Incline angle at the steepest section, measured from horizontal. Material type, lump size range and bulk density. Moisture content in normal operation and in the wettest season. Required capacity in tonnes per hour, and whether that is average or peak. Belt width, and whether it is fixed by the structure or can change. Center distance and the number of pulleys. Pulley diameters, especially the smallest one on the line. Drive data: motor power and belt speed, plus whether the belt is started loaded. And the take-up type with the available stroke.
Answer those nine and the selection falls out almost arithmetically. Angle gives the family. Lump size and moisture give the pattern height and pitch. Capacity and width confirm the carcass, and the pulley diameters confirm whether the chosen pattern can bend around them. The tension calculation comes last, not first, and it's the one we always run in house before issuing a drawing.
| RFQ line item | What to write | Why we need it |
|---|---|---|
| Incline | Steepest angle, degrees from horizontal | Sets the profile family |
| Material | Type, lump range, bulk density, moisture | Sets cleat height and pitch |
| Capacity | t/h average and peak, belt speed | Confirms width and ply count |
| Geometry | Center distance, pulley diameters | Checks minimum pulley for the pattern |
| Drive | Motor kW, start condition, take-up stroke | Tension and splice design |
| Commercial | Quantity, delivery port, required date | Price, packing and shipping plan |
A complete nine-point request normally returns a firm price and a pattern drawing within two working days.
Commercial terms, so there are no surprises
Our normal minimum for conveyor belts is around 50 meters per type and specification. Standard lead time is about 30 days from order confirmation, with a fast lane at 15 to 20 days for breakdown situations, and samples in 2 to 5 days. Payment is usually 30 percent deposit with the balance before shipment by T/T, or a letter of credit for larger orders. We support OEM and ODM work, including printed logos and non-standard widths. Every shipment leaves with a test report.
That test report isn't a formality. We test incoming rubber and fabric for rheological properties and tensile strength. Calendering and skim tension get monitored during production, finished dimensions and appearance get checked at the end, and the lab runs abrasion, adhesion and tensile tests. If a customer's specification names DIN 22102, ISO, RMA, AS 1332, BS or SANS requirements, we quote against that standard and record the results against it.
The fastest way to start is to send the nine points with a layout sketch to our engineering desk at our contact page, or browse the full product catalog if you already know which construction you want. If the incline is steep and the material is wet, read our notes on chevron belts in steep bulk handling before you write the specification, and take the abrasion duty into account with our guide to abrasion-resistant belts for quarry and steep-angle conveying.

10FAQ: Chevron Conveyor Belts
At what incline do I actually need a chevron belt?
Above about 16 degrees for dry, coarse material, and above 14 degrees for wet or fine material. Those are working thresholds, not rules. We check the friction the belt can generate against the material instead of trusting the drawing angle, because moisture, fines content and lump shape all move the limit. If your incline is 12 degrees and the feed is dry 0–40 mm stone, a smooth belt is fine. And cheaper.
Can a chevron belt run on a reversing conveyor?
No, not a single-direction chevron. The pattern points one way, and running it backward makes the ribs work against the load. For a reversing or shuttle conveyor, choose a herringbone or diamond pattern, which is symmetrical about the center line, or accept the capacity loss and stay with a plain cover.
Chevron or sidewall belt for wet, fine material?
Sidewall, in most cases. Once the product is under about 10 mm and wet, it behaves close to a fluid and will find its way around any open pattern. A corrugated sidewall belt encloses the load in boxes between the walls and the cross-cleats, so there's nothing to slide. The trade is a higher belt price and a conveyor that needs flanged pulleys and more careful transition geometry.
How do you splice a chevron belt?
Either a stepped splice with the pattern cut back on both sides, or a spliced pattern where the joint is restored after vulcanization with a matching mold. We align on the cleat line, not the belt end, and check it with a string line at four points across the width. Cure time follows the compound and the joint thickness, which is greater than a plain splice by the cleat height, so the plain-belt cure curve doesn't apply.
Will a standard belt scraper clean a chevron cover?
A single wide blade won't. It rides over the cleats and drops into the valleys, leaving streaks and chattering against the belt. Use a segmented cleaner with spring-loaded arms, or a rotary brush. A secondary cleaner on the flat return run helps too. If the material is fine and wet, no cleaner will hold the belt clean, and the fix belongs upstream at the transfer chute.
What are your minimum order, lead time and payment terms?
For conveyor belts our minimum is around 50 meters per type and specification. Standard lead time is about 30 days from order confirmation, with 15 to 20 days for urgent breakdown orders, and samples in 2 to 5 days. Payment is normally 30 percent deposit with the balance before shipment by T/T, or a letter of credit. Custom widths and cleat pitches are routine, and so are non-standard cover grades. Every shipment leaves with a test report.
11Related Products You May Need
| Chevron Conveyor Belt Our main profiled belt range: C5, C10, C15 and high patterns, molded on EP or steel cord carcass. |
Rubber Conveyor Belt Smooth-cover belts in abrasion, heat, oil and flame-resistant grades for general bulk duty. |
| EP Rubber Conveyor Belt Polyester-nylon carcass, EP100 to EP500, the workhorse for inclined aggregate and coal lines. |
Corrugated Sidewall Conveyor Belts Enclosed cross-section belts for inclines above 35 degrees and fine, wet or fluid-like products. |
| Steel Cord Conveyor Belt High-tension belts for long overland lines, primary crushing and heavy port duty. |
V-Belt Drives Wrapped, cogged and multi-ribbed belts for the drive packages behind your inclined conveyor. |
Need a price or a drawing? Send the nine selection points to sales@sinoconve.com via our contact page, or see the full product catalog and our factory profile.
Related Blog Posts
- Chevron Conveyor Belts for Incline and Anti-Slip Duty — our most-read page on chevron selection, with field notes on slipping belts.
- Chevron Conveyor Belt for Steep Bulk Handling — how steep is too steep for an open pattern.
- Cleated Conveyor Belt Selection for Bulk Handling — tall cleats, sidewalls and elevation duty compared.
- Corrugated Sidewall Conveyor Belt for Steep Conveying — wall heights, cleat pitch and pulley design.
- Sidewall Conveyor Belts in Incline Transport — layout tips for converting a chevron line to sidewall.