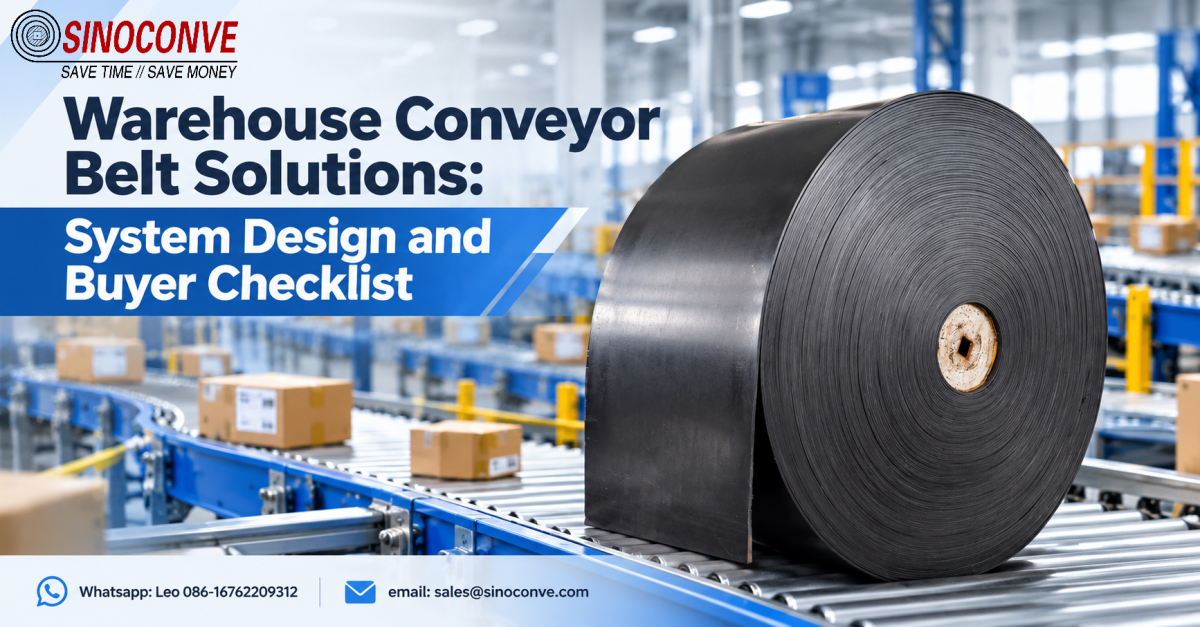
A warehouse conveyor belt is sized from throughput and takt time first, never from a belt catalogue. Convert parcels per hour into belt speed and load per metre, then fix belt width and running surface. Only after that do you approach a supplier. That order decides the outcome more than any single data sheet you will read this month.
Here is one rule you can apply today. If your takt is under 3 seconds, specify a low-stretch belt and a spliced endless joint. A mechanical fastener looks cheaper at quotation stage and then lets go at that cycle count, usually inside a quarter. The rest of this page gives the design sequence we run on site: a throughput table, an accumulation table, and a 20-item buyer checklist you can hand straight to your integrator or EPC.

01From Throughput Target to Belt Duty
Every belt decision starts with a number the warehouse already owns: parcels per hour, and roughly what each parcel weighs. Warehouse managers often arrive with a belt width in mind because a neighbouring site used it. We usually send them back to the throughput figure, because the same 600 mm belt behaves completely differently at 900 parcels per hour and at 2,400.
Two conversions sit behind the whole design. The first turns parcels per hour into mass flow, in kilograms per second. The second turns mass flow and belt speed into load per metre. Load per metre is the number that eventually sets belt tension, pulley diameter and the splice you can use. Skip it and you will over-specify the carcass, or worse, under-specify it and watch the joint pull apart in a busy hall.
How to Convert Parcels per Hour into Load per Metre
Take the parcel rate, multiply by average unit weight, and divide by 3,600 to get kilograms per second. Divide that by belt speed in metres per second, and you have load per metre. Belt speed itself comes from pitch: how far apart consecutive parcels sit, multiplied by how many pass a fixed point in an hour. Pack the parcels closer and you can run slower for the same rate, which is almost always the cheaper answer on a long line.
Sizing a conveyor for a distribution centre follows the same arithmetic whether the material is parcels or bulk. If you want a sense of how throughput targets map onto belt duty in a related bulk setting, the team behind our logistics and warehousing industry pages works through the same first steps, and our work as a conveyor belt manufacturer starts from those numbers rather than a stock list.
A Worked Example: 1,200 Parcels per Hour at 1.8 kg
Say a cross-dock line moves 1,200 parcels per hour and the average unit weighs 1.8 kg. Mass flow is 1,200 times 1.8, so 2,160 kg/h, or 0.6 kg/s. At a belt speed of 0.6 m/s the load per metre is 1.0 kg/m. That is light, and it tells you something useful: the belt carcass is not the constraint here. The constraint is tracking and splice life, because 1,200 parcels per hour means roughly 7.2 million small impacts across a two-shift year.
Now change one variable. Suppose the same line carries 8 kg cartons at 3,600 per hour. Mass flow becomes 28,800 kg/h, or 8 kg/s. Hold speed at 1.2 m/s and load per metre jumps to 6.67 kg/m. Same hall, same width, six times the tension. This is why we refuse to quote a warehouse belt from width alone.
| Throughput (units/h) | Unit Weight (kg) | Belt Speed (m/s) | Load per Metre (kg/m) | Belt Width (mm) |
|---|---|---|---|---|
| 600 | 2.0 | 0.50 | 0.67 | 500 |
| 1,200 | 1.8 | 0.60 | 1.00 | 600 |
| 1,800 | 3.0 | 0.80 | 1.88 | 800 |
| 2,400 | 5.0 | 1.00 | 3.33 | 1,000 |
| 3,600 | 8.0 | 1.20 | 6.67 | 1,200 |
Table 1: turning a throughput target into belt duty before any product is chosen.
Read the table across, not down. A 500 mm belt is perfectly adequate for the first row and completely unsuitable for the last. The duty grows faster than the width because mass flow scales linearly with rate and weight, while width only adds area. If you double both rate and unit weight, you need roughly four times the duty, not twice.
02Takt Time and Line Balancing
Takt time is the heartbeat of a warehouse line, and it is not the same as average throughput. Average throughput tells you what a shift produced. Takt tells you the interval the line must hold during the busiest hour, when labour is stretched and every micro-stop shows up. Design to the average and the line will fail every Monday morning.
Reading the Bottleneck, Not the Average
We ask for one week of scan data before we size belts. Then we look for the tightest station, not the fastest. A merge with a 2.4-second takt feeding a sorter that only clears one parcel every 3.1 seconds is a bottleneck wearing a suit. The belt on the slow side will run at whatever speed the sorter dictates, so its actual duty is set by the constraint, not by its own motor data plate.
The practical consequence is that a smooth, high-tensile rubber surface helps most at the constraint, and a lighter PVC belt is often fine everywhere else. If you are comparing cover materials at this stage, our note on rubber conveyor belt construction explains why cover compound matters less than carcass stretch once the takt drops below three seconds.
When a 2.4-Second Takt Changes Your Belt Spec
At a 2.4-second takt you close roughly 1,500 gaps per hour at each merge point. Every gap is a moment when the belt changes load, and every change is a small tug on the splice. A three-ply fabric belt that behaves beautifully at a 6-second takt starts to creep at 2.4 seconds. We raise the fabric specification one step and move to a vulcanised endless joint, which costs more on the invoice and far less across the year.
| Station | Pace (s) | Actual Rate (units/h) | Bottleneck | Action |
|---|---|---|---|---|
| Induction | 1.9 | 1,894 | No | Keep width, hold speed |
| Main merge | 2.4 | 1,500 | Yes | Upgrade carcass, endless joint |
| Sorter infeed | 3.1 | 1,161 | Yes | Reduce gap, add second chute |
| Packing outfeed | 2.2 | 1,636 | No | Standard belt is sufficient |
Table 2: a takt and balance sheet shows where belt spend actually earns its keep.
Field note from our engineers: At a distribution centre running a 2.4-second takt, the line used mechanical fasteners for the first two years. Fastener bars loosened and edge tear appeared at roughly 90 days, every time. We moved that belt to a hot-vulcanised endless joint and watched the same joint run 14 months without a splice fault. Belt change downtime also fell from about 6 hours to 4.
03Merge, Divert and Sortation Interfaces
Interfaces are where belts fail first, and they are also where buyers ask the least detailed questions. A merge, a divert and a sorter infeed all change the direction or the spacing of a parcel stream, and each one imposes a duty that a straight transport belt never sees. Treat every interface as its own design problem with its own belt specification.
Merge Geometry and Gap Control
At a merge, two streams become one. The classic failure is a knife-edge merge with no gap control upstream, so parcels arrive shoulder to shoulder and the merge belt has to accelerate a queue rather than a single parcel. Fitting a short metre of metering belt before the merge costs little and removes most of the shock load. We have seen merge belt life double after nothing more than adding that metering section and lowering the entry speed from 1.0 m/s to 0.7 m/s.
Divert Types and Their Belt Demands
Pusher diverts tolerate a modest surface. Pop-up wheel and shoe sorters demand tight width tolerance and a very flat belt, because any camber or ripple lifts the shoe mechanism and causes a mis-sort. Angled roller and paddle diverts sit between the two. For a mixed hall, we usually specify one belt family for the transport backbone and a stricter, flatter specification only across the sortation modules themselves.
| Interface Node | Throughput (units/h) | Typical Risk | Mitigation |
|---|---|---|---|
| Knife-edge merge | 1,500 | Shoulder-to-shoulder jam | Metering belt upstream |
| Pop-up wheel divert | 2,000 | Mis-sort from belt camber | Flat belt, tight width tolerance |
| Sorter infeed gap | 1,800 | Double feed to scanner | Speed step and singulation zone |
| Packing transfer | 900 | Product slide at handover | Matched speeds, small nose bar |
Table 3: interface duties differ sharply from straight-run transport duty.
Picking the right belt for each interface is easier when you have a framework for the whole hall. Our warehouse conveyor belt guide sets out the module map in more detail, and as a warehouse conveyor belt manufacturer we regularly sit with integrators at exactly this stage, before the module list is frozen. If you would rather send the interface list to us first, our team works as a conveyor belt supplier for both the backbone and the divert modules.
04Accumulation and Zero-Pressure Zones
Accumulation is the buffer that lets a downstream stoppage happen without stopping the whole hall. It is also the single biggest source of quiet damage in a parcel operation, because cartons that queue under pressure for hours take a set that only shows up as a bulge in the bottom panel. The choice of accumulation mode is a design decision, not a fallback.
Contact Accumulation vs Zero-Pressure
Contact accumulation lets parcels touch through the queue, so each unit carries a share of the ones behind it. It is cheap and simple, and it is fine for metal totes or shrink-wrapped pallets. Zero-pressure accumulation holds a discrete gap between units, using zone sensors and a controller that only runs the zone directly behind a free zone. The gap costs floor space and controls, and it protects the product.
For a parcel hall with a mix of poly bags and light cartons, we default to zero-pressure. For a case hall moving rigid goods, contact accumulation is often enough. The dividing question is simple: can the unit on the belt be deformed by a compression load of, say, 30 kg spread over its base? If yes, use zero pressure.
Sizing an Accumulation Zone
Zone length follows the length of the longest unit plus one safety gap, usually 150 to 250 mm. Count how many units you need to buffer against your longest realistic downstream stoppage, then multiply. A line that stops for 90 seconds at 0.4 units per second needs about 36 units of buffer, which at 600 mm pitch is roughly 22 m of accumulation lane. When floor space will not allow that, the honest answer is to fix the downstream stoppage rather than paper over it with more belt.
| Accumulation Mode | Unit Pressure | Throughput Effect | Best For |
|---|---|---|---|
| Contact accumulation | Rises through queue | Highest peak rate | Rigid totes and cases |
| Zero-pressure accumulation | Negligible, gap held | Lower, needs more length | Cartons, poly bags, mixed |
| Zero-contact sensor zone | None, no touch | Lowest, needs controls | Fragile or high-value units |
| Gravity chute buffer | Wall contact | Fixed, no speed control | Short vertical transfers |
Table 4: accumulation mode is chosen against product, not against budget alone.
Accumulation lanes also behave differently when the belt surface changes. A high-friction rough top holds a queued unit without slipping but loads the drive harder on restart, while a smooth surface releases cleanly and needs a higher breakaway torque. Our logistics conveyor belt warehouse guide walks through how accumulation interacts with surface choice on typical lanes.
Field note from our engineers: One accumulation lane was running contact accumulation and the client kept blaming the carton supplier for crushed bottoms. We measured a compression load near the discharge end, then converted the lane to zero-pressure and dropped entry speed from 0.5 m/s to 0.3 m/s over a 0.6 m ramp. Damage fell from about 1.8% to 0.4% within a month.
05Incline, Decline and Drop Points
Very few warehouse lines are perfectly flat, and the exceptions are usually the places where product ends up on the floor. Slopes and drops are governed by friction, not by habit, and the safe angle for a parcel belt is far lower than most people assume. Get this section wrong and you buy the same belt twice.
Maximum Slope Before Product Slips
For a smooth PVC belt running a typical cardboard carton, we treat about 12 degrees as the practical ceiling and prefer to stay under 10. Deep-frozen product with surface frost drops that to 8 degrees or less, because ice acts as a lubricant. Rough top and patterned covers buy you a few more degrees, and cleated or sidewall belts are the real answer above 15 degrees. If your layout shows 18 degrees with a plain belt, the layout is wrong.
Drop Points and Impact Zones
A drop point is an incline in disguise. Product that falls even 200 mm lands with energy, and that energy has to go somewhere. We size the belt around the worst angle and the worst drop together, then add an impact roller or a short cushion section at each transfer. The cost of one cushion section is trivial next to the cost of a torn cover on a main trunk line.
| Incline Angle | Drop Height | Product Risk | Anti-slip Measure |
|---|---|---|---|
| Up to 8 degrees | Under 150 mm | Low on dry cartons | Smooth belt, correct tracking |
| 8 to 12 degrees | 150 to 300 mm | Slide-back on light units | Rough top cover, speed control |
| 12 to 18 degrees | 300 to 500 mm | Frequent product tumble | Cleated belt or sidewall belt |
| Above 18 degrees | Above 500 mm | Unsuitable for flat belt | Sidewall belt plus chute redesign |
Table 5: slope and drop are designed together, because each one raises the demand on the other.
Where a slope carries loose or granular product rather than parcels, cleats and corrugated sidewalls do the work a smooth cover cannot. A rough top conveyor belt guide covers the light-duty end of that range, and our range as a conveyor belt distributor includes patterned covers for the steeper parts of a warehouse layout.
06Environment: Temperature, Humidity and Dust
Warehouse environments are rarely as gentle as the specification meeting suggests. The same building can hold a frozen store at minus 22 degrees Celsius, an ambient picking hall at 24, and a loading dock that swings between both within a shift. Belt cover compounds age at very different rates across that range, and the wrong choice shows up as cracking long before the carcass is worn out.
Cold Stores Below Minus 18 Degrees Celsius
Standard nitrile covers stiffen in a cold store and can crack at the flex points within a season. Below minus 18 degrees Celsius we move to a low-temperature compound and keep the belt thinner, because a thinner belt flexes more easily around a small pulley when the rubber is hard. We also avoid mechanical fasteners in freezer applications, since the metal bars conduct cold and become brittle.
Washdown, Condensation and Dust
Washdown areas are the opposite problem. Repeated wetting and drying shortens cover life unless the compound resists hydrolysis, and a warm hall with cold product creates condensation that behaves like a permanent lubricant. Fine dust, meanwhile, works into the pulley face and changes effective friction. If you are weighing cover materials for this mix, our comparison of rubber conveyor belt vs PVC conveyor belt sets out where each one wins.
| Parameter | Typical Range | Effect on Belt | Design Response |
|---|---|---|---|
| Temperature | Minus 22 to 40 degrees C | Cover stiffens or ages | Low-temperature compound |
| Relative humidity | 40 to 95 percent | Grip loss on damp cover | Hydrolysis-resistant cover |
| Condensation | Cold product, warm hall | Slip at incline points | Patterned cover, lower angle |
| Fine dust | High in waste and returns | Friction change, marking | Sealed rollers, cleaning access |
Table 6: environmental parameters that change the belt quote before a single price is agreed.
Environment also decides how your factory-backed warranty conversation will go, which is why we keep our own test line close to production. Buyers who want to see how a belt is built before they commit can visit the works that runs as our conveyor belt factory and review cure curves against their own temperature profile.
07Belt Type by Warehouse Function
This is the table most buyers actually want, and it only makes sense after the previous six steps. Belt type follows function, and function follows the duty you calculated. A returns belt and a sorter infeed belt can sit three metres apart and still need completely different specifications, because one carries damaged goods at low speed and the other carries uniform units at high speed with tight spacing.
Picking, Transport, Packing and Returns
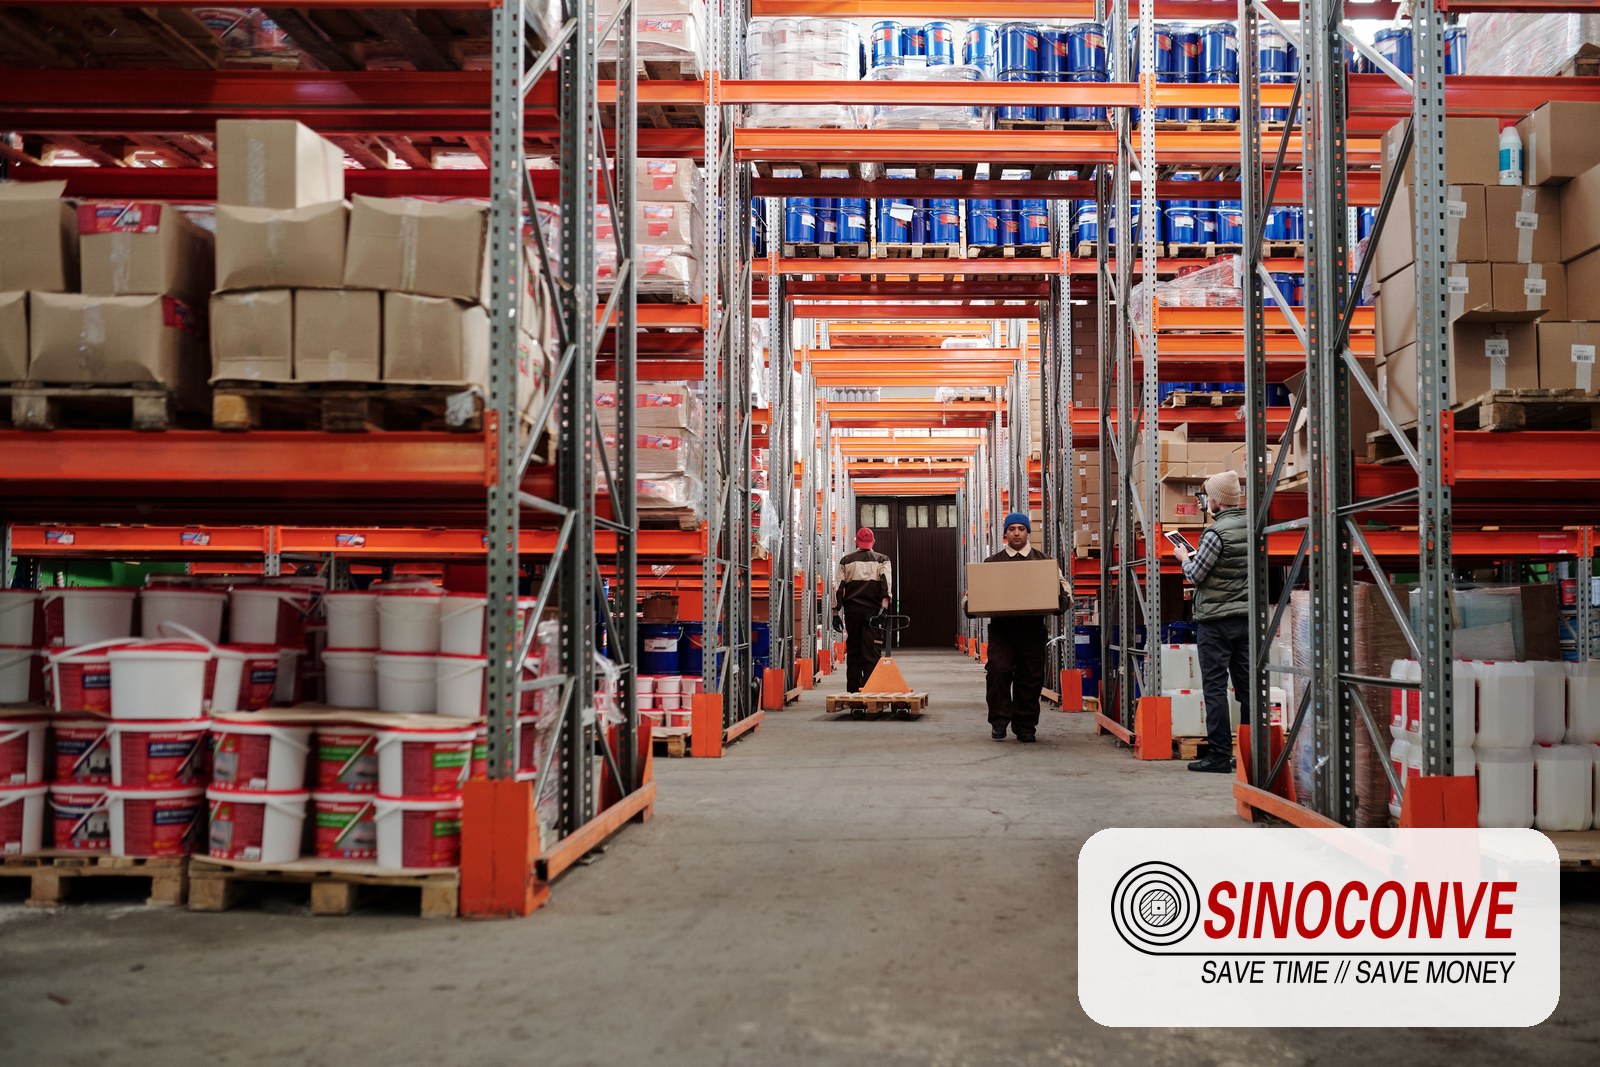
Picking lines want a belt with enough friction to hold a tote on a slight incline and enough release to let a picker slide a carton off by hand. Transport trunk lines are the opposite: minimal friction, maximum tracking stability, and a splice that will last. Packing and returns lines carry irregular shapes, so the surface needs to tolerate tape, strapping and small debris without marking the next clean parcel.
Reading the Function Table
Where a single belt must cover two functions, pick the stricter one and accept the cost. Where the two functions sit in different temperature zones, treat them as two belts even if the integrator has drawn them as one.
| Function | Belt Family | Surface | Joint Type | Reason |
|---|---|---|---|---|
| Order picking | PVC two-ply | Smooth, matte | Hot splice | Low noise, clean release |
| Main transport | PVC or light rubber | Smooth | Endless vulcanised | Tracking stability at speed |
| Merge and divert | Flat PVC, tight tolerance | Very flat | Endless vulcanised | No camber for shoe sorting |
| Incline transfer | Rough top | Nubbed | Hot splice | Grip on slopes to 15 degrees |
| Cold store feed | Low-temp PVC | Smooth | Endless vulcanised | Flexibility below minus 18 C |
| Returns and waste | Heavier PVC cover | Textured | Mechanical or hot | Puncture tolerance |
Table 7: the core deliverable, mapping warehouse function to belt family and joint.
Most parcel halls end up standardising on a PVC conveyor belt for the backbone because it is light, quiet and easy to clean. If you are mapping functions to specifications for the first time, our summary of PVC conveyor belt types gives the family differences in one place.
08Component Matching: Rollers, Pulleys and Drive
A belt is only as good as the components around it. We regularly see a perfectly specified belt destroyed within weeks by a pulley that is too small for the splice, or by idler spacing that was copied from a slow bulk conveyor and never recalculated for a fast parcel line. Component matching is where the design either holds together or quietly comes apart.
Pulley Diameter and Splice Compatibility
Every joint has a minimum pulley diameter, and a vulcanised splice generally needs a larger one than a mechanical fastener because the joint body is thicker and less flexible. If a layout forces a small nose pulley, the joint has to change, not the pulley. We have seen clients reverse-engineer this the expensive way, running a spliced belt over a 65 mm nose pulley until the splice cracked at the edge. Moving to the correct diameter ended the problem immediately.
Idler Spacing Under Parcel Loads
Idler spacing is set by the sag you can tolerate between supports. For a light parcel belt on 600 mm centres, 1,000 to 1,200 mm spacing is common. Increase the unit weight and the spacing must shrink, or the belt will sag and the parcels will ride the sag like a hammock. On a heavily loaded transfer we often end up at 600 mm spacing with a slightly crowned roller to help tracking.
Drive-side components deserve the same discipline. Conveyor drives and auxiliary equipment such as pumps, fans and packing-machine drives rely on transmission elements that are often ordered as an afterthought. If a hall uses V-belt drives on its sorters, matching profile and length correctly matters as much as the conveying belt itself. As a transmission belt manufacturer we see both sides of this, and our catalogue includes drive belts for the same integrators who buy our conveying belts. Buyers who need the full drive range can also review us as a V-belt manufacturer for the powered sub-assemblies on a line.
| Component | Selection Basis | Common Mismatch |
|---|---|---|
| Head pulley | Splice thickness, wrap angle | Diameter too small for splice |
| Carrying idlers | Load per metre, allowable sag | Spacing copied from bulk duty |
| Return rollers | Belt weight, cleaning access | Too few, belt flaps |
| Take-up | Elastic stretch of carcass | Insufficient travel for creep |
| Drive motor and gearbox | Breakaway torque on accumulation | Sized on running load only |
Table 8: component mismatches that shorten belt life far more than belt grade ever does.
Where a hall handles heavier industrial goods rather than parcels, the same component logic applies at a bigger scale. Our own heavy conveying programme, including an industrial conveyor belt built for continuous crushing duty, shows how pulley and carcass choices change once unit loads climb. For a parcel hall the lesson is the same, just at one tenth the load.
The interface between PVC and industrial systems is also where OEM programmes live. Integrators who build modules in series often need a single supply partner across both, which is why our work as an OEM PVC conveyor belt manufacturer covers frame-mounted belts as well as loose belts. If the design is still open, the plain warehouse PVC conveyor belt specification is the usual starting point for logistics automation modules.
09Energy Demand and Idle Strategies
Energy is the cost nobody audits until the invoice arrives, and in a warehouse it is mostly wasted at idle. A line of thirty short belts running empty for sixteen hours a day is far more expensive than one long belt running under load all shift. The design question is not simply how much power the conveyor needs, but when it needs any at all.
Where the Kilowatts Go
In a parcel conveyor, the running load is often a small fraction of installed motor power. Most draws go to friction under no load, plus the gearbox and any auxiliary drives. A single 0.75 kW module idling for 5,000 hours a year draws nearly 4,000 kWh before it moves a single parcel. Multiply that by a hall of fifty modules and the idle bill becomes the largest single line in the maintenance budget.
That is why zoning matters more than motor efficiency. Group modules into zones tied to actual traffic, and stop a zone when its upstream sensor has seen nothing for a set interval. A five-minute idle timeout on low-traffic spurs typically cuts conveyor energy by a third without touching throughput.
Sleep Modes, Soft Starts and Payback
Soft starts and variable-frequency drives reduce the inrush that occurs every time a belt restarts, and they matter most on high-cycle lines where a module stops and starts hundreds of times a shift. The trade-off is heat and complexity: a VFD cabinet needs ventilation, and a poorly tuned ramp can slip a loaded incline belt. We set ramps conservatively on inclines and let flat transport modules start faster.
| Mode | Draw Basis | Saving Measure | Payback Note |
|---|---|---|---|
| Continuous running | Full no-load draw all shift | Traffic-based zone stop | Controls only, shortest payback |
| Zoned idle | Stops after timeout | Tuned timeout per lane | Saves roughly one third |
| Soft start on demand | Ramped inrush | Reduced starting current | Best on high-cycle modules |
| Low-friction belt | Lower running load | Smoother cover, correct tension | Pays back across belt life |
Table 9: idle strategy usually returns more energy than motor upgrades.
When a hall standardises its belt, energy and procurement planning tend to be discussed in the same meeting, and that is where a consolidated supply list helps. Buyers who want to compare families across a whole line can browse the range as wholesale conveyor belts rather than ordering module by module.
10Noise and Surface Friction in Sorting Halls
Noise is a design output, not an accident. A sorting hall can meet its throughput target and still fail an occupational limit, and the fix is usually cheaper at design stage than after commissioning. Operators who cannot hear an alarm because the line is too loud are also slower to react to a jam, which costs throughput indirectly.
Sources of Noise on a Parcel Line
The loudest contributors are usually not the belt itself. Impact at drop points, roller bearing whine at speed, product chatter on a hard surface, and drive gearboxes each add their own band. A hard, smooth belt running fast against steel rollers gets noisy in a hurry. A slightly softer cover with correctly spaced idlers quiets the same line noticeably.
Reading Noise Figures Honestly
Published figures are often quoted at one metre from the source, in a quiet test room, which is not your hall. Treat any single number as a comparison between options, not as a prediction of your floor. What matters is the difference between two belt and roller combinations measured the same way.
| Noise Source | Typical Band | Mitigation |
|---|---|---|
| Impact at drop points | Highest, impulsive | Impact rollers, shorter drops |
| Idler bearing whine | Mid, tonal | Sealed, balanced rollers |
| Product chatter | Broad, surface dependent | Softer cover, matched speeds |
| Gearbox and drive | Low, steady | Enclosure, correct alignment |
Table 10: attack noise at its source rather than through building acoustics.
Field note from our engineers: A returns hall measured around 84 dB near its drop chutes and operators complained of fatigue across a shift. We shortened three drops from 400 mm to 180 mm and fitted cushion rollers. The same measurement point read about 79 dB afterwards. No acoustic panels were needed, and the parcels stopped bouncing into the side guards.
11Maintenance Windows and Spares Planning
A 24-hour warehouse has no natural maintenance window, so the window has to be designed into the layout. The honest question is how much of the line can be isolated without stopping dispatch, and how long the tasks that need isolation actually take. Getting a belt change down from six hours to four is a design achievement, not a maintenance efficiency.
Building a Two-Hour Window into a 24-Hour Line
We plan around the lowest-traffic hour of the day, usually just before the first inbound wave. Tasks are sorted into those that need the line stopped, those that need only a module stopped, and those that can be done while running. Tracking checks and cleaning fall into the last group, and moving them off the critical window frees the stop time for real work.
Spares strategy follows the same logic. We stock the parts whose lead time is long and price is low, and hold none of the parts that are cheap and fast to obtain. A warehouse running non-stop should hold one spare belt per critical module, a set of idlers, one head pulley and a splice kit. The rest can be purchased on demand.
| Task | Frequency | Stop Required |
|---|---|---|
| Tracking inspection | Weekly | No, while running |
| Splice inspection | Monthly | Module stop only |
| Idler replacement | Quarterly rotation | Module stop, one hour |
| Belt replacement | On condition | Full stop, four to six hours |
| Pulley lagging check | Annual | Full stop, planned |
Table 11: tasks sorted by the window they actually need, not by tradition.
12Tracking and Edge Damage in High-Cycle Lines
Edge damage is the first symptom most warehouses notice and the last one they correctly diagnose. A frayed edge looks like a belt quality problem and is usually a loading or alignment problem. Fix the belt and the new one frays in the same place.
Why Edges Fail First
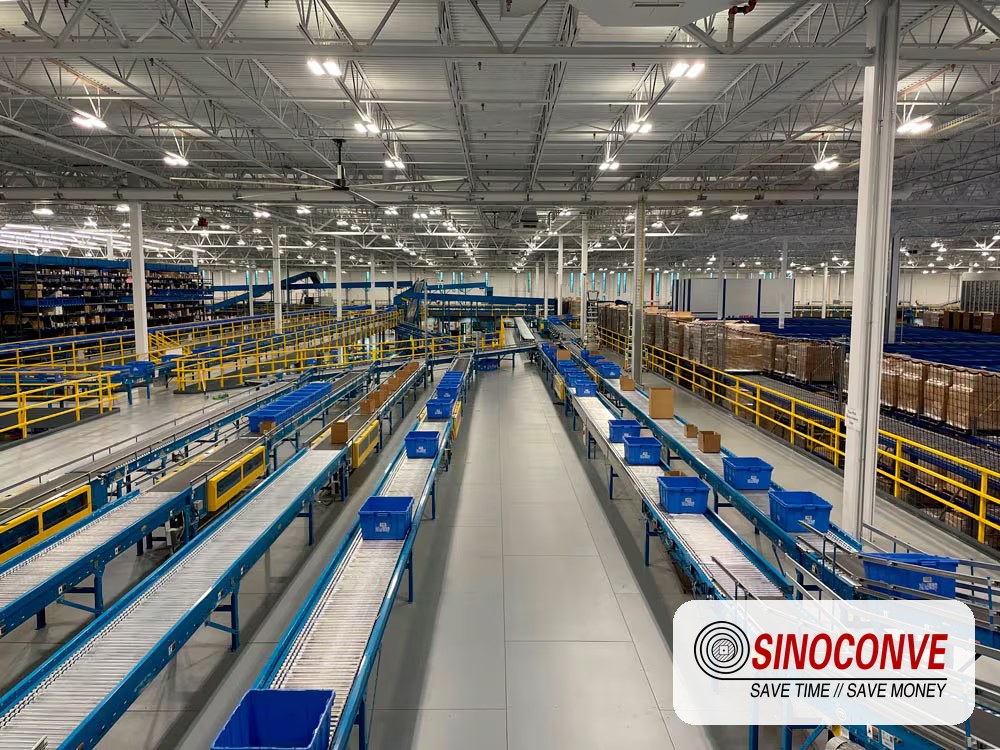
Load offset is the usual cause. If parcels consistently land on one side, that side carries more tension and the belt runs against the edge of a roller. The friction then grinds the cover and exposes the fabric. It is rarely symmetrical, which is why one edge fails and the other looks new. Slight misalignment at a single pulley can produce the same pattern.
| Symptom | Likely Cause | Correction |
|---|---|---|
| One edge frayed | Load offset or skewed pulley | Centre the load, square the pulley |
| Belt drifts on start | Loose take-up, cold belt | Re-tension, warm-up cycle |
| Drift only under load | Crowned roller, unequal stretch | Self-aligning roller at return |
| Scuff marks mid-belt | Product chatter, debris | Cleaning access, softer cover |
Table 12: track edge damage to its mechanical cause before ordering a replacement.
Tracking problems often start at the return side, where a single misaligned roller can move the whole belt. Our note on choosing an aligning roller covers the inexpensive fix we reach for first on a fast line.
13Splicing and Rapid Belt Replacement
Replacement time is designed, not discovered. Two belts with identical specifications can differ by three hours of downtime depending on how the joint was made and how the frame was built. On a line that cannot stop, that difference decides whether you replace a belt during a shift or bring in a contractor overnight.
Joint Type vs Cycle Count
Mechanical fasteners win on install speed and lose on life. They are the right choice for a low-cycle belt or a temporary repair, and the wrong choice anywhere the belt passes a scraper or a nose pulley thousands of times a shift. Vulcanised joints cost more hours in the field and then run for months without attention.
| Joint Method | Downtime | Suitable Belt |
|---|---|---|
| Mechanical fastener | One to two hours | Low-cycle, temporary repair |
| Hot vulcanised splice | Four to six hours | High-cycle transport belts |
| Factory endless belt | Frame removal | Short modules, OEM builds |
Table 13: joint choice trades install hours against service life.
Before you order, it is worth checking the joint against the application rather than the price list. Our comparison of a splice vs mechanical fastener joint sets out where each method belongs, and a conveyor belt splicing buyer checklist lists the twelve points we verify before a joint is accepted. Buyers who want to remove the joint from the field entirely should also read why endless conveyor belts suit short, high-cycle modules.
14Acceptance Test Plan at Handover
Acceptance is where a design either proves itself or is quietly written off. Most disputes we see at handover are not about belt quality; they are about the absence of a recorded baseline. Without one, nobody can prove the line ever met its target.
What to Record on Day One
Run the line at design throughput for a full hour and record the actual rate, the number of micro-stops, and the measured belt speed. Then measure tracking at three points, photograph the splice, and note the ambient temperature. A baseline that nobody records cannot be used as evidence in six months.
| Item | Criterion | Record |
|---|---|---|
| Design throughput | Met for one sustained hour | Units per hour, by station |
| Belt tracking | Within edge clearance all along | Photos at three points |
| Splice integrity | No step, no visible void | Close-up image, splice number |
| Noise | Within project limit | dB reading at fixed points |
| Safety devices | All guards and stops proven | Signed checklist |
Table 14: a recorded handover baseline protects both buyer and supplier.
15KPIs and Total Cost of Ownership
Purchase price is the smallest part of what a warehouse belt costs. The dominant terms are downtime, labour for replacement, and the throughput lost while a module is open. A belt that costs a little more and lasts twice as long wins on arithmetic almost every time.
The Three-Year View
Build the case over three years, not one. Include the belt, the joints, the idlers consumed, and the hours of lost throughput. A line losing four hours of dispatch twice a year at a modest value per hour usually dwarfs the difference between belt grades. That is the number that should drive the decision.
| KPI | Measure | Three-Year Example |
|---|---|---|
| Belt life | Months in service | 36 vs 18, two replacements saved |
| Unplanned stops | Events per year | Nine down to three |
| Replacement hours | Hours per event | Six down to four |
| Cost per metre | Landed cost over life | Lower on the better grade |
Table 15: the three-year view, where belt grade usually pays for itself.
16Buyer Checklist: 20 Items Before You Place the Order
This is the sheet we ask a warehouse to complete before we quote. Twenty items, and any blank line is a risk that will surface later. Hand it to the integrator, fill it with them, and keep a copy with the purchase order.
Working Through the Twenty Items
Start with the throughput and takt rows, because everything else depends on them. Then confirm the environment and the joint type, and only then finalise width, surface and supplier. If two lines conflict, resolve them in that order rather than negotiating each row on its own.
| Check Item | Requirement | Evidence | Owner |
|---|---|---|---|
| 1 Peak throughput | Units per hour, worst hour | WMS report | Ops |
| 2 Hourly rate | Seconds per unit | Scan data | Ops |
| 3 Unit weight range | Minimum to maximum | Sampling record | Ops |
| 4 Load per metre | Calculated kg/m | Design sheet | Engineering |
| 5 Belt width | Matches widest unit | Layout drawing | Engineering |
| 6 Belt speed | Set from pitch | Drive calculation | Engineering |
| 7 Surface | Matched to grip need | Sample test | Buyer |
| 8 Cover colour | Site standard | Spec sheet | Buyer |
| 9 Temperature range | Min and max site values | Logger data | Facilities |
| 10 Humidity | Typical and peak | Logger data | Facilities |
| 11 Slope | Degrees at each incline | Layout drawing | Engineering |
| 12 Drop heights | Millimetres at transfers | Layout drawing | Engineering |
| 13 Joint type | Vulcanised or endless | Method statement | Supplier |
| 14 Minimum pulley | Meets joint limit | Supplier data | Supplier |
| 15 Idler spacing | From load and sag | Design sheet | Supplier |
| 16 Take-up travel | Covers stretch | Design sheet | Supplier |
| 17 Spares held | One belt per critical line | Stores list | Maintenance |
| 18 Maintenance window | Hours available weekly | Shift plan | Maintenance |
| 19 Acceptance plan | Tests agreed in writing | Signed plan | Buyer |
| 20 Documentation | Data sheet and joint record | Handover pack | Supplier |
Table 16: the twenty items we want answered before a warehouse belt order is released.
A few of these items sit close to the PVC buying process itself, and it is worth cross-checking them against a dedicated list. The twelve points in our PVC conveyor belt buyer checklist extend the documentation side of this sheet, and if you are standardising several modules at once, the plain product catalog is the fastest way to compare families.

17Frequently Asked Questions
How do I size a belt from parcels per hour?
Multiply the parcel rate by average unit weight, divide by 3,600 for kilograms per second, then divide by belt speed in metres per second. That gives load per metre, which sets the tension and the carcass. Belt width comes next, and it follows the widest unit rather than the load. Get the working on paper before any supplier conversation.
What takt time forces an endless splice?
Under 3 seconds, as a working rule. At that interval a joint passes a pulley and a scraper well over a million times a year, and mechanical fasteners usually loosen within 90 days. Between 3 and 6 seconds it depends on the product and the number of reverse bends in the layout.
When is zero-pressure accumulation worth the cost?
Ask two questions. Can the unit be deformed by compression, and is the queue longer than a few minutes? If either answer is yes, the extra zones and controls usually pay for themselves in reduced damage. The trade-off is length: zero-pressure needs more floor space for the same buffer.
What slope can a parcel belt handle before product slips?
Roughly 12 degrees for a smooth PVC belt on dry cardboard, and we prefer to stay under 10. Frosted or damp product drops that ceiling to about 8 degrees. Above 15 degrees, move to cleated or sidewall belts rather than trusting friction.
Does humidity in a cold store change belt choice?
Yes, and cold is only half of it. Below minus 18 degrees Celsius the cover stiffens, so a low-temperature compound and a thinner belt help flex around small pulleys. Condensation on a cold product then behaves like a lubricant, which is why incline angles in freezer zones should be reduced even when the belt compound is correct.
How much energy does idling actually waste?
More than most audits expect. A 0.75 kW module running empty for 5,000 hours draws close to 4,000 kWh without moving a single parcel, and a hall of fifty such modules makes idle the biggest line in the maintenance budget. Zoning with a five-minute timeout typically removes about a third of conveyor energy.
What causes edge damage on a high-cycle sortation line?
Load offset, nine times out of ten. Consistent off-centre loading raises tension on one side and grinds the cover against a roller edge. A skewed pulley produces the same signature. Check the loading point and the pulley alignment before blaming the belt.
How long should a belt change take during a shift window?
Four to six hours for a hot vulcanised joint on a main line, and one to two hours for a mechanical fastener on a short module. Layout decides much of it. Frames with removable side sections and open pulley access routinely cut an hour off the job, so plan that at design stage.
Which KPIs reveal a failing warehouse belt first?
Unplanned stops per month, not belt age. A belt that begins stopping the line twice as often has told you everything already, long before the cover looks worn. Track replacement hours per event alongside it, because a hidden rise there usually points to a tracking or take-up problem rather than the belt itself.
What should an acceptance test include at handover?
Run the line at design throughput for a full hour and record the actual rate, then log micro-stops, belt speed, tracking at three points, a splice photograph and a noise reading. Add the safety check. A baseline nobody records cannot be used as evidence six months later, which is when most disputes actually arrive.
Still working through the design? Our frequently asked questions page covers the procurement side in shorter form, and the wider blog gathers the module-level notes referenced above.
Related Products You May Need
- PVC conveyor belt: the usual backbone choice for parcel and picking lines.
- Chevron conveyor belt: patterned cover for inclined transfers.
- Rubber conveyor belt: heavier cover for returns and industrial goods.
- EP rubber conveyor belt: multi-ply carcass where load per metre climbs.
- V-belt: drive belts for sorter and auxiliary drives.
- Timing belt: synchronous drives on automation modules.
- Conveyor roller: carrying and return rollers matched to belt duty.
- Product catalog: browse the full range by family.
Related Blog Posts
- Warehouse conveyor belt guide for parcel sorting and logistics
- Warehouse conveyor belt manufacturer for parcel sorting
- Logistics conveyor belt warehouse guide
- OEM PVC conveyor belt manufacturer for logistics automation
- PVC conveyor belt types selection guide
- Conveyor belt splice vs mechanical fastener joint
- Conveyor belt cleaning methods and schedules
- Endless conveyor belts: benefits and applications