A vulcanised splice is decided inside the press, long before anyone measures it. Temperature, dwell time and ram pressure held across the joint area determine whether the cured rubber reaches the strength of the belt body or becomes the weakest point on the whole line. Our crews have rebuilt joints that let go in six weeks and inspected joints still running after five years on the same drive, and in nearly every case the difference came down to process control rather than material grade.
The numbers are not subtle. A fabric-reinforced joint cured at 145 °C for 40 minutes under 1.2 MPa normally develops at least 90 percent of the parent belt's tensile strength in a peel-and-tensile test. Pull that same joint out of the press twelve minutes early and the typical figure lands closer to half. The rubber, the plies and the fitters are identical. Only the cycle changed.

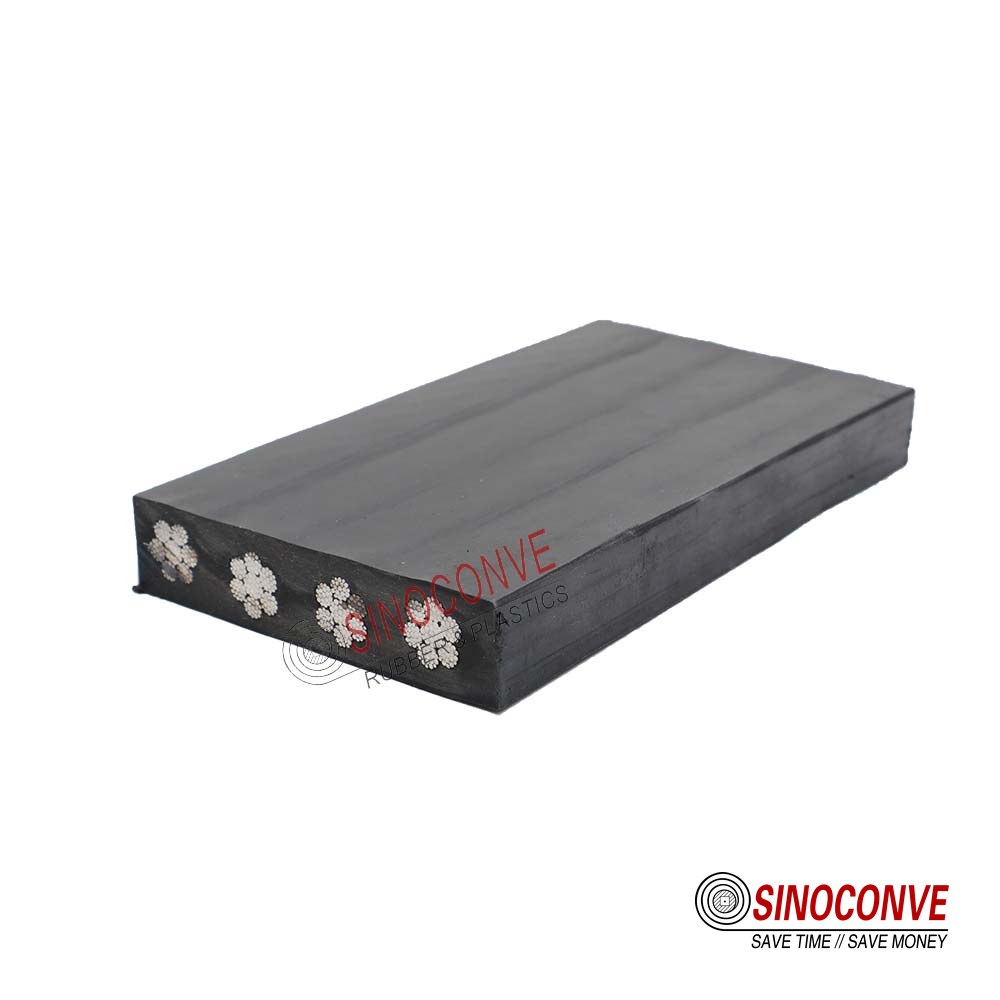
We cure joints on rubber conveyor belt in every cover grade our customers run, from a 6 mm two-ply packing line belt to a heavy steel-cord carcass on a mainline trunk conveyor. The window changes with the construction. The discipline does not.
01Why Process Control Beats the Press You Own
Two splicing crews can own identical presses, work from the same drawing and still turn out joints that differ in service life by years. What separates them is rarely the machine. It is whether the crew treats the cure as a measured process with logged numbers or as a waiting period with a timer. We have stood on sites where the platen gauge read 152 °C while the belt surface between the plies sat at 118 °C, and nobody questioned it, because the controller insisted the cycle was on track.
Heat has to travel. A press thermocouple measures the platen; it does not measure the interface between two skim coats, which is where the bond actually forms. That gap explains most joints that cured by the book and still came apart on the second shift.
What the cure does to the rubber makes the rest of this article easier to follow.
What the Cure Is Really Doing Inside the Rubber
Uncured compound is a loose tangle of polymer chains with sulfur and accelerators distributed through it. Heat starts building sulfur bridges between those chains, and the material stiffens into the elastic solid that carries tension around the pulleys. The reaction depends on temperature and on how long that temperature is held at the bond line. It does not care about shift patterns, or about the loader waiting at the transfer point.
Cross-linking keeps going as long as heat is present. Hold a joint at 150 °C for 25 minutes and the network is close to complete. Hold the same joint for 90 minutes and the extra heat begins breaking that network back down. Splicers call it reversion. The rubber softens, the cover goes tacky, and the joint you cured so carefully ends up worse than the one you cut out.
Where a Joint Fails First When the Cycle Drifts
Failure rarely begins in the middle of the splice. It starts at the step edges and the outer shoulders, where the heat path is longest and the clamping pressure is lowest. Ten degrees of shortfall at the platen can mean twenty at the shoulder of a 1,200 mm wide belt, and that shoulder is exactly where water, fines and pulley load arrive first.
02The Eight Stages of a Vulcanised Splice
Every vulcanised joint follows the same sequence, whether it is a 600 mm fabric belt on a plant incline or an industrial conveyor belt mainline running at 4 m/s. The eight stages below are the ones we audit on our own field work and on third-party splices that customers ask us to inspect before they sign off on a shutdown.
Skipping a stage never saves the time it promises. It moves the cost to a failure you will meet later, in bad weather, at night, with a spare roll that is 200 mm too short.
| Stage within the splice build sequence | The control our fitters watch at this stage | What we see when the control is missed |
|---|---|---|
| Measuring, marking and cutting both belt ends square | We square each end to within 1 mm across the full belt width | A skewed joint feeds one edge and trains the belt off centre |
| Stripping the cover and stepping the plies by length | Every step is cut to the specified length with no ply nicked | Nicked warp cords quietly remove a fifth of the tensile capacity |
| Cleaning every exposed surface back to dry rubber | We buff, vacuum and wipe until the surface is matte and dry | Dust, oil or moisture leave a bond that peels away in weeks |
| Applying cement and letting the solvent flash off fully | Two thin coats, each dried to tacky but never left wet | Trapped solvent becomes a blister that opens under load |
| Laying tie gum and cover gum into the prepared step | Tie gum goes in first, cover gum last, with no air pockets | Misplaced gum builds voids that open once the belt is loaded |
| Squaring the ends, clamping and tensioning the joint | Bar clamps hold alignment while the press closes squarely | A joint pulled out of square destroys the splice within days |
| Closing the press and bringing the ram to pressure | Pressure reaches the set value before any heat is applied | Heat without uniform pressure cures unevenly across the joint |
| Heating to cure temperature and holding the dwell time | Belt interface thermocouples, not the platen gauge, drive the clock | Under-cured rubber stays soft and tears away at the edges |
Those durations assume a two-platen press and a belt with an 8 mm cover. Thicker covers, higher ply counts and steel-cord carcasses stretch every stage that involves heat, which is why we plan the press window from the belt data sheet rather than from habit.
03Skiving and Building the Step Joint
Step geometry sets the ceiling on joint strength. Every tonne of running tension has to cross from one belt end to the other through the shear area between plies, so the length of that area is a load-bearing number rather than a workshop preference. Our standard layout uses one step per ply, and we avoid steps shorter than 200 mm on belts with covers thicker than 8 mm, even when the belt is narrow and the time saved looks tempting.
As a conveyor belt manufacturer we build the step on our own trimming tables before the belt leaves the plant, and our field crews reproduce the identical layout on site. Consistency between the two keeps a replacement section from behaving differently from the rest of the line.
Cutting tools matter more than most people expect. A hot knife running too hot seals the ply edges and leaves a glaze that cement cannot bite into, which shows up months later as a clean peel along the step line. A blade dragged at the wrong angle nicks the cords underneath, and the damage is invisible from the top of the belt.
How We Lay Out Steps So the Joint Shares Load
Mark both ends square, then measure each step forward from the cut edge instead of backward from a fixed mark on the belt. Measuring backward accumulates error across four or five plies, and the last step always ends up short. On a 4-ply EP belt with 300 mm steps, a 6 mm shortfall in the final step is enough to concentrate stress on the two plies nearest the cover.
After trimming, we feather the top cover down to the first ply over a 50 to 80 mm taper. That taper spreads the stress transition instead of leaving a hard line where the original cover ends and the cured gum begins, and it is the detail most often rushed on a tight shutdown.
Clean cuts, matched steps, no nicked cords. The rest is patience.
04Surface Preparation and Cleaning Before Any Gum Goes Down
Buffing does one job: it exposes fresh rubber with a mechanical key. A wire brush or a coarse disc run at low speed lifts the surface to a matte finish, and anything shinier than matte tells you the wheel was too fine, too fast or simply worn out. Once buffing stops, every subsequent step is about keeping that surface clean until the press closes.
We vacuum the dust out of the step, then wipe with a clean lint-free cloth and solvent, working in one direction so contamination leaves the joint instead of being spread across it. Reusing a dirty cloth is the same as painting the joint with the dust you just removed.
Why Moisture Is the Quiet Killer at the Bond Line
Rubber compound absorbs water from humid air, and a damp surface will not bond, no matter how much cement you apply. Solvent flashes more slowly on a wet day, and if the gum goes down while the cement is still open, both solvent and moisture end up sealed inside the joint where no amount of dwell time will dry them out.
On a coastal site we measured 92 percent relative humidity at seven in the morning and moved the splice under a temporary shelter rather than fight the weather. The crew lost forty minutes and kept the joint.
If the buffed surface feels cool and damp, or if solvent takes more than a few minutes to disappear, stop. Warm air and time are cheaper than a second shutdown.
05Cement, Tie Gum and Cover Gum Application
Cement is a carrier, not the bond itself. Its job is to wet the buffed surface and hold the tie gum in position until the press closes, and two thin coats do that far better than one heavy one. A thick coat traps solvent in the middle of the layer, where heat has to travel furthest to drive it out, which is exactly the geometry that produces blisters.
Tie gum is the layer that actually fuses plies together, and it has to suit the carcass rather than be whatever remains on the roll at the end of a job. As a conveyor belt supplier we keep matched tie gum and cover gum for each of the cover grades we ship, because a grade mismatch is a slow failure that only appears after the belt has been in service for a season.
Rolling matters as much as laying. Work a hand roller from the centre of the step outward, in overlapping passes, and watch the gum darken as trapped air escapes. On a 1,200 mm wide joint that rolling stage takes about fifteen minutes and removes most of the air that would otherwise become a void.
Matching Tie Gum and Cover Gum to the Carcass
Fabric plies of different constructions take different gum. A 3-ply NN belt run at high tension wants a stiffer tie gum than a lightweight two-ply line belt, and using the softer compound on the heavier carcass produces a joint that creeps under load. The difference is not visible on the day of the splice. It shows up as ply separation three months in.
Cover gum then has to match the top cover in hardness and abrasion resistance, or the patch becomes the soft spot that material wears into. Our rule is simple: same catalogue grade, same thickness, same cure characteristics as the belt being joined.
Where the belt carries hot material, the gum has to be approved for that surface temperature as well. We stock heat-rated compounds for that reason, and the same logic applies whether the customer buys a single joint or a full heat resistant belt from us.
06Clamping, Alignment and Pressurising the Joint
Clamps keep the two belt ends from moving while the press closes, and their value is entirely in the first ten minutes. Lose alignment there and no later correction will fix it. On a 4 m/s mainline we expect the finished joint to be square within 2 mm across the width, because a joint that feeds to one side will drag that edge across every pulley in the run.
Ram pressure then has to reach the set value before heat is applied. We have seen crews start the platens while the pump is still building pressure, which cures the centre of the joint while the edges are still loose. The same clamping logic applies to smaller drives, where one of our teams working as a transmission belt manufacturer vulcanises endless V-belts on narrow platens and a 0.2 MPa pressure error leaves a soft band across the section.
Pressure Distribution, Pads and the Cold Edges
A press applies force through pads, and pads spread load only if they are thick enough and wide enough to reach past the belt edge. Joints that feel firm in the middle and spongy at the shoulders are almost always pad problems rather than press problems.
We use aluminium or hardwood pads at least 20 mm thick, cut a little wider than the belt, and stagger the joints in the pad material so the hard spots do not line up. Then pressure is measured at three or four points across the width, and the spread between the highest and lowest reading should stay inside 10 percent of the set value.
Edge pressure is where most of the argument happens on site, and where the answer is usually a thicker pad rather than a higher gauge reading.
07Heating Up, Soaking and Cooling Down Under Pressure
The heat-up phase is where a joint is won or lost. Platens climb to cure temperature, and the bond line follows behind them, always lagging. On a 10 mm cover the lag can run twenty minutes, which means the clock that matters starts when the rubber between the plies reaches temperature, not when the press was switched on.
Soaking is the flat part of the curve, and its length is set by the compound and the thickness rather than by how quickly the crew wants to be finished. Cooling comes next, and it happens with the press still closed.
Ramp Rate and the Reason We Do Not Rush the First Twenty Minutes
A gentle ramp lets heat move through the joint evenly instead of cooking the outer plies while the centre is still cold. We look for the bond line to climb toward set point over 15 to 25 minutes on a typical fabric splice, and we keep pressure on throughout that climb so the plies stay consolidated as the gum softens.
Push the ramp too hard and the cover skins over before the middle is cured. The joint looks finished, the edges are firm, and the centre is raw. It is one of the hardest defects to spot on a visual inspection because the surface gives nothing away.
Cooling Under Pressure Before You Break the Clamp
Rubber is weak while hot. Break the pressure at 120 °C and the joint can shift under its own weight, which produces an internal fold that will never come out. We hold the load until the belt surface drops below about 60 °C, sometimes cooling with the platens rather than opening straight away.
That final wait adds twenty or thirty minutes to a shutdown. Cutting it short usually adds a day.
Field note from our engineers: On one 1,400 mm steel-cord mainline we opened a press at 96 °C because a belt had to be back before shift change. The joint looked perfect. Four days later the cover lifted along the whole width, and the second repair cost two shifts instead of half of one. We have not opened a hot press since.
08Temperature, Time and Pressure: One Window, Three Variables
Temperature, dwell and pressure are not three separate settings. They form one window, and moving one edge changes the others. Raise the temperature and the dwell has to come down, unless you want reversion. Lower the pressure and the same temperature needs longer to drive heat through the consolidated gum bed. Teams that treat the three as independent dials end up chasing defects they created themselves.
Practical windows used by most splicing crews sit between 140 and 155 °C at the platen, with dwell times from 25 to 60 minutes and ram pressures from 0.8 to 1.6 MPa. Where a joint lands inside that box depends on construction, cover thickness and the compound supplier's data. As a conveyor belt distributor we pass the supplier's cure data sheet to the crew on site, and we ask them to record what they actually held rather than what the sheet specified.
| The belt construction we are curing today | Platen temperature we hold on this build | Dwell we count at the bond line | Ram pressure we set at the joint |
|---|---|---|---|
| Two-ply EP belt with a 6 mm wearing cover | We hold the platen at 145 to 148 degrees Celsius | We count about 30 minutes after the centre reaches heat | We set roughly 1.0 MPa across the whole joint width |
| Four-ply EP belt carrying a 10 mm cover grade | We run this build between 148 and 152 degrees Celsius | The dwell we allow is usually 40 to 45 minutes | We set 1.2 to 1.4 MPa and check the spread across the belt |
| Steel cord carcass on a long mainline trunk conveyor | We keep the platen near 150 degrees with a slow ramp | Dwell runs longer, typically 50 to 60 minutes | We hold 1.4 to 1.6 MPa so the cord bed stays closed |
| Heat-rated cover for hot clinker and sinter service | We cure at 150 degrees but ease the ramp on the way up | The dwell we allow is 45 minutes measured at the bond line | Pressure stays near 1.2 MPa and is held through cooling |
Reading the Window as One Set of Numbers, Not Three Limits
A useful habit is to write the target cycle on the press itself before the shift starts: set point, ramp time, dwell counted from the bond line, and cool-down release temperature. With that written down, an operator can see immediately when a delay in one number has to be paid for in another.
If the ramp ran ten minutes long because the generator dipped, the dwell can usually be trimmed slightly. If the dwell ran long because nobody watched the clock, the joint is over-cured and the strength has already started to fall away. The two look similar on a chart and have opposite answers.
A Worked Example on a Thicker Cover
Take a 4-ply EP belt with a 12 mm cover instead of 8 mm. The extra rubber is an insulator, so heat takes longer to reach the plies. In practice the crew holds the same platen temperature, adds about 8 to 10 minutes to the dwell, and checks a second thermocouple tucked into the step rather than trusting the first one.
Total press time rises from roughly 95 minutes to about 115. That is the honest cost of the thicker cover, and it is cheaper than a joint that fails at 60 percent of rated strength.
09Why You Cannot Simply Speed Up a Cure
Every shutdown pressure ends with the same suggestion: raise the temperature and finish early. The suggestion fails because the cure is not a linear process that can be compressed. Above a certain point the extra heat starts destroying the network it just built, and the relationship between blanket temperature and bond-line temperature becomes less predictable, not more.
There is also a physical limit that has nothing to do with chemistry. Heat has to conduct through rubber, and rubber conducts slowly. A 155 °C platen does not deliver 155 °C to the plies ten millimetres in, at least not in the first twenty minutes. Operators who chase the gauge reading end up with an over-cured skin and an under-cured core in the same joint.
What Under-Cure and Reversion Cost You Later
Under-cured rubber has an unfinished network, so it tears at the step edges under shear and lets the plies slide. Reversion goes the other way: the rubber softens, loses elasticity, and goes tacky under the cover. Both reduce joint efficiency, and both usually appear within the first weeks of service rather than during the splice itself.
The economics are unforgiving. A joint that reaches 92 percent of belt strength and runs four years beats a joint rushed to 60 percent that fails in the first quarter, even if the faster cycle saved two hours on the night. Working through the same logic on drive belts, where one of our plants acts as a V-belt manufacturer, the numbers look identical: shorter cure, earlier failure, more downtime.
10Monitoring Points and Records That Survive an Audit
Instrumentation is only useful if it measures the right place. Platen thermocouples tell you the press is behaving; interface thermocouples tell you the joint is curing. We normally run at least two probes into the step area, one at roughly a quarter of the belt width and one near the centre, and on wide belts a third near the far edge.
Pressure gets the same treatment. A gauge on the pump is not a measurement of the joint, so we pair it with readings taken across the width and with a visual check that the pads are actually covering the belt edge.
The Record Sheet We Leave Behind on Every Splice
Every joint we cure leaves a one-page record: belt identification and ply count, the two ends marked square, the compound batch and its date, the cement batch, set point, actual ramp time, dwell counted from the bond line, release temperature, and the names of the fitters. As a conveyor belt factory we keep a copy, and the customer keeps a copy in the maintenance file.
That sheet is what turns a dispute into a discussion. When a joint fails at eleven months, the record shows whether the cycle was held or whether the overnight crew was working against a generator that kept tripping, and the answer usually points straight at the cause.
Record the numbers you actually measured, not the ones in the procedure.
11Defect Modes, Causes and What to Do About Them
Joints fail in a handful of recognisable ways, and each one leaves a signature. Reading that signature before the press reopens saves weeks of guessing later. For plants that buy wholesale conveyor belts and run their own splicing crews, the defect list below is usually the fastest route from a failed joint to a fixed procedure.
The five modes we see most often are under-cure, reversion from over-cure, blisters and delamination, mis-stepped plies, and soft edges. Three of them come from the cure cycle. Two come from how the joint was built before the press ever closed.
| Defect we find after the press opens | How it behaves on the joint | Root cause we usually trace it to | What we do about it in the field |
|---|---|---|---|
| Under-cured rubber that never finished cross-linking | The joint feels soft and tears at the step edges under shear | Dwell was counted from the platen instead of the bond line | Cut the joint out, rebuild it, and cure with interface probes |
| Reversion on a joint left in the press far too long | The cover goes tacky and the rubber softens until it loses bounce | The dwell ran long after a delay nobody wrote on the sheet | Trial in service if minor, otherwise cut and rebuild the splice |
| Blisters and flat delamination between the plies | Air pockets show as raised patches and plies peel apart cleanly | Solvent, moisture or air sealed under a heavy cement coat | Open, dry, re-cement and re-roll the area before recuring |
| Ply steps that do not line up once the joint has cured | One end sits higher, so the joint hammers every pulley it meets | Ends were measured from a fixed mark rather than the cut edge | Cut the joint out, since a mis-stepped splice cannot be saved |
| Soft, hollow shoulders along the outer edge of the joint | Tapping the edge returns a dull sound instead of a firm ring | Pads too thin or too narrow to carry load to the belt edge | Re-clamp with thicker pads, inject and recure, or replace it |
Reading the Joint in the Ten Minutes After the Press Opens
Open the press, let the joint cool enough to handle, and look before anyone touches it. Colour tells you a lot: a joint cured evenly is uniform across its length, while a patchy surface usually means the heat was uneven or the pressure dropped somewhere in the middle. Run a hand along both edges and press the shoulders with a thumb.
Then tap. A light hammer at 150 mm intervals is enough to find the hollow zones, and it takes about five minutes on a typical 1,200 mm splice. Dull spots in the middle of a step line are worth investigating before the belt goes back in the string.
Repair or Replace: How We Decide
Small surface defects can be repaired in place: open the area, clean it back, refill with matched gum and recure under a local patch. Anything that reaches a ply interface, shows delamination, or spans more than about 15 percent of the joint length gets cut out. A patch over a structural defect simply delays the failure until a more inconvenient moment.
One more test we apply: if we cannot explain why the defect formed, we cut the joint out. Unexplained failures repeat.
12Getting the Belt Back Into Service: Acceptance Criteria
Release is a decision, not a formality. The belt should go back into the string because someone checked the joint against defined criteria rather than because the shift ended and the line needed to run. Our release checks are the same whether the splice was cured by our crew or by a contractor the customer hired.
Four of the five checks below can be done on site in under half an hour. The fifth needs a sample and a press.
| Acceptance check we run on the finished joint | What we measure or listen for | The criterion we apply before releasing the belt |
|---|---|---|
| A visual pass along both edges and the step line | Even colour, no glossy patches and no soft shoulders | Any tacky or blistered area sends the joint back for repair |
| A tap test with a light hammer at regular intervals | A firm clear ring over solid rubber and a dull thud over voids | Two or more dull spots close together mean a hollow zone |
| An ultrasonic scan when the belt is critical or the client asks | A return signal that stays consistent along the whole joint | We compare the trace with a cured reference from the same stock |
| A destructive tensile and peel sample from the same cycle | Joint efficiency stated as a percentage of the parent belt | We look for at least 85 to 90 percent before we release |
| A supervised run-in under load for the first few hours | How the joint behaves at each pulley and how the edges track | No creeping, no edge lift and no change in joint sound |
The Acceptance File We Hand Over
Along with the cycle record, we hand over the joint location and splice number, the sample test result if one was taken, photographs of both edges, and the belt tracking reading after run-in. On steel cord belts we add a note on the cord alignment across the joint, because that is where most hidden repairs show up later.
Customers who keep those files find that the second splice on a given conveyor is always better planned than the first. The paperwork is not decoration. It is the reason a maintenance team stops repeating the same mistake.
13Common Operating Mistakes We Still See on Site
Most repeat joint failures trace back to four habits, and none of them is exotic. They survive because each one saves something visible tonight and costs something invisible later.
Splicing in the rain or in heavy morning humidity is the first. Water in the compound and water on the surface both defeat the bond, and no increase in dwell time will fix a joint that was assembled wet. Moving under cover, or waiting for the dew to lift, costs an hour at most.
Cleaning that stops at a visual standard is the second. Buffed dust looks harmless and is not; it sits exactly where the cement needs to bond. We have opened joints where a clean thumbprint could still be read on the ply after curing, which tells you the surface was never properly wiped.
Insufficient pads are the third, and they are easy to spot in the record because edge defects cluster on one side of the belt. A pad that is 30 mm narrower than the belt leaves the outer plies at lower pressure, so they cure thinner and softer than the rest of the joint.
Temperature Jumps and What They Leave Behind
The fourth habit is the hardest to catch: letting the platen temperature jump instead of ramping steadily. A spike of 15 degrees for ten minutes does not always show in the final chart, and it can still over-cure the outer plies while the centre is climbing. On one job the recorder showed a clean 148 °C line, but the second thermocouple in the step caught three spikes to 165 °C that nobody saw until the data was pulled.
Those spikes are why we log both probes and review the curve with the customer, not just the set point. A joint released on a set point alone has not really been inspected at all.
Field note from our engineers: The best joint we ever cured sat under a tarpaulin in a storm, because the crew supervisor refused to lay gum on a wet belt. Two shifts were lost and the joint has now run six years on a 3.5 m/s mainline. We mention it when customers ask whether the shelter is really necessary.
14Where This Guide Stops and Which Topic Comes Next
Everything above applies to a general splice: fabric carcass, workshop or field press, standard cover grades. What it deliberately leaves out is the operating environment, and that gap matters most for aggregate and mining conveyors, where belts are thicker, carcasses are heavier, shutdown windows are shorter and the splice is often built in dust and weather rather than under a roof.
That scenario is the subject of the companion article in this series on aggregate conveyor vulcanising, which deals with heavy-duty and steel-cord joints cut on site, contamination control in a quarry, and acceptance measured at the plant rather than in a workshop. Read the two together: this article gives you the process, and that one gives you the conditions you will actually meet.
For joints that are planned rather than repaired, our splice planning checklist covers the commercial side, and the broader guide to splicing methods covers where vulcanising sits against mechanical fastening.

15Frequently Asked Questions
How long does a complete vulcanised splice take from first cut to back in service?
On a 1,200 mm four-ply EP belt with a 10 mm cover, allow six to eight hours of elapsed time. Cutting, stepping and cleaning usually take two to three hours, gum laying and clamping another hour, and press time runs about 115 to 130 minutes including ramp and cooling. Add transport, scaffolding and belt pulling, and most field joints occupy a full shift. A workshop splice on a short belt can be finished in half that.
What temperature should we set on the press?
Most fabric splices cure in the 145 to 152 °C range at the platen, with steel cord slightly higher and heat-rated compounds typically at 150 °C. The correct number comes from the compound data sheet, not from a general figure. What matters more than the set point is how long the bond line takes to get there.
Can we shorten the cure by raising the platen temperature?
Not by much, and the attempt usually backfires. Rubber conducts heat slowly, so a hotter platen over-cures the outside while the centre is still warming, and holding above about 160 °C starts breaking the network down. You end up with a joint that is brittle at the surface and soft in the middle, which is the worst combination for shear. If time is short, cure two joints in parallel presses rather than one joint at a higher temperature.
Are interface thermocouples really necessary if the press has a controller?
Yes, always, because the controller measures the platen and the joint cures at the plies.
How do we know the joint is fully cured without cutting a sample?
You cannot prove it without a sample, but you can build strong evidence: interface probes that reached set point, a dwell counted from the bond line, uniform pressure across the width, and a tap test that rings cleanly. Taken together with the cycle record, that set of observations is what most plants accept for release.
What causes a soft, gummy edge on a finished splice?
A cold edge, and the usual reason behind it is pressure that never reached the outer plies.
Is it acceptable to splice outdoors in high humidity or rain?
It is possible with a proper shelter, warm air and patience, and it is a bad idea without them. Moisture on the buffed surface and moisture absorbed into the plies both attack the bond from the inside. If relative humidity is above roughly 80 percent and you cannot move indoors, build a tent around the joint area and dry the belt with warm air before laying gum.
What joint efficiency should we expect compared with the belt's own strength?
A properly cured fabric splice typically reaches 85 to 95 percent of parent belt strength, and steel cord joints often do slightly better because the load path is more direct.
When is it worth repairing a defect instead of cutting the joint out?
Repair makes sense when the defect is shallow, does not cross a ply interface and covers less than about 15 percent of the joint length. Surface blisters, small cover lifts and localised edge voids all fall into that group. Anything showing delamination along a step line, mis-stepped plies or a dull tap response across a wide area gets cut out. Our test is whether we can explain why it happened. If we cannot, the joint goes.
Related Products You May Need
- Rubber conveyor belt in EP and NN carcass constructions
- EP rubber belts built for heavy tension and long centres
- Steel cord belts for high-tonnage mainline conveyors
- Heat resistant belt grades for clinker and sinter duty
- Chevron and profile belts for inclined conveying
- Full belt catalogue for splicing and replacement planning
Related Blog Posts
- Splicing methods, costs and field tips compared
- Twelve checks to run before you order a spliced belt
- Cover grades explained for buying and replacement
- Keeping an EP belt tracking after a new joint
- Cleaning methods, schedules and scraper limits
- Steel cord belt durability in heavy material handling
- Return side cleaning to protect joints and pulleys
- Abrasion resistant belts for hard rock duty