Ask three people on the same site whether a 20 degree incline needs a patterned belt and you will get three answers, each delivered with total confidence. The maintenance planner points at the flat belt that has been slipping since the wet season started. The project engineer points at drawings that have said "smooth EP belt" since 2009. The buyer wants to know why one quote came back a third higher than the other for what looks like the same conveyor. Nobody is lying. They are answering three different questions.
The question that actually decides the belt is narrower and harder. What incline does this material hold at this moisture, this lump size and this feed condition, and is that angle inside or outside the physical limit of a smooth surface? Answer that and the belt type picks itself. Skip it and you buy whichever belt happens to be in the bonded warehouse, then find out whether it was right somewhere around the first rain of the season, or the first load of wet fines off the wash plant.
We build both types, so we have no commercial reason to push one over the other. What we do have is a clear view of the cost of getting it wrong: belt changes, carryback cleanup, spillage under the head pulley, and a maintenance crew that has quietly stopped trusting the conveyor drawing. So this comparison walks through the decision in the order we actually use it, starting with the real required incline, then material behavior, then belt type, then the conversion checks, the cost line, and the splicing detail almost nobody thinks about until the belt is already cut in half. If you are specifying a conveyor belt for incline duty, the order of those steps is what keeps you out of trouble.

01Calculate the Real Required Incline Before You Pick Any Belt
Almost every failed incline conversion we get called in to fix started with the belt type. Somebody said "we need a chevron belt for incline work," and the conversation jumped straight to cleat height, pattern pitch and price per meter, as if the best conveyor belt for incline duty were the same for every material and every feed. Nobody spent half a day on the number that decides the answer: the angle the material actually has to be lifted at, and whether that angle is stable for the material in its worst realistic condition.
So we start with a worksheet. It takes one site visit and two phone calls. It has saved clients more money than any single piece of belt hardware we have ever sold them.
Measure the frame, not the drawing
Nominal incline on the drawing is a design intent. The frame on site is a fact, and the two drift apart. Foundations settle, a head section gets re-shimmed during a shutdown, a tail end gets moved 1.5 m to clear a new sump. We put a digital inclinometer on the belt frame at the tail, mid span and head, on both stringers, and we write down six numbers. A 2 degree difference between drawing and reality is common. On a marginal incline that 2 degrees is the entire margin between a belt that carries and a belt that slips.
Then we convert to a true angle, because field people quote incline in all sorts of units. A rise of 7.0 m over 24 m of horizontal run is 16.3 degrees, not "about a 17 degree belt." A rise of 7.0 m over 24 m of belt length is 16.9 degrees, which is a different conveyor. Get the run and the slope measured the same way every time. It matters when you compare quotes.
Find the worst condition, not the average one
Most lines are designed around a lab sample taken in the dry season. The belt fails in the rainy one. So we ask for the worst case the conveyor will see at least once a quarter: saturation after a storm, fines washed out of the stockpile, a batch of clay-rich interburden, frozen lumps in February, a slug of material off the wash plant cyclone underflow. If the plant has any of those conditions, they set the incline limit, not the annual average.
Practical test, if you have no shear box on site: fill a 200 mm diameter split pipe or a plastic bucket with the material in its worst realistic state and tip it slowly on a steel plate. Note the angle at which the surface starts to run. Repeat five times, wet and dry, coarse and fine. That number is the static angle of repose for that batch, and it is the top of the decision range. It is not the incline limit of a belt, and treating it as one is one of the most common mistakes we see.
Apply the dynamic margin
A belt is not a static plate. It sags between idlers, it vibrates, it accelerates at start-up with a full load, it receives an impact at the loading point, and the lump resting on the surface is not the same as the surface itself. All of that reduces the stable angle. In our worksheets we subtract a dynamic margin from the static repose angle, and the size of the margin depends on the feed:
For a controlled, screened feed with a short loading transition, we subtract 8 to 10 degrees. For run-of-mine or primary crushed feed with a 1.5 m drop into the chute, we subtract 12 to 15 degrees. For material that is saturated, oily or clay bearing, subtract 15 degrees or more, and expect the answer to land outside the smooth belt range entirely.
There is a second check people forget. The most heavily loaded part of an incline is the section just after the loading point, where the bed is deepest and the belt is least supported. If your angle is going to fail, it fails there, and it fails as carryback and roll-back rather than as a clean stall.
A worked example we ran this quarter
A crushed limestone line, 1,000 mm belt, 185 t/h, minus 40 mm product with about 12 percent fines, nameplate incline 16 degrees. On paper that is inside the smooth belt band and the OEM shipped it that way. In practice the operators were cleaning 2 to 3 tonnes a week of roll-back off the tail and had replaced the belt twice in four years.
Our measurements: frame incline 17.6 degrees at mid span after foundation settlement. Static angle of repose, dry 38 degrees, wet with clay content 29 degrees. Worst realistic condition, wet and clay bearing. Dynamic margin for a chute with a 1.2 m drop, 12 degrees. Stable angle ceiling for that material on a smooth surface, roughly 17 degrees. Against a frame at 17.6 degrees, there was no margin at all in the wet season. The material was already at the edge when it was dry.
The fix was not simply a patterned belt. We recommended a rough top cover first, because the profile adds surface grip without changing pulley geometry and the customer could test it in a 30 m section. It held through one wet season and failed in the second. That is the honest outcome you should be prepared for with a partial upgrade: rough top moves the limit, it does not remove it. The belt we finally supplied was a chevron profile with 15 mm cleats, and the geometry stayed at 17.6 degrees because re-profiling the frame would have cost more than the belt for ten years.
If you want the deeper version of that selection logic, our engineering team wrote it up in chevron conveyor belts for incline and anti-slip, and it pairs well with the worksheet above.
02What Actually Limits a Flat Belt on an Incline
Flat belts are not weak. A smooth rubber conveyor belt in a proper trough will hold 16 to 18 degrees of incline on crushed stone all day, and some well-behaved materials go further. That is the honest starting point for any conveyor belt for incline selection, so it is worth knowing where the ceiling comes from. The limit is not the belt. It is the friction interface between the cover and the bulk solid, and that interface has six variables that matter more than the belt construction itself.
Material internal friction and angle of repose
What holds a pile of material on a slope is the friction inside the material, particle to particle, plus the friction between the bottom layer and the cover. Coarse, angular, well-graded material has high internal friction and holds a steeper angle. Rounded, uniform, fine material has low internal friction and rolls or slides much earlier. Two materials with the same angle of repose can behave completely differently on a moving belt, because repose measures a static heap, and the belt is a dynamic surface.
This is why particle shape is worth a look on its own. Crushed basalt at 40 degrees repose is far more forgiving on an incline than river gravel at 38 degrees, because the crushed faces interlock. If you are specifying belt for an incline and the only sample available is a screenshot of a stockpile, we will ask for a 20 kg bag of the actual material. As a conveyor belt manufacturer, we would rather spend an hour on the sample than replace a belt that never had a chance.
Surface condition: dry, damp, wet, oily, frozen
A single film of water changes the answer more than any other variable. Moisture lubricates the interface, fills the interstices between particles and reduces the apparent friction angle by 8 to 15 degrees on many materials. Clay bearing fines are the worst case, because they form a slick paste that behaves like grease between the cover and the bed. On some coal and iron ore lines, the wet season incline limit is barely half the dry season number.
Frozen material has its own trap. Ice crystals on the cover act as a lubricant until the surface scrapes clean, then grip returns, so the belt slips for the first 30 m of every cold start and carries fine afterwards. Oily or greasy material from machining, food processing or scrap handling behaves the same way, and no cover compound completely solves it.
Lumps, fines and segregation
Inclined belts separate material along the slope. Big lumps roll back, fines stay put, and within a few minutes the top of the incline has a bed of coarse rolling material and the bottom has a fines layer that glues itself to the cover. The rolling lumps do the damage; the fines create the carryback. If your product has more than about 15 percent of material that will roll at that angle, expect migration, edge spillage and a permanent cleaning problem.
Take a photo of the material surface in the middle of the incline during a normal shift. If the surface looks like a riverbed of rounded stones rather than a stable, slightly sheared mass, the incline is already at or past the practical limit, whatever the design table says.
Impact loads and the loading point
The loading point sets the initial condition of the whole bed. A 2 m drop straight onto an inclined belt does three things at once: it punches the bed into the cover, it aerates and loosens the material, and it launches lumps in the direction of travel. The bed arrives at the incline loose and disturbed, which is exactly the state in which material slides.
The standard fixes are old and still effective: reduce the drop with a ladder or a rock box, align the chute so the material lands in the direction of belt travel at close to belt speed, keep the skirt length at least 2 m so the bed settles before the incline starts, and never load directly on a curve or a transition. If the loading section is short and badly aligned, no belt pattern will fully compensate.
Cheaper still, when the incline is marginal, a shallow anti slip conveyor belt or a rough top surface can buy two or three degrees without touching the frame, the pulleys or the cleaners. That is usually the first thing we test on a borderline duty, because it is reversible. If it holds, you have solved the problem for the price of a short belt.
Belt speed, idler spacing and vibration
Faster belts hold a shallower stable angle, for the same reason a faster stream carries more sediment. Somewhere above about 2.5 m/s on a marginal incline you can watch the bed start to creep even though the angle has not changed. Long idler spacing makes it worse, because the belt sags into a series of shallow ramps between rollers and material migrates into each sag. Heavier belt, closer idlers, and a slightly slower speed are three cheap levers before you spend anything on a pattern.
Finally, the cover grade. Abrasion resistant grades to DIN 22102 such as W and X change how long the cover lasts, not how much it grips. A high-abrasion cover on a wet incline is still a wet smooth surface. Buy abrasion resistance for wear life and buy surface texture, or a pattern, for grip. Confusing the two is a very expensive habit.
03Incline, Material and Belt Type: The Decision Table
Once you have the worst-condition incline and the material behavior, the selection collapses into a small number of bands. The table below is the one we use in internal reviews. Read the incline column as the worst realistic angle at the frame, not the number on the drawing.
| Worst-condition incline | Belt surface that normally works | Typical materials | Profile guidance | Main watch-out |
|---|---|---|---|---|
| 0 to 10 degrees | Smooth flat belt, standard cover | Grain, cement, pellets, dry sand, packaged goods | None | Nothing specific; keep cleaners working |
| 10 to 15 degrees | Smooth flat belt, high-friction cover | Sized coal, clinker, crushed stone when dry | None, unless the material gets damp regularly | Slip after rain, rising carryback |
| 15 to 18 degrees | Smooth belt at the top of its range, rough top preferred | Crushed limestone, granite chips, sized coal with fines | Rough top or patterned surface, 1.5 to 3 mm texture | Bed migration, speed ceiling, seasonal grade creep |
| 18 to 25 degrees | Deep rough top or shallow chevron profile | Damp crushed stone, coal with fines, dry sand, clinker | Cleats 6 to 10 mm, pitch 200 to 300 mm | Cleat tip wear, cleaner interference |
| 25 to 30 degrees | Chevron profile, C15 class cleats | Wet stone, clay bearing fines, iron ore, dredged sand | 15 mm cleats, pitch 250 to 400 mm | Pulley diameter, transition length, splice method |
| 30 to 35 degrees | Deep chevron profile, C25 class cleats | Wet, sticky and fine materials, filter cake, tailings | 25 mm cleats, pitch 300 to 500 mm | Vulcanized splice only, larger pulleys, real cleaning plan |
| 35 to 45 degrees | Corrugated sidewall belt, cross rigid base | Most bulk solids up to about 100 mm lump size | Sidewall 60 to 120 mm plus cross cleats | Specialist design, minimum pulley rules, cost base 2 to 4 times flat |
| 45 to 90 degrees | Corrugated sidewall belt, pocket design, or a vertical lift | Cement, clinker, fertilizer, sand, fine minerals | Sidewall 120 to 400 mm, cross rigid base | Loading method decides everything; compare against skip or bucket elevator |
Planning bands we use for worst-condition inclination. Use them to narrow the shortlist on a conveyor belt for incline project, then confirm the choice against a sample and a site measurement. They assume a well supported belt, a settled bed and a working loading point.
Material by material starting points
The second table is the one we hand to buyers who have never worked with incline limits before. Repose angles are typical published ranges for the material in a dry heap; the incline column is a practical planning ceiling for a smooth belt, and the delta column shows roughly how much a patterned surface typically buys you. Treat all of it as a starting point that a proper sample and a site measurement will refine.
| Material | Static angle of repose (dry, typical) | Smooth belt planning ceiling | Rough top or shallow pattern adds | Notes from the field |
|---|---|---|---|---|
| Crushed limestone, minus 40 mm | 35 to 40 degrees | 16 to 18 degrees | 6 to 8 degrees | Forgiving when dry and angular, sharp drop in wet season |
| Crushed granite or basalt | 35 to 40 degrees | 16 to 18 degrees | 6 to 8 degrees | Interlocking faces help; watch cleat tip wear |
| Sized coal, dry | 35 to 40 degrees | 16 to 18 degrees | 6 to 8 degrees | Watch fire resistance requirements for the whole belt |
| Coal, wet fines and slurry | 40 to 50 degrees wet heap | 12 to 15 degrees | 5 to 7 degrees | Behaves like a paste, not a solid, on the belt |
| Dry sand | 30 to 34 degrees | 14 to 16 degrees | 5 to 7 degrees | Lives in the cleat pockets after discharge |
| Wet or dredged sand | 38 to 45 degrees heap | 12 to 14 degrees | 4 to 6 degrees | High heap angle misleads people; it flows easily when moving |
| Cement clinker | 30 to 35 degrees | 18 to 20 degrees | 6 to 8 degrees | Abrasive, hot; specify cover grade for heat and wear first |
| Iron ore pellets | 20 to 25 degrees | 12 to 14 degrees | 4 to 6 degrees | Rounded and free rolling; also hard on the cover |
| Grain, wheat, corn | 25 to 28 degrees | 11 to 13 degrees | 4 to 6 degrees | Food grade cover, and cleats must not trap grain |
| Wood chips | 40 to 45 degrees | 18 to 22 degrees | 6 to 9 degrees | Long particles interlock, then bridge across the chute |
| Bauxite, dry and screened | 30 to 35 degrees | 15 to 17 degrees | 5 to 7 degrees | Very abrasive on the loading section and at the cleat tips |
Typical planning values only. The delta column is the extra angle that texture or a shallow pattern usually buys, not a guarantee.
Why these are engineering bands, not guarantees
Both tables are decision aids, and we deliberately publish them as ranges with a warning rather than as a lookup chart with an answer. Three reasons. First, real materials are rarely one material; a stockpile is a blend that changes with the face being worked and with the weather. Second, the friction interface depends on cover compound, surface finish and temperature, so the same material can behave differently on two belts from the same conveyor belt supplier if the compounds differ. Third, everything above assumes the conveyor itself is sound, which is a bigger assumption than most people expect.
For a fuller treatment of profile geometry, cover grades and their selection logic, our technical group keeps a long form reference in the chevron conveyor belt ultimate guide. This page stays on the comparison side of the question.
04How Cleat Height and Pitch Change Climbing Ability
Choosing a conveyor belt for incline work is not one decision with one performance figure, and an anti slip conveyor belt is not one product either. It is not. Cleat height and cleat pitch are two independent dimensions, and they trade off against each other in ways that show up as carryback, belt damage or wasted money.
The cleat only works when the bed is deep enough
This is the fact that surprises people most. A chevron cleat does not act like a bucket. It acts like an obstruction that the bed has to push against. If the material depth on the belt is less than the cleat height, the material simply flows over the top of the cleats, and the belt performs close to a flat belt with an expensive surface. On a 1,000 mm belt carrying 60 t/h of 20 mm product, the bed may be 25 mm deep at the center. A 25 mm cleat in that situation is doing almost nothing for grip, although it is doing plenty to trap material and interfere with cleaners.
So the first question about cleat height is not "what climbs steepest" but "how deep is the bed on this conveyor at design and at turndown." We ask for the troughing angle, the belt width, the capacity and the bulk density before we suggest a profile. If the design duty gives a 40 mm bed and the shutdown turndown gives 12 mm, the belt will only climb properly at full rate unless the profile is chosen conservatively.
Height, pitch and what each one does
Height increases the obstruction the bed has to climb over, which increases the angle the belt can hold. Pitch sets how far apart those obstructions are. Short pitch means lots of small pockets, good for fine material and shallow beds, with more total cleat edge to wear and more trapped material. Long pitch means big pockets, more effective in deep beds and with sticky material, but the bed has a longer unsupported face between cleats, so a long pitch can let the surface shear and run even at moderate angles.
| Cleat height | Typical pitch range | Typical working incline | Best fit | Carryback and cleaning behavior |
|---|---|---|---|---|
| 6 mm shallow pattern | 150 to 250 mm | 18 to 22 degrees | Dry, free flowing material, thin beds | Light pockets, most belt cleaners still work |
| 10 mm | 200 to 300 mm | 20 to 25 degrees | Damp crushed stone, coal with fines | Moderate pockets; rotate cleaners to brush or star type |
| 15 mm | 250 to 400 mm | 25 to 30 degrees | Wet stone, clay bearing fines, ore | Real pockets; plan for a return strand cleaning station |
| 20 mm | 280 to 450 mm | 28 to 33 degrees | Wet and sticky bulk, deep beds | Heavy carryback; check reduced pulley wrap |
| 25 mm | 300 to 500 mm | 30 to 35 degrees | Very wet or paste-like feed | Needs a designed cleaning and containment setup, not a scraper |
| 32 mm and above | 350 to 600 mm | 33 to 38 degrees | Steep short transfers, sticky fines | Above this, sidewall construction is usually the better engineering |
Typical profile geometry we quote. Pitch and height must match the bed depth on your conveyor, so we confirm against the duty sheet before releasing a drawing.
Cleat tip wear is the hidden cost line
The tip of a cleat is a small area taking a repeated impact and abrasion load. On a 25 mm cleat that carries wet granite, tip wear of 3 to 5 mm per year is normal in continuous duty, and once the cleat is worn to roughly two thirds of its height the climbing performance drops noticeably even though the belt looks structurally fine. That is the point at which operators start reporting "the belt has gone off" on wet days. Nobody measures the cleat height, so the symptom gets misdiagnosed as a material change.
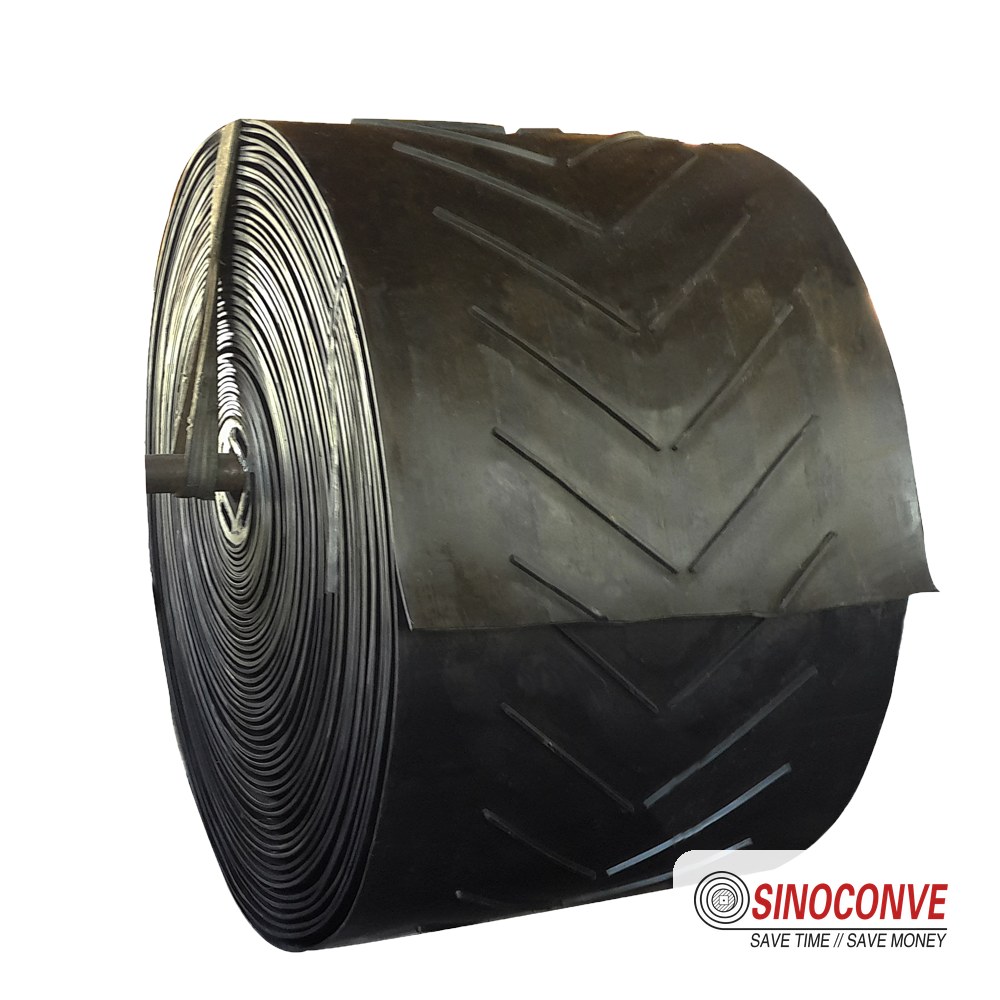
A rough top conveyor belt is a different product from a chevron profile. The texture is only 1.5 to 3 mm deep, so it cannot form real pockets, and it suits shallow beds better than deep ones. The maintenance habit is the same, though. Cheap habit, large payoff: mark the cleat height at installation with a paint line at the original dimension and re-measure twice a year at three fixed stations. It takes ten minutes and it tells you when to plan a belt change instead of discovering it during a wet week. Profiles that are cut into a thick cover last longer at the tip than thin pressed patterns, which is one reason a proper moulded chevron profile costs more up front but wins on total cost in abrasive duty.
Every patterned conveyor belt trades cleaning simplicity for climbing ability, and nowhere is that trade more visible than at speed. Belt speed matters here as well. Above about 2.5 m/s on an incline, cleats meet the material at a harsher angle and tip wear accelerates. If the conveyor was originally designed for a fast, flat belt and you are converting it, check the speed against the profile before ordering. Our rough top rubber conveyor belts article covers the same wear mechanics on textured surfaces, which fail in a similar pattern to shallow patterns.
05Where Chevron Stops and a Sidewall Belt Starts
A chevron belt increases friction and creates pockets in the direction of travel. It does not contain anything at the edges and it does not stop material from working sideways, and that is the simple reason a chevron belt eventually runs out of capability. The transition point is usually somewhere between 30 and 35 degrees of worst-condition incline, and it arrives earlier when three conditions stack up. Past that point a conveyor belt for incline stops being a friction question and becomes a containment question.
The three signals that a chevron belt is not enough
First, edge spillage. On a steep incline the bed becomes unstable at the shoulders, and material spills over the belt edge during any surge or crosswind. If you are already running a chevron belt and cleaning spillage off both sides of the stringer, the incline is telling you that containment, not friction, is now the limiting factor. Second, a thin or highly variable bed. Chevron cleats need material depth to work against, and a conveyor that runs at 15 mm of bed depth half the day cannot rely on a 25 mm cleat. Third, paste-like material. Filter cake, tailings, clay slurry and some wet fines behave as a semi-fluid and will simply flow over or around cleats.
When those signals appear, the engineering answer is a corrugated sidewall belt. A cross rigid base belt carries vulcanized sidewall flanges on both edges plus transverse cleats between them, so the conveyor forms a moving trough. That is the point of a sidewall belt for bulk handling: the material is contained by geometry rather than held by friction. Sidewall heights from about 40 mm to 400 mm cover the range from a modest 35 degree incline to a near vertical lift, and cleat heights typically run from 40 mm up to 120 mm in the standard range.
| Attribute | Flat smooth belt | Chevron and patterned belt | Corrugated sidewall belt |
|---|---|---|---|
| How it holds the load | Friction between cover and material only | Friction plus the bed pushing against cleats | Containment by sidewalls and cleat pockets |
| Practical incline ceiling | 12 to 18 degrees depending on material | 18 to 35 degrees depending on cleat height | 30 to 90 degrees, geometry driven |
| Edge spillage control | Skirt rubber only, limited on steep sections | Weak point; bed shoulders unstable above 25 degrees | Built in, sidewalls contain the whole bed |
| Pulley and idler requirements | Standard troughing, minimum diameters apply as usual | Larger minimum pulley diameter; no small bends on the return | Cross rigid base, special pulley geometry, flat idlers |
| Cleaning | Doctor blades work normally | Blades cannot follow the pattern; brush or rotary cleaners | Pockets need wash or air blast on many duties |
| Splice method | Vulcanized or mechanical, both work | Vulcanized stepped splice in most cases; cleats must align | Vulcanized, sidewall and cleat joints are part of the splice |
| Relative belt price | Baseline | Usually 15 to 40 percent above the same flat construction | Typically 2 to 4 times the flat belt of similar width |
| Best fit | Level and gentle inclines, clean materials | Moderate inclines where the frame cannot be moved | Steep or vertical lifts, tight plant footprint |
Comparison of the three constructions we support on inclined duties. Every patterned conveyor belt we quote carries a defined cleat height, cleat pitch and minimum pulley diameter. Price relationship is per meter of belt, not installed cost.
The economics of moving the angle instead of the belt
Before anyone commits to sidewalls, we always run one alternative. Changing the belt type is one way to solve an incline; changing the incline is another, and sometimes a cheaper way. Stretching the conveyor to reduce the angle reduces the load on every downstream component and returns you to a plain flat belt with normal cleaning and normal splicing.
The geometry is simple enough to check in a few minutes. For a 30 m lift, a conveyor at 18 degrees needs about 97 m of belt and structure. The same 30 m lift at 30 degrees needs about 60 m. That is 37 m of structure, belt and idlers you do not buy, and often the reason a flatter, longer conveyor with a sidewall-free design wins on capital cost even though it looks like more equipment on the plot plan. On the other hand, when the plot is constrained by a road, a rail line or an existing stockyard, the compact steep option usually wins, and that is where we see sidewall belts doing their best work. It is also the situation where a sidewall belt for bulk handling earns back its price, because the alternative is buying land you do not have.
Where the plant sits inside a port or a bulk terminal, the spillage and transfer questions get harder, because the incline interacts with ship loader geometry, wind and surge loads. We covered that combination in a separate piece on steep transfer spillage at bulk terminals, which is worth reading before you finalize a steep transfer design.
What we check in both directions
If you buy through a conveyor belt distributor rather than direct, make sure somebody is still asking the geometry questions. The two failure modes we see are symmetric: a chevron belt ordered for a duty that needed sidewalls, and a sidewall belt ordered for a 22 degree incline where a chevron belt would have run for years at half the price. Both come from the same root cause, which is quoting from habit instead of from a measurement.
06Six Checks Before You Convert a Flat Belt Line to Chevron
A patterned belt is not a drop-in replacement for a flat belt on an existing conveyor. The belt gets thicker, the surface stops being smooth, and both of those facts break assumptions that were built into the original design. We have a standard six-point check, and we will not release a chevron belt to an existing structure until every line is answered. Every conveyor belt for incline retrofit we quote goes through it, whatever the order value. Skipping any one of them creates a problem that costs more than the belt.
1. Pulleys, rollers and minimum diameters
Cleats have to pass over every pulley and under every roller. A chevron belt needs a larger minimum pulley diameter than the flat belt it replaces, and the requirement grows with cleat height. We measure every pulley in the path, including take-up and bend pulleys that nobody looks at, and we compare them against the profile drawing. Crowned pulleys need particular attention, because a cleat crossing a crown is pulled sideways at the edges.
On the roller side, check spacing and type. Impact idlers under the loading point, rubber disc returns, spiral rollers and any snubber arrangement can all interfere with a pattern, and reverse running over a small bend pulley will strip cleats. If a bend pulley is too small, the options are to change it, to reduce cleat height, or to move the bend. Changing a pulley is usually cheaper than a premature belt failure, and much cheaper than the downtime. Our conveyor rollers and idlers range is sized to work with profiled belts when the frame allows it.
2. Belt cleaners: the check most people fail
A doctor blade cleaner works because it presses a straight edge against a flat surface. A chevron surface is not flat, so the blade rides on top of the cleats, loses contact in the pockets, and either chatters or gets bent. On a converted line, the primary cleaner is often the first component to fail, and it fails in the worst place, because a loose blade can slice a belt.
What works on a patterned belt: rotary brush cleaners, rubber star or finger cleaners set just clear of the cleat line, or an air knife for dry fines. Some duties genuinely need no cleaner at the head, with cleaning moved to a return strand station instead. Whichever route you choose, design it before ordering the belt. Retrofitting cleaners to a chevron belt after installation is a common and avoidable expense, and it is a question we ask when someone wants a quote through their local wholesale conveyor belts source.
3. The return strand and carryback
Every cleat pocket holds material after discharge. Unlike a flat belt, where carryback is a film on a smooth surface, a patterned belt delivers discrete lumps and slugs that drop off at unpredictable points along the return run and build up under the conveyor. We ask for the return strand layout. Is there a plow, a V plough, a return brush, a dribble chute? Where does the material go?
If the answer is "it just falls onto the floor," the conversion will fail on housekeeping grounds even if the belt climbs perfectly. On many sites we end up adding a containment tray and a cleaning station in the first 10 to 15 m of the return strand, capturing the material as soon as it leaves the head. That is cheap at the design stage and awkward afterwards.
4. Transition distances and troughing
Transition distance is the length over which the belt goes from the flat pulley line into a full troughing angle. Cleats and a thicker belt both increase the stress in that zone, so the transition has to be longer than it was for the flat belt. Too short a transition puts the belt edges in tension, distorts the pattern, and on profiled belts it is a common source of edge cracking. We calculate the transition from belt tension and belt width rather than copying the old drawing, and if the frame does not have room we say so before supplying anything.
Idler configuration matters too. A chevron belt still troughs normally in the load carrying section, but it does not like aggressive three roll angles combined with a short transition. If the conveyor was designed as a low tension, tight footprint unit, expect to re-space idlers or to ease the troughing angle on the load section.
5. Skirtboards and the loading chute
Skirt rubber seals against a flat belt surface. With cleats passing underneath at intervals, a continuous seal is not possible, and you get two options: lift the skirt clear of the cleat line and accept some leakage, or design a chute where the loading zone has a run of belt with the pattern interrupted. In our experience the cleanest solution is a long skirt section positioned so that material lands in the pockets rather than on the cleat ridge, plus a slightly wider chute so lumps do not wedge between the skirt and a cleat.
Also check the drop height and the chute angle. A steep, narrow chute aimed at the cleat line produces impact damage and, worse, can launch a lump that lands on top of a cleat and rolls back down the incline. A single rolling lump can start a slide.
6. Belt thickness, mass and the drive
The last check is arithmetic. A chevron belt is thicker and heavier, and the profile adds mass. Take-up travel, counterweight and drive power were all sized for the old belt, and a heavier belt changes all three. We ask for the take-up type and available travel, the motor nameplate and the actual running current before quoting, because a conversion that leaves the drive at 96 percent of its thermal limit is not a conversion we want our name on.
Roll diameters matter too. A thicker, stiffer belt with a pattern will not sit as tightly on a small diameter when it comes off the reel, so check that it feeds through the existing take-up without fouling and that the storage loop radius is adequate. While you are in the drive house, confirm the reducer and holdback arrangement can handle the added rotating mass, particularly on a regenerative decline section.
| Check | What we measure | Pass condition | Typical fix if it fails |
|---|---|---|---|
| Pulleys and rollers | Every pulley diameter, crown, idler spacing and type | Diameters above the profile minimum, no small reverse bends | Replace bend pulley or reduce cleat height |
| Cleaners | Cleaner type, mounting position, available room | Brush or rotary type, or a defined cleaning station | Swap blades for brush or star cleaners |
| Return strand | Layout, plows, dribble chutes, housekeeping load | Material captured and routed back into the process | Add tray plus brush station in the first 10 to 15 m |
| Transition and troughing | Frame length between pulley and full trough, roll angles | Transition length calculated for the new belt, not copied | Re-space idlers or ease the troughing angle |
| Skirtboard and chute | Skirt length, gap, chute width, drop height, impact angle | Material lands in the pockets, no wedging at the skirt | Raise or section the skirt, widen the chute, add a rock box |
| Thickness, mass and drive | Take-up travel, counterweight, running current, roll radii | Drive headroom and take-up travel remain adequate | Add counterweight, adjust take-up, re-check drive rating |
The conversion checklist we run before releasing a chevron belt for an existing flat belt structure.
One more practical point, because it comes up in almost every retrofit. Belt tension per unit width on the new belt is unlikely to match the old one, so do not assume the existing vulcanized joint specification will carry over. A thicker belt with a different ply construction needs its own splice design, and that is a drawing, not a rule of thumb.
If your conveyor was sized by an OEM for a smooth industrial conveyor belt and you are now pushing it past its design angle, it is worth having the frame checked as well as the belt. We have walked onto sites where the right answer was a longer conveyor at a shallower angle with a plain belt, and we have said so even though it reduced the order value. That position comes from being a conveyor belt factory that also has to live with the installation, and it is why our engineers ask for the conveyor drawing before the belt width. We also sit in those reviews as a transmission belt manufacturer, so the drive train on the same conveyor gets examined in the same conversation rather than two months later.
07Cost and Service Life: The Part the Price per Meter Misses
The first comparison a buyer makes is price per meter, and on that measure a chevron belt always loses. On a conveyor belt for incline that is the wrong comparison, and it is worth saying so plainly. The honest answer is that price per meter is the wrong measure, because the belt is usually not the dominant cost on an incline that is being run outside its capability. Labor for cleanup, product loss as spillage, and unplanned downtime are. We have seen a 25 percent higher belt price save a plant six figures a year in cleaning and lost production, and we have seen the opposite: a patterned belt over-specified for a 14 degree incline that spent the following three years fouling cleaners for no benefit at all.
| Cost or life factor | Flat belt on an over-steep line | Chevron belt suited to the duty | Notes from our records |
|---|---|---|---|
| Belt price per meter | Lower | Typically 15 to 40 percent higher for the same construction | Compare the same ply, cover grade and width, not just the profile |
| Cover and edge wear | Accelerated; slipping material polishes and scours the cover | Cleat tips wear first, cover usually lasts longer | Tip wear of 3 to 5 mm a year on abrasive duty is normal |
| Expected belt life | Often 6 to 12 months before performance falls away | Commonly 18 to 30 months in comparable duty | Heavily dependent on abrasiveness, moisture and loading conditions |
| Cleanup labor | Constant; roll-back and spillage at the tail | Reduced, but a defined cleaning station is still needed | We routinely see 2 to 3 tonnes a week of cleanup on a failing incline |
| Cleaning equipment | Standard doctor blades, inexpensive | Brush, rotary or air knife cleaning; higher first cost | Budget this with the belt, not after the first failure |
| Spillage and product loss | High; material rolls back and escapes at the edges | Low if the profile matches the bed depth | Lost product is usually the largest hidden number |
| Downtime events | Slip stalls, belt changes, chute blockages | Planned belt changes at a predictable interval | Predictable beats cheap every time on a critical path conveyor |
| Retrofit scope | None | Possible pulley, cleaner and skirt changes | Do the six-point check before you compare prices |
| Drive side | Existing drive and V-belt manufacturer specification unchanged | Heavier belt; verify power, tension and belt drive capacity | A slightly heavier belt can drive a whole re-check of the drive train |
Cost and life factors we compare in a total cost of ownership review. Ranges come from our own project records and vary with duty.
The residual material line nobody budgets
Cleaning out the pattern is a real, recurring cost on any chevron installation, and it is worth quantifying before the purchase rather than after. Material trapped between cleats either falls off in the return strand, where someone has to shovel it, or stays in the pockets until it dries out and cements in place. On sticky material, pocket cleaning during shutdown can run to a full shift per change-out even on a short conveyor.
The mitigations are simple and mostly mechanical. Choose the shallowest cleat that meets the angle requirement rather than the deepest available. Slope the loading point so the pockets are filled rather than packed. Add a cleaning station that removes material while it is still wet and easy to move. If the material is genuinely paste-like, accept that a sidewall design with a wash system is often cheaper over five years than a deep chevron profile with a permanent cleanup crew.
Lead times and order quantities
One cost that surprises overseas buyers is the interaction between lead time and profile. A flat belt in a standard construction is often available from stock. A chevron belt with a specific cleat height, pitch and width is a production item. Our normal lead time is around 30 days, with a 15 to 20 day fast lane for urgent breakdowns, samples in 2 to 5 days, and a minimum order of about 50 m per profile. If the line is down and the only option is a flat belt in stock, remember that a temporary flat belt on an over-steep incline will slip, so plan the temporary run with reduced tonnage and a shorter belt run where you can.
We also supply the drive side of the same conveyors, from the transmission belt side of our range through to heavy duty fabric and steel cord belting, because a conveyor retrofit is rarely just about the belt surface. Buyers who are comparing a full line replacement usually ask us for both anyway, and it is easier to size them together.
08Splicing a Chevron Belt: How the Pattern Aligns
This is the part that decides whether a good belt performs like a good belt. A chevron belt is almost always hot vulcanized rather than mechanically fastened, because a fastener plate has to cross the cleat line, and no fastener we have seen survives that arrangement for long. The splice itself is a stepped, bias cut, multi-step joint, and the sequence matters as much as the press temperature.
Mark the belt before you cut anything
Before cutting, we mark the longitudinal centerline, then mark the cleat position on both belt ends using a stringline or a laser across the full width. The pitch between the last cleat on one end and the first cleat on the other has to come out at the nominal pitch, not "close enough." We also mark the direction arrow and confirm it matches the direction of travel, because the pattern has a defined orientation and reversing it after vulcanizing means doing the whole joint again.
The reason the pitch matters is mechanical. A short or long cleat spacing at the joint creates a lump in the running line. That lump drums over the head pulley once per revolution, flexes the splice, and turns a joint that should last as long as the belt into the first failure point. In practice we hold the joint pitch to within a few millimeters of nominal and check the lateral cleat alignment across the width within about 5 mm.
Build a cleat free window at the joint
Presses need flat platens. Most splicing crews therefore work with a cleat free window at the joint, typically 200 to 300 mm, so the platen closes square and the steps line up. Whether your crew removes the cleats inside that window, orders the belt with an interrupted pattern at a known position, or uses a shaped platen insert depends on the profile height and the press available. Decide it at the drawing stage, because cutting cleats off by hand on site introduces exactly the misalignment the window was meant to avoid.
We have also seen crews try to vulcanize straight through a 25 mm cleat with a plain platen. It never seats, the joint cures unevenly and the splice fails in weeks. If you are converting an existing line, confirm the splicing method before the belt is ordered, not when the belt is on site and the shutdown window is closing.
Splice strength and what to design around
A properly prepared, stepped, hot vulcanized splice on a fabric belt typically achieves 60 to 90 percent of the rated belt strength, and the spread between those two numbers is almost entirely workmanship. We build the conveyor's safety factor around the conservative end of that band rather than the optimistic one, and we ask any splicing contractor for their step length, ply preparation and cure data before they touch a belt. On a steady incline with a moderate tension, that margin is comfortable. On a high tension incline, the splice is the component to watch, and we ask for the tension calculation before quoting the belt.
09Procurement Verification Checklist
When the decision is made, the risk shifts from engineering to procurement. An incline belt order is easy to get wrong in ways that only show up at commissioning, so we encourage buyers to run a short verification list with whichever supplier they choose. The same list applies to any conveyor belt for incline order, patterned or plain. Here is the list we are happy to be measured against.
| Item to verify | What to ask for | A good answer looks like this | Red flag |
|---|---|---|---|
| Incline data | Measured frame angle, belt width, capacity, speed, troughing | A question back, and a calculation on the duty sheet | A recommendation issued without any conveyor data |
| Material sample | 20 kg of the worst realistic condition, plus moisture range | A profile recommendation tied to that sample | "Chevron always works better" with no material question |
| Profile drawing | Cleat height, pitch, cleat angle, tolerances, pattern direction | A dimensioned drawing, not just a profile name | Height quoted as "standard chevron" with no numbers |
| Belt construction | Ply type and count, cover grade, total thickness, standard | A construction compatible with DIN 22102 or ISO, stated explicitly | Thickness described only as "heavy duty" |
| Minimum pulley diameter | Confirmed minimum for that cleat height | A number, cross checked against your existing pulleys | "It will be fine" without measuring your pulleys |
| Splice design | Step length, ply preparation, cleat window, cure schedule | A written splice specification for the exact construction | "Your splicer will know" as the whole answer |
| Cleaning plan | Cleaner type, position, or a defined alternative | A specific recommendation for your duty | No mention of cleaning at all in the quotation |
| Quality documents | Material test report with the shipment | Batch linked inspection report, not a generic brochure page | Certificates that appear after the belt has shipped |
| Commercial terms | MOQ, lead time, packing, roll length, payment terms | Clear numbers in writing, with a fast lane for breakdowns | Lead time that changes after the deposit |
| Marking | Direction arrow, cleat height reference, roll identification | Markings that survive a year of operation | No direction marking, so the pattern goes on backwards |
Procurement verification list for incline and patterned belt orders.
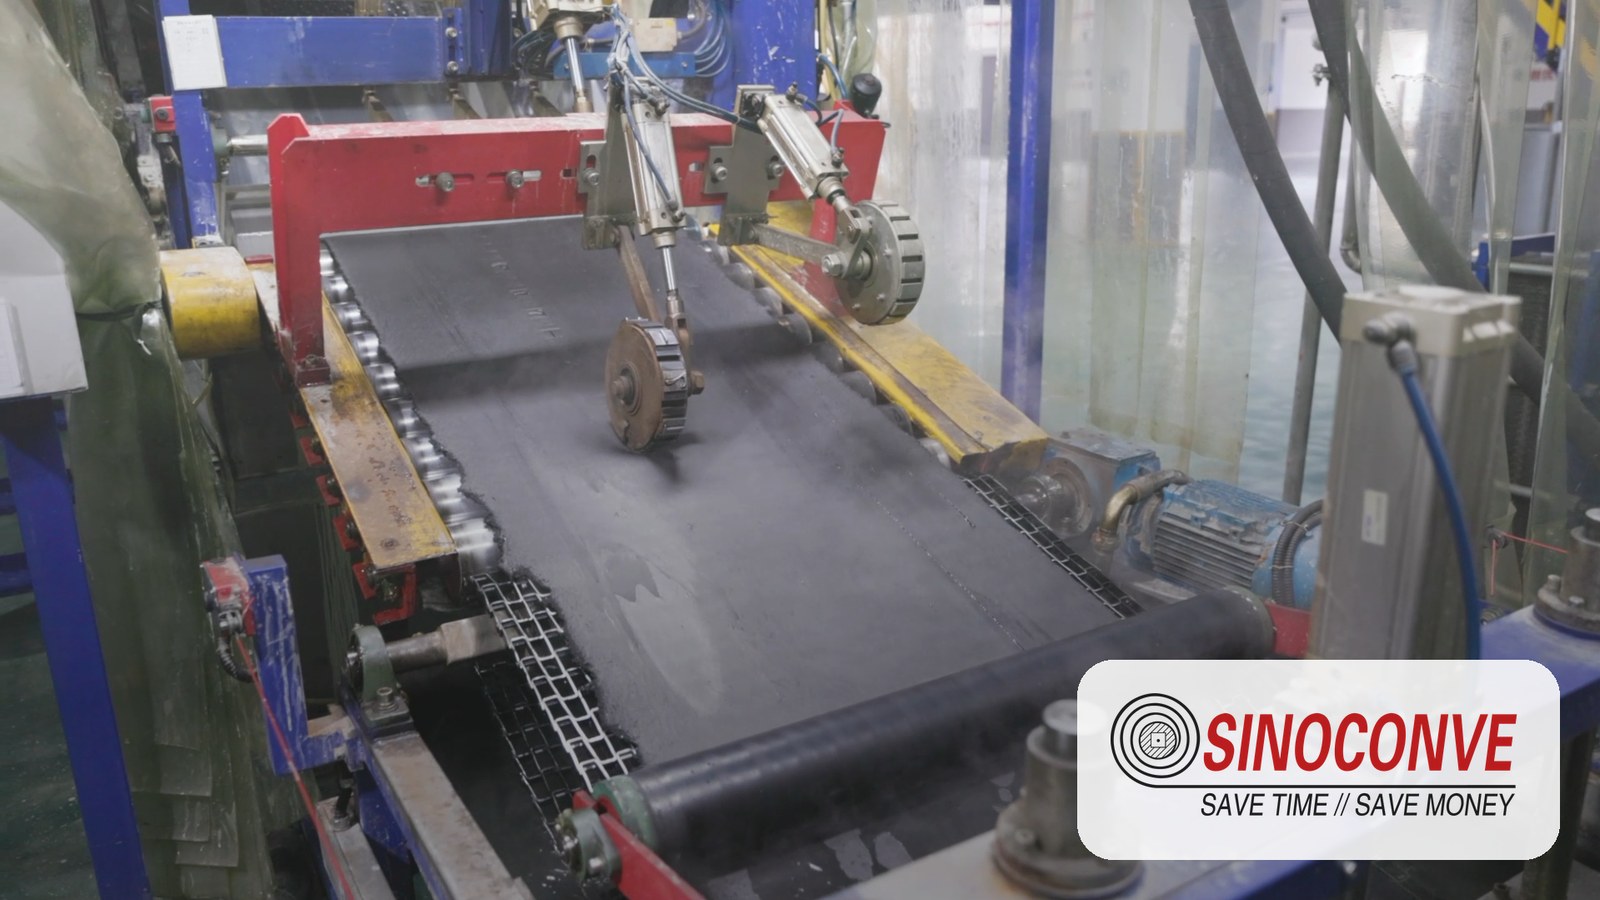
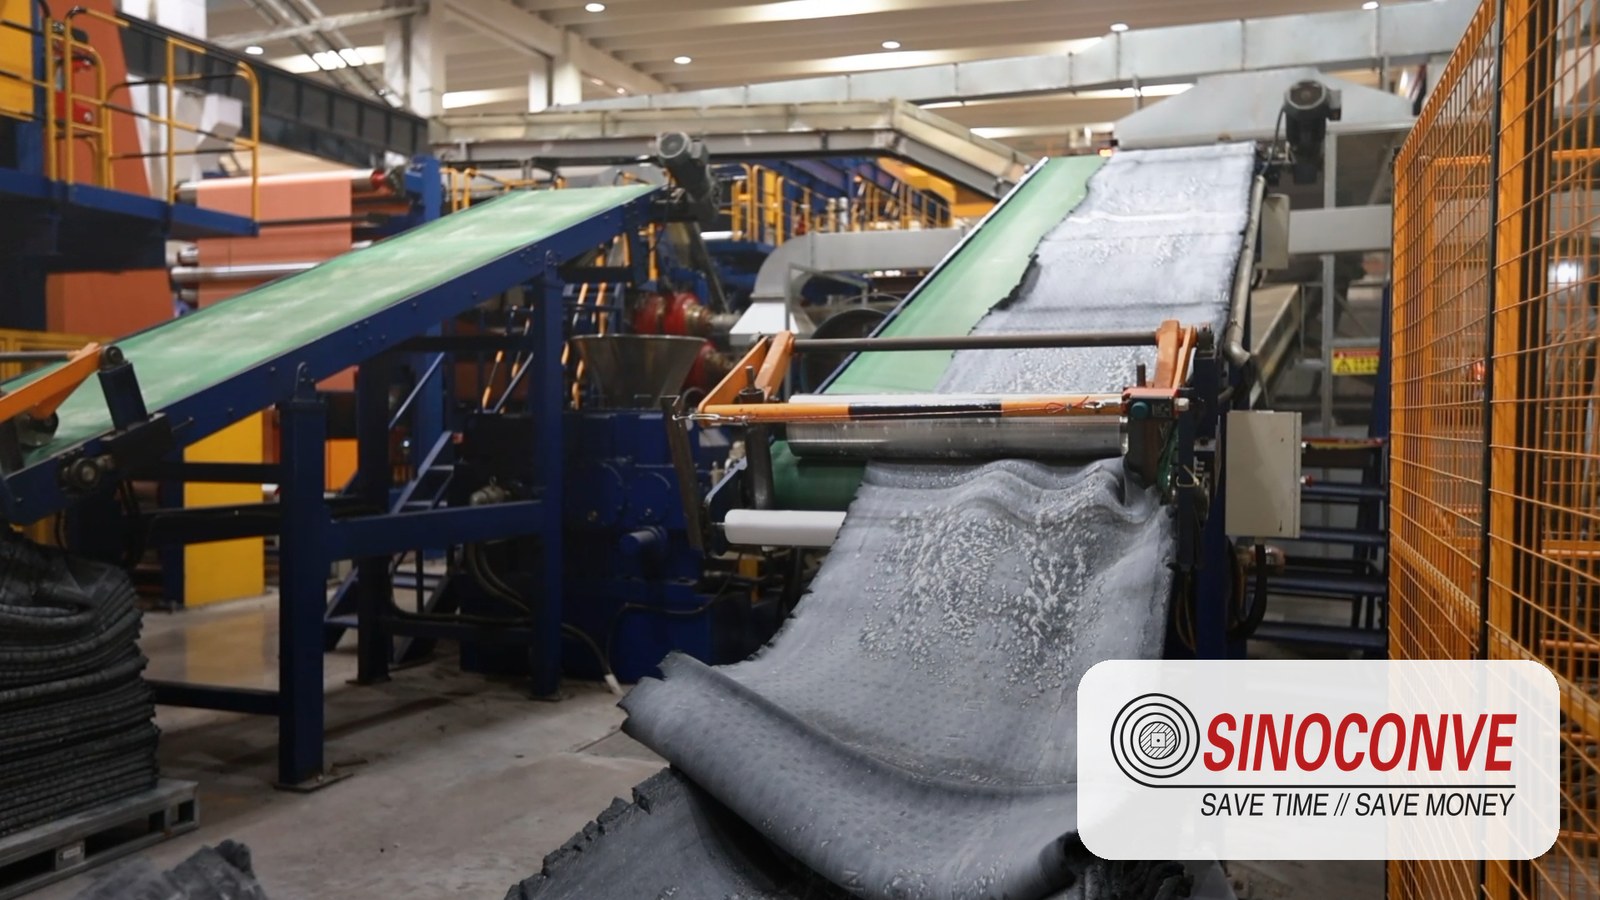
Pictured above is the surface finishing stage before the chevron pattern is formed, which is where cover thickness and compound consistency are actually set. A profile is only as good as the cover it sits on, and it is worth asking any supplier you shortlist how the cover is checked before the pattern goes on. The same question applies whether you are buying a corrugated sidewall belt or a simple two ply flat belt for a gentle incline.
10Five Misuses We See on Inclined Conveyors
Most bad outcomes on inclined conveyors fall into five patterns. None of them is exotic, and all five are cheaper to avoid than to fix.
| Misuse | How it shows up on site | What it costs | What to do instead |
|---|---|---|---|
| Using a pattern to fix a bad loading point | New patterned belt, same slip experienced two months later | Belt price plus downtime, twice | Fix the drop height, chute alignment and skirt length first |
| Deep cleats under a shallow bed | 15 mm of material riding over 25 mm cleats at turndown | Wasted specification, trapped material, cleaner damage | Size the cleat against the shallowest expected bed depth |
| Chevron belt on a reversing conveyor | Good climbing one way, poor the other, material in the pockets | Half the operating hours at reduced capability | Use a symmetric pattern or a flat belt with better loading |
| Deep profile over undersized pulleys | Cracking at the cleat roots near the head pulley | Belt scrapped years early | Check every pulley diameter before ordering the profile |
| Designing on the dry season sample | Belt performs all summer, fails in the first wet month | Emergency belt order at premium freight | Specify on the worst condition the line will see each year |
The fifth one deserves a comment, because it is the most common and the least visible. Design reviews happen in whatever season the project lands in, and samples get taken when the stockpile is dry. We ask every buyer one specific question before we release a profile drawing: what does this material look like on the worst day of the year. If nobody can answer, we ask for a sample from the bottom of the stockpile instead of the top, because that is where the wet, fine, slippery fraction ends up.

11FAQ: Chevron Versus Flat Belt on an Incline
What is the maximum incline for a flat conveyor belt?
There is no single number, but for general bulk handling a smooth belt holds roughly 12 to 18 degrees of worst-condition incline. The low end fits wet, fine, rounded or clay bearing materials; the high end fits dry, angular, well graded crushed stone and clinker. Above 18 degrees we start recommending a textured or patterned surface, and above roughly 25 degrees we are usually talking about a chevron profile. Measure your frame angle and your material in its wettest state before you pick a number from any table, including ours.
Can I fit a chevron belt to a conveyor that already runs a flat belt?
Usually yes, but not as a straight swap. The belt is thicker, the surface is no longer flat, and both facts break assumptions in the original design. Run the six checks in this article first: pulley diameters, cleaners, return strand, transition length, skirtboard clearance and drive capacity. Most retrofits need at least a cleaner change and a new splice specification, and many need a bend pulley replaced. The belt itself is rarely the expensive part of the conversion.
Is a rough top belt enough for an 18 degree incline?
Sometimes it is, and it is always worth testing because rough top costs less and works with normal cleaners. On dry crushed stone at 18 degrees in worst condition, we would expect a rough top cover to hold, with the caveat that it buys you grip without changing equipment geometry. If the test section starts showing carryback or grade creep in a wet week, you have learned something useful for the price of a short belt rather than a full one.
How much more does a chevron belt cost than a flat belt?
For the same carcass, cover grade and width, a chevron profile typically adds 15 to 40 percent to the belt price, and corrugated sidewall belts typically run 2 to 4 times the price of a flat belt of similar width. That gap narrows or widens with profile height, pitch and whether the belt has to be made to order. Compare total cost rather than price per meter, including cleaning equipment, cleaning labor, spillage loss and the interval between belt changes on each option.
Do chevron belts reduce the carrying capacity of the belt?
Not in any significant way. Chevron cleats sit partly inside the material bed, and the reduction in free cross section is small compared with the capacity loss caused by the incline itself. What does change is the effect of inclination on capacity: inclined conveyors carry less than level ones for the same belt width and speed, and if you are comparing options, apply an inclination factor rather than assuming the nameplate tonnage holds on a slope.
Can a chevron belt be joined with mechanical fasteners in an emergency?
It happens, and we treat it as a temporary measure only. A fastener plate has to cross the cleat line, which makes the joint height irregular, damages the pattern and loads the splice badly as it runs over the pulley. If a mechanical joint is the only way to keep the plant running for a few days, reduce the loading rate, watch the joint at every shift, and book a vulcanized replacement. Plan a cleat free window at the joint when the permanent splice is made.
Which belt cleaner works on a chevron belt?
Rotary brush cleaners, rubber star or finger cleaners set clear of the cleat line, and air knives on dry fines. A standard doctor blade does not work, because it cannot follow the pattern and loses contact in the pockets. The practical sequence is to decide the cleaning method first and buy the belt second. If your duty allows cleaning on the return strand instead, that is often the simplest and most durable arrangement on a short incline.
What do you need from us before quoting an incline belt?
Four things, and the quote gets sharper with each one. The measured frame incline, or the rise and run so we can calculate it. A sample of the material in its worst condition, 20 kg is plenty. The conveyor data, meaning belt width, capacity, speed, troughing angle and pulley diameters. And the maintenance side, meaning how the belt will be spliced and how carryback will be cleaned. With those four, we can size the profile confidently and tell you honestly if a flat belt would still do the job.
Can a chevron belt run on a decline or a reversing conveyor?
Partially, and that is the honest answer. A chevron pattern has a working direction, and on a conveyor that reverses the belt only performs as designed in one of the two directions. On a decline, the pattern does help hold material back rather than letting it slide, but it also traps more material in the pockets at the discharge end. If the conveyor genuinely reverses in normal service, tell us before ordering, because the profile choice and the pattern arrangement change.
How often should I expect to change an incline belt?
On a line that is correctly specified, we commonly see 18 to 30 months of service for a chevron belt in abrasive bulk duty, against 6 to 12 months for a flat belt that is being run past its angle. That range moves with abrasiveness, moisture, loading conditions and belt speed. Track cleat height at fixed stations twice a year. When the cleats are down to about two thirds of their original height, plan the replacement instead of waiting for a wet week to decide it for you.
What is the best conveyor belt for incline work?
There is no best type in isolation, only the type that matches your measured angle and your material. Up to 12 to 18 degrees, a smooth belt with the right cover grade is usually the cheapest answer. Between 18 and 30 degrees, a chevron profile with cleats matched to the bed depth is the workhorse. Above roughly 30 to 35 degrees, or wherever the bed is thin and edge spillage is already visible, a corrugated sidewall belt is the engineering answer. Measure, sample, then choose. That order has never failed us, and reversing it has never worked.
Related Products You May Need
| Rubber Conveyor Belt General duty fabric belting in EP and NN carcass, widths from 500 to 2,200 mm, cover grades to DIN 22102. |
EP Rubber Conveyor Belt High tension EP constructions for long overland runs, crusher feed and heavy quarry duty. |
Steel Cord Conveyor Belt ST grade belting for the highest tension lines, high lifts and long centre distances. |
| Chevron Conveyor Belt Profiled belts for inclined conveying, cleat heights from 6 mm to 32 mm, custom pitch on request. |
Corrugated Sidewall Belt Cross rigid base with sidewalls and cleats for steep and vertical lifts in a tight footprint. |
Talk to an Engineer Send us the incline, the material and the conveyor data, and we will size the belt with you. |
Related Blog Posts
- Chevron Conveyor Belts: Incline and Anti-Slip Selection
- Chevron Conveyor Belt Ultimate Guide (2026): Types, Grades and How to Choose
- The Application of Rough Top Rubber Conveyor Belts
- Port Conveyor Belts: Steep Transfer, Spillage Control and Bulk Terminal Selection
- Heat Resistant Conveyor Belt Ultimate Guide (2026): Types, Grades and How to Choose
- V-belt Ultimate Guide (2026): Profiles, Sizes and How to Choose