Conveyor Belt Splicing Ultimate Guide (2026): Methods, Costs and Field Tips
Conveyor belt splicing looks cheap on a scope of work and gets expensive in a hurry. We have been on crusher decks, cement clinker lines, port stockyards and aggregate pits for a long time now, and the same pattern keeps showing up. The belt is specified with care. The idlers are checked regularly. The drive is sized properly. Then the joint becomes the weakest number on the whole conveyor, and nobody finds out until the shift that matters.
A splice is a repair. It cannot be as strong as the belt carcass, and anyone who tells you otherwise is selling something. What you can control is how much strength you give away, how long the joint holds, and how much production you lose while it is being made. That is what this guide covers. Not another step-by-step tutorial. We already publish those, and we link to them further down. This is about the decisions that sit in front of the wrench work: which method, what it really costs, how to survive the site, and how to know whether the crew did a decent job before the first ton rides over it.

01A Splice Is a Business Decision Before It Is a Workshop Task
Most maintenance teams treat the joint as a consumable detail. Procurement teams treat it as a line item. Both views undersell what is actually happening. A splice sets a ceiling on how hard the conveyor can be pushed, how often it stops, and how much of the maintenance budget goes into callouts rather than planned work.
Think about what a joint failure costs on a mine overland conveyor. The belt stops. The crusher upstream backs up in a few minutes. Trucks queue. If the joint opened over a transfer point, you now have torn belt edges, damaged skirt rubber and a cleanup job measured in shifts. A joint that lets go at 06:00 can turn a two-hour repair into a twelve-hour recovery. That is the real reason the method choice matters.
We are a conveyor belt manufacturer and we supply both finished belting and the consumables that go with it, so we see the question from both ends. Buyers ask us for a price per meter. Then they ask why the splice quote is a different animal entirely. It is different because splicing is service work with a skill curve, not a product you can drop-ship.
The three numbers a buyer should hold in their head
Before any technical talk, pin down three figures. First, the availability target for that conveyor, expressed as hours per month you are willing to lose to belt work. Second, the cost of one hour of lost production on that line, which the plant accountant already knows and rarely shares with the maintenance planner. Third, the remaining belt life at the splice location, because there is no sense paying for a premium joint on a belt that is twelve months from retirement.
Get those three numbers and the method discussion becomes quick. Without them, every splice conversation becomes an argument about preference, and preferences change with whoever is on shift.
Field note from our engineers: before we quote a splicing job we ask for the take-up travel available, the drop height at the loading point, the pulley diameters, the belt width and the tonnage per hour. Four out of five urgent calls we get could have been avoided if someone had checked the take-up travel first. A joint made with the counterweight at the end of its stroke will be tensioned wrong from the moment the belt runs.
02Three Joint Families and What Each One Is Actually Good At
Every splice on a bulk handling conveyor belongs to one of three families: hot vulcanized, cold bonded, or mechanical. All three work. All three fail. The difference is where the margin sits.
Hot vulcanized splicing
A vulcanized splice rebuilds the carcass. The plies are stepped, the rubber is filled with uncured compound, and the joint is pressed and heated until the rubber cross-links into one continuous body. Done properly, this is the strongest joint available and the only one that behaves close to the parent belt in fatigue.
The equipment matters as much as the operator. A conveyor belt vulcanizing machine has to hold two things steady for hours: platen temperature across the full width, and pressure. Water-cooled platens cost more and save joints, because cooling under pressure is what keeps the splice from opening at the edges later. On a 1,800 mm wide ST1600 belt, that cooling cycle is not optional. Cutting it short to get the plant running is the most common way a good splice is ruined after it is made.
Hot splicing conveyor belt work also demands a clean, dry, wind-protected area. Rain on an open splice is fatal. So is dust blowing into freshly buffed plies.
Cold bonded splicing
Cold bonding uses the same stepped geometry as a vulcanized splice, but the bonding comes from a two-part cement and a press held at ambient temperature. No heat, no generator, no platen. For a maintenance team that cannot get a vulcanizer to site quickly, this is often the difference between a planned stop and an unplanned one.
What people get wrong is the word "cold." Cold bonding is not easier, only cooler. Surface preparation has to be better, because there is no heat to drive the bond. The cement has a pot life and a working window, and humidity decides how long that window really is. On a damp morning at a quarry face, a cement that behaves well in the workshop can be tacky and useless by the time the third ply is laid.
Mechanical fasteners
Mechanical splices bolt or hook through the belt. Strength retention is lower, typically in the range of 40 to 70 percent of belt rating depending on plate style and belt construction, and the joint needs regular inspection. Fasteners also introduce a lump that scrapes every cleaner and every pulley it passes.
That said, no maintenance engineer should dismiss them. A mechanical joint can be installed in two to four hours by two people, with hand tools, in bad weather, at a remote transfer tower. If the objective is to get the plant producing tonight and plan a permanent splice at the next shutdown, mechanical is the right answer. It is a bridge, not a destination. We supply fasteners to customers who run a rubber conveyor belt on short, low-tension runs where a mechanical joint genuinely is the permanent solution, and that is a valid design choice too.
For a full walk-through of the cut, the steps and the tools, our guide to conveyor belt joint methods covers the mechanics in detail. The job here is choosing between them, not repeating that page.
03The Decision Matrix: Match the Joint to the Duty, Not to the Habit
Most plants use one method because that is what they have always used. That habit is fine until the duty changes. A conveyor that moved 300 tonnes per hour of minus 40 mm aggregate behaves nothing like the same conveyor moving 900 tonnes per hour after a plant upgrade.
Work through the matrix below against your actual belt data. Tension class is the first filter. If the belt is rated above roughly 1,000 N/mm and it is a steel cord construction, the answer is decided for you: vulcanized, and nothing else.
| Joint method | Belt tension class it suits | Typical strength retention | Install time, 1,200 mm belt | Where it earns its place |
|---|---|---|---|---|
| Hot vulcanized, multi-step | EP 200 up to EP 400, all ST classes | 60 to 90 percent of belt rating | 8 to 14 hours with cooling | Trunk conveyors, overland lines, steel cord mainlines |
| Cold bonded, stepped | EP 100 to EP 250, fabric only | 50 to 80 percent of belt rating | 5 to 8 hours plus cure time | Remote sites, short belts, urgent repairs with no vulcanizer on site |
| Mechanical fastener | EP 100 to EP 200, low tension | 40 to 70 percent of belt rating | 2 to 4 hours | Emergency restart, short field conveyors, mobile crushing spreads |
| Hybrid, mechanical then vulcanized at shutdown | Any class, as a temporary state | Set by the temporary joint | Fast, then a full second job | Where production cannot stop long enough for a single long outage |
The retention figures above are industry-typical ranges, not guarantees. Actual results depend on belt construction, ply count, step length, splice geometry, ambient conditions and crew skill, and they should be confirmed against the belt drawing and your site conditions. A fabric belt with four plies, a well-cut 250 mm step and a disciplined cure will outperform a steel cord splice made in the rain every time.
Second filter is belt construction. A single-ply or two-ply fabric belt on a light duty conveyor is often better served by a cold bond, because the ply is thin and a heat cycle can scorch it. A steel cord belt at ST1000 to ST2000 demands hot vulcanization with the correct cord spacing and a controlled cooling ramp.
Third filter is width. On belts from 500 mm to about 800 mm, one vulcanizing press and one crew can manage the job in a single shift. Past 1,400 mm, you need either a wider press or a stepped, sectional cure, and the job starts to look like a small project with a schedule of its own. We build industrial conveyor belt up to 2,200 mm wide, and at that width an off-site prepared splice kit with pre-cut step templates saves a full shift of site time.
04What a Wrong Choice Actually Costs
Nobody calls us to say the splice choice was wrong. They call us six weeks later, when the joint has opened for the second time.
There is a repeatable pattern in these calls. A plant chooses a cold bonded splice on an EP315 belt on a 420 m overland conveyor with a 90 m lift, because the vulcanizing press was already committed elsewhere. The joint holds for a month, then starts showing edge lift. Two more attempts follow, each one eating a shift. Six months and four repairs later, the team has spent more on site hours and lost tonnage than a properly scheduled vulcanized splice would have cost on day one.
We are careful not to put numbers on other people's failures, because we have not measured them. But the structure of the loss is predictable, and it usually has four parts. Repeated labour on the same joint. Repeated downtime, often unplanned and at the worst hour. Collateral damage to the belt edge, skirt rubber and cleaner blades. And a creeping loss of confidence that pushes the planner into over-maintaining the rest of the line.
The opposite mistake costs money too, in a quieter way. A plant spends a full shift and a premium consumable package on a vulcanized splice for a 60 m mobile stacking conveyor that runs eight hours a day at EP160. A mechanical joint or a cold bond would have done the same job for a fraction of the sit time. Being deliberate about this is not about always choosing the biggest option. It is about matching spend to duty.
This is the conversation where a good conveyor belt supplier earns their margin. Ask your supplier to quote the joint as a service with a duration, not just as material. If the answer is a price and no hours, you are the one carrying the schedule risk.
05The Real Cost Structure of a Splice
Ask three people what a splice costs and you will get three answers. The maintenance planner counts labour hours. The buyer counts the consumable invoice. The plant manager counts lost tonnes. All three are right, and all three are incomplete.
Materials and consumables
The visible part. Unvulcanized tie gum and cover compound, cement, buffing wheels, cleaning solvent, edge sealing strips, cord for steel cord joints, and the press consumables that never appear on anyone's budget: thermal paper, release film, water for cooling.
Material cost scales with width, ply count and step length, not with belt length. A splice consumes a fixed footprint of rubber no matter how long the conveyor is. That is why the cost per joint is basically flat and the cost per meter of belt falls as the belt gets longer.
Labour, equipment and access
Two to four skilled technicians is the normal crew for a fabric belt splice, six to eight for a wide steel cord job with sectional curing. Then add the press: ownership, rental, transport to a remote site, generator, and the electrical supply to run it. Add scaffolding or a platform if the splice has to be made at height. Add a windbreak and a tent on an open stockyard.
None of this appears in a per-meter belt price. It is why a splicing quote can look disproportionate next to the belting itself.
Downtime, the number that dominates everything
Here is the arithmetic that changes minds. Take a conveyor handling 800 tonnes per hour with a contribution margin of USD 3 per tonne after direct processing cost. Every hour of lost production is roughly USD 2,400 in contribution. A 10-hour vulcanized splice on that line costs about USD 24,000 in lost contribution before you pay for a single consumable.
Two hours saved on that splice pays for a better press, a better crew, or a full set of spare consumables. This is the whole argument for planning splicing properly. Do not optimize the invoice. Optimize the outage.
The number we watch: cost per spliced meter is a useful benchmarking figure, but cost per hour of outage avoided is the one that survives a budget review. A crew that finishes two hours early with a clean joint beats a crew that finishes on time with a joint that needs a second visit. We would rather quote a slightly higher consumable package that includes pre-cut step templates and spare tie gum than watch a site improvise with material that is not there.
There is a third strand that rarely gets counted: the cost of carrying the wrong spares. Plants that keep three belt widths and four ply combinations in service often keep eleven different consumable kits on the shelf. Standardizing on a supplier who can deliver wholesale conveyor belts and matching splice kits together removes most of that inventory problem, and it simplifies the crew's training as well. The same logic applies to the drive side of a plant. Buying belts, splice kits and drive sets on one delivery schedule from a transmission belt manufacturer keeps the stores list short and the paperwork in one folder.
06Cost Benchmarks to Sanity-Check a Quote Against
Benchmarks are useful for catching outliers, not for setting a price. Regional labour rates, site access and belt construction move the numbers a lot. Treat the bands below as a reality check and confirm them against your own last three splice invoices.
| Scope | Typical crew | Material share of total | Dominant cost driver |
|---|---|---|---|
| Vulcanized splice, fabric EP belt, 800 to 1,200 mm | 2 to 3 technicians | 20 to 35 percent | Labour hours and press time |
| Vulcanized splice, steel cord ST1250 to ST2000 | 6 to 8 technicians | 35 to 50 percent | Width, sectional curing, cooling cycle |
| Cold bonded stepped splice, fabric belt | 2 technicians | 30 to 45 percent | Cement quality and cure discipline |
| Mechanical fastener installation | 2 technicians | 50 to 70 percent | Fastener grade and plate style |
One practical observation from quotes we see crossing our desk. Sites that buy consumables and service separately almost always spend more than sites that buy them together, because the consumable package gets trimmed to win the material order and the crew then works with the minimum. A thin splice kit is a false economy. The rubber is the cheapest part of the job.
If you are sourcing belting and splice material together, a conveyor belt distributor arrangement is often the cleanest route: one commercial contact, one delivery schedule, one set of documentation covering both the belt and the joint consumables.
07Why a Vulcanized Splice Cannot Be 100 Percent Strong
Understanding the loss explains almost every field failure.
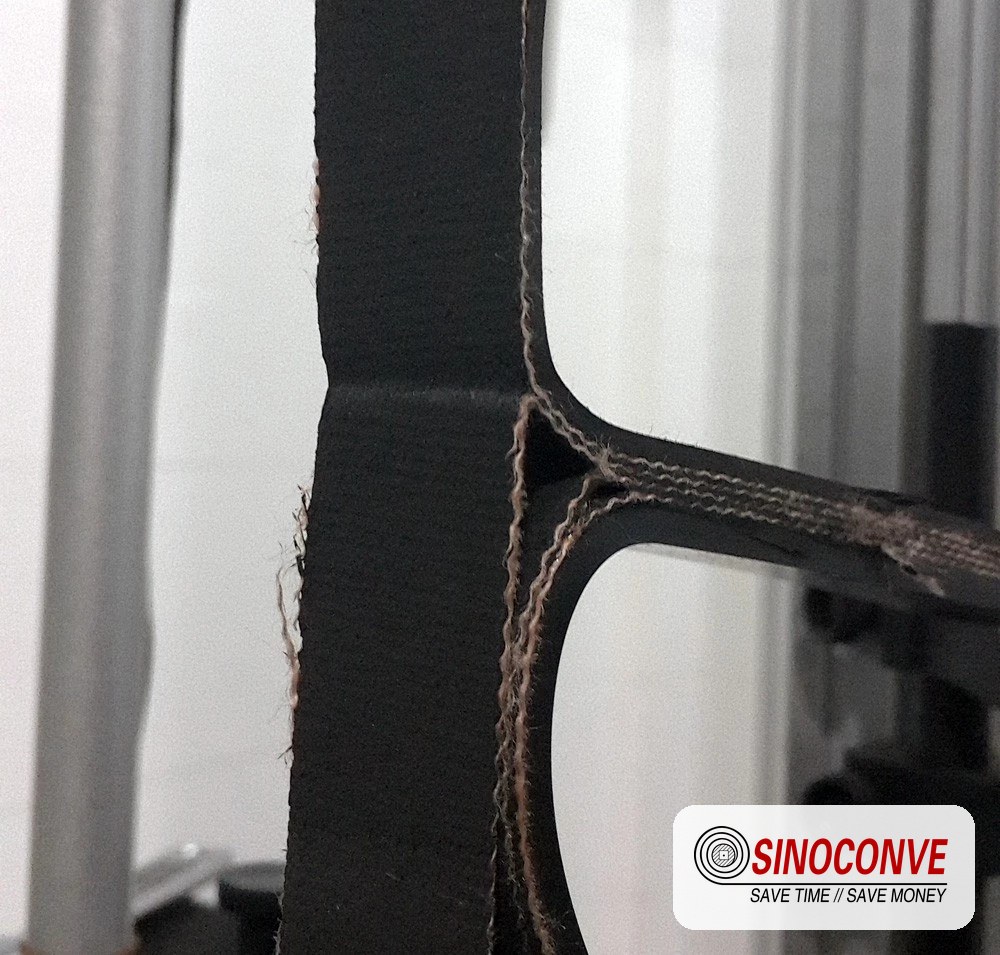
The picture shows what a stepped splice does to a belt. Instead of a straight cut, the plies are separated and cut back in steps. Each step transfers load from one ply into the next through rubber, in shear. The joint is therefore only as good as the rubber-to-fabric bond along those steps, plus the geometry that spreads the load.
Three things limit the result. First, the shear bond between rubber and fabric is weaker than the tensile strength of the ply itself. Second, the joint ends up slightly thicker than the belt body, and that thickness change is a bump that every pulley and idler sees. Third, the outer plies and the cover take a bending cycle at the splice that they would not take in a continuous belt.
Step length is the geometry that matters
Step length is set by carcass strength and construction, and the standards give you the framework: DIN 22102 for textile carcass belts, ISO 340 for flame resistance testing and, for fire-risk installations, AS 1332, BS 490 and SANS 1173 depending on the market your mine reports to. In practice a fabric splice typically uses steps of roughly 150 to 300 mm, with harder, higher-tension carcasses at the top of that range.
Shorten the step to save time or material and you shorten the shear path.The splice still cures. It looks fine in daylight. Then it opens under load, and it opens from the middle of the step, which makes it look like a rubber problem when it was a geometry problem all along.
Bias angle matters too. Most field splices are cut at an angle across the belt rather than at 90 degrees, so the joint crosses one idler at a time instead of meeting it as a hard transverse line. That single detail reduces impact force at the splice considerably and is one of the cheapest quality improvements available.
We build the belting on the conveyor belt factory side with known ply counts and cord spacing, which means we can supply the step template that matches the actual carcass rather than a generic drawing. When the template does not match the belt, the splice is compromised before the first cut.
08Field Execution: The Twelve Hours That Decide the Joint
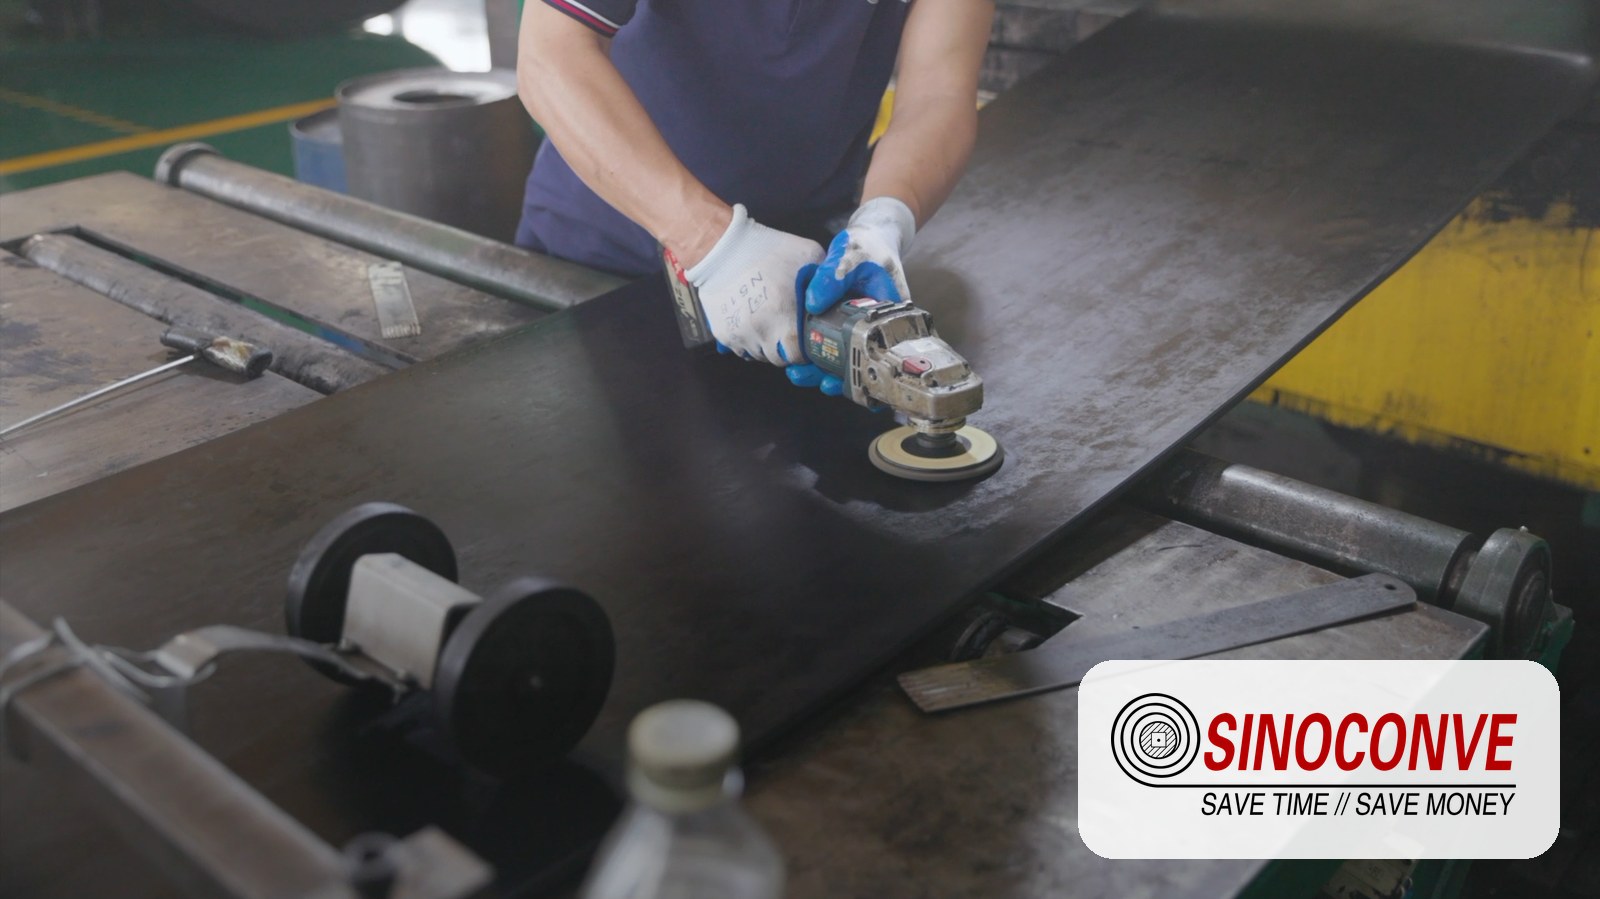
Everything before the press closes is preparation, and preparation is where outcomes are decided. The photo above is a routine stage: plies separated, surfaces buffed, waiting for cement. What separates a joint that lasts five years from one that lasts five months is usually hidden in this stage, not in the cure.
Lay-out and cutting
Square the belt first. Not approximately square, actually square, using a line across the full width and marks on both edges. A joint that is 10 mm out of square will cause the belt to train to one side for the rest of its life, and no amount of training idler adjustment will fully correct it.
Then mark the step positions from the template, on both ends, before any cutting starts. We have watched crews cut the first end generously and then discover the second end does not have enough belt left to match the step pattern. The belt gets shorter, the take-up takes up the slack, and everyone starts the day behind.
Ply separation and buffing
Separate plies with a hook knife or a ply separator, not with a grinder. Buffing is for the rubber surface, to raise a fresh, clean, slightly roughened face for bonding. Over-buffing is the classic error: burning through the fabric, glazing the surface, or leaving rubber dust in the weave. A light, even pass with a clean wheel is enough. Fabric that has been cut or scorched will never hold full shear.
Then vacuum or brush out every trace of dust and wipe with the correct solvent. Solvent choice matters more than people think. A solvent that leaves an oily residue is worse than no solvent at all, because it contaminates the bond line invisibly.
Clamping, alignment and tension
Bring both belt ends together with the take-up released and the belt slack. Clamp the belt flat and straight, then check centre line alignment across the joint with a string line. Fill the step gaps with tie gum, lay the plies back in order, and check that no ply is reversed or missing a step.
Do not tension the belt before the splice has fully cooled. Pulling a hot splice through a pulley is how edge separation starts.
Cure parameters and the cooling rule
The press does the rest, provided three parameters are right: temperature, pressure and time. Typical cure schedules for conveyor belt splicing sit in the 145 to 150 degrees Celsius range with pressure set by the belt construction and the press manufacturer's data, held for a period that depends on total splice thickness. Use the belt maker's schedule, not a remembered number.
Cooling under pressure is the step crews skip. It must run until the splice is close to ambient, and on thick high-tension belts that can add 45 to 90 minutes. Skipping it leaves residual stress in the splice that shows up weeks later as edge lift. On a large steel cord job, that extra hour is the cheapest insurance on site.
The habits that pay for themselves on a conveyor belt jointing job are boring ones. A dry tent. A calibrated thermometer, not the press gauge alone. A written schedule posted where the crew can see it. Two extra sheets of tie gum in the kit. Everything else is technique, and technique can be taught.
09Seven Field Failures We See Again and Again
After enough site visits, failures stop looking random. These are the causes that account for the majority of repeated splice problems we are called out to.
1. Moisture in the bond line
Water, damp fabric or humid air trapped under the cover compound turns to steam during cure. The result is a field of small blisters that look like a cosmetic issue and behave like a delamination. Cure in a tent, with heat, when the belt itself is dry. On a wet belt, plan an extra hour of drying before anything else happens.
2. Over-buffed or contaminated plies
Scorched fabric, glazed surfaces and grinding dust left in the weave all reduce shear strength. Buff lightly, clean thoroughly, and change the buffing wheel when it loads up. A loaded wheel polishes rather than roughens, which is the opposite of what the bond needs.
3. Steps cut too short
Sometimes to save material, sometimes because the template was wrong. Short steps concentrate shear stress and the splice fails progressively from the ends inward. Verify step length against the drawing after cutting, not before.
4. Insufficient cooling under pressure
The splice looks perfect when the press opens. Two weeks later the edges lift. If your crew's cure log shows cooling times consistently at the short end, that is the cause.
5. Contaminated or expired compound
Unvulcanized rubber has a shelf life and it is shorter in a hot store room than on the data sheet. Cement has a pot life once mixed. Kits that have been sitting in a container for two summers behave differently from fresh ones. Rotate stock and check dates before the shutdown, not during it.
6. Misalignment and tension at cure
Off-square cuts, a twisted belt, or tension applied too early. All three put permanent stress into the splice. The belt then mistracks, the splice takes uneven load, and the joint becomes a chronic problem on a conveyor that was previously fine.
7. Damage caused by the splice itself
A thick, poorly finished splice scrapes cleaner blades, wears skirt rubber and can catch on a chute lip. The splice survives. Everything around it does not. Finishing the joint means sanding the cover flush, sealing the edges and checking that the splice passes every cleaner without interference.
Stores discipline and splice quality end up in the same conversation. A plant running its crushers and screens on V-belt drives has two belt families to manage, and ordering them from one V-belt manufacturer alongside the conveyor consumables avoids a separate set of deliveries, invoices and documentation.
We keep a longer analysis of how these failures develop, with the damage patterns that give each one away, in our notes on conveyor belt splice failure causes. If a plant has had three failures on the same conveyor, that page is usually where the pattern becomes obvious.
10Site Conditions That Break Joints: Drop Height, Take-Up and Troughing
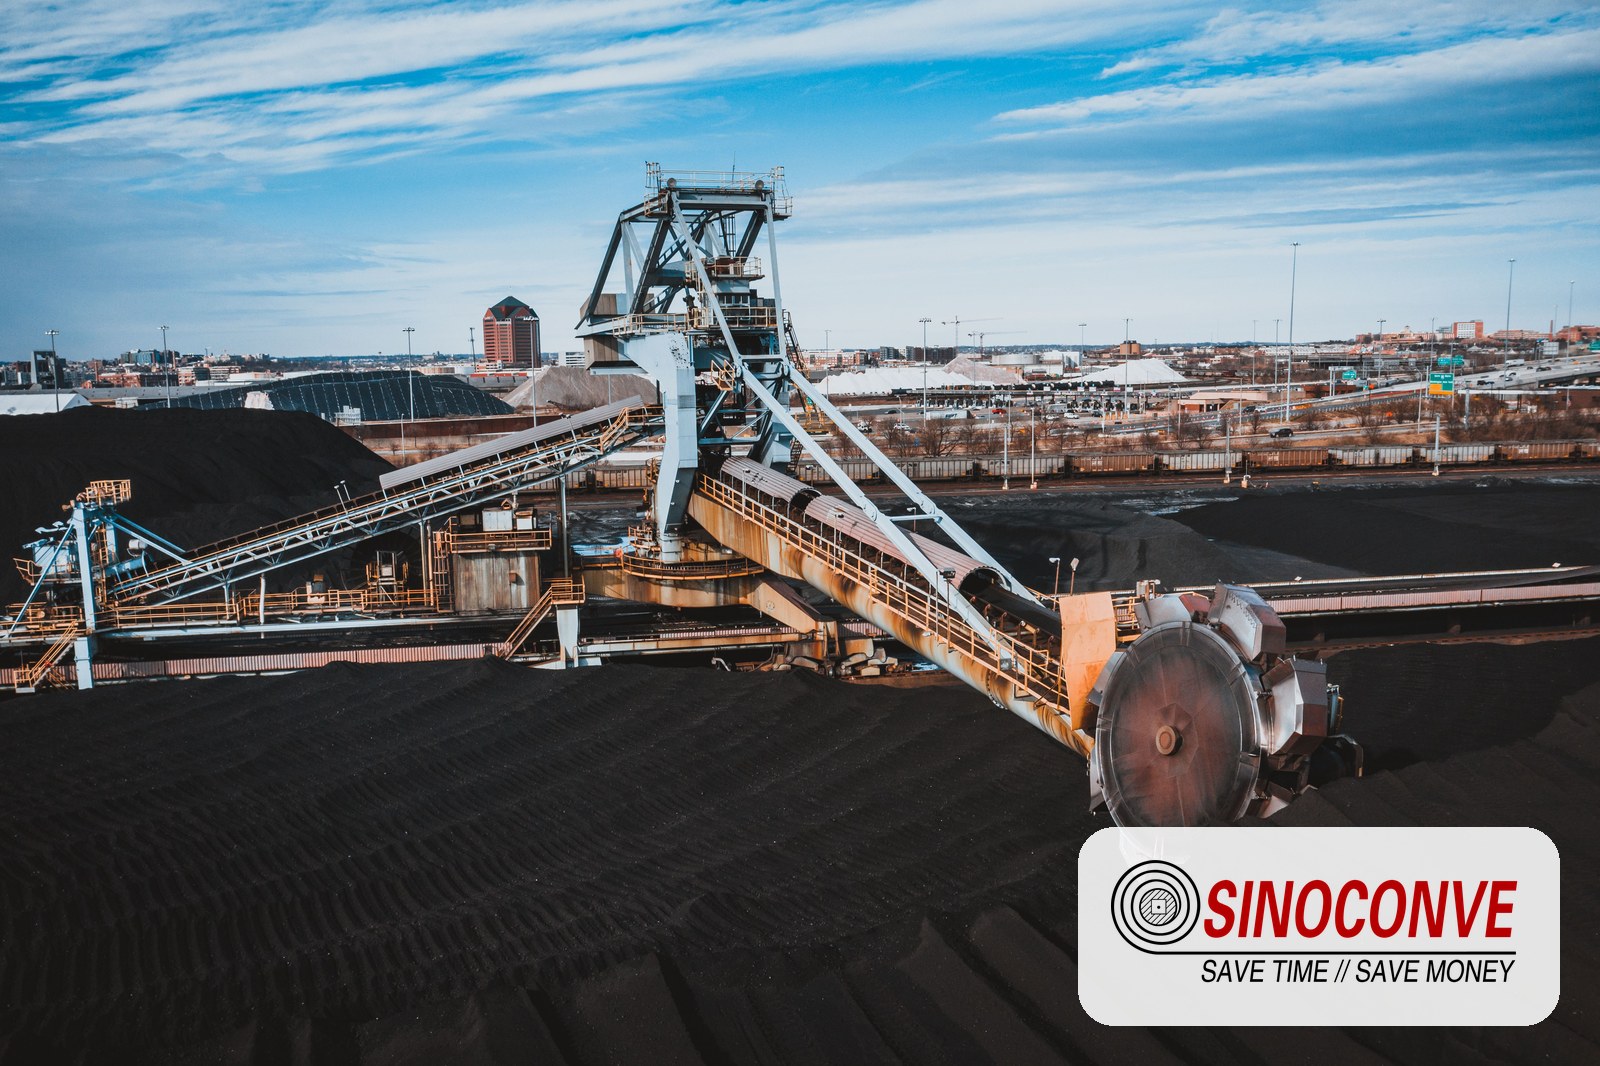
A splice that would last five years on a slow coal line can fail in a season on a quarry stacker. The joint is the same. The duty is not. Stockpile conveyors like the one above look gentle from a distance and are brutal on splices, because they combine a high drop height, frequent repositioning and a heavy impact zone right at a point where the belt is often spliced.
Drop height and impact
Material landing on a belt from three meters imparts several times the force of the same material from one meter. If that impact zone sits near a splice, the splice takes a shock load every few seconds for a full shift. That is a fatigue problem, not a strength problem. Two fixes work: reduce the drop with a chute, chain curtain or rock box, and keep splices out of the first two meters after the loading point whenever the belt length allows.
Take-up travel
Splices shorten a belt. Each vulcanized joint removes 300 to 600 mm of belt depending on step geometry and width, and a mechanical joint removes more. On a conveyor with gravity take-up, that slack has to go somewhere. If the counterweight is already near the bottom of its travel before the job starts, the splice either cannot be made properly or the belt will run too tight afterwards.
Check the take-up position before the shutdown, and check it again after. On a screw take-up, measure the remaining adjustment. We have seen a plant shorten a belt three times in a year and end up relocating the take-up frame, which cost more than the three splices combined.
Troughing angle, load and cover grade
A 35 or 45 degree troughing set creates a sharper edge fold at the belt edges than a 20 degree set, and a splice that is not perfectly flat through the joint will open at the edges first. That is one reason narrow, deep-trough conveyors punish sloppy work more than flat ones.
Cover grade selection belongs in the same conversation. Highly abrasive crushed rock generally wants an RMA Grade I abrasion class cover, while wet, sticky material may need a different compound entirely. A splice filled with tie gum designed for general purpose service, in a belt wearing an abrasion-resistant cover, will wear faster than the belt around it and become a low spot that collects material and moisture.
For mining and quarry duty specifically, our notes on conveyor belts for mining and quarrying cover how belt specification and splice planning interact across crushing, screening and stockpiling circuits. It is worth reading before specifying a joint for a plant you have not worked on before.
11Acceptance: How to Sign Off a Splice Before It Runs
The moment between opening the press and starting the belt is the cheapest inspection you will ever get. After the belt runs, everything you have to check requires a shutdown.
What to look at, in order
Start with the surface. The cover should be smooth and continuous, with no blisters, no visible seams along the step lines, and no soft or spongy areas when pressed. Any blister is a trapped void; it will grow.
Check the extent of cure. On a vulcanized splice, a properly cured joint is firm and slightly resilient across the whole width. If one area feels noticeably different from another, the platen pressure was uneven or the splice was not fully in the press. Temperature strips or a probe at the belt surface during cure give you a record to compare against, and the record is what you actually want, because it lets you tell whether a failure next year was a cure problem.
Then check geometry. Step positions should line up with the drawing on both edges. The joint should be flat and square, with no twist. Run a straight edge across the splice and look for a step change in thickness; a slight crown is normal and acceptable, a hard ledge is not.
Finally, check the finish. Edges sealed. Cover sanded flush where it meets the belt. No rubber flash left to catch on a cleaner blade. Walk the splice past the first pulley and every cleaner by hand, or at crawl speed if the drive allows. Listen for it.
| Check | Accept | Reject and redo |
|---|---|---|
| Step length against drawing | All steps within tolerance on both edges | Any step short enough to change shear area |
| Cover surface | Continuous, no blisters, smooth at the edges | Blistering, spongy patches, open seam lines |
| Cure record | Temperature and time inside schedule, cooling logged | Press opened early, no cooling record |
| Squareness and alignment | Square across width, centre lines matching | Visible skew, belt edge offset at the joint |
| Clearance through cleaners and chutes | Passes with no contact or scraping sound | Splice strikes a blade, chute lip or skirt |
Ask for the documentation pack: cure log with times and temperatures, consumable batch references, technician names, and a splice location record with the meter mark. When a joint fails eighteen months later and two parties disagree about whose work it was, that pack settles the question in ten minutes.
12Inspection and Splice Life: What to Record, When to Retire
Splice life is not one number. Three things age at the same time: the rubber bond, the ply ends, and the belt body on either side of the joint. The joint is finished when the first of the three gives up. In the failures we get asked to look at, that is nearly always the ply ends.
What a walking inspection should actually capture
We walk the mainline on Fridays, on the inching drive or at crawl speed, and a splice check takes about four minutes per joint. The marker line across the joint is the first thing to look at, because if the two halves no longer sit square the belt has been creeping. Then the edges, for lift. Then the step lines, for a crack running along one of them. Then the surface, for ply ends showing through. Moisture or a dark stain around the splice is the last item, and it nearly always traces back to a cleaner throwing water into a seam that has already opened.
Write the same five readings down each time, on the same sheet, with the date and the meter mark of the joint. Edge lift in millimetres, taken with a steel rule held against the belt surface. Two years of those sheets is worth more than any single inspection, because the trend shows how fast that one joint is going. With the trend in hand you book the replacement into a planned stop, typically eight to ten weeks out, instead of losing a shift the night it lets go.
Repair or replace the splice
Running repairs have a narrow window. Edge lift under roughly 30 mm on a fabric belt can often be trimmed back, cleaned and sealed, then watched — that buys a few more months. Anything wider than that, or a crack that has travelled past a step line, is not coming back. Cut the joint out and make a new one. We have watched plants attempt three patches on the same splice; the third one always fails during production, and by then the belt either side of the joint is damaged as well.
So how long should a joint last? On a well-specified belt, correctly spliced and looked at once a week, several years is realistic in moderate duty, and the joint will often outlive the belt. Move that same joint onto a high-tension mainline under a 2 m drop height and two to three years is a good result. Six months is not bad luck. It is a signal to look at the belt specification, the loading point and the splice method together, rather than at the joint on its own.
One more thing sits underneath all of this: the press. If your site owns one, its condition sets the ceiling on splice quality. Worn platens, a bladder that leaks overnight, a panel that heats unevenly across its width, a pressure gauge nobody has calibrated since installation — all four are common, and all four show up later as joints that fail early. Our notes on what a modern conveyor belt vulcanizing machine should offer in thermal control and cooling go through the specification detail. If the press is booked solid across three sites, buy a second unit. Do not buy the time back by cutting the cooling cycle.
13What Procurement Should Have Ready Before the RFQ
Most splicing delays are not technical. They are missing paperwork. A supplier who has to ask three times by email for belt width, ply count and tension rating will quote slowly and quote safely, and a safe quote is an expensive one.
The data pack to assemble once, then reuse
Start with the belt. Width in millimetres. Carcass type and rating — EP, NN or steel cord. Ply count, or cord construction on a steel cord belt. Cover grade and thickness on both faces. And the standard the belt was built to, because that decides which consumables are acceptable. Most textile carcass belting is specified to DIN 22102; AS 1332 turns up on Australian projects, RMA classifications on North American ones. If the belt works underground or in a coal handling plant, say so on the first line: a flame-resistant classification changes both the belt and the splice material, and ISO 340 is the test that normally settles it.
Then the conveyor. Length, lift, incline angle, tonnes per hour, material description with lump size, pulley diameters at both ends. Then the site itself. How many hours can the conveyor be stopped? Is the joint at ground level or 20 m up on a gantry? Can a press be fed within cable reach? Who supplies the cooling water? A joint at ground level with a crane and a water line is a one-shift job. The same joint on the head end of a stacker is two days. That difference belongs in the tender document, not in a phone call the night before the shutdown.
Commercial terms worth fixing in advance
Fix the commercial numbers before the RFQ goes out. Standard production lead time on our lines runs about 30 days from drawing confirmation, and rush orders usually land in 15 to 20 days depending on width and carcass. Minimum order is typically 50 m per model, with pre-production samples at 2 to 5 days. If the shutdown date is fixed, count backwards from that date — never forwards from the purchase order.
Two ownership questions are worth settling early. Who supplies the consumables, and who supplies the press. And who carries the cost if the job runs into a second shift. Plants that buy belting from one vendor and splice material from another regularly discover the two specifications were never compared: a cover grade quoted against a different step geometry, or a bonding compound that does not match the carcass. One integrated order closes that gap. There is a second saving in it as well — if the same supplier can put drive belts on the same consignment, a plant running a main conveyor plus a bank of V-belt driven crushers, screens and fans pays the freight once instead of twice.
14How a Splicing Program Runs in Practice
A one-off splice is a repair. A splicing programme is a maintenance asset, and the plants that run one spend less on belting per tonne conveyed than the plants that do not. The saving is not visible in the belt price. It shows up in the number of unplanned stops in a year.
The shape of a programme is straightforward. One register, one file, every splice on site: location, belt specification, joint method, date made, consumable batch number. Inspection frequency set by criticality — weekly on the mainline, monthly on the yard conveyors, quarterly on a standby unit that runs two weeks a year. Consumable stock sized for one full splice at each belt width, rotated so nothing sits past its shelf life. Press and crew booked into the production calendar at the start of the quarter, rather than pulled off another job when something fails.Then a review every three months: which joints have been replaced twice, and why.
That review is where a supplier earns their keep. A conveyor that eats splices usually has a cause somewhere upstream of the joint — a belt specification too light for the impact it takes, a chute that loads off-centre, tracking that rubs the belt against a structure, a cleaner set too hard against the surface. Fixing the cause costs less than buying better joints forever, and the conversation normally starts with the belt data rather than with the joint.
We supply belting into mines, quarries, cement plants and EPC projects across a long list of markets, and the full range — fabric belts, steel cord, chevron and specialty constructions — is published in our product catalog. For a plant planning a programme rather than a single repair, our engineers will work through the belt data, the step geometry and the consumable list with your team before anything is ordered.

15Frequently Asked Questions About Conveyor Belt Splicing
What is conveyor belt splicing?
It is the job of turning two belt ends into one endless loop, so the belt runs around the pulleys without a break in it. Three methods do it — hot vulcanising, cold bonding, mechanical fasteners — and the one you pick sets both the strength you get back and how long the joint holds. On a fabric belt the stepped joint is usually somewhere between 300 and 1,000 mm long, depending on ply count and step length.
How much does a conveyor belt splice cost?
Consumables are the small part — roughly 20 to 50 percent of the invoice. The rest is labour, press time, access, transport and the production lost while the belt is down. Downtime is normally the largest line in that list.
Is a vulcanized splice stronger than a mechanical joint?
In most cases, yes. A hot vulcanised joint typically gives back 60 to 90 percent of the belt's rated strength; a mechanical fastener usually sits between 40 and 70 percent. Strength is not always the deciding factor, though. If the plant has to be producing within four hours and the belt is a light fabric one, a fastener gets you through the shift and you plan the vulcanised joint into the next stoppage. Retention figures vary with belt construction and splice geometry, so treat these as typical ranges and confirm them for your carcass.
How long does a vulcanized splice take to make?
On an 800 to 1,200 mm fabric belt, budget eight to fourteen hours from the first cut to the belt running again. That includes the cooling stage, and the cooling stage is not negotiable. A steel cord joint on a 1,600 mm mainline needs a longer splice, a larger crew and often twenty hours or more.
Can a steel cord belt be spliced cold?
Not to any standard we would sign off. Steel cord belting from ST1000 to ST2000 needs hot vulcanisation — cords laid at the correct spacing, temperature held across the platen, a controlled cooling ramp under pressure. If someone offers to cold-splice your steel cord mainline, ask what retention figure they will put in writing.
How long should a splice last?
It depends entirely on duty, and there is no useful single answer. Moderate duty, correct specification, weekly inspection: several years, and the joint may outlast the belt. High-tension mainline under heavy impact: two to three years is a fair working expectation. Gone inside a year? Stop looking at the joint. Look at the loading point, the belt specification and the splice method, in that order.
What lead time and minimum order should we plan for?
Thirty days is the normal production lead time after drawing confirmation. Urgent orders can often be turned round in 15 to 20 days, but that depends on width and carcass and is not something to gamble a shutdown on. Minimum order is generally 50 m per model and samples take 2 to 5 days, so build the timeline backwards from the shutdown date and allow an extra week.
Do you supply splice material only, or also the service?
Both, depending on the market and the site. What we always supply is the belt, the splice consumables and the data that goes with them — step templates cut to your actual carcass, not a generic drawing. For the joint itself we work with trained splicing crews and will advise on the press, the schedule and the conditions they are likely to meet.
Which standards apply to belt splicing?
Most textile carcass belting is specified to DIN 22102, and ISO 340 is the test normally quoted for flame resistance. Depending on where the plant sits, AS 1332, BS 490 or SANS 1173 may be the governing document instead, and RMA classifications appear on North American specifications. Check whichever applies against the belt drawing and your local regulations before ordering consumables — the standards are not interchangeable, and a joint built to the wrong one will not pass an audit.
Related Products You May Need
|
General purpose fabric and rubber belting for mines, quarries and cement plants. |
EP100 to EP400 polyester nylon carcass belting for medium and high tension duty. |
ST630 to ST2000 steel cord belting for long overland and high-tension mainlines. |
|
Cleated and chevron profiles for inclined conveying of wet or loose material. |
Browse every belt construction, profile and cover grade we manufacture. |
Send belt data and site conditions for splice planning and a quotation. |
Related Blog Posts
- Conveyor belt joint methods: a comprehensive guide — the full step-by-step breakdown of cutting, stepping and curing.
- Conveyor belt jointing methods guide — practical jointing technique and tooling for site crews.
- Conveyor belt splice failure causes — how joints fail, and the damage patterns that identify each cause.
- Conveyor belt vulcanizing machine guide — platen, pressure and cooling features that decide splice quality.
- Conveyor belt cleaner selection notes — why carryback and cleaner setup shorten splice life.