A flexible sheet material can look fine on the bench and fail in service. Extension testing is what closes that gap — it shows how a material actually behaves under load: how far it stretches, where it starts to fail, and whether layered structures hold together or peel apart. For sourcing teams qualifying suppliers or product teams approving incoming material, understanding what an extension test measures and how to read the results is worth the time.
Why Visual Inspection Is Not Enough
Incoming inspection catches a lot. Dimensional irregularities, surface defects, color variation, edge condition — most of these are visible. What inspection does not catch is how the material will behave once stress is applied. A sheet that measures 1.2 mm consistently across its width can still stretch unevenly, delaminate at the coating interface, or tear along a hidden line of weakness the moment loading begins.
That gap between visual acceptance and mechanical performance is where extension testing earns its place in a qualification workflow. It does not replace incoming inspection — it works alongside it to build a more complete picture of whether the material is suitable for its intended use.
What an Extension Test Is Actually Measuring
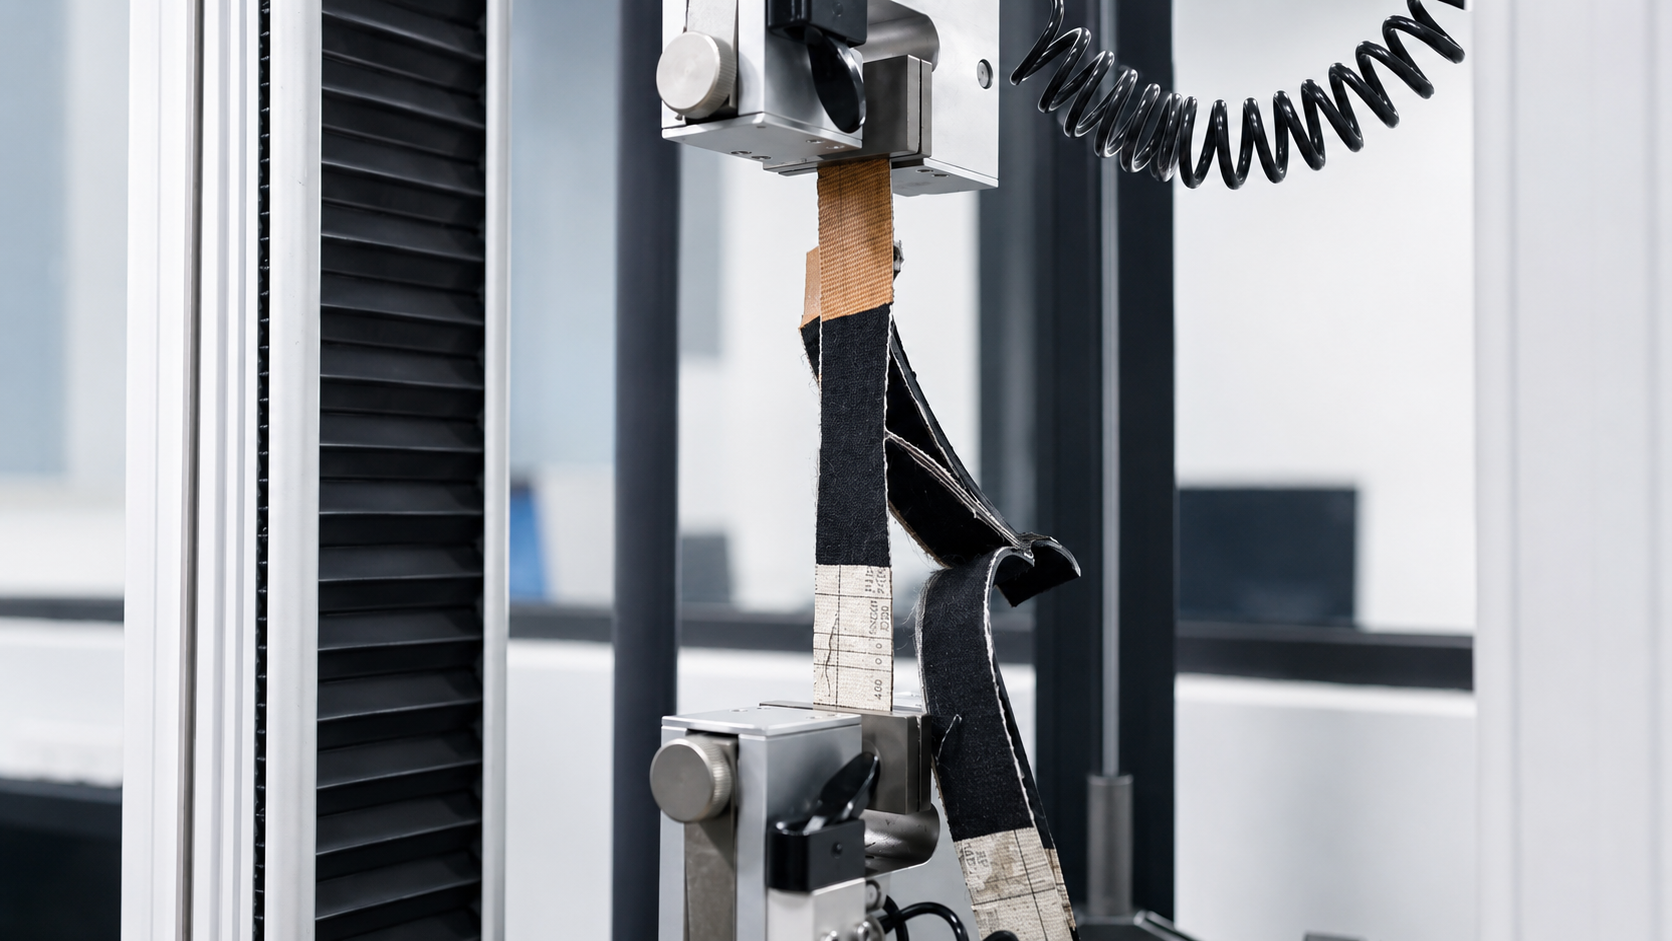
The basic setup is straightforward: a specimen strip is gripped at both ends and pulled at a controlled rate while load and displacement are recorded. What the test captures is the material's response across the full stretch — not just the point of failure.
For a buyer, the useful questions are: does the material deform gradually or fail suddenly? At what elongation does visible necking or splitting begin? If the specimen is layered or coated, do the layers separate before the base material tears, or does failure go through the body of the material? Each of those answers tells you something different about how the material will behave in a gasket, a liner, a conveyor belt cover, or a protective pad.
Failure mode matters as much as the load number. A cohesive failure through the rubber body tells you the adhesive bond between layers is stronger than the material itself — usually a good sign. An adhesive failure at the interface tells you the bond is the weak point, which may or may not be acceptable depending on the application. A tear that initiates at the edge of the specimen may indicate a specimen preparation problem rather than a material problem.
How Extension Testing Relates to Other Material Checks
Extension testing, thickness measurement, and abrasion resistance are related but answer different questions. Treating them as interchangeable is a common procurement mistake.
|
Test Type |
What It Measures |
What It Does Not Measure |
|
Extension / tensile test |
Elongation, load at failure, failure mode, layer adhesion |
Dimensional geometry, surface wear resistance |
|
Thickness inspection |
Dimensional consistency, process stability |
Mechanical strength, elongation, wear behavior |
|
Abrasion / friction test |
Surface wear under rubbing or repeated contact |
Tensile strength, elongation, failure under axial load |
In a complete qualification workflow, these three checks tell different parts of the same story. Thickness measurement confirms the material came from a stable process. The extension test confirms the mechanical behavior matches what the application demands. Abrasion testing confirms the surface will survive the service environment, whether that is a liner rubbing against a conveyor belt, a gasket under repeated compression, or a protective pad seeing movement against a working surface.
Specimen Preparation and Setup — Where Results Go Wrong
A well-run extension test starts before the machine is switched on. Specimen width needs to be consistent — uneven cuts create stress concentrations at the narrow point, and the test will show a false low strength result. Grip alignment matters: if the specimen loads off-axis, the test measures a combination of tension and bending rather than pure extension. Frayed or torn edges from a dull cutting blade distort results in the same direction.
These are not exotic requirements. They are basics that get skipped when the lab is under time pressure or the operator is not familiar with flexible sheet materials specifically. A specimen can be mounted, loaded, and run correctly according to the test standard while still producing misleading data if the specimen itself was not prepared carefully.
For layered or coated flexible sheet materials, the operator should also note where in the specimen the failure initiates. Edge initiation suggests a preparation issue. Failure at the midpoint of the gauge length is the expected result for a sound specimen. Failure at the grip is usually a clamping issue. Delamination before tensile failure tells you the coating or laminate bond is the limiting factor for that material.
Thickness and Consistency: The Upstream Check
Before running an extension test on a flexible sheet material, thickness measurement is a sensible first step. A sheet with significant thickness variation across its width will not load evenly in the grips — thinner sections will reach failure first, and the test result reflects the thinnest part of the specimen rather than the average material.
Consistent thickness also tells you something about the manufacturing process. Calendered sheet, extruded sheet, and coated fabric all have characteristic thickness variation patterns. A sheet that shows random thickness irregularity across multiple measurement points suggests a process instability worth investigating before the material goes into production use.
When Abrasion Testing Should Be Added
A material that stretches well can still be a poor choice if the surface wears quickly. For flexible sheet materials used in any application involving movement — conveyor belt covers, liners against sliding surfaces, protective pads on machinery — abrasion resistance data is not optional.
The DIN abrasion test is the standard method for rubber and rubber-like materials: a defined abrasive wheel presses against the specimen under controlled load, and volume loss is measured in mm³. Lower loss means better wear resistance. A material showing 120 mm³ loss handles hard rock and aggregate exposure; above 200 mm³ suits lighter-duty applications. Adding an abrasion check alongside the extension test gives a much more complete picture of whether the material is appropriate for a contact-heavy service environment.
Common Mistakes in Material Qualification
Requesting a single strength number and treating it as the whole story. Tensile strength at break is one output of an extension test. Elongation at break, load-extension curve shape, and failure mode are at least as informative — sometimes more so, depending on the application.
Comparing results from different test methods as equivalent. An extension test run to ISO 37 and one run to ASTM D412 will produce different numbers from the same material. They are not directly comparable without knowing which standard was used and whether the specimen geometry was the same.
Assuming a clean specimen means a good material. A specimen prepared and mounted correctly can still reveal poor mechanical behavior once loading begins. That is the point of the test, not a problem with the test.
Buyer Checklist Before Approving a Flexible Sheet Material
Ask the supplier for the test method used (standard and specimen geometry), the specimen preparation procedure, and a description of the observed failure mode — not just the load number. Request thickness data from multiple points across the sheet width. If the material will see friction or contact in service, ask for abrasion test data separately.
For ongoing supply, incoming inspection and mechanical testing should tell consistent stories across lots. If dimensional data is stable but mechanical results vary lot-to-lot, the raw material or process control has a variable that is not showing up in dimensional measurement alone.
FAQ
Is an extension test the same as a tensile test?
The terms are often used interchangeably in procurement conversations. Technically, a tensile test measures strength and elongation to failure; an extension test may refer more specifically to measuring elongation behavior across a defined stretch range. In practice, the setup is similar — the important thing is knowing which standard was used and what outputs were recorded.
Can thickness inspection replace extension testing?
No. Thickness measurement confirms geometry and process stability. It does not predict elongation behavior, failure load, or how layered structures behave under tension. Both checks are useful; they answer different questions.
When should abrasion resistance be tested alongside extension behavior?
Any time the flexible sheet material will be used in an application involving rubbing, sliding, or repeated contact against another surface. Conveyor belt covers, protective liners, gaskets in moving assemblies, and surface pads on machinery all fall into this category. Extension data alone does not predict surface durability in those applications.
What does failure mode tell a buyer that the load number does not?
Failure mode tells you where and how the material gave out. Cohesive failure through the rubber body means the adhesive bond between layers is stronger than the material — generally good. Adhesive failure at a laminate interface means the bond is the weak point. Edge-initiated failure may mean the specimen was not prepared correctly rather than the material being weak. The load number tells you how much force was needed; the failure mode tells you why and where.